![]()

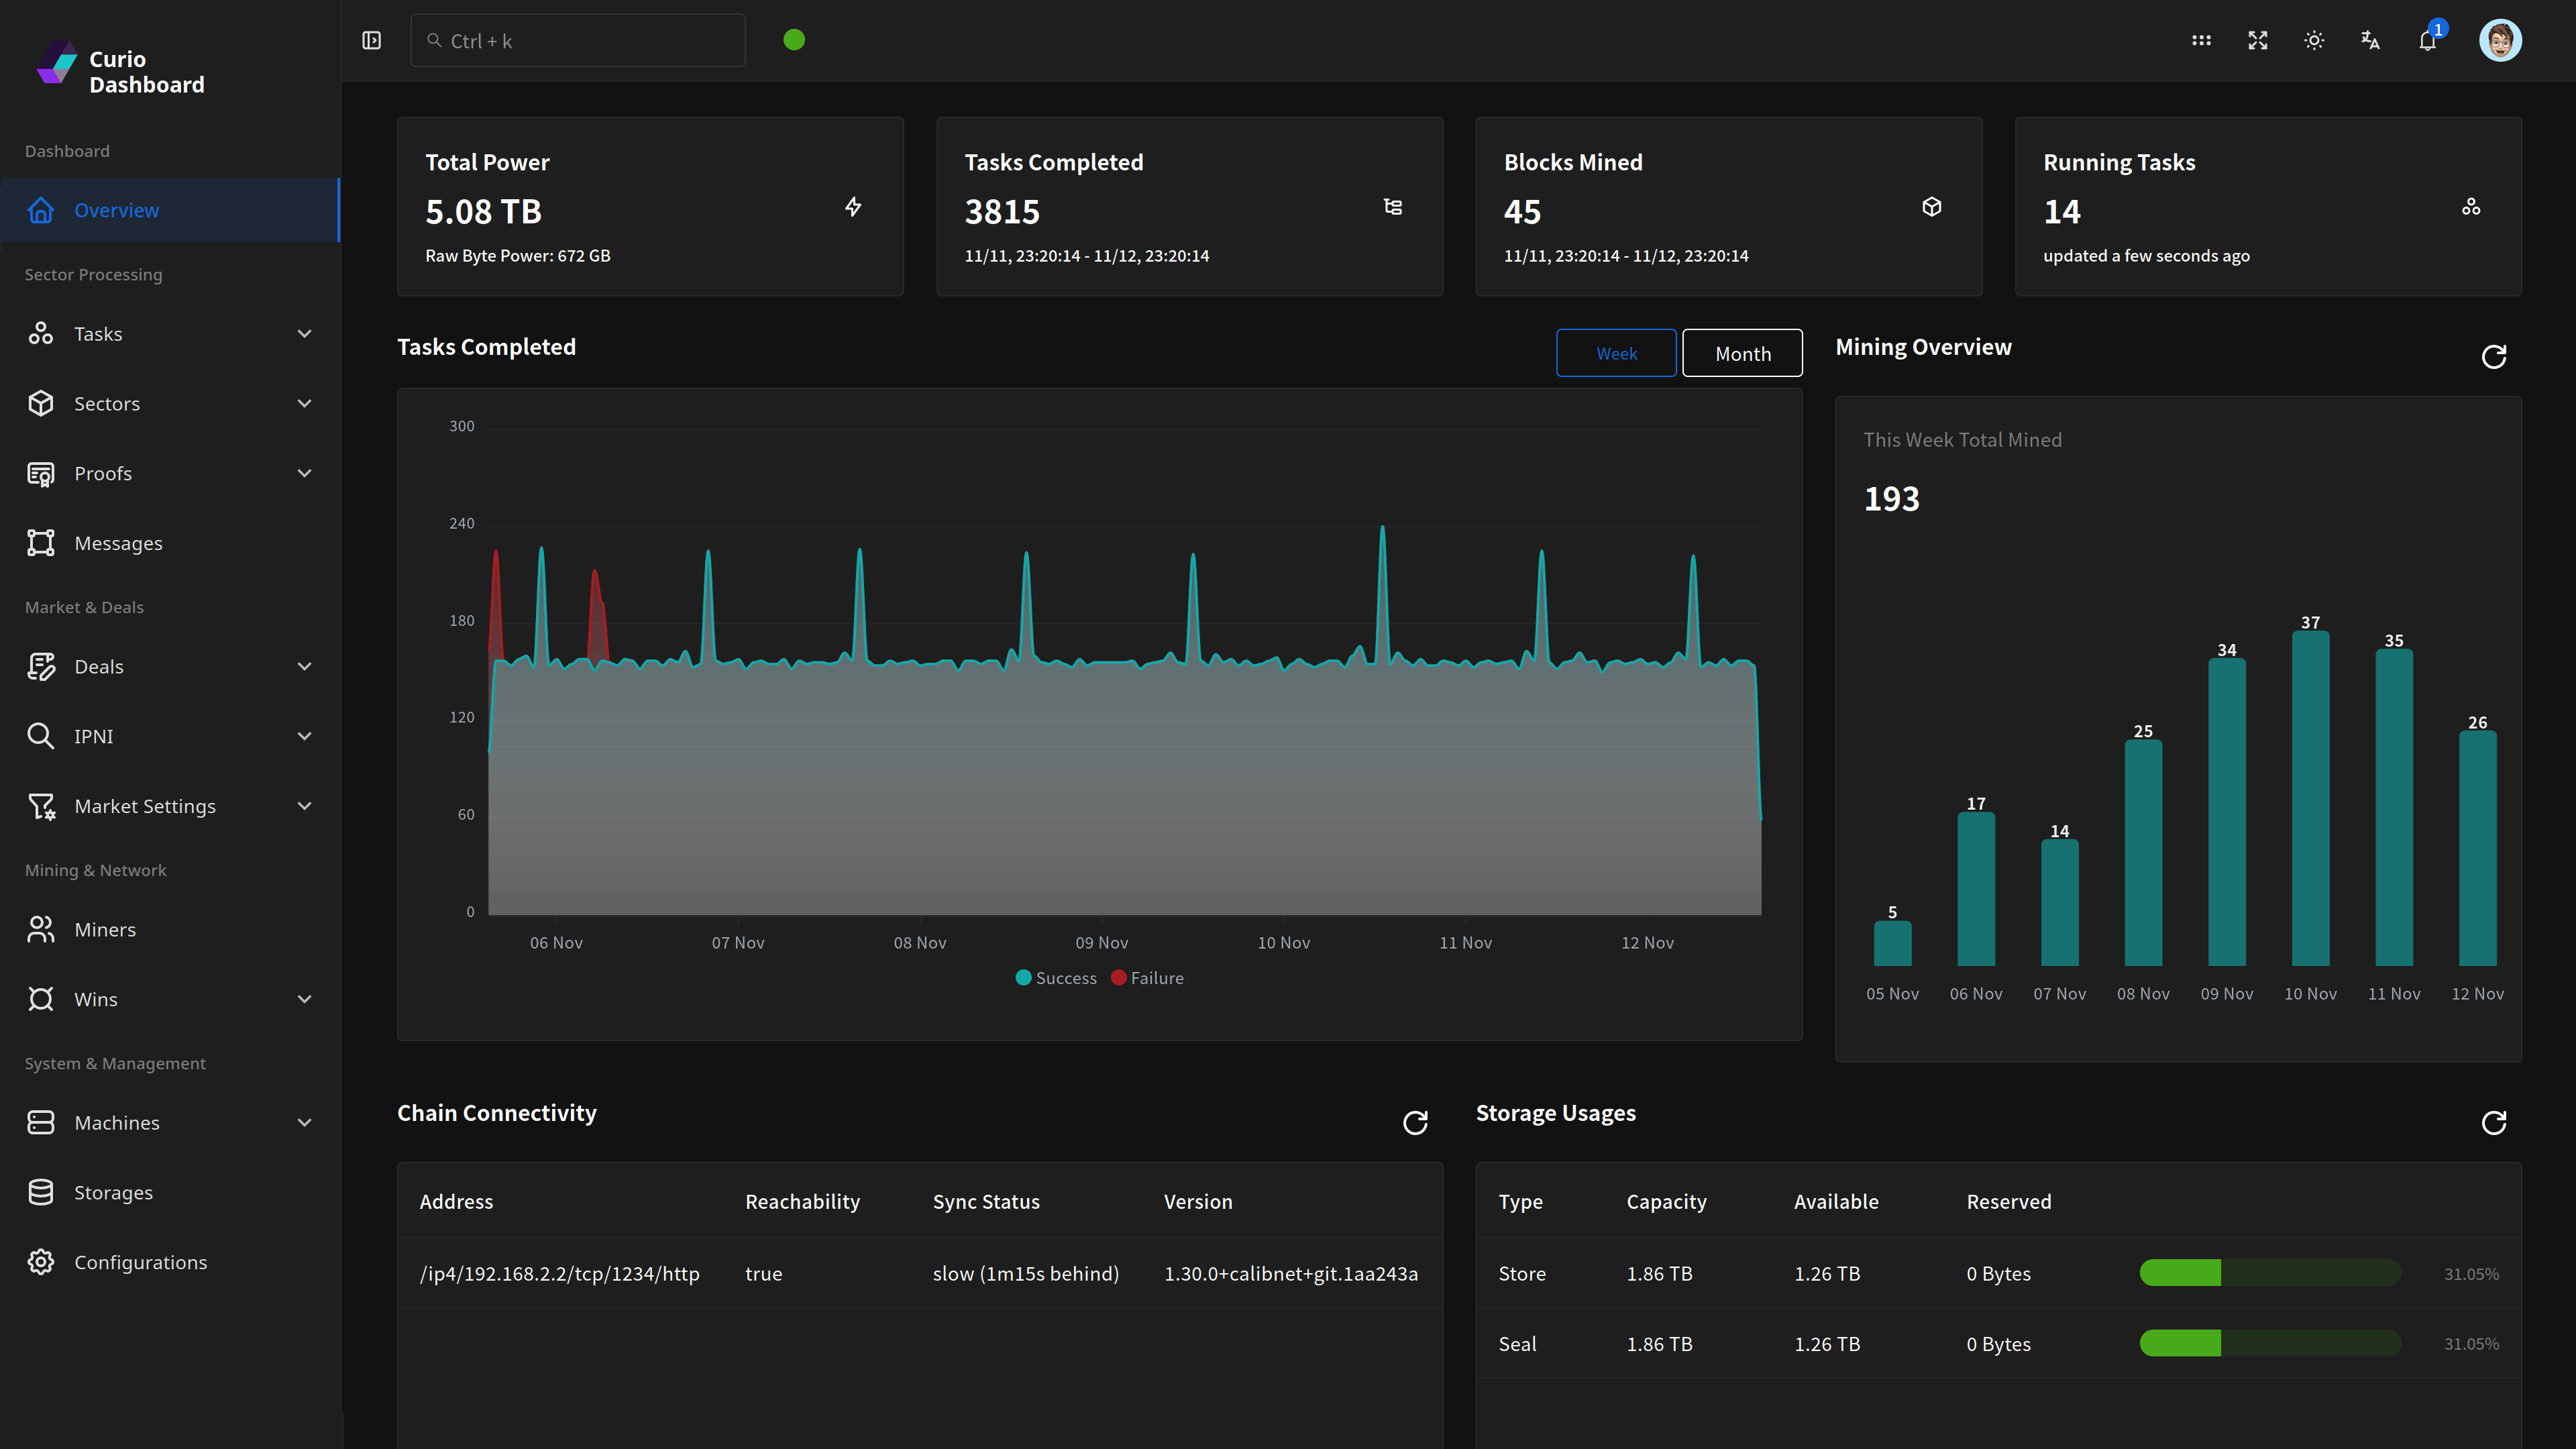
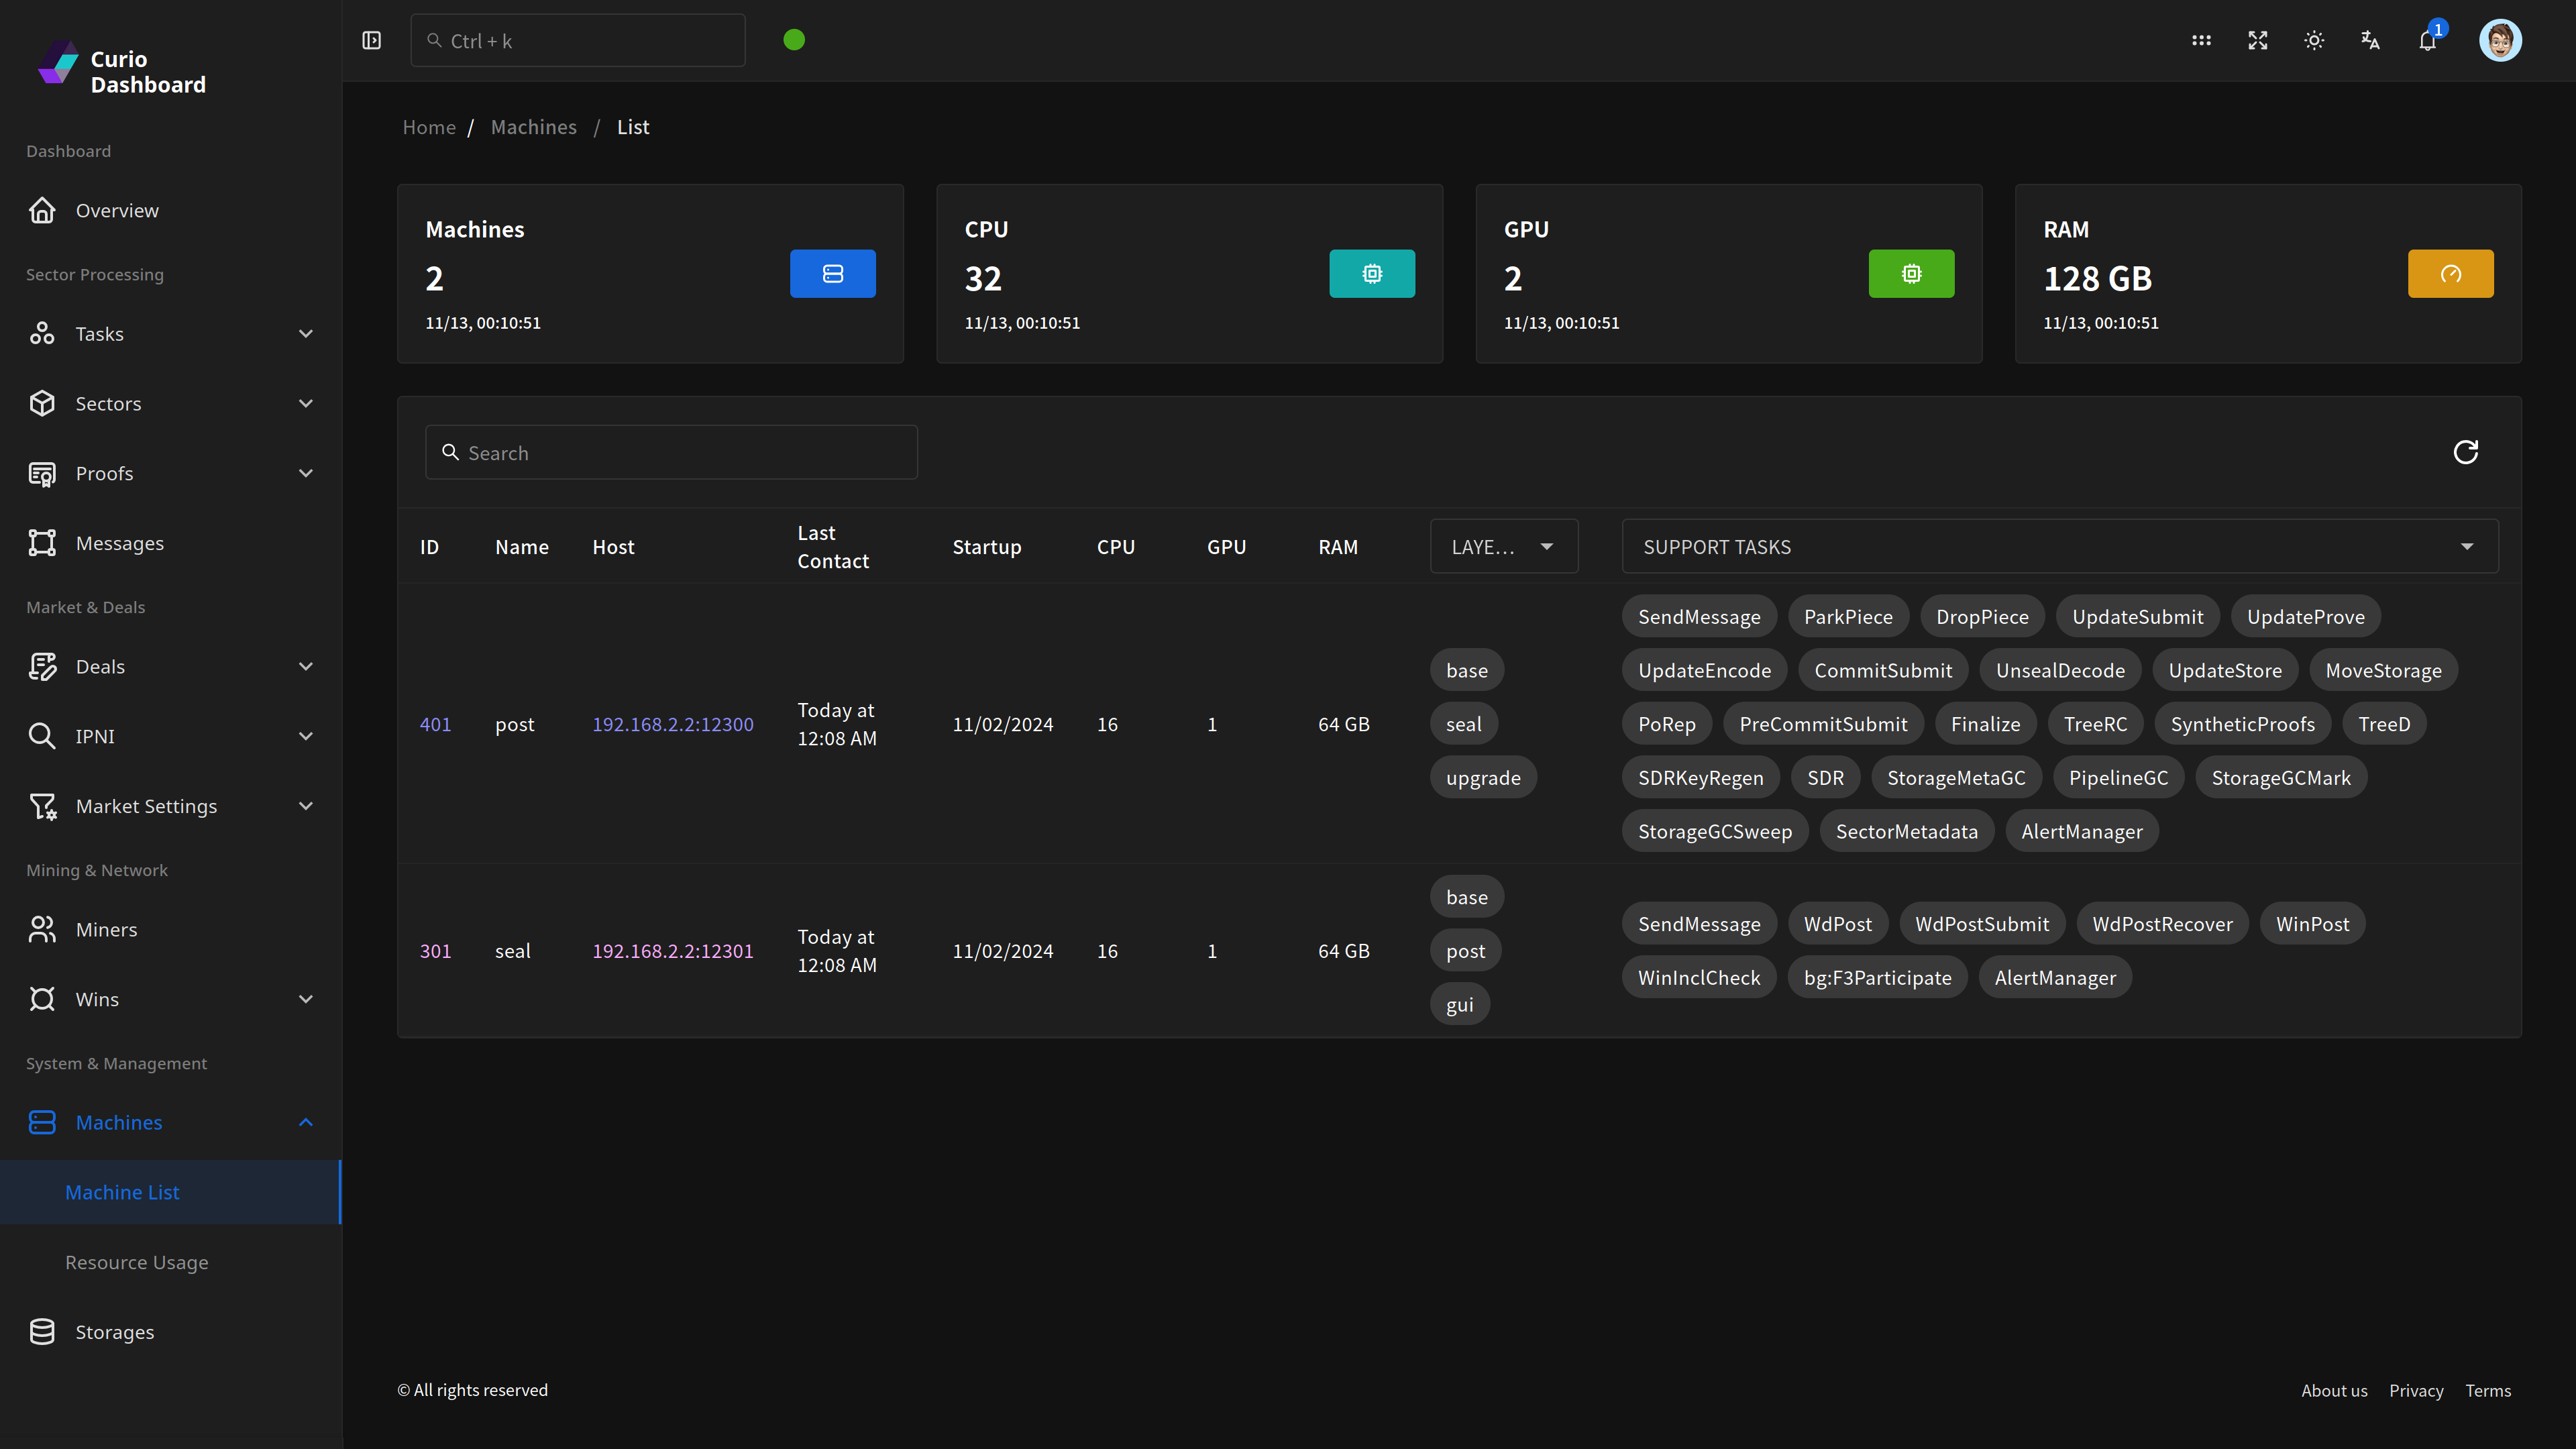
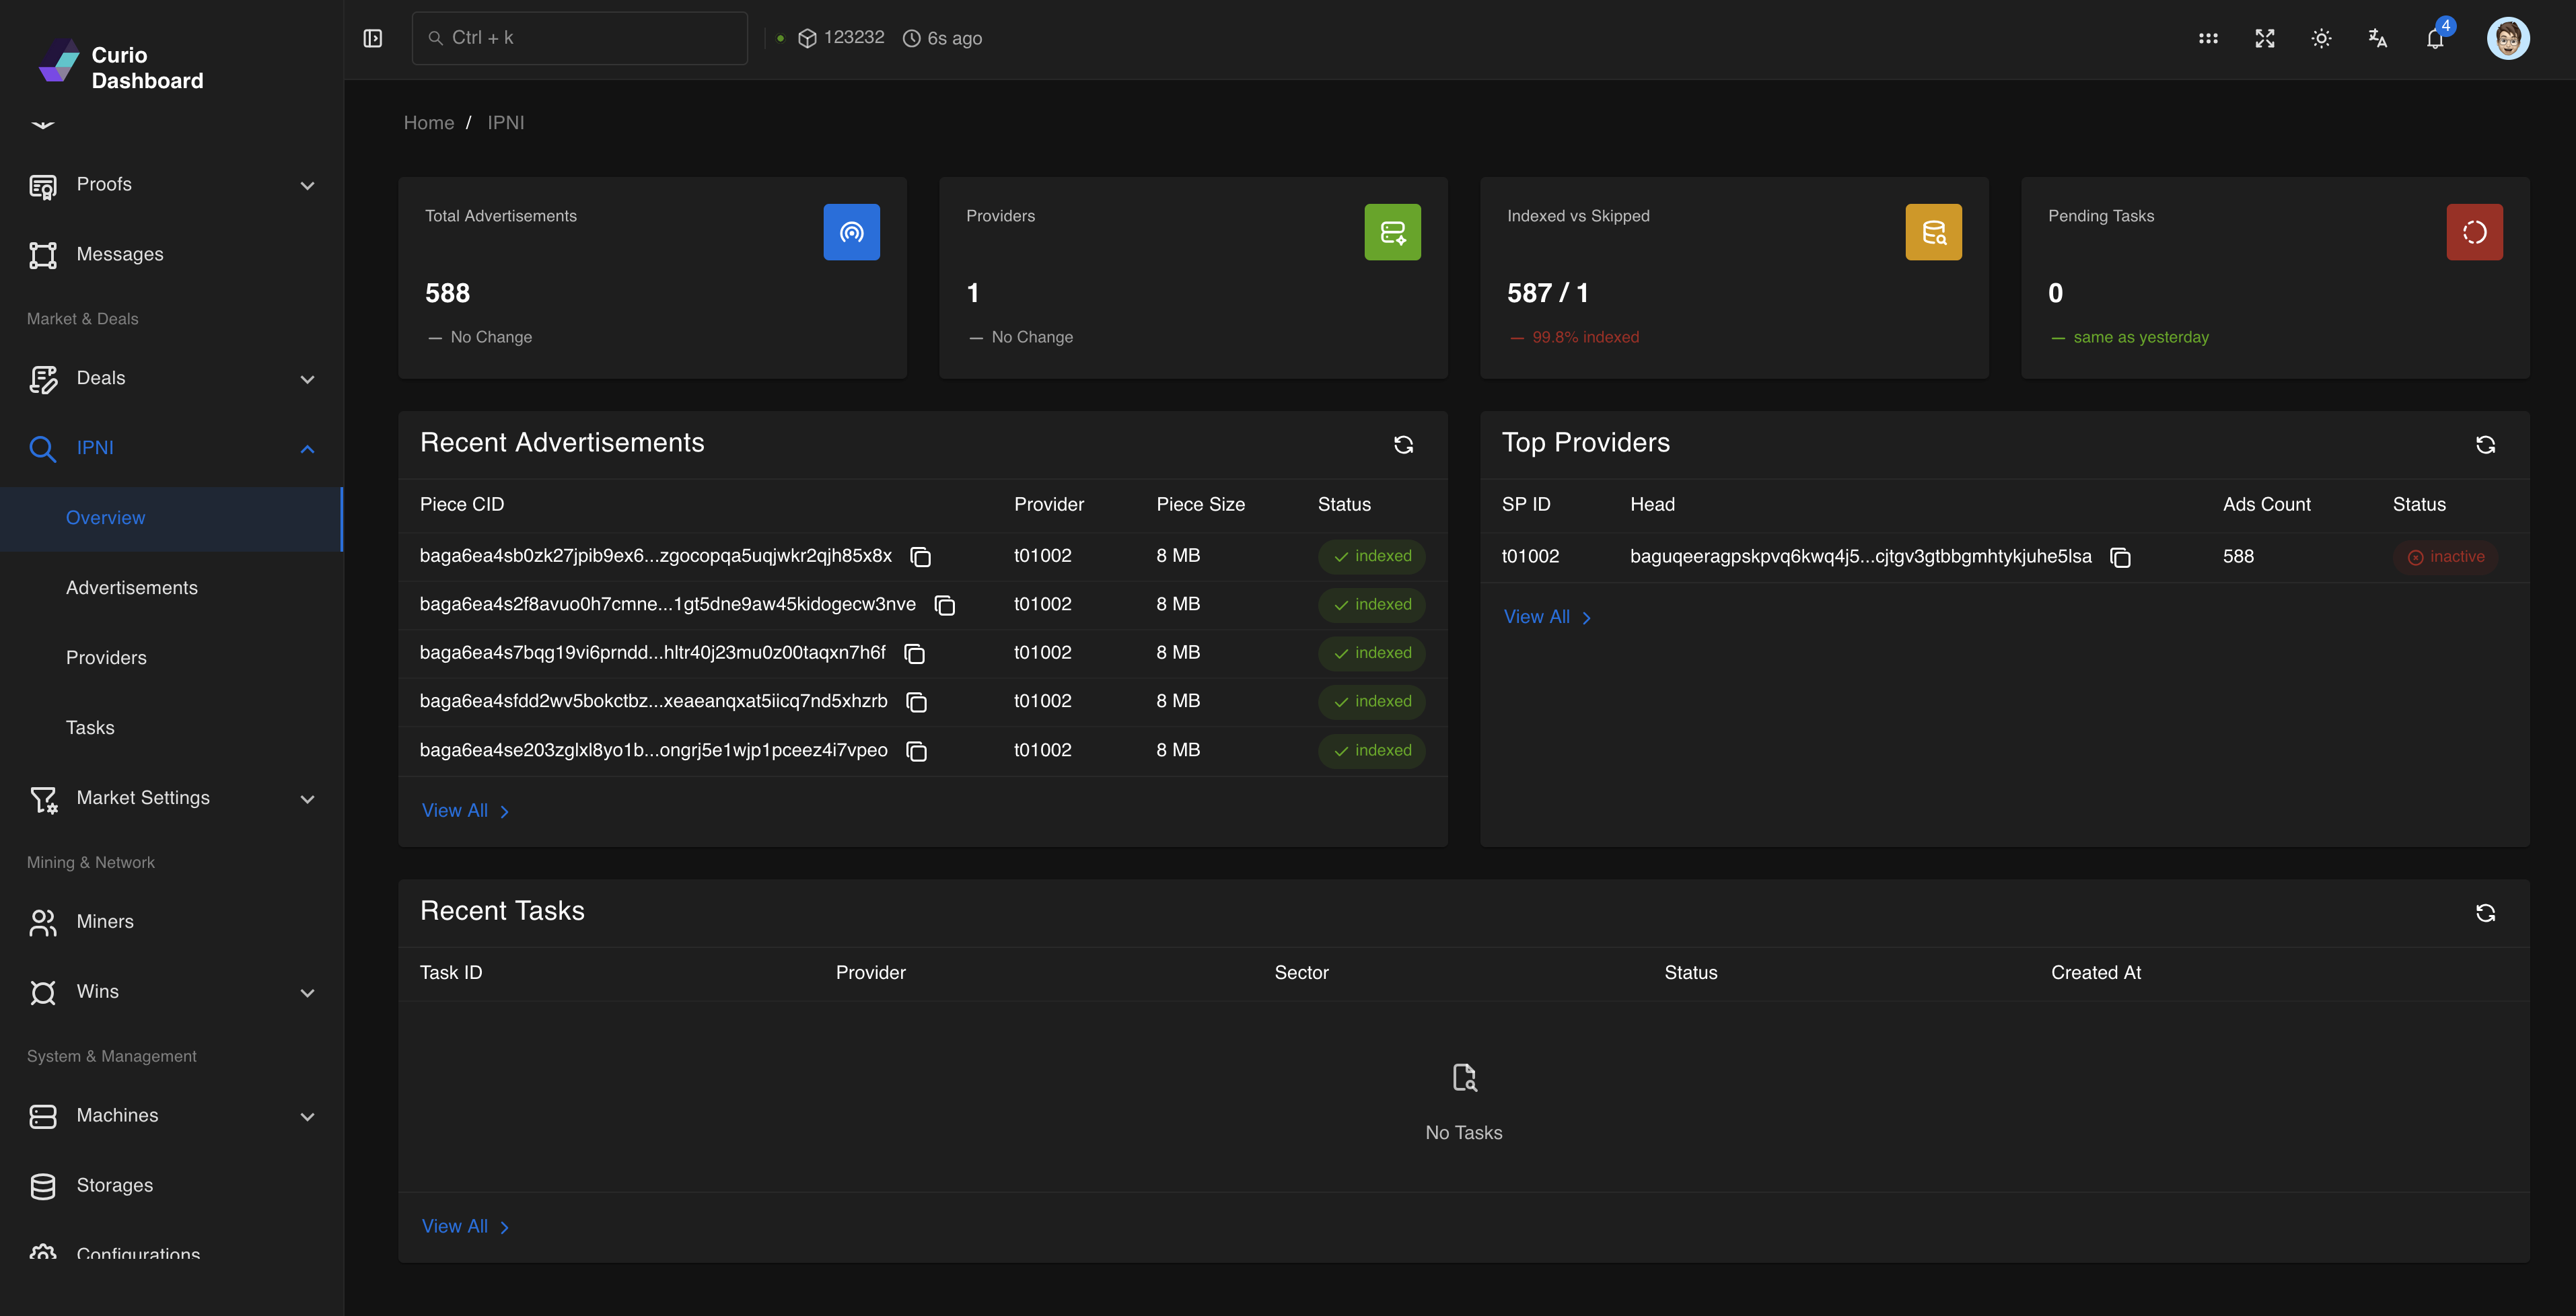
Curio Dashboard is a web-based interface designed for monitoring and managing your Curio cluster. It provides an intuitive layout with real-time metrics and rich visualizations, allowing you to efficiently oversee cluster activity and data insights.
 |
 |
|---|---|
 |
 |
- Access Control: Secure login with built-in role-based permissions (Admin, Operator, User) ensures data protection and granular access control.
- Efficient Data Management: Server-side pagination and filtering for handling large datasets.
- Responsive UI: Dark/light mode support and responsive layout design for different screen sizes.
- Real-Time Monitoring: Live data streaming for real-time insights.
- Data Visualizations: Detailed charts to analyze cluster performance and trends.
flowchart TD
    subgraph Frontend
        UI["Dashboard UI (Vue.js)"]
    end

    subgraph Backend
        App["Backend (Go)"]
        Config["Config"]
        GraphQL["GraphQL API"]
        DB["Database Connector"]
        Helper["Helpers"]
    end

    subgraph External
        Curio["Curio Node API"]
        YB["YugabyteDB"]
        Prom["Prometheus"]
        Exporter["Curio Exporter"]
        Lotus["Lotus Daemon"]
    end

    subgraph Deploy
        CICD["CI/CD & Container"]
    end

    UI --> GraphQL
    Config --> App
    App --> GraphQL
    App --> DB
    App --> Helper
    GraphQL --> Curio
    GraphQL --> Prom
    DB --> YB
    App --> Lotus
    Curio --> Prom
    Exporter --> YB
    Exporter --> Prom
    CICD --> App
- Curio Node: A reachable Curio Web API, e.g.,
http://localhost:4701. - YugabyteDB: Distributed database used by the Curio cluster.
- Prometheus: Collects metrics from the Curio cluster for monitoring. (Optional)
- Lotus Daemon Node: Required for blockchain data retrieval.
# Pull the latest Docker image
docker pull ghcr.io/web3tea/curio-dashboard:latest  # Use the latest release
# docker pull ghcr.io/web3tea/curio-dashboard:main # Use the main branch

# Generate the default configuration file
docker run --rm ghcr.io/web3tea/curio-dashboard:latest config default > config.toml

# Edit the configuration file
# vim config.toml # or use your preferred text editor

# Run the dashboard
docker run -d \
  -p 9091:9091 \
  --restart unless-stopped \
  -v "$(pwd)"/config.toml:/config.toml:ro \
ghcr.io/web3tea/curio-dashboard:latest --debug runVisit the Releases page to download the latest binaries.
After downloading the correct binary for your platform and architecture, follow the Running the Dashboard instructions below.
Follow these steps to build the dashboard from source:
-
Install System Dependencies Follow the Curio Storage Installation Guide. You’ll also need Node.js and pnpm for the frontend.
-
Clone the Repository
git clone https://github.com/web3tea/curio-dashboard.git
-
Build the Project
cd curio-dashboard
make
-
Generate Default Configuration
./curio-dashboard config default > config.toml -
Edit the Configuration Adjust the
config.tomlto match your setup, including user roles and permissions, or start with a minimal configuration file. -
Start the Backend
./curio-dashboard --debug run
-
Access the Dashboard
- Production URL: http://localhost:9091
- Development URL: http://localhost:3000 (
cd ui; pnpm dev)
The Curio Dashboard implements a role-based access control system with three permission levels:
- Admin: Full system access with all privileges
- Operator: Operational access for monitoring and management tasks
- User: Basic read-only access for viewing dashboard data
Configure users and their roles in the config.toml file:
[auth]
secret = "your-jwt-secret"
expires = 24  # Token expiration in hours

[[auth.users]]
username = "admin"
password = "strong-password"
role = "admin"
description = "Administrator account"

[[auth.users]]
username = "operator"
password = "secure-password"
role = "operator"
description = "Operations account"

[[auth.users]]
username = "user"
password = "user-password"
role = "user"
description = "Read-only account"
GraphQL Playground is a graphical, interactive, in-browser GraphQL IDE that allows you to explore and test the GraphQL API.
-
Without Authentication
- If authentication is disabled (no JWT secret configured), you can directly access the playground at:
-
With Authentication
- If authentication is enabled, you will need a valid token:
./curio-dashboard auth gt --user admin
- In the playground interface, add a header with your token:
{ "Authorization": "Bearer <your_token>" } - This token will allow you to execute authenticated GraphQL operations in the playground
- If authentication is enabled, you will need a valid token:
