![]()
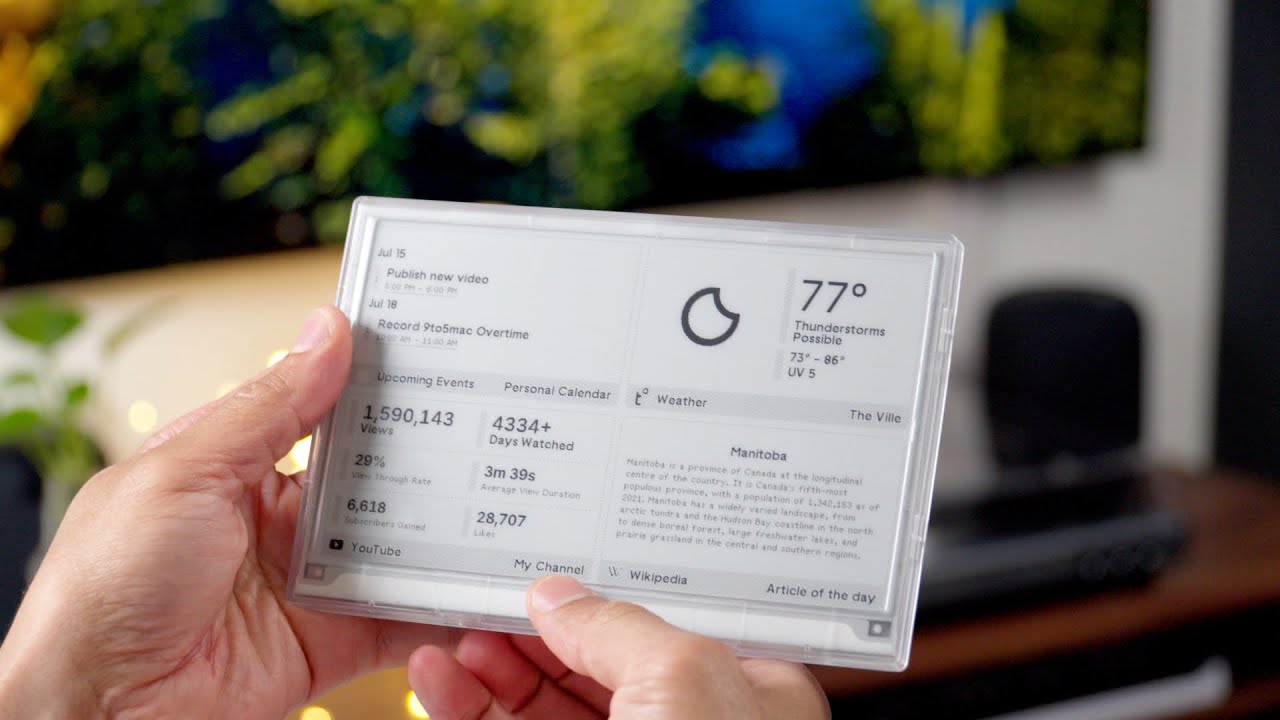
Terminus is a Ruby/Hanami web server that allows you to manage TRMNL devices running on your own local network or hosted cloud. This is also the flagship BYOS implementation officially supported by TRMNL. For a quick introduction on TRMNL devices, check out the following 9to5Mac overview:

Click the above button to immediately to deploy to Render, using the Free Plan, as a self-hosted solution.
-
Allows you to run your own server on your own private network.
-
Uses htmx for Hypermedia-Driven user interfaces.
-
Uses ImageMagick for image processing.
-
Uses Overmind for running multiple processes.
-
Uses PostgreSQL for the database.
-
Uses Puma for the server.
-
Uses Rodauth for authentication.
-
Supports YJIT.
-
Supports Docker.
-
Supports TRMNL devices.
The following is a high level overview you can use to compare/contrast when deciding between using this Build Your Own Server (BYOS) implementation or our hosted solution.
Legend
-
⚪️ Planned.
-
🟢 Supported.
-
🟡 Partially supported.
-
🔴 Not supported, not implemented, or isn’t applicable.
Matrix
| Terminus | Hosted | |
|---|---|---|
Dashboard |
🟢 |
🟢 |
Auto-Provisioning |
🟢 |
🟢 |
Devices |
🟢 |
🟢 |
JSON Data API |
🟢 |
🟢 |
Image Previews |
🟢 |
🟢 |
Playlists |
🟢 |
🟢 |
Plugins* |
🟢 |
🟢 |
Recipes* |
🟢 |
🟢 |
Account Management |
🟢 |
🟢 |
Docker |
🟢 |
🔴 |
ℹ️ Plugins and Recipes are supported by pulling screen data from our Core server. This means Terminus accesses data outside your private network to acquire this data. This is done by proxying, per device, to our Core server (disabled by default), downloading screens from your playlist, and then rendering on your device. See Background Pollers for more details.
-
Git.
-
Ruby (optional, for development).
-
PostgreSQL (optional, for development).
-
Hanami (optional, for development).
-
Google Chrome (optional, for development): For screen generation via the headless browser.
-
Overmind (optional, for development): Uses your
Procfileto launch all processes. -
A TRMNL device (can use a virtual device too).
To immediately spin up Terminus on your local machine, run:
curl https://raw.githubusercontent.com/usetrmnl/byos_hanami/refs/heads/main/scripts/quick.sh | bashOnce launched, open http://localhost:2300 in your browser then click on the Register link to register and log into the system.
💡 This script is not idempotent which means you can’t run it more than once since your database credentials will be different each time. It’s only meant for getting up and running quickly. To customize, see the Docker documentation.
To set up this project for local development, run:
git clone https://github.com/usetrmnl/byos_hanami terminus
cd terminus
bin/setup
💡 The setup script is idempotent so you can run it multiple times without harm. To rebuild a file managed by the setup script, delete the desired file and rerun setup to recreate.
To launch the server, run:
# Development
overmind start --port-step 10 --procfile Procfile.dev --can-die assets,migrate

# Production
overmind start --port-step 10 --can-die assets,migrate
To view the app, use either of the following:
-
Secure: https://localhost:2443
-
Insecure: http://localhost:2300
From your browser, you can then click on the Register link to register and log into the system.
There are several environment variables you can use to customize behavior by updating the .env file created for you during setup. They are:
-
API_URI: Used for connecting your device to this server or via Docker. Defaults to your host machine’s IP address and port. This assumes you are connecting your device directly to the same server Terminus is running on. If this is not the case and you are using a reverse proxy, DNS, or any service/layer between your device and Terminus then you need to update this value to be your host. For example, if your host ishttp://demo.iothen this value must behttp://demo.io. This includes updating your device, via the TRMNL captive Wifi portal, to usehttp://demo.ioas your custom host too. How you configurehttp://demo.ioto resolve to the server you are running Terminus on is up to you. All your device (and this value) cares about is what the external host (or IP and port) is for the device to make API requests too (they must be identical). -
API_ACCESS_TOKEN_PERIOD: Used to set the amount of time, in seconds, the JWT access token remains valid before needing to refresh your token. This is only necessary when using the Server APIs. Default: 1,800 seconds (30 minutes). -
APP_SECRET: Used for session, cookie, and Cross-Site Request Forgery (CSRF) protection. This is automatically created for you during setup but is recommended that you update this with your own secure value. -
BROWSER: Used for configuring headless browser behavior when creating screens for your device. Must be a JSON object. Default:'{"js_errors": true, "process_timeout": 10, "timeout": 10}'. Additional keys are ignored. For more details, see the Ferrum Customization Documentation. -
DATABASE_URL: Necessary to connect to your PostgreSQL database. Can be customized by changing the value in the.env.developmentor.env.testfile created when you ranbin/setup. -
FIRMWARE_POLLER: Enables/disables firmware polling. See Background Pollers for details. Defaults to enabled. -
HANAMI_PORT: The default port when running the app locally or via Docker. When using Docker, this is used for the internal and external port mapping. -
MODEL_POLLER: Enables/disables model polling. See Background Pollers for details. Defaults to enabled. -
RACK_ATTACK_ALLOWED_SUBNETS: Defines the Rack Attack subnets that are allowed to connect to this server which helps when adding DNS, a reverse proxy, or a VPN, etc. between your device and this application so you can use this environment variable to add more subnets as desired. This takes a single subnet/IP or an array — with no spaces — of subnets/IPs as values. Example: "111.111.111.111,150.120.0.0/16". Alternatively, you can disable Rack Attack altogether by removing theconfig.middleware.use Rack::Attackline fromconfig/app.rbor customize Rack Attack via theconfig/initializers/rack_attack.rbfile. Any of these approaches will allow you to get your service layer properly configured so your device can talk to this server. By default, the following subnets are allowed:10.0.0.0/8,172.16.0.0/12,192.168.0.0/16,127.0.0.1, and::1. -
PG_DATABASE: Defines your database name. Used by Docker only. Default:terminus. -
PG_PASSWORD: Defines your database password. Used by Docker only. Default: (auto-generated for you during setup). -
PG_PORT: Defines your database port. Used by Docker only. Default:5432. -
PG_USER: Defines your database user. Used by Docker only. Default:terminus. -
SCREEN_POLLER: Enables/disables model polling. See Background Pollers for details. Defaults to enabled.
When launching this application for the first time, there will be no users. The first user to register will automatically be given Verified status along with full access to the system. All subsequent users will marked as Unverified and must be manually Verified in order to have access to the system. In the future, more fine grained control will be provided for individual users, roles, and permissions.
Also, once logged in, you can manage your settings as follows:
-
Visit
/me/loginto update your email address. -
Visit
/me/passwordto update your password. -
Visit
/me/rememberto enable, disable, or forget if you should be remembered.
See Docker documentation for details.
Connecting your device to this server is as simple as using the captive WiFi portal on your mobile phone to connect your TRMNL device to your local network where this server is running. You can also delete your device, via the UI and/or API, and it’ll be reconfigured for you automatically when the device next makes a Display API request. For more information (including dealing with tricky WiFi situations), check out the help guides below:
See Background Pollers documentation for details.
See API documentation for details.
To contribute, ensure you have completed the Setup and the entire project builds properly by running bin/rake.
To access the console with direct access to all objects, run:
bin/consoleOnce in the console, you can interact with all objects. A few examples:
# Use a repository.
repository = Hanami.app["repositories.device"]

repository.all              # View all devices.
device = repository.find 1  # Find by Device ID.
YJIT is enabled by default, when detected, which means you have built and installed Ruby with YJIT enabled. If you didn’t build Ruby with YJIT support, YJIT support will be ignored. That said, we recommend you enable YJIT support since the performance improvements are worth it.
💡 To enable YJIT globally, ensure the --yjit flag is added to your RUBYOPT environment variable. Example: export RUBYOPT="--yjit".
Pure CSS is used in order to avoid pulling in complicated frameworks. The following stylesheets allow you to customize the look and feel of this application as follows:
-
Bits: These are the bits and small reusable components that make up the site. There is a file for each type.
-
Pages: These are the pages that make up the site. There is a file for each unique page.
-
Colors: Use to customize site colors.
-
Defaults: Use to customize HTML element default styles.
-
Keyframes: Use to customize keyframe behavior.
-
Layout: Use to customize the site layout.
-
Settings: Use to customize site settings.
-
View Transitions: Use to customize view transitions.
The Santize gem is used to sanitize HTML/CSS when using the console, API, or UI. All of this configured via the Terminus::Sanitizer class which defaults to the Sanitize::Config::RELAXED style with additional support for style and source elements. If you find elements being stripped from your HTML/CSS content, this is why. Feel free to open an issue if you need additional support.
By default, all logging is set to INFO level but you can get more verbose information by using the DEBUG level. There are multiple ways to do this. First, you can export the desired debug level:
export LOG_LEVEL=debugYou can also specify the log level before launching the server:
LOG_LEVEL=debug overmind start --port-step 10 --procfile Procfile.dev --can-die assets,migrateFinally, you can configure the app to use a different log level via lib/terminus/lib_container.rb by adjusting log level of logger during registration:
register(:logger) { Cogger.new id: :terminus, level: :debug, formatter: :detail }💡 See the Cogger gem documentation for further details.
SimpleCov code coverage reports are generated with every Circle CI build. The badge at the top of this document isn’t updated in real-time, unfortunately, but is fairly accurate since this project is configured for 100% code coverage.
To view up-to-date details, follow these steps:
-
Visit the Circle CI build page.
-
Click on the latest "Success" build at the top of the page.
-
Click on
build. -
Click on ARTIFACTS.
-
Click on the
coverage/index.htmlfile.
At this point you can click through the tabs at the top of the page to inspect the various namespaces that make up this application.
While this project is distributed under the permissive MIT License, we strongly believe that technology should serve humanity’s best interests. We created this software with the intent that it be used to benefit people and communities, not to cause harm. We encourage individuals and organizations to consider the ethical implications and to use this project in ways that respect human rights, promote equity, and contribute positively to society. Though we cannot legally restrict usage under the MIT License, we ask that you join us in fostering a responsible technology ecosystem by avoiding applications that could cause harm, perpetuate discrimination, or undermine human dignity. Technology is best used to enrich lives, let’s ensure we build a better world together!
-
Built with Hanamismith.
-
Engineered by TRMNL.