First create your own Netlify account. Signing up with Github is recommended for easy deployment, and is the method this guide is following.
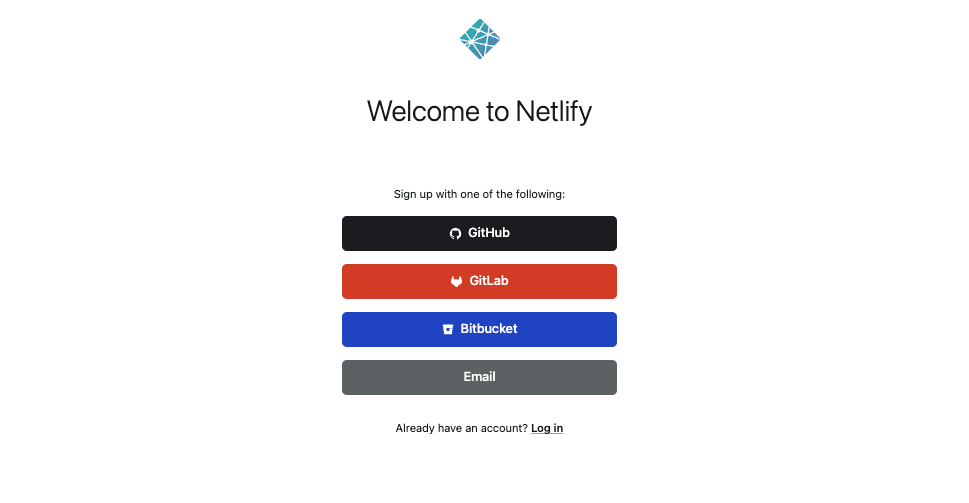
After creating an account, there will be a few user questions. Follow through the prompts until you get to this page:
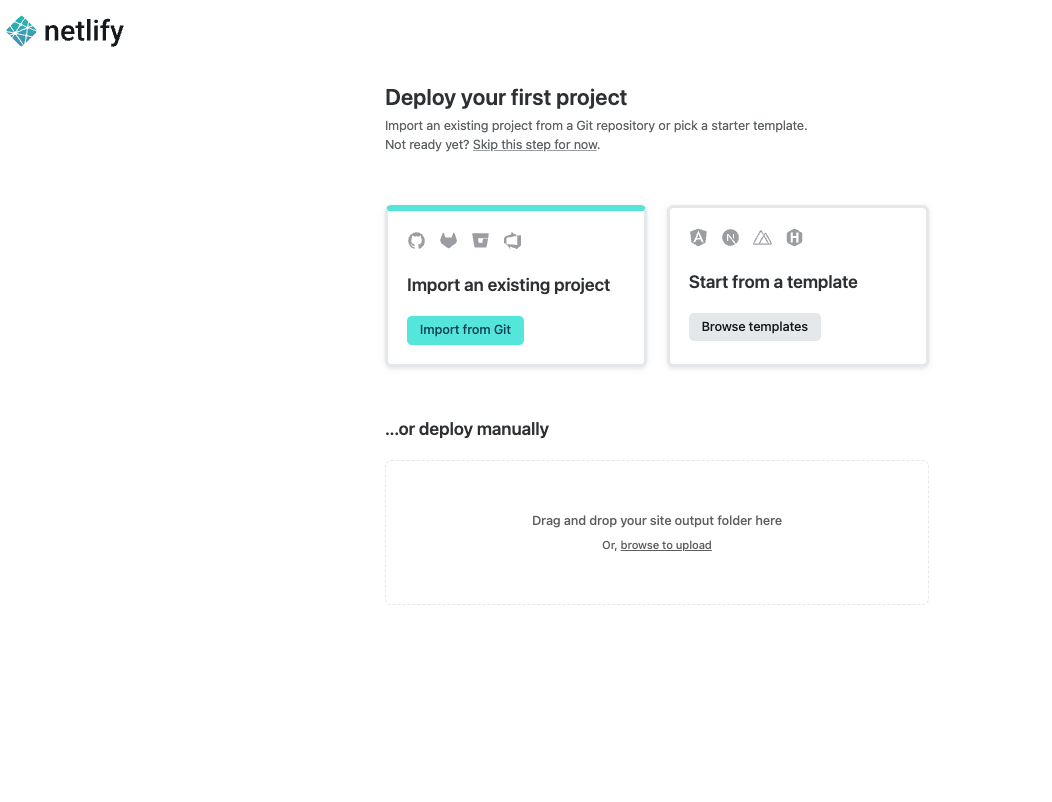 Select import from an existing project
Your screen will look like the image below.
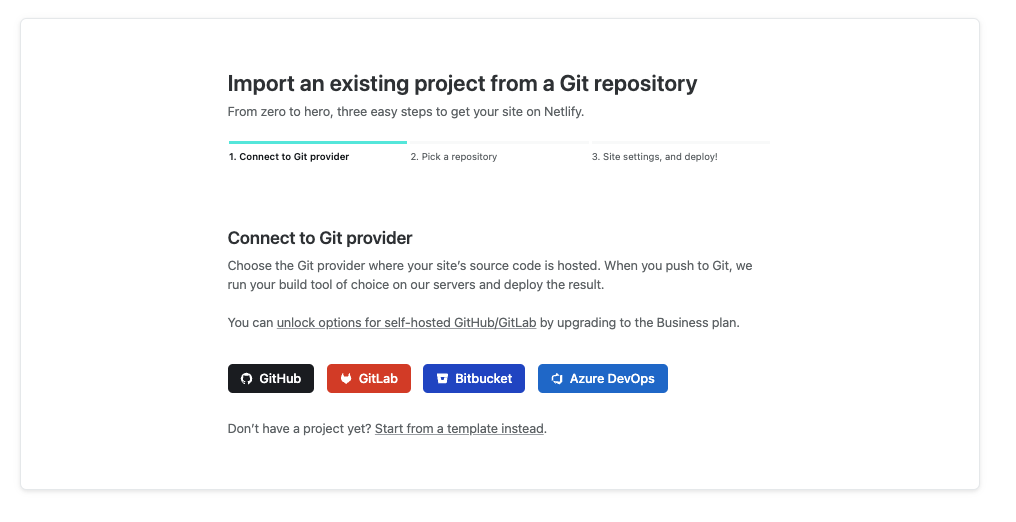 Now we want to connect to the Git provider, select Github
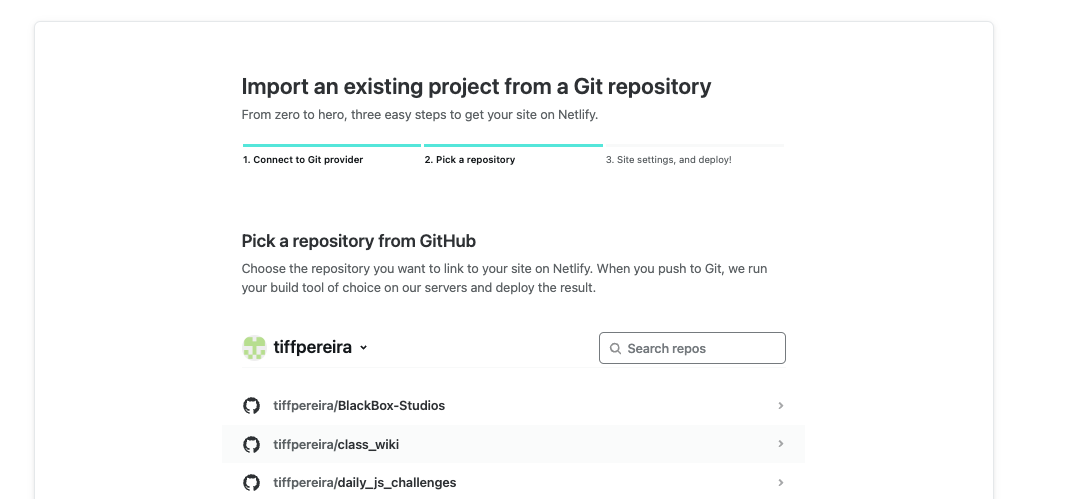
The following page will allow you to select any repos in your Github account. Search and select the repo you wish to deploy.
Now we want to give Netlify a few instructions when deploying your site. In the base directory section add the name of your react app, NOT your root directory/GitHub repo name. In the build command section include 'npm run build', and for your publish directory 'build'.
 Now you can select deploy site. This will bring you to the following page:
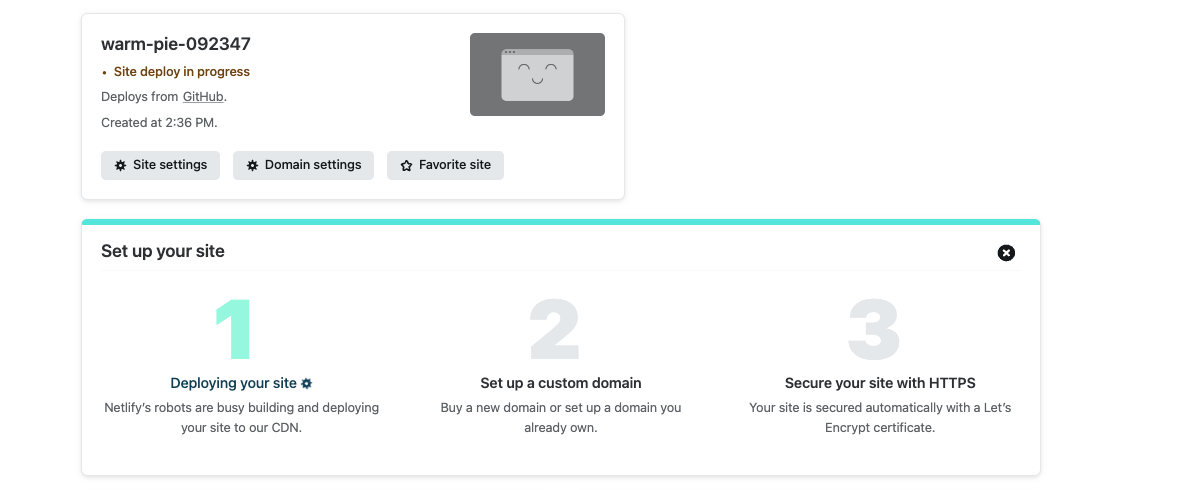 It may take a few minutes to a few hours for your react site to fully deploy, so be patient. Once your site is deployed you can edit the domain name and send the URL to friends and family!