


Starting from version 1.0.0 the application allows downloading images and videos from Pexels API.
This app allows the download of thousands of images and videos from Pexels straight to a Supervisely dataset. After specifying a search query and some additional parameters (such as a number of files, files size, etc.) with only one click you can download images or videos from Pexels and add them to a Supervisely dataset including meta information from Pexels (photographer name, Pexels file id, etc.).
For example, you can choose what kind of file you need for downloading (image or videos), after that enter a search query "dog" and set the number of images to 1000. You can check which meta information to download along with the images. After it, you can specify the project and the dataset to add the images (otherwise a new project and dataset will be created automatically). And now you only need to click "Start upload" and wait for the app to finish the job. After that, you will have a Supervisely dataset with up to 1000 images of dogs and all the meta information from Pexels that you have selected. For more details, see the How To Run section.
To use this app, you need to obtain a Pexels API key. To do this, you need to register a Pexels account and then get your API key from this page: Pexels API Keys. You have two options to use your API key: you can use team files to store a .env file with the API key or you can enter the API key directly in the app GUI. Using team files is recommended as it is more convenient and faster, but you can choose the option that is more suitable for you.
- Create a .env file with the following content:
PEXELS_API_KEY=your_api_key - Upload the .env file to the team files.
- Right-click on the .env file, select "Run app" and choose the "Pexels downloader" app.
The app will be launched with the API key from the .env file and you won't need to enter it manually.
- Launch the app.
- You will notice that all cards of the app are locked except the "Pexels API Key" card. Enter your API key in the field and press the "Check connection button".
- If the connection is successful, all cards will be unlocked and you can proceed with the app. Otherwise, you will see an error message and you will need to enter the API key again.
Now you can use the app. Note that in this case, you will need to enter the API key every time you launch the app.
Note: in this section, we consider that you have already obtained the API key, and use it to run the app. If you haven't done it yet, see the Preparation section.
So, here are the steps to download images or videos from Pexels:
Step 1: Enter the search query in the Search query field. You can use complex queries, for example, "dog cat" or "blue car city", but you should know that Pexels API will return search results, that contain files matching ALL the words in the beginning, and then the files matching ANY of the words. So, it's better to check the available number of results for each word before using a complex query. Otherwise, the result files may be not relevant to the query.
Step 2: After completing the previous step, we recommend checking the available number of results with the Check number of images/videos button. It will show you the total number of files with the specific search query. If the number is smaller than you expected, you can change the search query.

Step 3: Now you need to enter the Number of files to download. Note: the number of files you will get may be smaller than the number you have entered, because Pexels may return duplicates in the search results, and additionally, some of the files may be unavailable for download. So, we recommend entering a number of files that is slightly larger than you need.
Step 4: You can also specify the Starting files number to search. It is useful if you want to continue downloading files to the existing dataset where you have already downloaded some images or videos for the same (or similar) search query. So, this option allows you to skip a specified amount of files in the search results. For example, if you have already downloaded 100 images for the search query "dog" and you want to continue downloading files, you can enter 100 in the "Starting files number" field and the app will skip the first 100 files in the search results.
Step 5: Now you need to choose an Upload method. There are two options available: upload images/videos as links or as files. The first option won't download the image/video files to the dataset, it will just use the source file links. So, if the source file will be unavailable, it may cause data loss. This option is faster than the second one, but it is not recommended to use this method for long-term storage, because the source files may be unavailable in the future. The second option will download the image/video files to the dataset, it's safer but slower. You can choose the option that is more suitable for you.
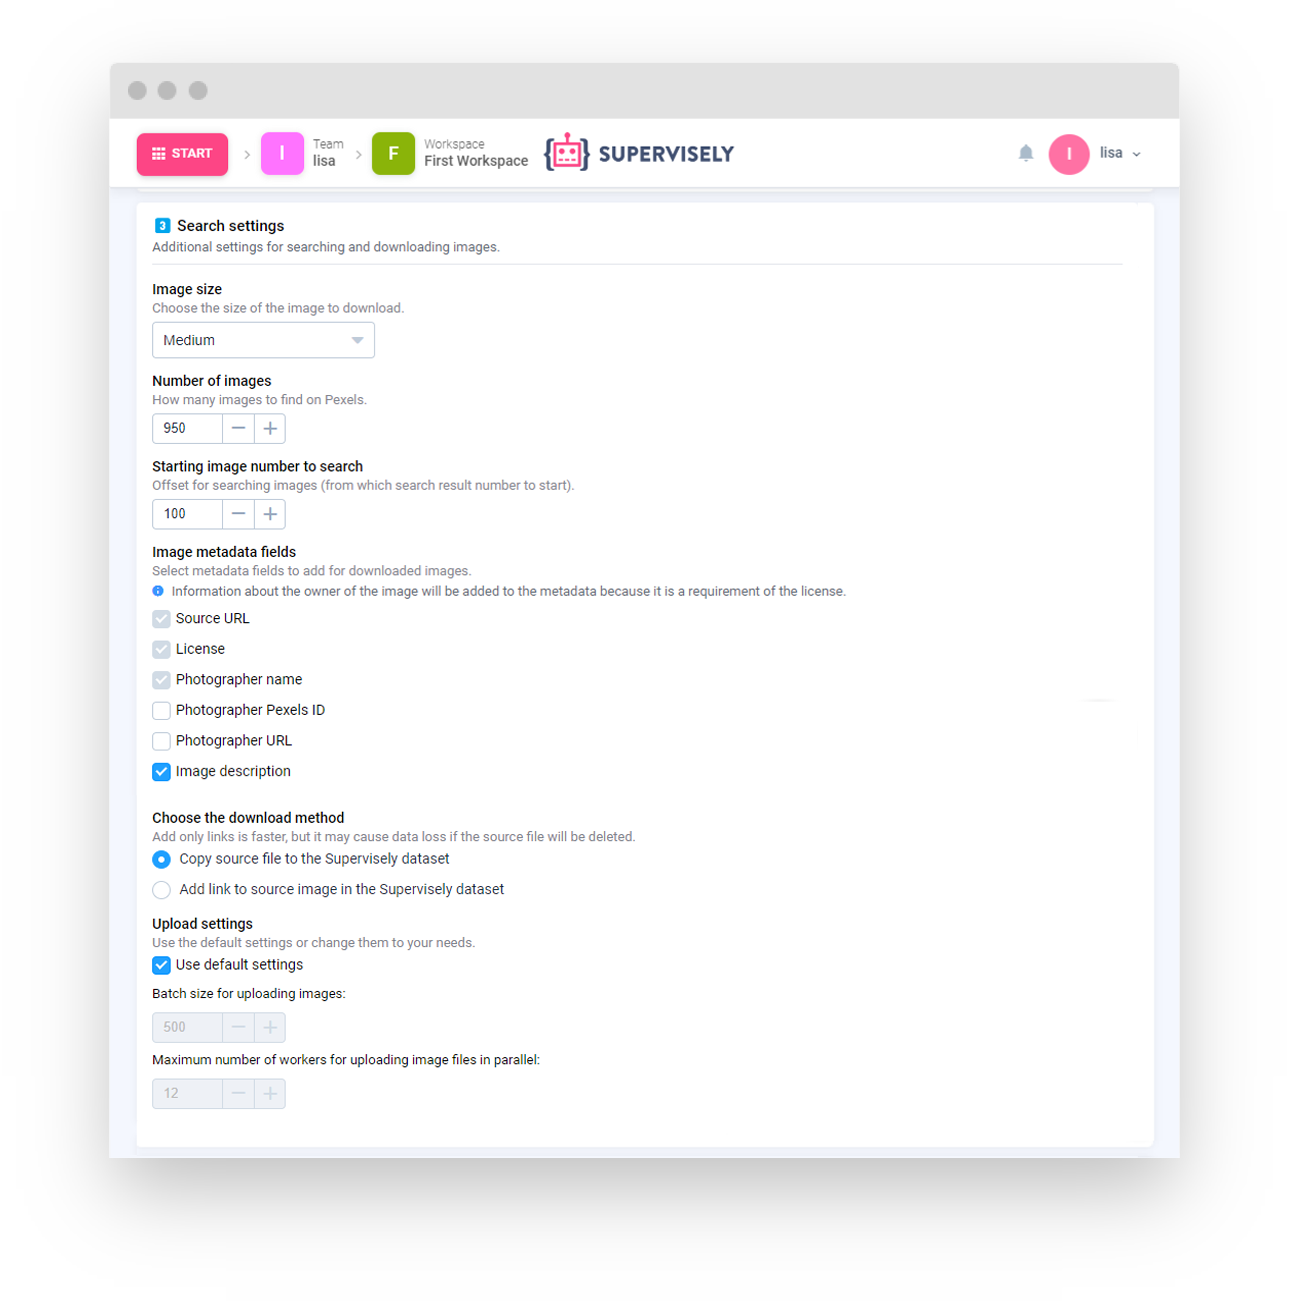
Step 6: The next option is to change the Upload settings. It is disabled by default, which means that you don't need to change those settings in most cases. But if you want to change it, you can do it by unchecking the "Use default settings" checkbox and changing the values. The batch size value is the number of files to upload to the dataset in one batch. The second value is the number of workers to download files in parallel. Note: unoptimized settings may cause the app to work slower, so we recommend using the default settings unless you have a specific reason to change them.
Step 7: In the Destination section, you can specify the project and the dataset to add the files. If you don't specify the project or the dataset, a new project or dataset will be created automatically using the search query and the current date for generating names. You can also specify the name of the project or the dataset manually if you want to create them with custom names. Note: if you are adding files to the existing dataset, where you have already downloaded some files for the same (or similar) search query, you should use the Starting files number from Step 4 to skip the already downloaded files or the app will ignore the duplicates and the result number of files will be smaller than you expected.
Step 8: After completing all the previous steps, you can click the Start Upload button to start downloading files from Pexels and uploading them to the dataset. The app will show you the progress of the upload, and you can also cancel the upload at any time by pressing the "Cancel upload" button.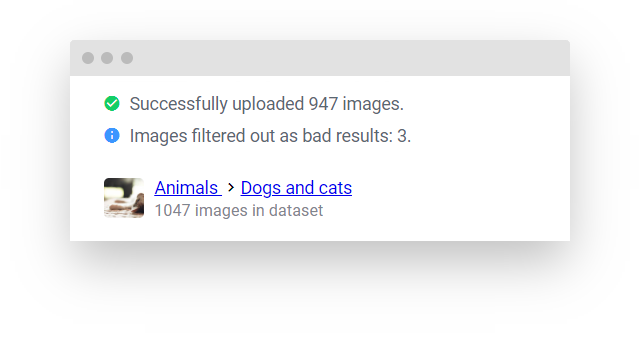
After the upload is finished, you will see a message with the number of files that have been successfully uploaded to the dataset. The app will also show the number of duplicates that were skipped during the upload and the number of files that were unavailable for download. The app will also show the project and the dataset to which the files were uploaded. You can click on the links to open the project or the dataset.
Note: the app will also add information about the search query and the license types to the custom data of the project. The entries will be grouped by the Pexels downloader app name and the search query. The entries will also contain the date and time of the upload, the number of files, starting file number and the upload method. This information will be useful if you want to continue downloading files for the same (or similar) search query in this project or dataset.