![]()
User Documentation is at https://www.docs.rpanion.com/software/rpanion-server
This is a node.js based server for companion computers used in Mavlink-based vehicles (ie Ardupilot, PX4).
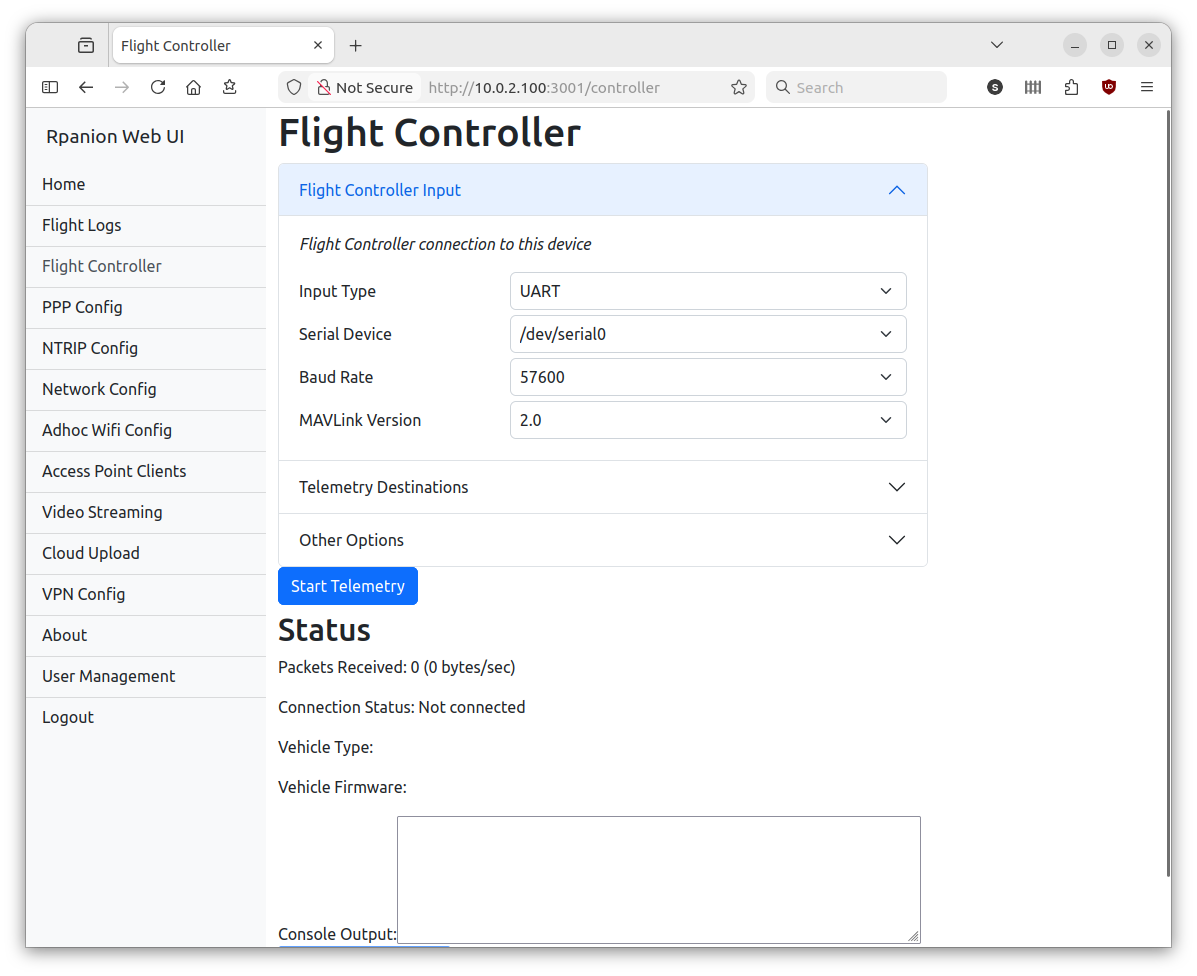
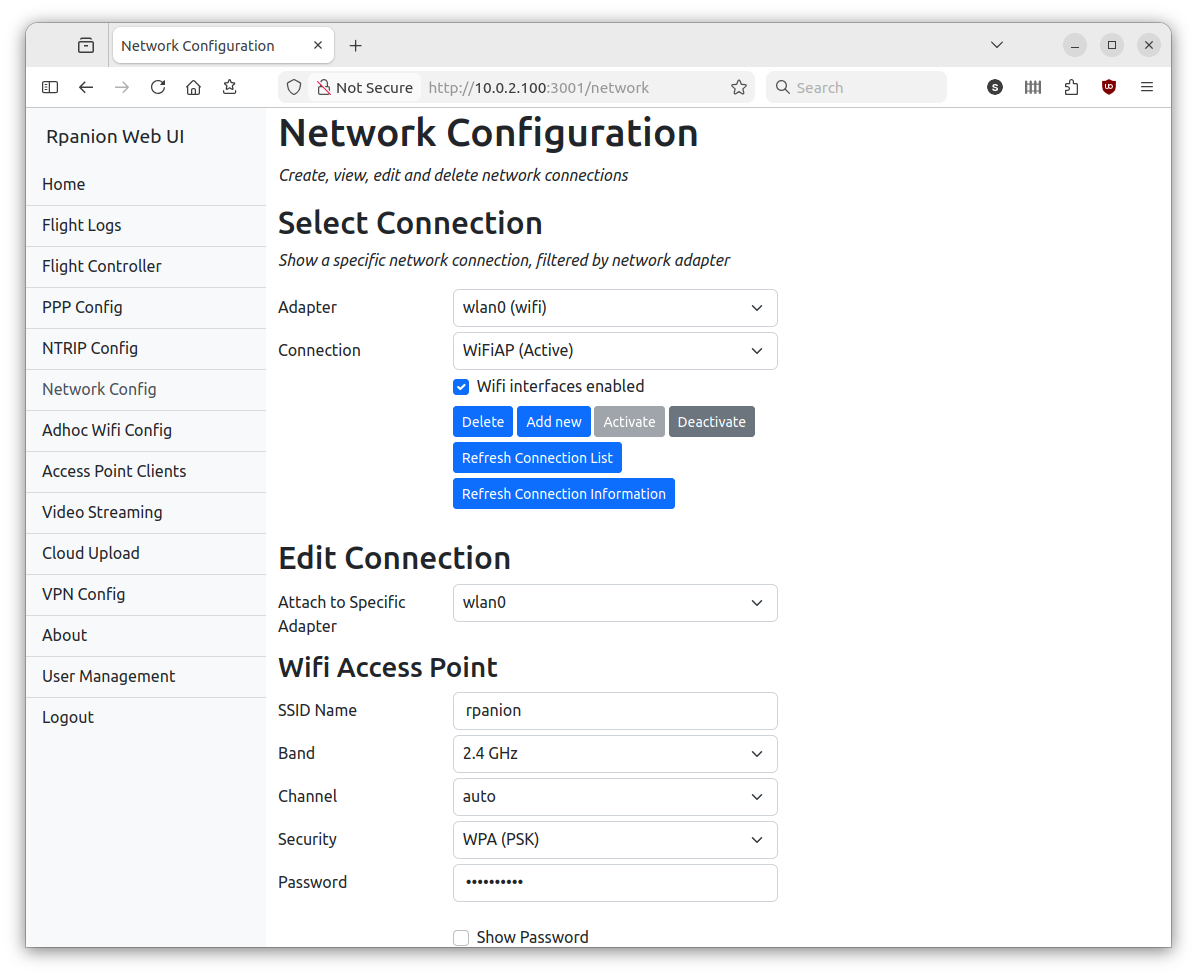
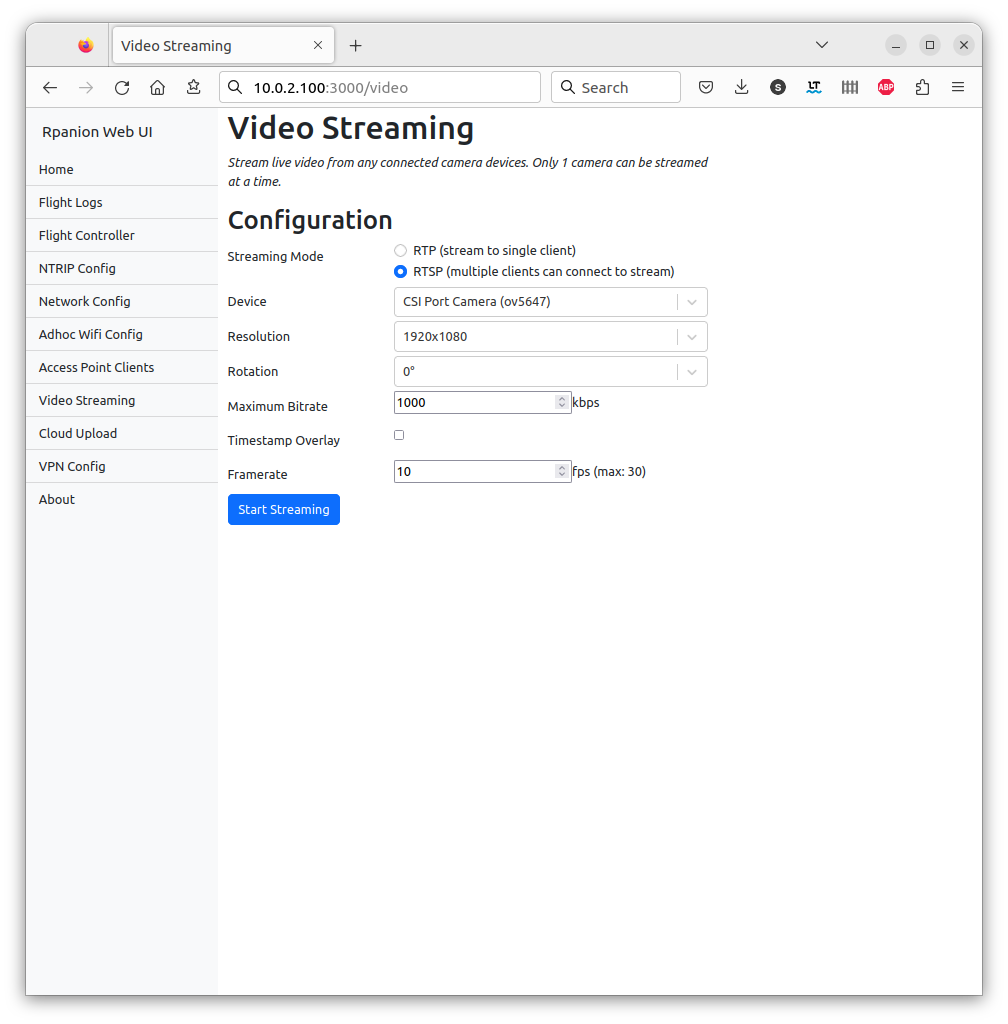
It presents a web-based interface (running on the companion computer), where system settings such as network, telemetry and video streaming can be configured from.
On the Raspberry Pi, Rpanion-server is compatible with the Raspberry Pi OS and Ubuntu 20.04 LTS.
On the Nvidia Jetson, Rpanion-server is compatible with Ubuntu 18.04 LTS.
On the Nvidia Jetson Orin, Rpanion-server is compatible with Ubuntu 22.04 LTS.
On the Libre Computer Le Potato, Rpanion-server is compatible with their flavor of Raspberry Pi OS.
Note
Some users may have issues connecting to the UART on the Raspberry Pi 3B+. Further details and configuration fixes are at #215 (comment).
Note
For the Raspberry Pi CM4, Wifi AP performance is typically poor when using the internal antenna. It is recommended to use an external antenna. Additionally any CSI cameras will not be autodetected. See here for more details.
Rpanion-server allows the user to configure:
- Flight Controller telemetry routing to udp outputs
- Video Streaming via an RTSP server
- Network configuration
- NTRIP Streaming
- Logging (tlog and bin logs)
Rpanion-server has pre-built debian packges for arm64 platforms (Jetson, Raspberry Pi, etc). This is the easiest way to get started.
There are also full disk images with a pre-configured Wifi hotspot for the Raspberry Pi.
To (optionally) use the Zerotier and/or Wireguard VPN's, install as follows:
curl -s https://install.zerotier.com | sudo bash
sudo apt install wireguard wireguard-tools
Then install the required packages:
sudo apt install -y gstreamer1.0-plugins-good libgstrtspserver-1.0-dev gstreamer1.0-plugins-base-apps
sudo apt install -y gstreamer1.0-plugins-ugly gstreamer1.0-plugins-bad python3-netifaces
sudo apt install -y network-manager python3 python3-dev python3-gst-1.0 python3-pip dnsmasq git ninja-build jq
sudo apt install -y libxml2-dev libxslt1-dev python3-lxml python3-numpy python3-future gpsbabel zip
If running on RasPiOS, install the libcamera drivers:
sudo apt install -y gstreamer1.0-libcamera python3-picamera2 python3-libcamera python3-kms++
Install Nodejs:
sudo apt install -y ca-certificates curl gnupg
sudo mkdir -p /etc/apt/keyrings
curl -fsSL https://deb.nodesource.com/gpgkey/nodesource-repo.gpg.key | sudo gpg --dearmor -o /etc/apt/keyrings/nodesource.gpg
echo "deb [signed-by=/etc/apt/keyrings/nodesource.gpg] https://deb.nodesource.com/node_20.x nodistro main" | sudo tee /etc/apt/sources.list.d/nodesource.list

sudo apt update
sudo apt install -y nodejs
Then install Rpanion-server:
sudo dpkg -i rpanion-server-xxx.deb
After installation, Rpanion-server will be available at http://<device_ip>:3001
The Raspberry Pi Zero W(1) and Raspberry Pi 2 are not supported from version 0.10.0 onwards.
Note the CSI camera does not currently work on Ubuntu 22.04 and 24.04, due to incompatibilities with the Raspberry Pi.
Note the GPIO UARTs are not currently working with Ubuntu 24.04.
If an older version of the Raspberry Pi OS is used (Buster, V10 or below), the gst-rpicamsrc Gstreamer element
must be installed. See https://github.com/thaytan/gst-rpicamsrc for install instructions.
If using a usb to serial converter, you might need to modify permissions of the device.
Temporary device permission update
sudo chmod 666 /dev/ttyACM0
Persistent device permission update
Follow the steps on this site for your specific device: https://www.xmodulo.com/change-usb-device-permission-linux.html
The mavlink-router (https://github.com/mavlink/mavlink-router) software is used for backend routing and is required to be installed.
Follow the scripts in the /deploy folder for your selected platform to set up the
development environment.
Running in development mode allows for any code changes to trigger a restart of Rpanion-server.
Rpanion-server consists of a node.js server running on port 3001 and a React frontend application running on port 3000 in development mode.
Run both applications (front and back end) together, use the command:
npm run devIt is important to only use npm run dev during development, as it will skip
the user login and authentication checks.
At this point, the website will be active at http://<ip of device>:3000
Rpanion-server has access control in place to prevent unauthorised users from making changes to the system via the GUI.
The access control does not apply to any MAVLink or video streams
The default username is admin and password admin. This can be changed
on the "User Management" page.
Usernames and passwords are stored in the user.json file in the Rpanion-server folder. Resetting this file (via git checkout user.json)
will reset the usernames/passwords back to it's defaults.
Unit tests are split into separate commands for the frontend (ReactJS) and backend.
Unit tests can be run with the command:
npm run testback
npm run testfront
Code coverage statistics are automatically calculated for the backend tests.
Linting (via eslint) is available via:
npm run lintUse npx npm-check-updates -u to update nodejs libraries.
Use npm version minor to create a new release commit.
Then update the changelog.md and amend this to the commit.
Then "git push --tags" to create the release PR.
To produce a disk image from a SD card, insert the card and run ./deploy/create_image.sh.