


This package contains an artisan command visit that allows you to visit any route of your Laravel app.
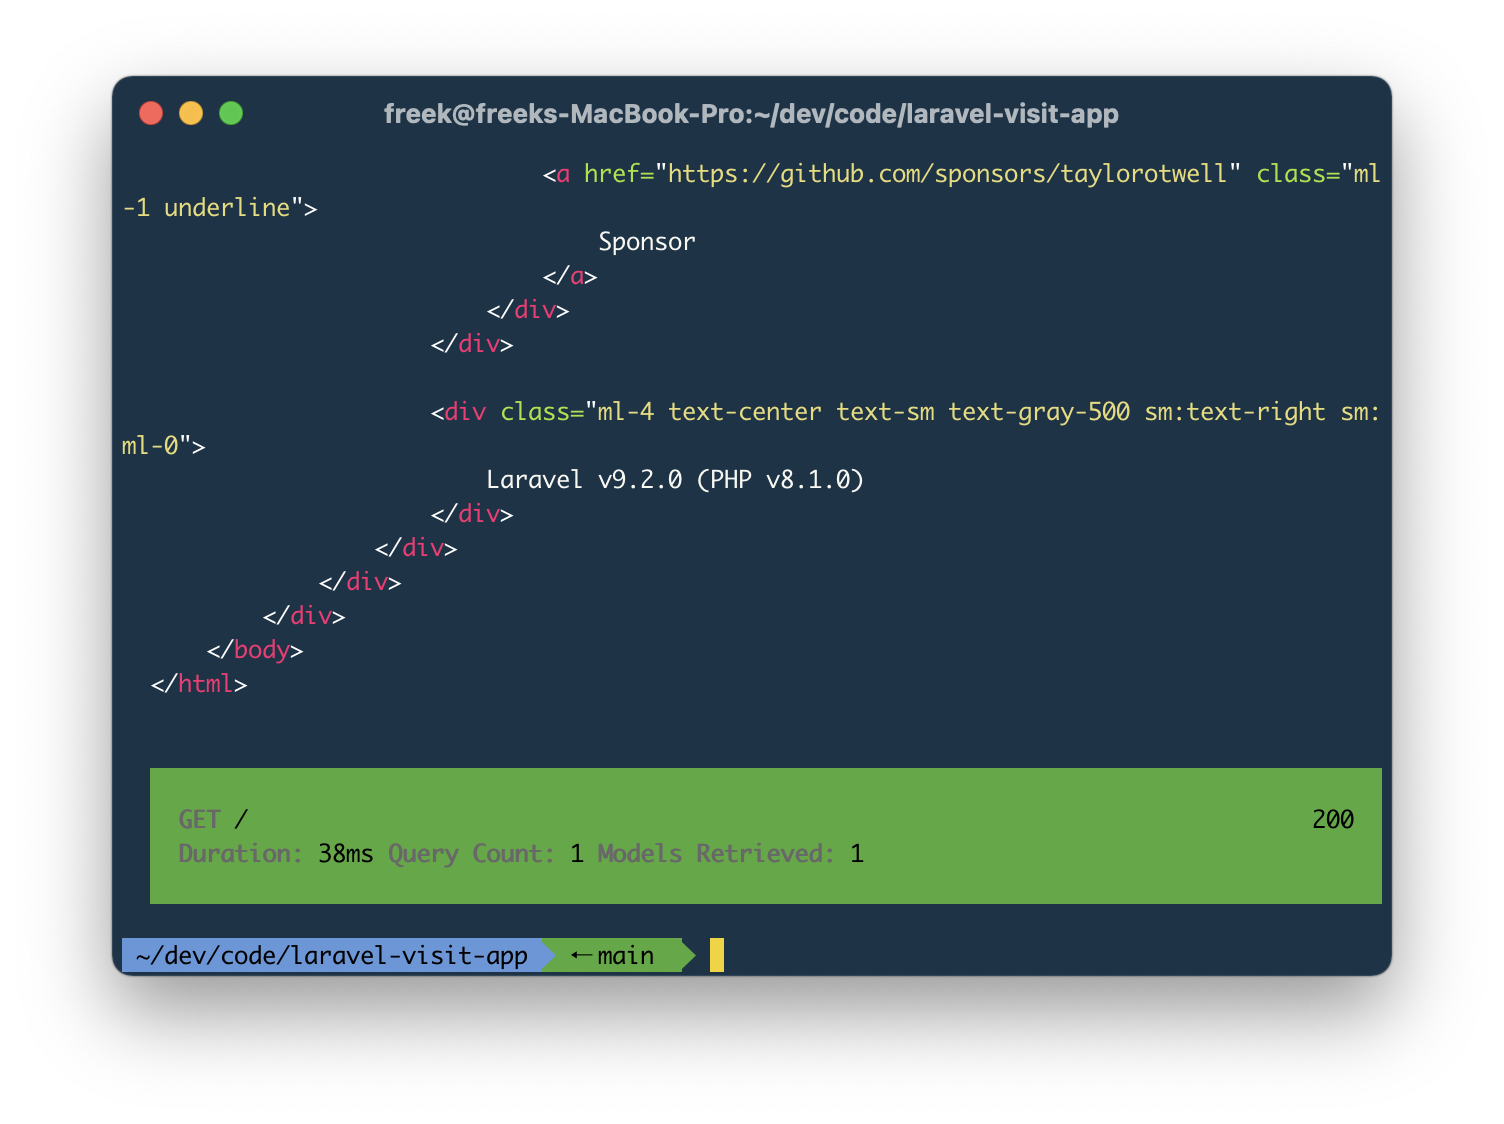
php artisan visit /my-pageThe command display the colorized version of the HTML...
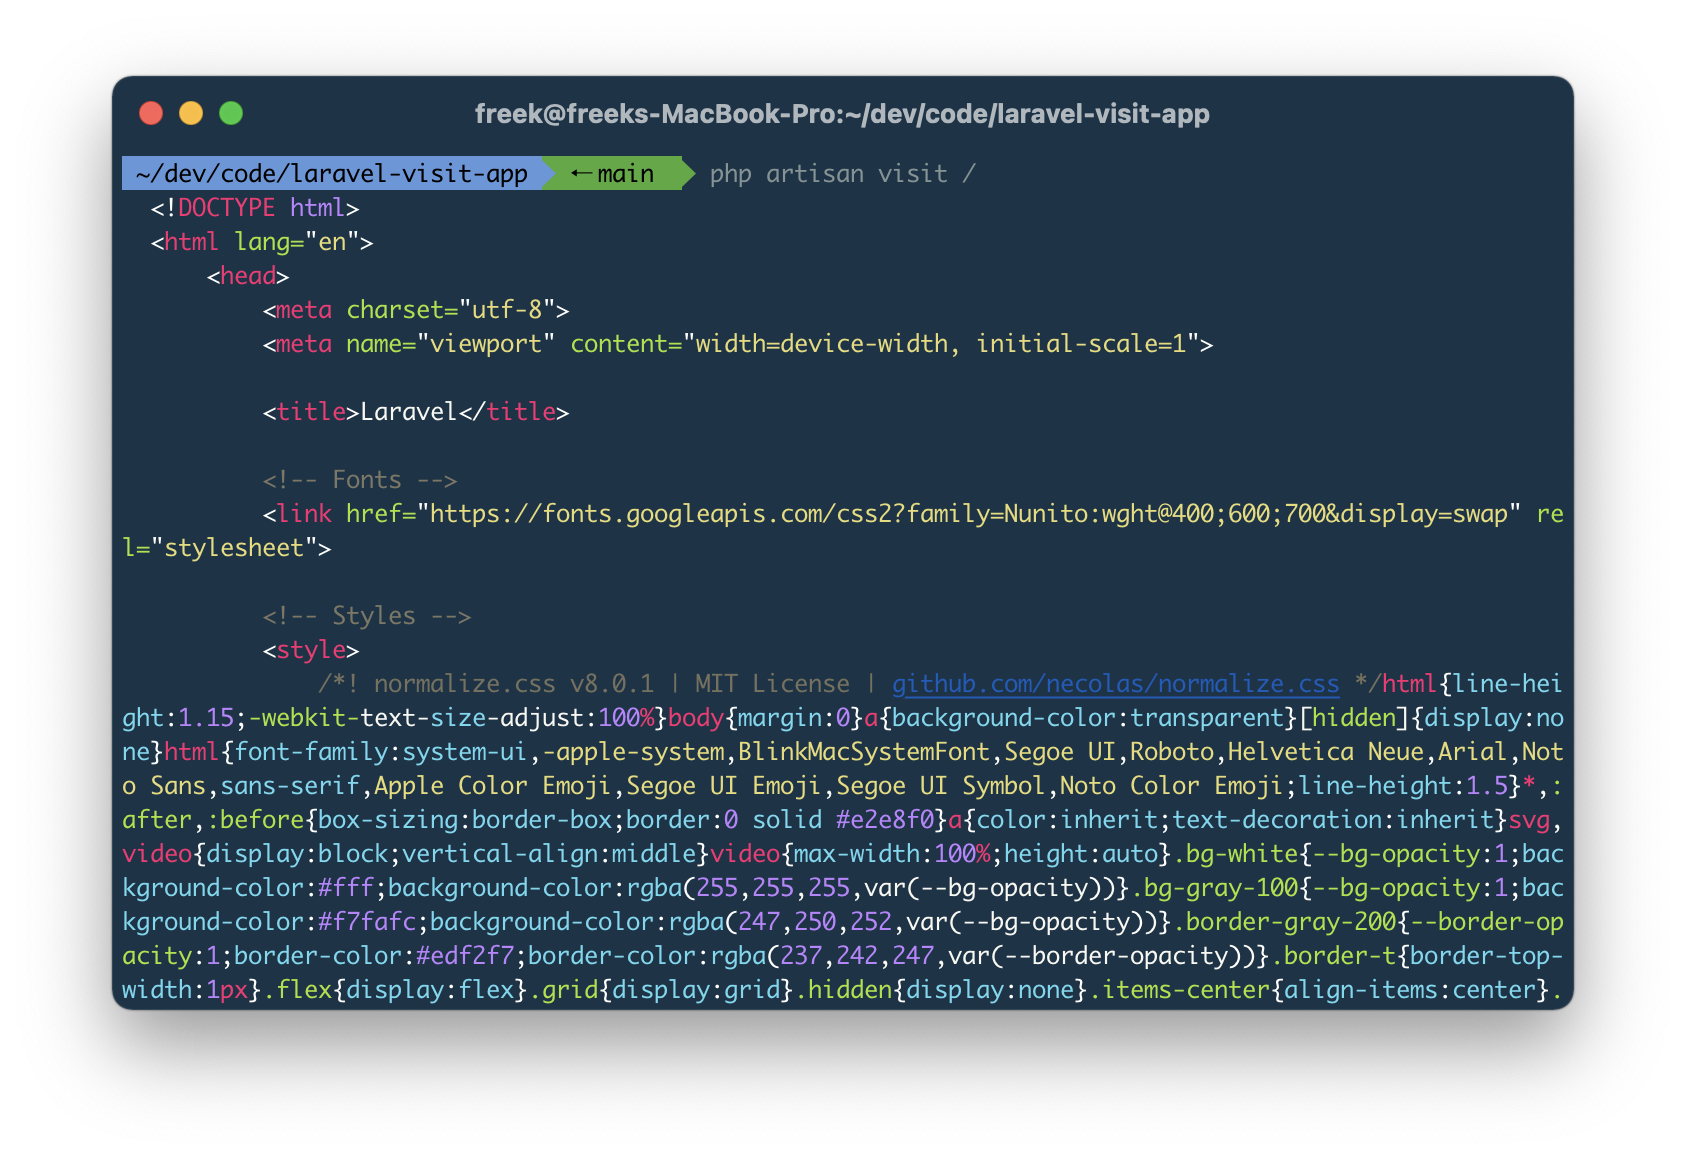
... followed by a results block.
The command can also colorize JSON output. It also has support for some Laravel niceties such as logging in users before making a request, using a route name instead of and URL, and much more.
The spatie/visit tool can be installed globally to visit any site.

We invest a lot of resources into creating best in class open source packages. You can support us by buying one of our paid products.
We highly appreciate you sending us a postcard from your hometown, mentioning which of our package(s) you are using. You'll find our address on our contact page. We publish all received postcards on our virtual postcard wall.
You can install the package via composer:
composer require spatie/laravel-visitTo colorize HTML, you should install bat.
brew install batTo colorize JSON, you should install jq.
brew install jqOptionally, you can publish the config file.
php artisan vendor:publish --tag="visit-config"This is the content of the published config file:
return [
    /*
     * These classes are responsible for colorizing the output.
     */
    'colorizers' => [
        Spatie\Visit\Colorizers\JsonColorizer::class,
        Spatie\Visit\Colorizers\HtmlColorizer::class,
    ],

    /*
     * These stats will be displayed in the response block.
     */
    'stats' => [
        ...Spatie\Visit\Stats\DefaultStatsClasses::all(),
    ]
];To visit a certain page, execute php artisan followed by a URL.
php artisan visit /your-pageInstead of passing an URL, you can pass a route name to the route option. Here's an example where we will visit the route named "contact".
php artisan visit --route=contactBy default, the visit command will make GET request. To use a different HTTP verb, you can pass it to the method option.
php artisan visit /users/1 --method=deleteYou can pass a payload to non-GET request by using the payload. The payload should be formatted as JSON.
php artisan visit /users --method=post --payload='{"testKey":"testValue"}'When you pass a payload, we'll assume that you want to make a POST request. If you want to use another http verb, pass it explicitly.
visit <your-url> --method=patch --payload='{"testKey":"testValue"}'To log in a user before making a request, add the --user and pass it a user id.
php artisan visit /api/user/me --user=1Alternatively, you can also pass an email address to the user option.
php artisan visit /api/user/me --user=john@example.comBy default, the visit command will not show any headers. To display them, add the --headers option
php artisan visit /my-page --headers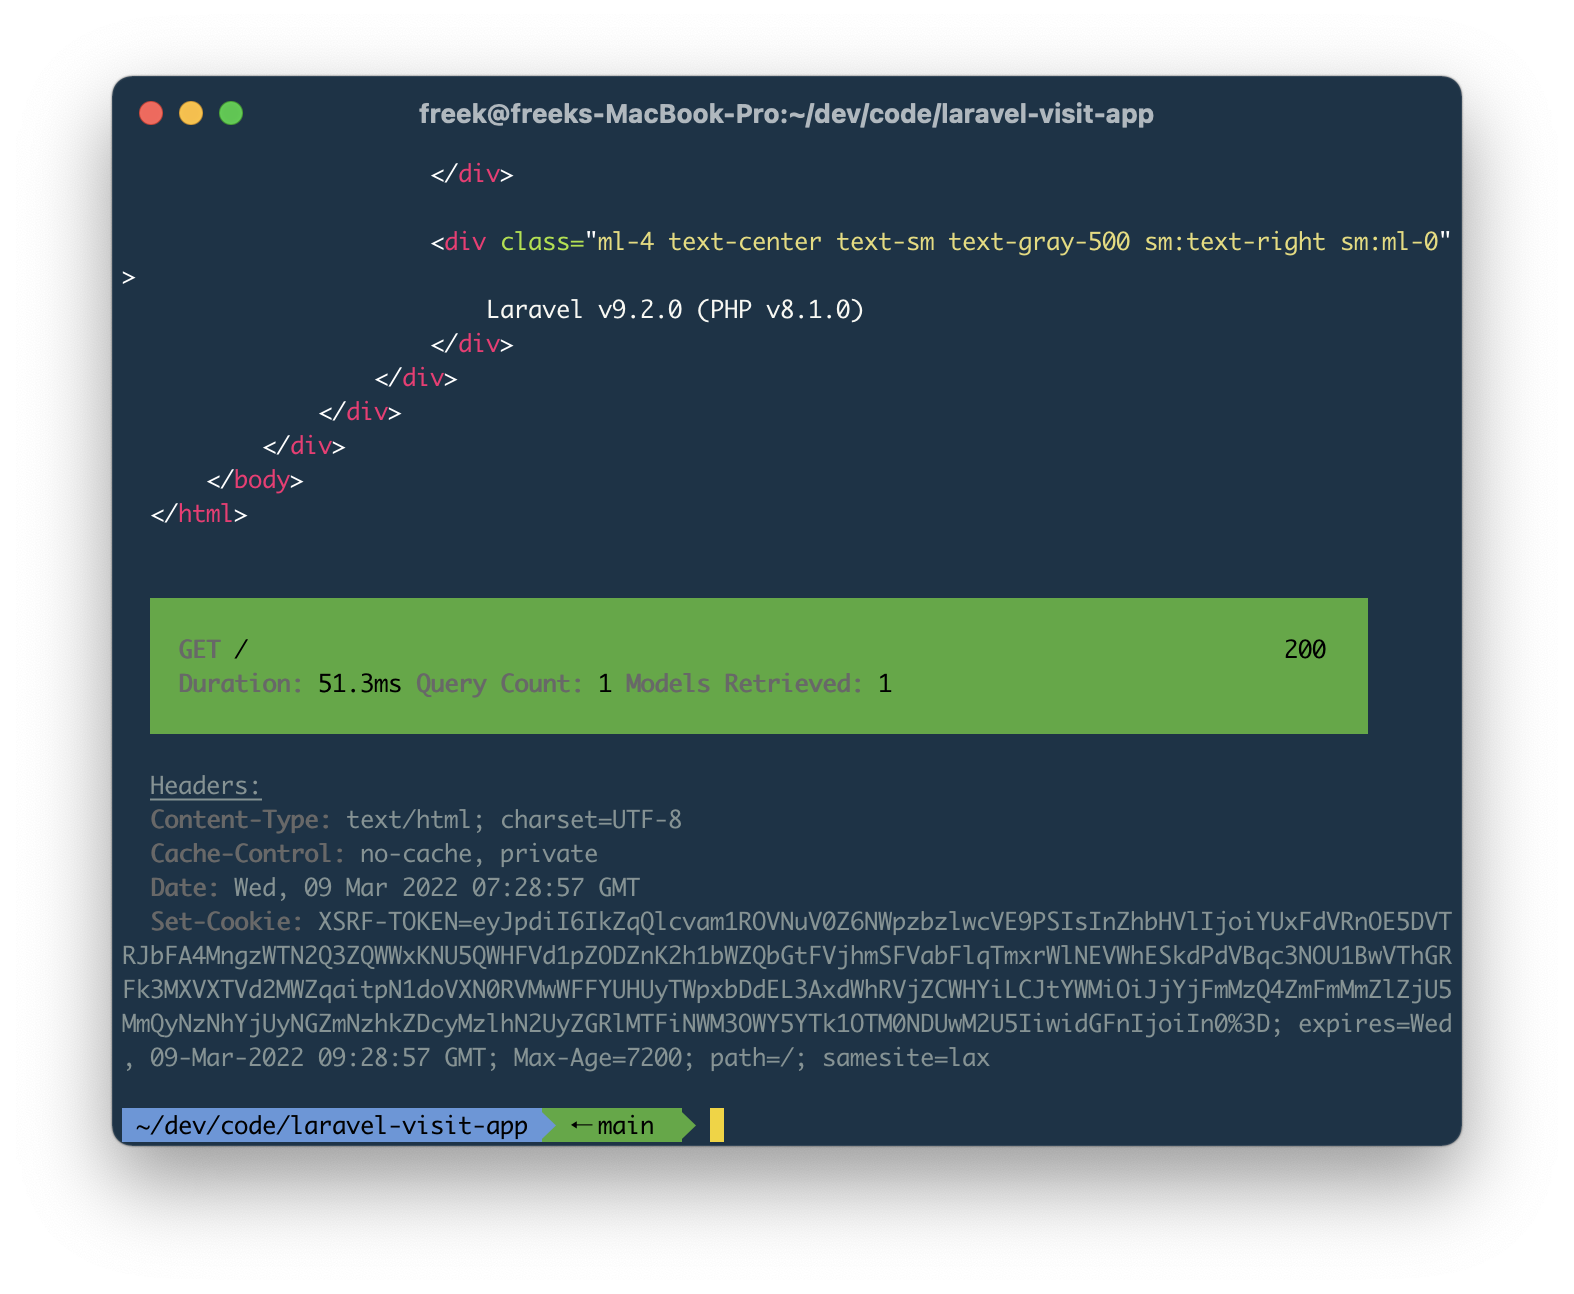
By default, the visit command will not follow redirects. To follow redirects and display the response of the redirection target, add the --follow-redirects option.
php artisan visit /my-page --follow-redirectsWhen your application responds with an exception, the visit command will show the html of the error page.
To let the visit command display the actual exception, use the --show-exception option.
php artisan visit /page-with-exception --show-exceptionIf you want the visit command to only display the response, omitting the response result block at the end, pass the --only-response option.
php artisan visit / --only-responseTo avoid displaying the response, and only display the response result block, use the --only-stats option
php artisan visit / --only-statsThe visit command will automatically colorize any HTML and JSON output. To avoid the output being colorized, use the --no-color option.
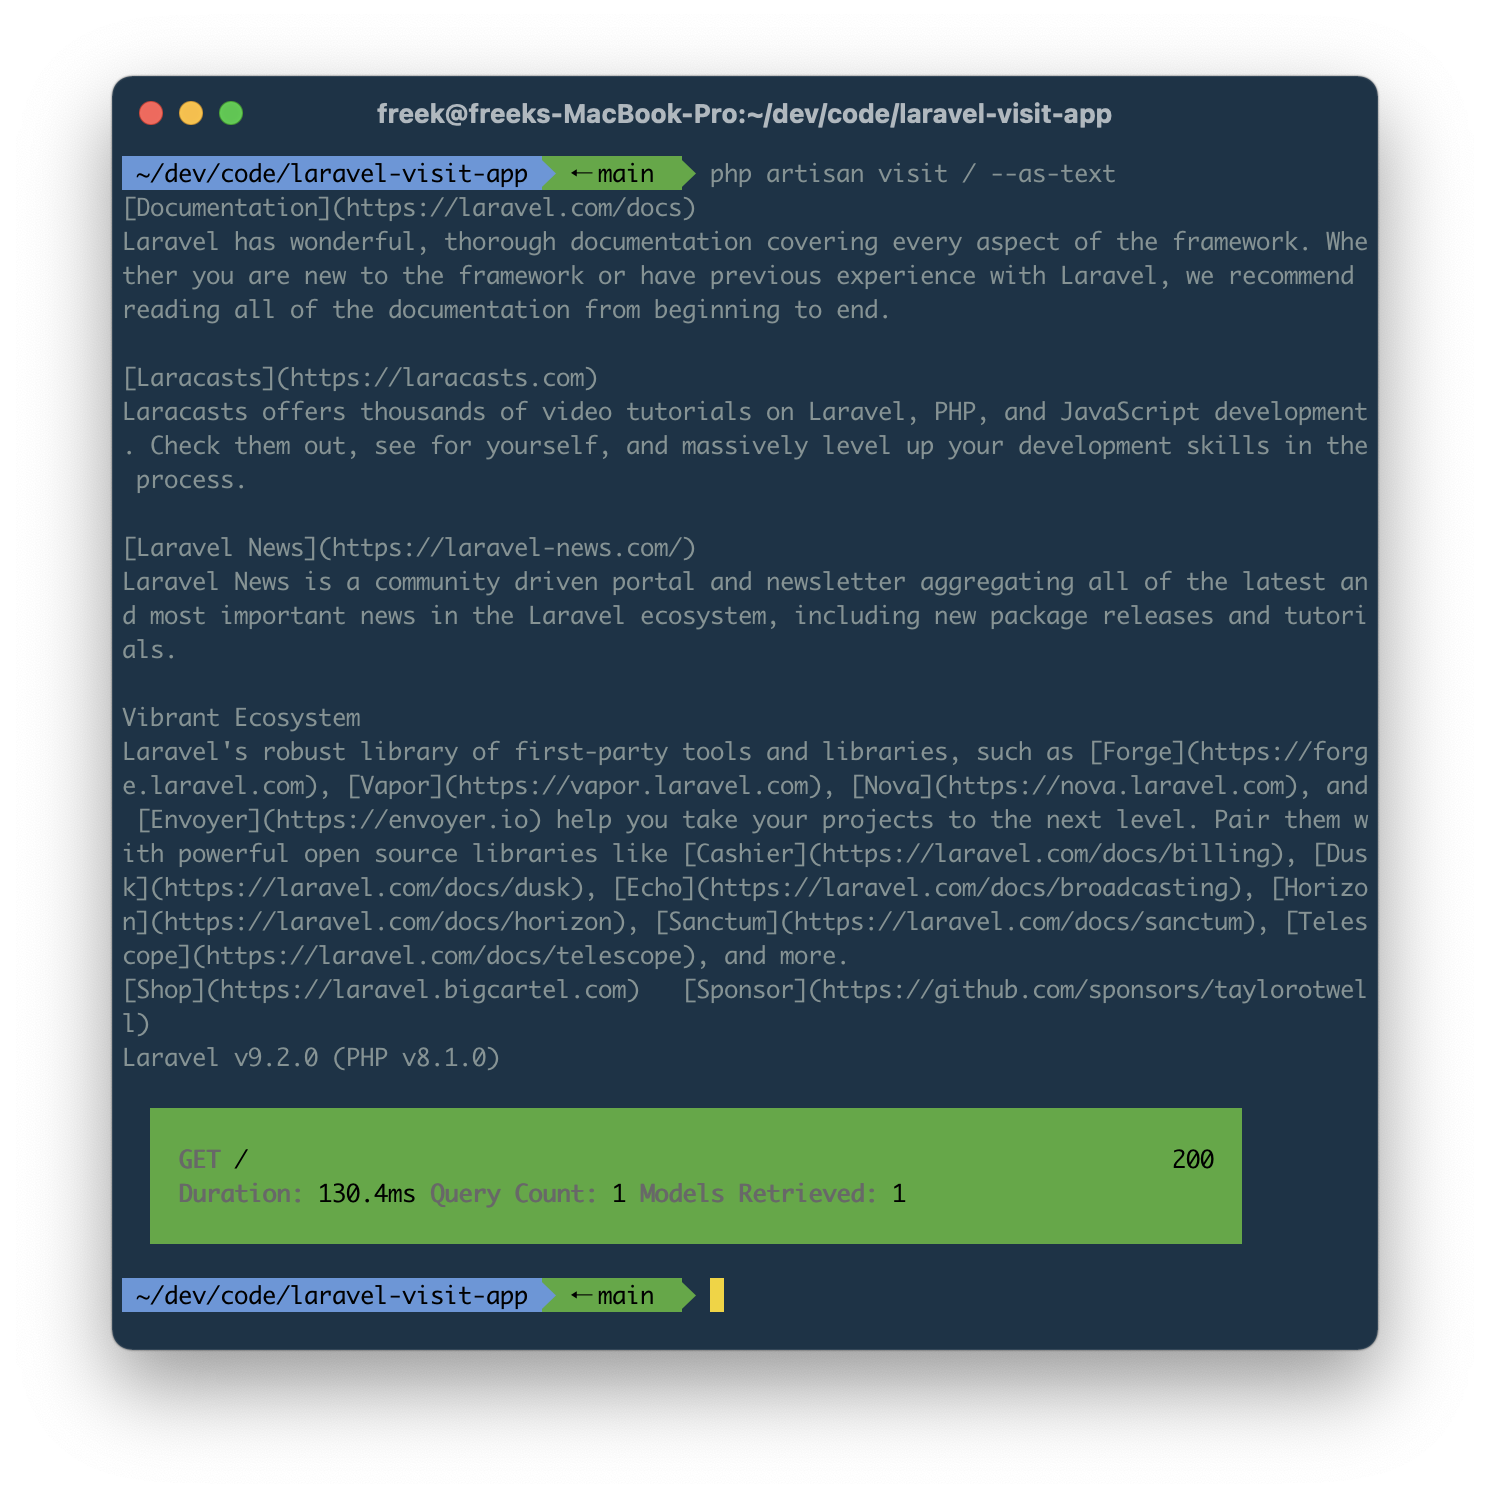
php artisan visit / --no-colorUsually an HTML response is quite lengthy. This can make it hard to quickly see what text will be displayed in the browser. To convert an HTML to a text variant, you can pass the --text option.
php artisan visit / --textThis is how the default Laravel homepage will look like.
If you only want to see a part of an HTML response you can use the --filter option. For HTML output, you can pass a css selector.
Imagine that your app's full response is this HTML:
<html>
    <body>
        <div>First div</div>
        <p>First paragraph</p>
        <p>Second paragraph</p>
    </body>
</html>
This command ...
php artisan visit / --filter="p"... will display:
<p>First paragraph</p>
<p>Second paragraph</p>If you only want to see a part of an JSON response you can use the --filter option. You may use dot-notation to reach nested parts.
Imagine that your app's full response is this JSON:
{
    "firstName": "firstValue",
    "nested": {
        "secondName": "secondValue"
    }
}
This command ...
php artisan visit / --filter="nested.secondName"... will display:
secondValueIn the results block underneath the response, you'll see a few interesting stats by default, such as the response time and queries executed.
You can add more stats there by creating your own Stat class. A valid Stat is any class that extends Spatie\Visit\Stats\Stat.
Here's how that base class looks like:
namespace Spatie\Visit\Stats;

use Illuminate\Contracts\Foundation\Application;

abstract class Stat
{
    public function beforeRequest(Application $app)
    {
    }

    public function afterRequest(Application $app)
    {
    }

    abstract public function getStatResult(): StatResult;
}
As an example implementation, take a look at the RunTimeStat that ships with the package.
namespace Spatie\Visit\Stats;

use Illuminate\Contracts\Foundation\Application;
use Symfony\Component\Stopwatch\Stopwatch;
use Symfony\Component\Stopwatch\StopwatchEvent;

class RuntimeStat extends Stat
{
    protected Stopwatch $stopwatch;

    protected ?StopwatchEvent $stopwatchEvent = null;

    public function __construct()
    {
        $this->stopwatch = new Stopwatch(true);
    }

    public function beforeRequest(Application $app)
    {
        $this->stopwatch->start('default');
    }

    public function afterRequest(Application $app)
    {
        $this->stopwatchEvent = $this->stopwatch->stop('default');
    }

    public function getStatResult(): StatResult
    {
        $duration = $this->stopwatchEvent->getDuration();

        return StatResult::make('Duration')
            ->value($duration . 'ms');
    }
}
To activate a Stat, you should add its class name to the stats key of the visit config file.
// in config/stats.php

return [
    // ...

    'stats' => [
        App\Support\YourCustomStat::class,
        ...Spatie\Visit\Stats\DefaultStatsClasses::all(),
    ]
]composer testPlease see CHANGELOG for more information on what has changed recently.
Please see CONTRIBUTING for details.
Please review our security policy on how to report security vulnerabilities.
The MIT License (MIT). Please see License File for more information.