Getting Started
PoshC2 is very simple to install, which ever method you choose. We have two install methods are single no fuss installer and a slightly more involved method which is best used if the user wants to do any development on PoshC2.
This method is as simple as we've created an installer;
powershell -exec bypass -c "IEX (New-Object System.Net.WebClient).DownloadString('https://raw.githubusercontent.com/nettitude/PoshC2/master/C2-Installer.ps1')"
Copy the command string from above and paste it into the terminal. The installer method shown above is probably the best way to get started with PoshC2, it also includes functionality that can be used to update the current version of PoshC2, simply re‐running the the above command will determine that PoshC2 is installed, remove it and download and install the latest version.
There is an optional requirement for PoshC2 which enables it to create a custom Java based payload. This requires the Java Development Kit to be installed, this can be downloaded from the Oracle website, the link to the download at the time this document was written is below;
Download and install the JDK as per the directions from Oracle.
The ability to clone the PoshC2 Github repository is not natively supported by Windows and extracting the zip of the repository uses strange paths and folders, we recommend using the Github Desktop application, available free from;
Download and install the application as per the directions from Github. Once installed the easiest way to clone the repository is to open the PowerShell based Git Shell application;
Double clicking the above icon will bring up a PowerShell windows which has the familiar ‘git’ commands included.
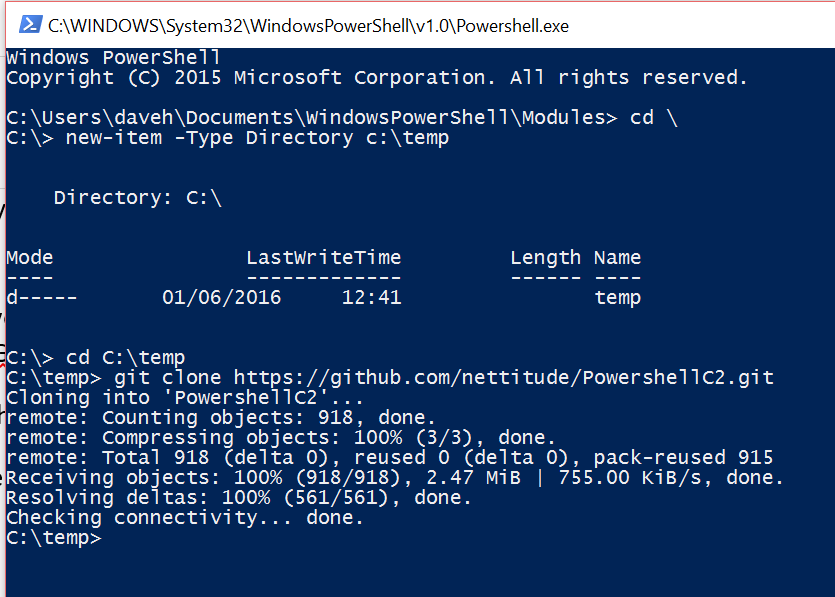
The commands to run in the PowerShell session are;
cd \
new‐item –Type directory c:\temp
cd c:\temp
git clone https://github.com/nettitude/PowershellC2.git
Also still required is the Java Development Kit as described above.
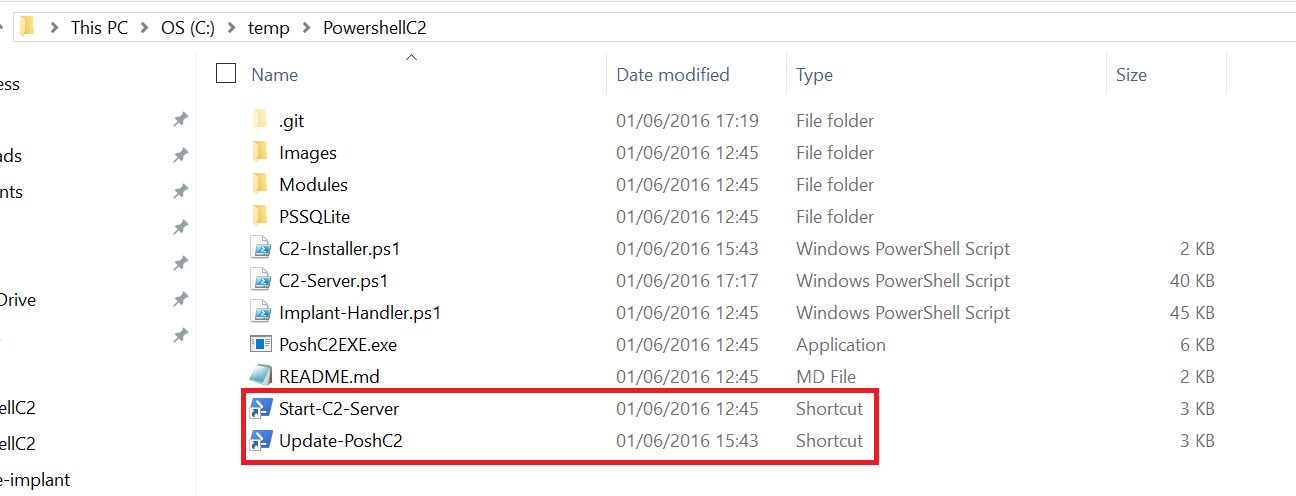
PoshC2 consists of two individual PowerShell terminals, one called ‘PoshC2 Server’ and the other ‘Implant‐Handler’, this may sound odd but all will become seamless and intuitive once you start using the application. Starting the application is as simple as double‐clicking a shortcut. Take a look in the PoshC2 folder within the c:\temp directory, there will be two shortcuts, one to start PoshC2 and one to update it. Copy these to icons to your desktop for convenience.

Double‐clicking the ‘Start‐C2‐Server’ icon will initially check for administrative rights of the user and if required will elevate privileges to allow running as an administrative level user, the PoshC2 server PowerShell window will open up and the user will be asked a series of questions;
- If multiple Ethernet adaptors are detected PoshC2 will ask which IP/Adaptor to use for its listener;
- The user will be asked if they want to set the engagement folder name, by default this will be a time stamped folder name;
- The user will be allowed to set a different implant beacon interval;
- The ability to set a kill time for the implant;
- The option to set the port for the listener, i.e. 443, but to be honest port 80 is preferred.

Another PowerShell session will start‐up, this is the ‘Implant‐Handler’, implant is our term for payload, agent or beacon. This PowerShell session is were the user selects and interacts with the established remote shells or implants.

Above we’ve seen what happens when a connection is made to the C2 server from one of our implants. Lets take a look at how this happens, PoshC2 has four auto generated payloads
- payload.bat, a batch file which runs powershell.exe with an encoded command, nothing new one of the easiest ways to get a remote connection.
- macro.txt, a text file that contains the code to paste into a Word document macro which will produce a remote connection.
- a java applet payload.
- a payload that looks just like a shortcut, that can be embedded into an email or document – credit here to Alexey http://onready.me
There is also a further two quick infection methods given in the PoshC2 PowerShell session start‐ up, a simple one‐liner and method created by @SubTee


Using either of the quick infect methods will get you going on a test system or if you have local access, which will allow you to play with the functionality of PoshC2, so copy and paste the command from the C2 server windows into a victim Windows host. In the screenshots below, we can see an active implant that has connected to the PoshC2‐Server and notification of a new implant is show in the ‘Implant‐Handler’
In the screenshots below, we can see an active implant that has connected to the PoshC2‐Server and notification of a new implant is show in the ‘Implant‐Handler’

To interact with an active implant, simply enter the numeric id of the desired implant, in the case above this is ‘1’.
Once the implant is selected you are now able to interact with and send commands like ‘ls’, ‘dir’ in fact any command that you could enter at a normal powershell session prompt, also there are some predefined commands that can be used to carry out stuff like ‘Invoke‐AllChecks’ from PowerUp. Type ‘help’ to see a list of these commands. The commands are arranged in task type, a few are shown below;


As an example we can run the PowerUp, Invoke‐AllChecks command on the current implant, enter the below command into the ‘Implant‐Handler’
The output from the command will be shown in the PoshC2‐Server session
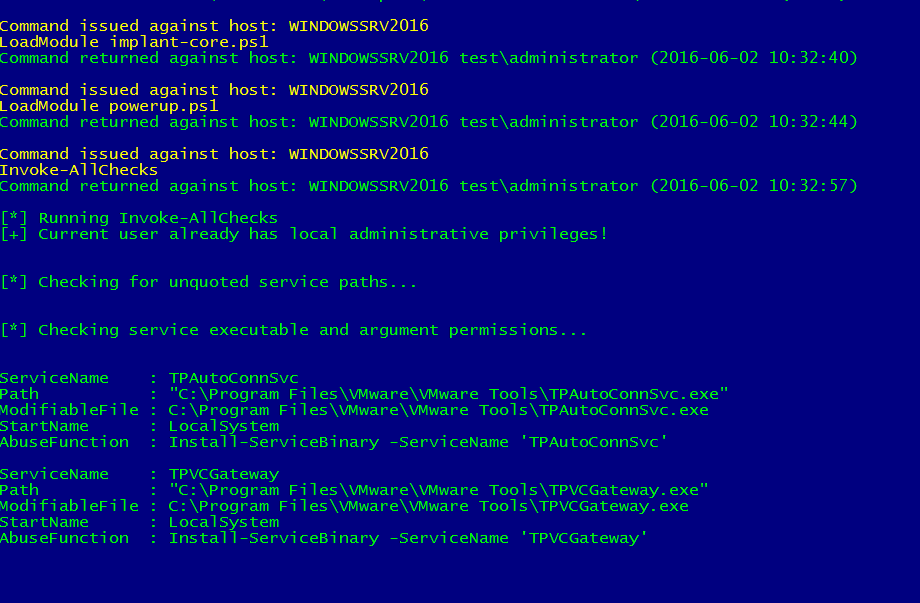
As you see in the screenshot PoshC2 is quite verbose by default, providing time stamped entries for all of its actions, something that is very important in terms of incident response/management. In fact all of the commands and activity of PoshC2 are added to a SQLite database which can be queried to produce a simple html report of the activity of that implant.


PoshC2 has many built‐in preset commands as shown by issuing the ‘help’ command into the ‘Implant‐Handler’, some of the preset commands make use of many of the established PowerShell ‘Hacking Tools’ such as PowerSploit, PowerView and PowerUp functionality. There are also some bespoke modules written by us for use with PoshC2, to see these take a look in the ‘Modules’ folder in the PoshC2 directory. One of the nice features of PoshC2 are that the user can copy any PowerShell module written by them or anyone else into the ‘Modules’ folder and use those directly within PoshC2 using the ListModules and LoadModules commands the user can see whats available and load new modules into the current implant.
For example we may want to use a module from PowerSploit that’s not included, lets say ‘Invoke‐ NinjaCopy.ps1’
The user can simply copy the Invoke‐NinjaCopy.ps1 file into the Modules folder and then use LoadModule Invoke‐NinjaCopy.ps1 on the Implant‐Handler to add the new module to the implant.

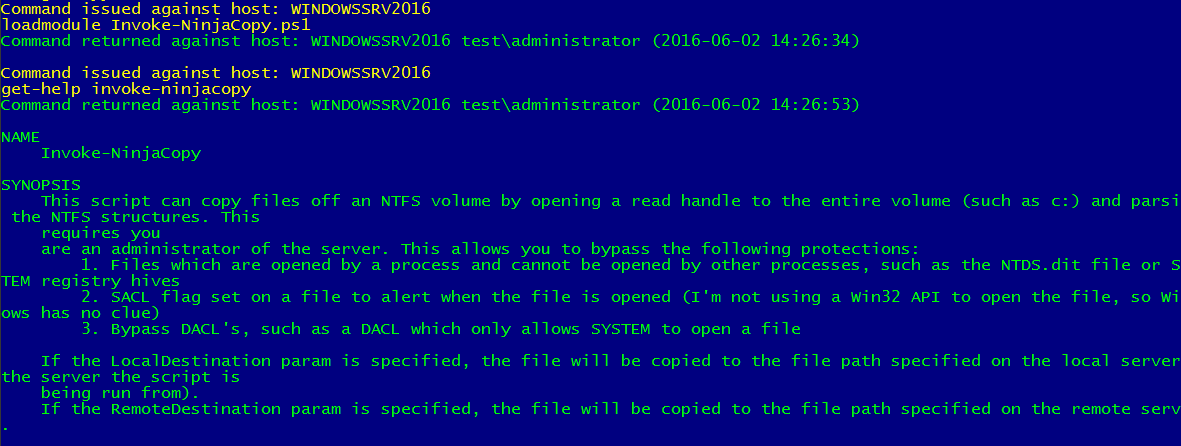
So here we see the new module loaded into the selected implant and the built in help displayed for the newly imported module, again re‐iterating the point that any command or command string that could be typed into a normal PowerShell session can be entered into the Implant‐Handler.
This is the time for you to go and play with the tool and checkout its functionality and capabilities. To follow this article we will have some follow up articles that will take ‘Deep Dives’ into the inner workings, detailed descriptions and example usage of the built‐in functionality and modules. Enjoy.