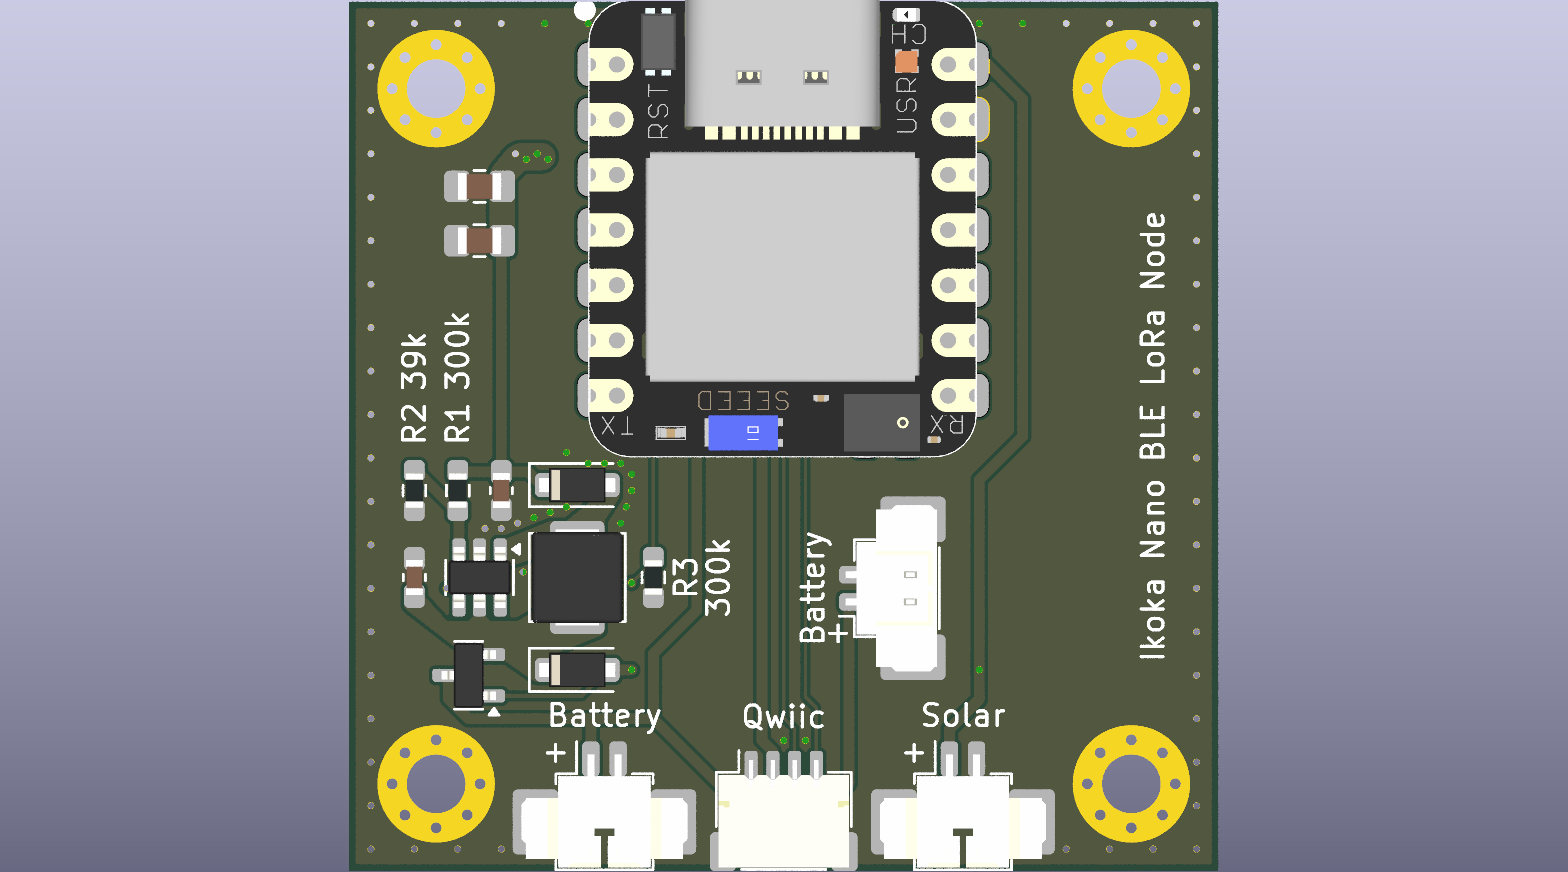
A Meshtastic device based on the Seeed Studio XIAO nRF52840 and EBYTE E22-XXXMXXS series LoRa modules. Pinout matches the Meshtastic xiao_ble variant.
The focus is on small size without an onboard display or buttons, meaning it must be used with Meshtastic client software, or as a remote repeater managed with remote node administration.
- USB-C for power and data
- Qwiic connector for I²C sensors
- Battery connectors (PicoBlade 1.25-2P)
- Solar connector (PicoBlade 1.25-2P, 4.45 to 6.45 V - BQ25100 charge IC)
- SnapMagic E22-900M30S footprint & symbol
- SparkFun KiCad Libraries
- SeeedStudio OPL KiCad Library (forked to add missing XIAO nRF5240 symbol)
- The files were created in KiCad 8
- Clone this git repository recursively, i.e. with
--recursive
- Generate the production files
- Install kicad-jlcpcb-tools
- Open the PCB file
- Tools -> External Plugins -> JLCPCB Tools
- Look over the Bill of Materials list and perform any substitutions required
- Click Generate
- Order the PCBs
- Use the Gerbers, BOM and CPL files in
jlcpcb/production_files - Default 1.6mm 2-layer PCB settings should work well, this PCB passes DRC based on JLCPCB specifications (other than the silkscreen of XIAO module being clipped by the PCB edge)
- Use the Gerbers, BOM and CPL files in
- Check the exported BOM file in
jlcpcb/production_files
I suggest PCBA, but I used handsoldering pads and all SMDs are 0603 or larger so can be hand-soldered.
- Solder the SMD components
- The larger (0805) capacitors go closer to the USB-C connector end of the PCB
- Solder the connectors
- Solder the XIAO BLE
- It helps to tin the BAT+ pad first, it will help ensure successful soldering through the back. Remove excess solder so that the pad is flat, otherwise the XIAO will not sit flush
- Solder one pad first then verify all pads and the battery hole are lined up well, adjust the alignment if necessary
- Solder one more pad diagonally opposite, double check the alignment of the pads
- Solder the rear hole that goes to the BAT+ pad
- Solder the rest of the pads
- Test that the XIAO is able to power up from the battery and that charging works (a yellow LED will light up if the battery is charging), you won't be able to access the BAT+ pad once the E22 module is soldered
- Solder the E22-900M30S module
- Custom Meshtastic builds web installer
- Select your device -> Xiao BLE
- Select firmware version -> Pick the latest release
- Select update or reinstall -> Update device (usually works fine, but if Meshtastic does not start after a few seconds, wipe and reinstall)
- Download UF2
- Connect USB-C to PC, double-tap the reset button
- Drop UF2 file into XIAO-SENSE USB volume
Follow the instructions at meshtastic/firmware/variants/diy/xiao_ble/.
A snap-fit 3D printable enclosure is available in the enclosures folder. This has not been updated for the latest board design (2b17a53).