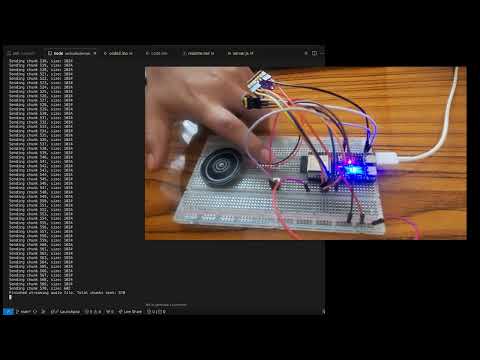
We'll guide you through creating an AI assistant using the ESP32-S3, a microphone, and a speaker. This project will capture audio, process it with AI, and respond with synthesized speech.

https://github.com/lout33/ai_assistant_esp32
- ESP32-S3 Devkit
- INMP441 Microphone
- MAX98357A Amplifier
- 0.5W Speaker
- Breadboard and Jumper Wires
-
Connect the Microphone (INMP441):
- VDD to 3.3V
- GND to GND
- SCK to GPIO 5
- WS to GPIO 6
- SD to GPIO 17
-
Connect the Amplifier (MAX98357A):
- VIN to 3.3V
- GND to GND
- BCLK to GPIO 5
- LRC to GPIO 6
- DIN to GPIO 7
-
Connect the Speaker:
- Connect the speaker to the output terminals of the MAX98357A.
-
Connect the Button:
- Connect one terminal to GPIO 35 and the other to GND.
-
Connect the RGB LED:
- Connect to GPIO 48.
-
Install Required Libraries:
- Install
ArduinoWebsocketsandAdafruit_NeoPixellibraries via the Arduino Library Manager.
- Install
-
Upload the Code:
- Use the provided
code.inofile. - Update the WiFi credentials and WebSocket server details.
- Use the provided
-
Install Node.js and Required Packages:
npm install ws wav openai fluent-ffmpeg
-
Run the Server:
- Use the
server.jsfile. - Replace the OpenAI API key with your own.
- Use the
-
Start the Node.js Server:
node server.js
-
Power the ESP32-S3:
- Connect it to your computer or a power source.
-
Interact with the AI Assistant:
- Press the button to start recording.
- Speak into the microphone.
- The AI will process your speech and respond through the speaker.
- ESP32-S3 captures audio and sends it to the server via WebSocket.
- Node.js Server processes the audio using OpenAI's API and sends back a response.
- ESP32-S3 plays the response through the speaker.
- Ensure all connections are secure.
- Check WiFi credentials and server IP.
- Verify the OpenAI API key is correct.
This project demonstrates a simple AI assistant using readily available components. Enjoy experimenting and expanding its capabilities!
graph TD
    %% Main Hardware Components
    subgraph Hardware [ESP32-S3 Hardware Components]
        Button[Push Button]
        Mic[INMP441 Microphone]
        Speaker[MAX98357A Speaker]
        LED[RGB Status LED]
    end

    %% ESP32 Processing
    subgraph ESP32 [ESP32-S3 Processing]
        AudioIn[Audio Input Handler]
        AudioOut[Audio Output Handler]
        WSClient[WebSocket Client]

        %% LED States
        style LED_States fill:#f9f9f9,stroke:#666
        subgraph LED_States [LED Status]
            Recording[🔴 Recording]
            Playing[🟢 Playing]
            Idle[🔵 Standby]
        end
    end

    %% Server Processing
    subgraph Server [AI Processing Server]
        WSServer[WebSocket Server]

        subgraph AI [OpenAI Services]
            Whisper[Speech-to-Text]
            GPT[GPT-4 Processing]
            TTS[Text-to-Speech]
        end
    end

    %% Data Flow Connections
    Button -->|Press & Hold| AudioIn
    Mic -->|I2S Protocol| AudioIn
    AudioIn -->|Raw Audio| WSClient
    WSClient -->|WebSocket| WSServer

    WSServer -->|Audio Stream| Whisper
    Whisper -->|Text| GPT
    GPT -->|Response| TTS
    TTS -->|Audio| WSServer

    WSServer -->|Audio Response| WSClient
    WSClient -->|I2S Protocol| AudioOut
    AudioOut --> Speaker

    %% LED Status Flow
    AudioIn -->|Triggers| Recording
    AudioOut -->|Triggers| Playing
    WSClient -->|Triggers| Idle
-
Standby Mode 🔵
- System idle and ready
- WebSocket connection active
- LED shows blue
-
Recording Mode 🔴
- Button pressed
- Capturing audio via INMP441
- Streaming to server
- LED shows red
-
Response Mode 🟢
- Receiving AI response
- Playing audio via MAX98357A
- LED shows green
-
Audio Capture
- Button trigger → INMP441 microphone
- I2S protocol handling
- Raw audio buffering
-
AI Processing
- Speech-to-Text (Whisper)
- Language Processing (GPT-4)
- Text-to-Speech Synthesis
-
Audio Playback
- WebSocket streaming
- I2S protocol output
- Speaker amplification