Photo Gallery coded in java
You can download the last release. There is a tar or zip file. untar/unzip the folder and execute the command :
java -jar photoGallery.jar
Otherwise you can download the source code and compile it yourself. This is a maven project. So you can run the following command to compile: mvn package
Then the jar created is in the "./target" folder. It must be moved to the folder above which contains paint.jar :
mv target/photoGallery.jar ../
Launch the photo gallery:
cd ..
java -jar photoGallery.jar
First, you can add a folder by clicking the "Add Folder" button on the left side. Then, all you have to do is select the folder whose photos you want to see, then validate the dialog box.
!! WARNING !! If the folder doesn't contain a photo, then it will not appear. And you will not be able to perform any action on it.
Once you have selected your folder, you can click on it:
- If you click 1 time, then all the photos contained in the folder AND in its sub-folders will appear.
- If you click twice, then only the photos contained in the folder will appear. Photos from its subfolders will NOT appear.
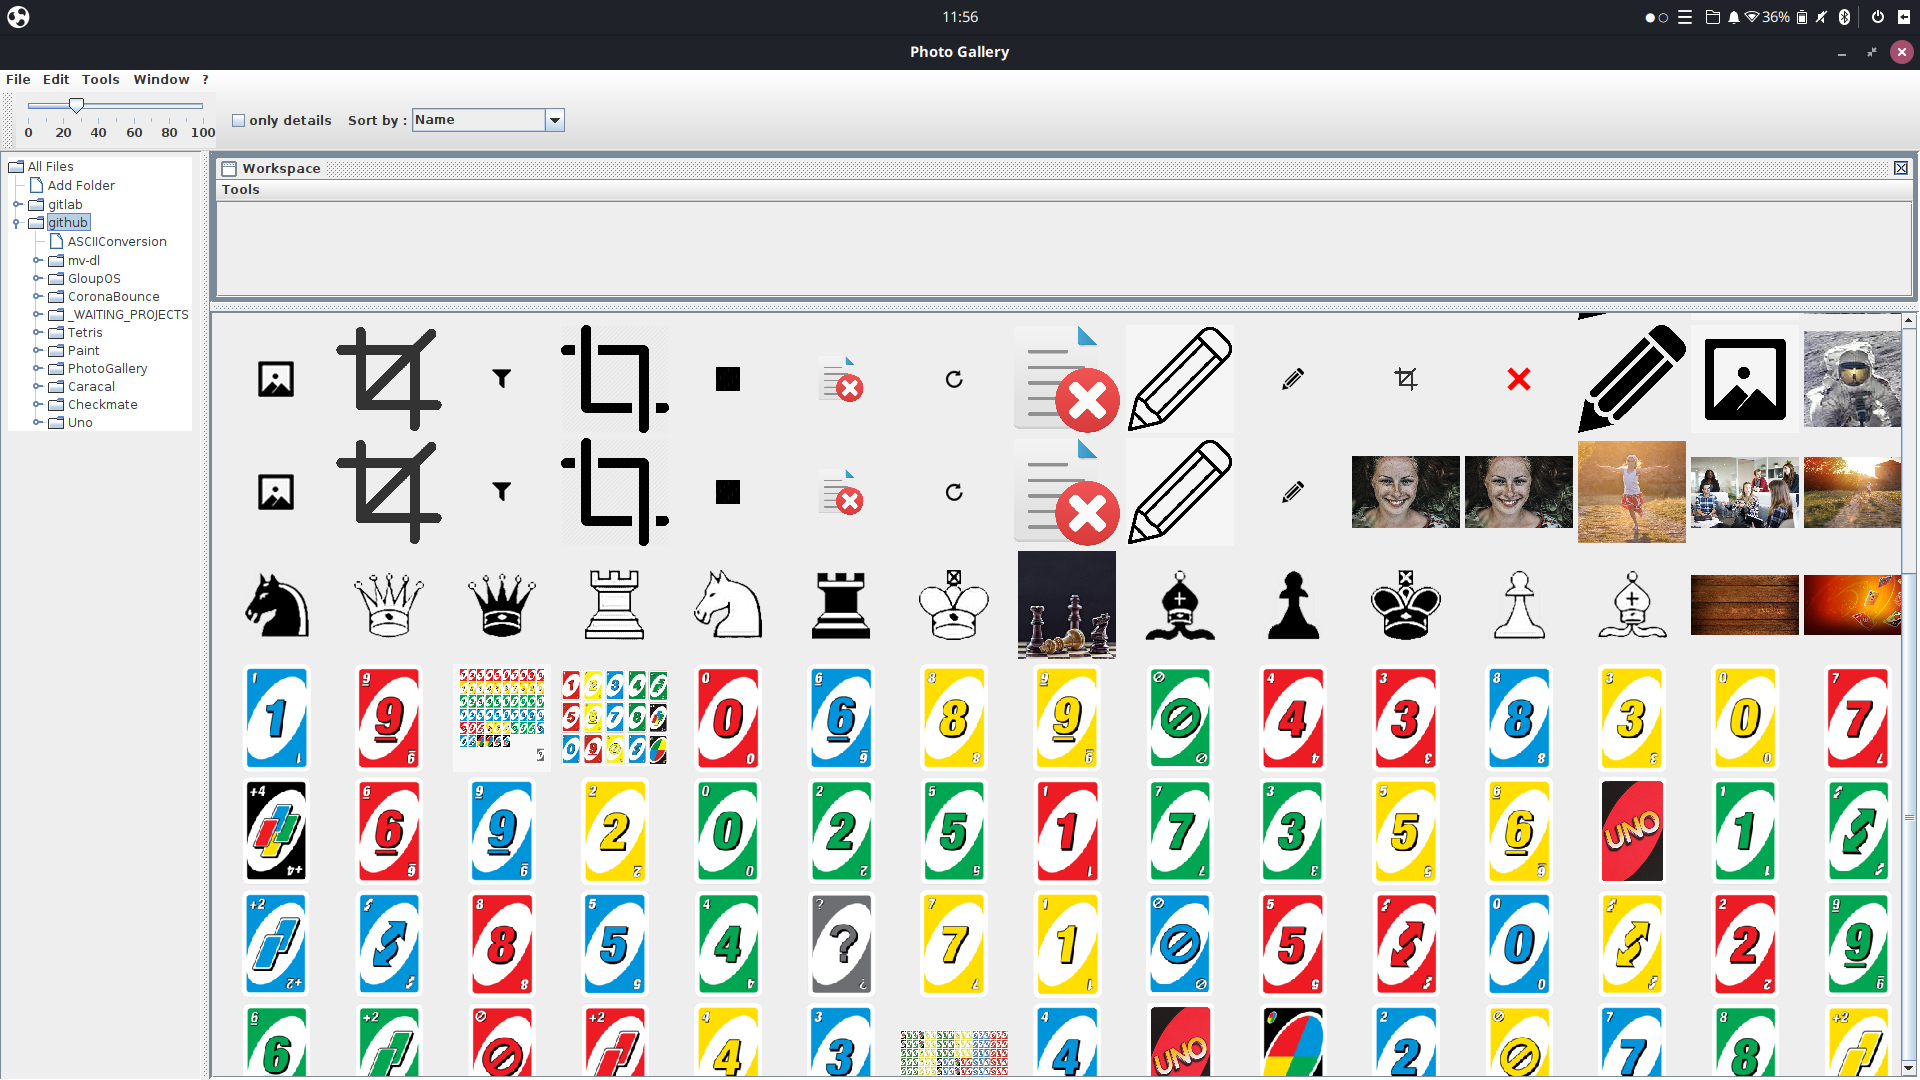 Here you can see all the images contained in my github folder and its subfolders
All the settings and folders you have chosen are saved in a preset.ini file. All your settings will be restored the next time you launch the app. You can choose to:
- Delete your preset by going to: File -> Reset Preset
- Create a new preset: File -> New Preset
- Open a preset located in another folder: File -> Open Preset
The workspace will allow you to make a selection of photos. All you have to do is drag and drop all images you want. Once moved into the workspace, they will appear inside. When you have completed a selection, you can:
- export all images to a folder. Simply click on Tools -> Export.... in the toolbar of your workspace.
- delete all images from your workspace by clicking on Tools -> clear.
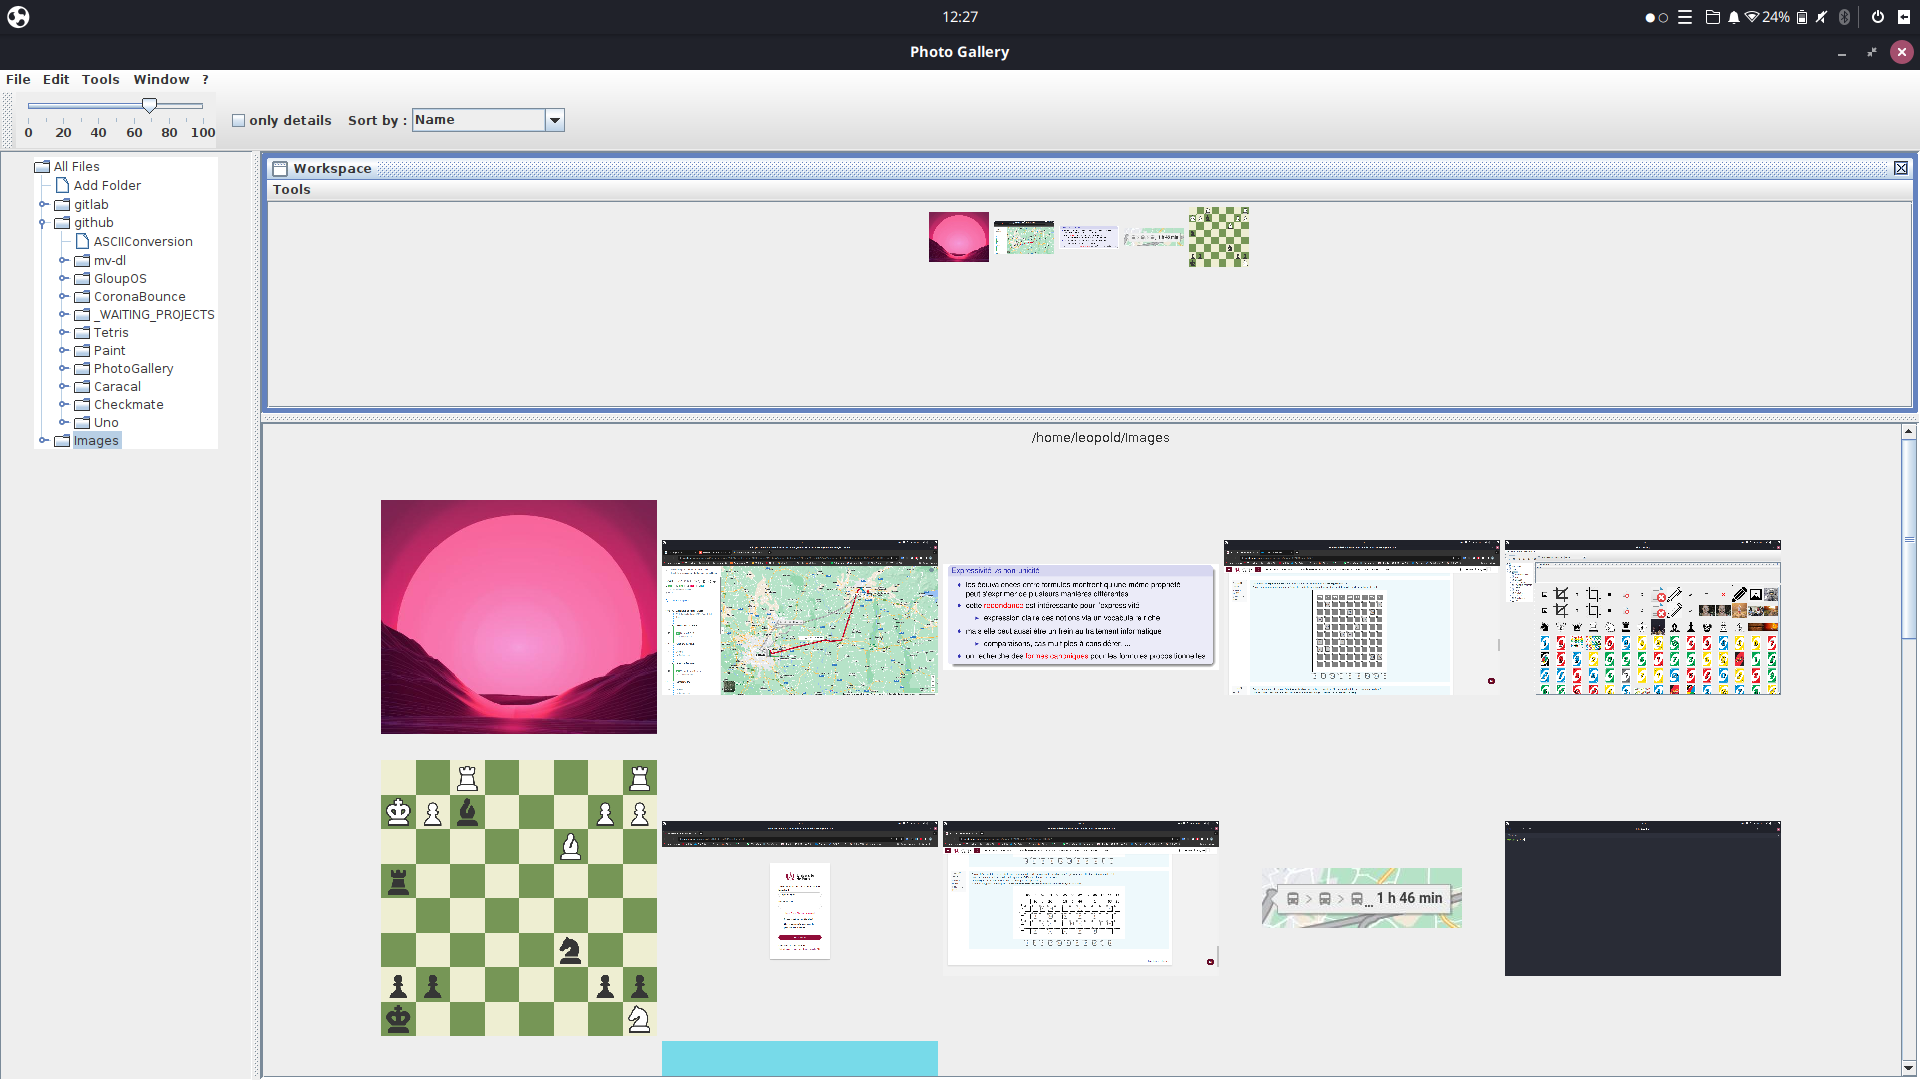 Vous pouvez voir les images dans le workspace. Le bouton Tools également
Otherwise, you can of course close it if you don't need it. To reopen it later, use Tools -> Open Workspace button in the window
Vous pouvez voir les images dans le workspace. Le bouton Tools également
Otherwise, you can of course close it if you don't need it. To reopen it later, use Tools -> Open Workspace button in the window
- Edit button: it's not working actually.
- Window -> Reset Perspective : You can reset all the perspective.
- File : Go to Preset explanation to get further informations.
- Tools -> Open Workspace : To open the workspace
With the second toolbar, you can:
- Reduce or enlarge the size of the images using the slider.
- see only the detail of the images by clicking on "only details". If your computer is too slow, this option can be very practical. This makes it easy to load images.
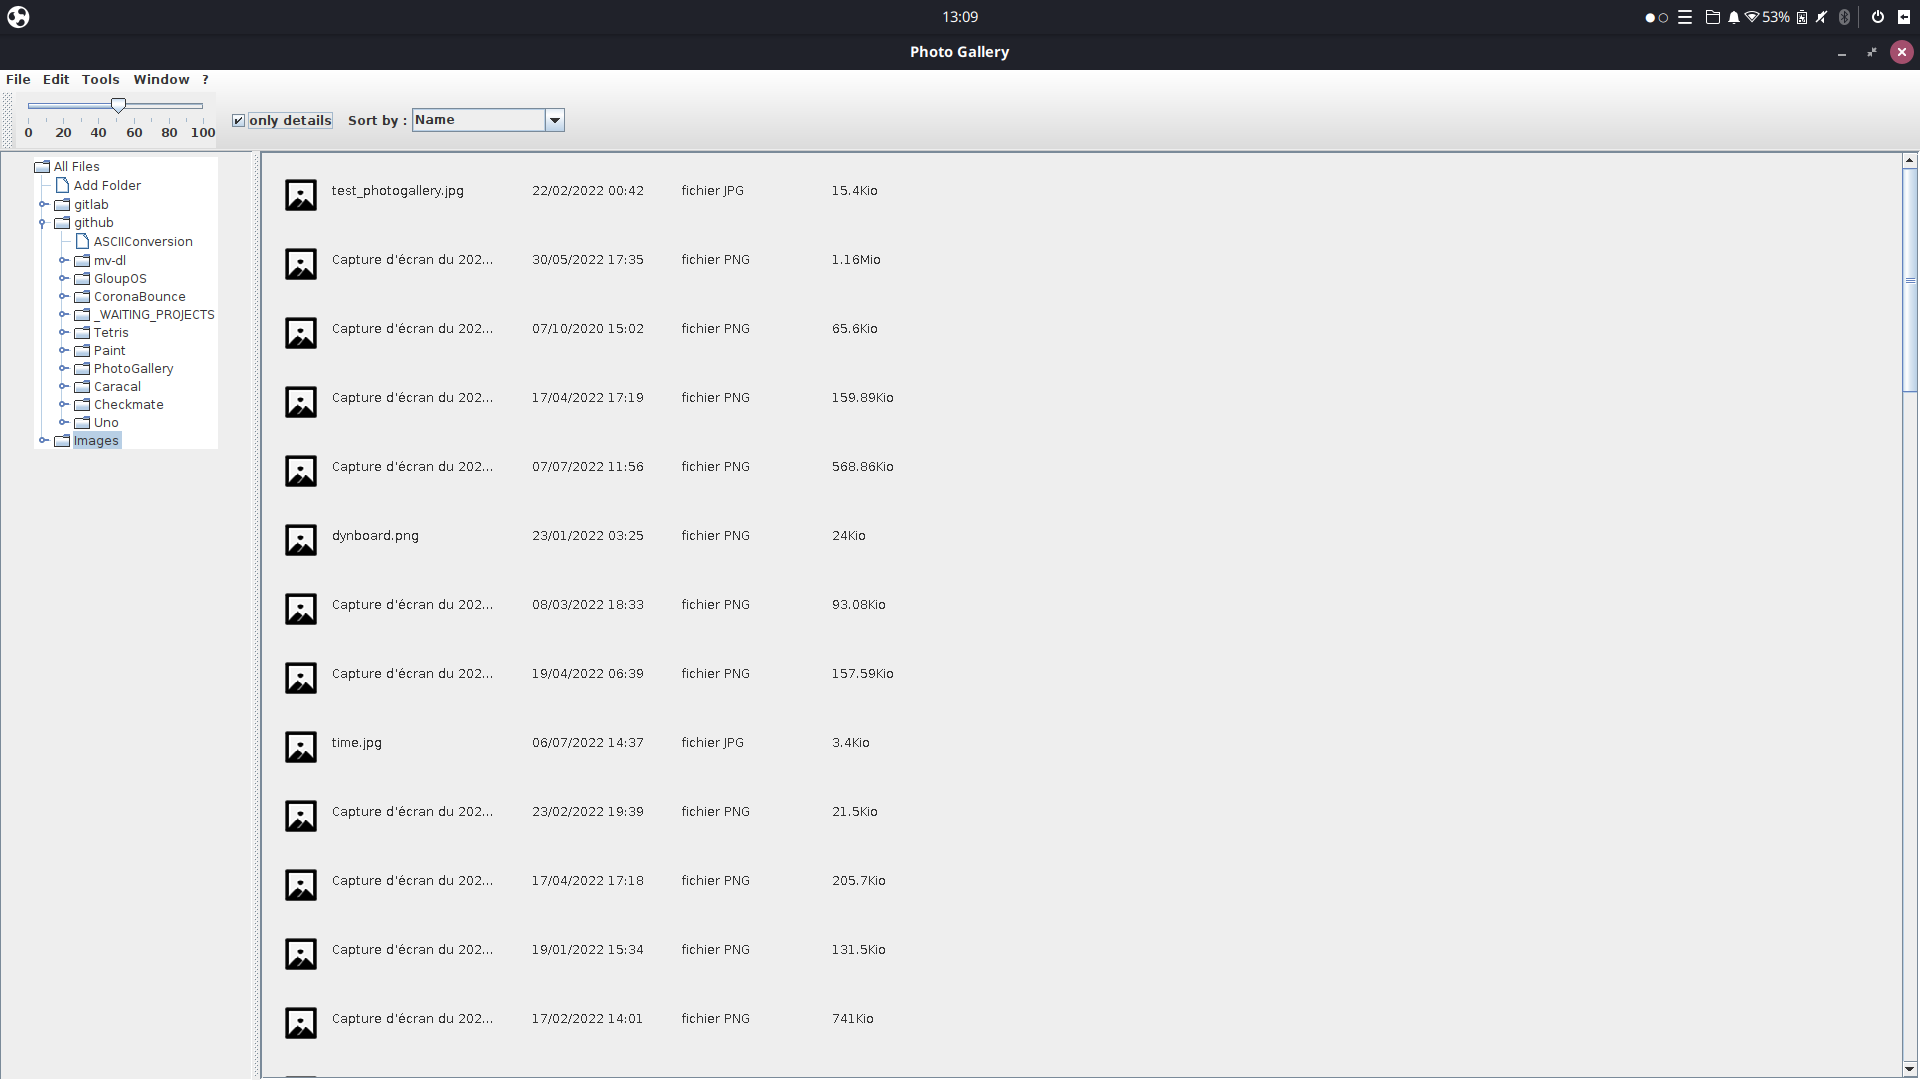
- You can sort images by multiple criteria.
You can select an image by clicking once on it then use the arrows to go from left to right. If you double click on an image, you will enter the PictureViewer. (Or press ENTER).
You can also right click on the image to:
- View properties
- Move/Copy the image to another folder
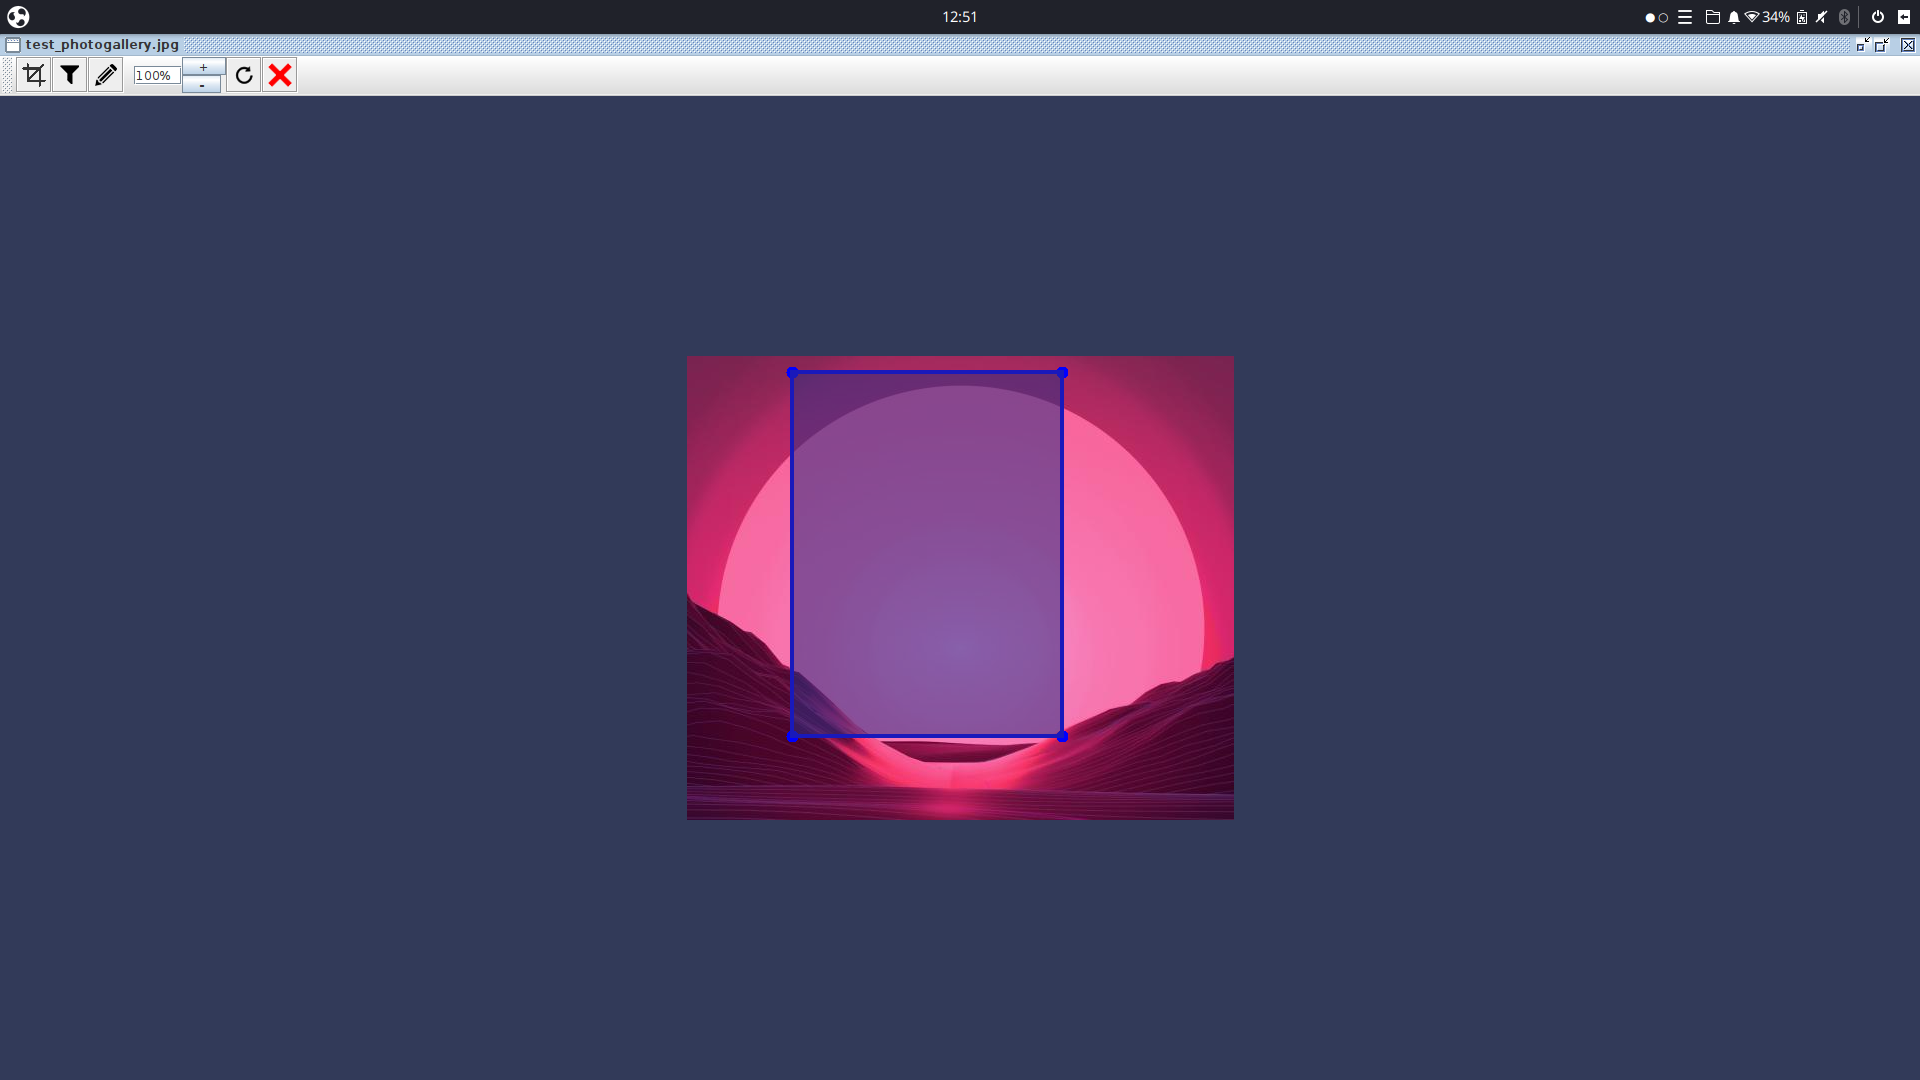
It allows you to observe images and modify them. You can :
- browse the images using the arrow keys
- zoom using the mouse, wheel or +/- button. You can also double click to zoom in/out.
- Cropping: You can crop the image by clicking on the button at the top left.
- Filters: the funnel-shaped button allows you to apply several filters to your image.
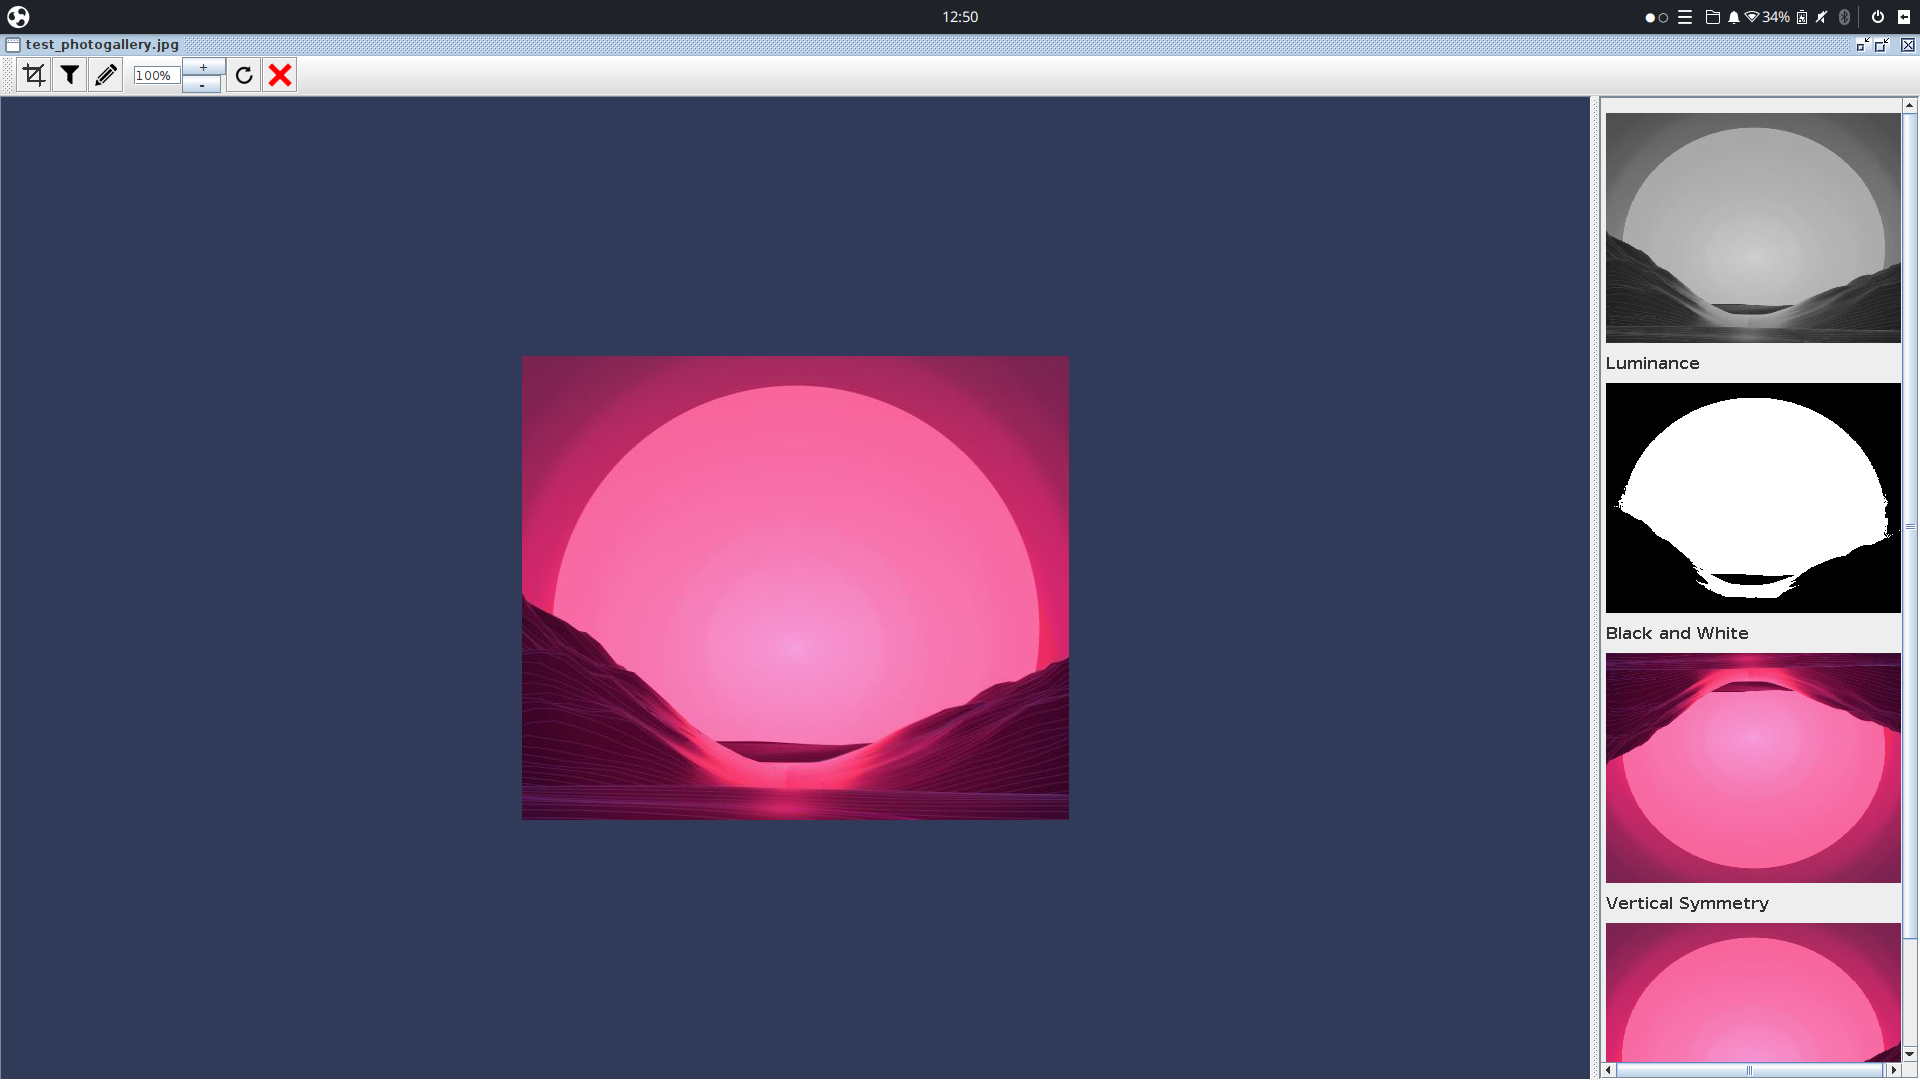
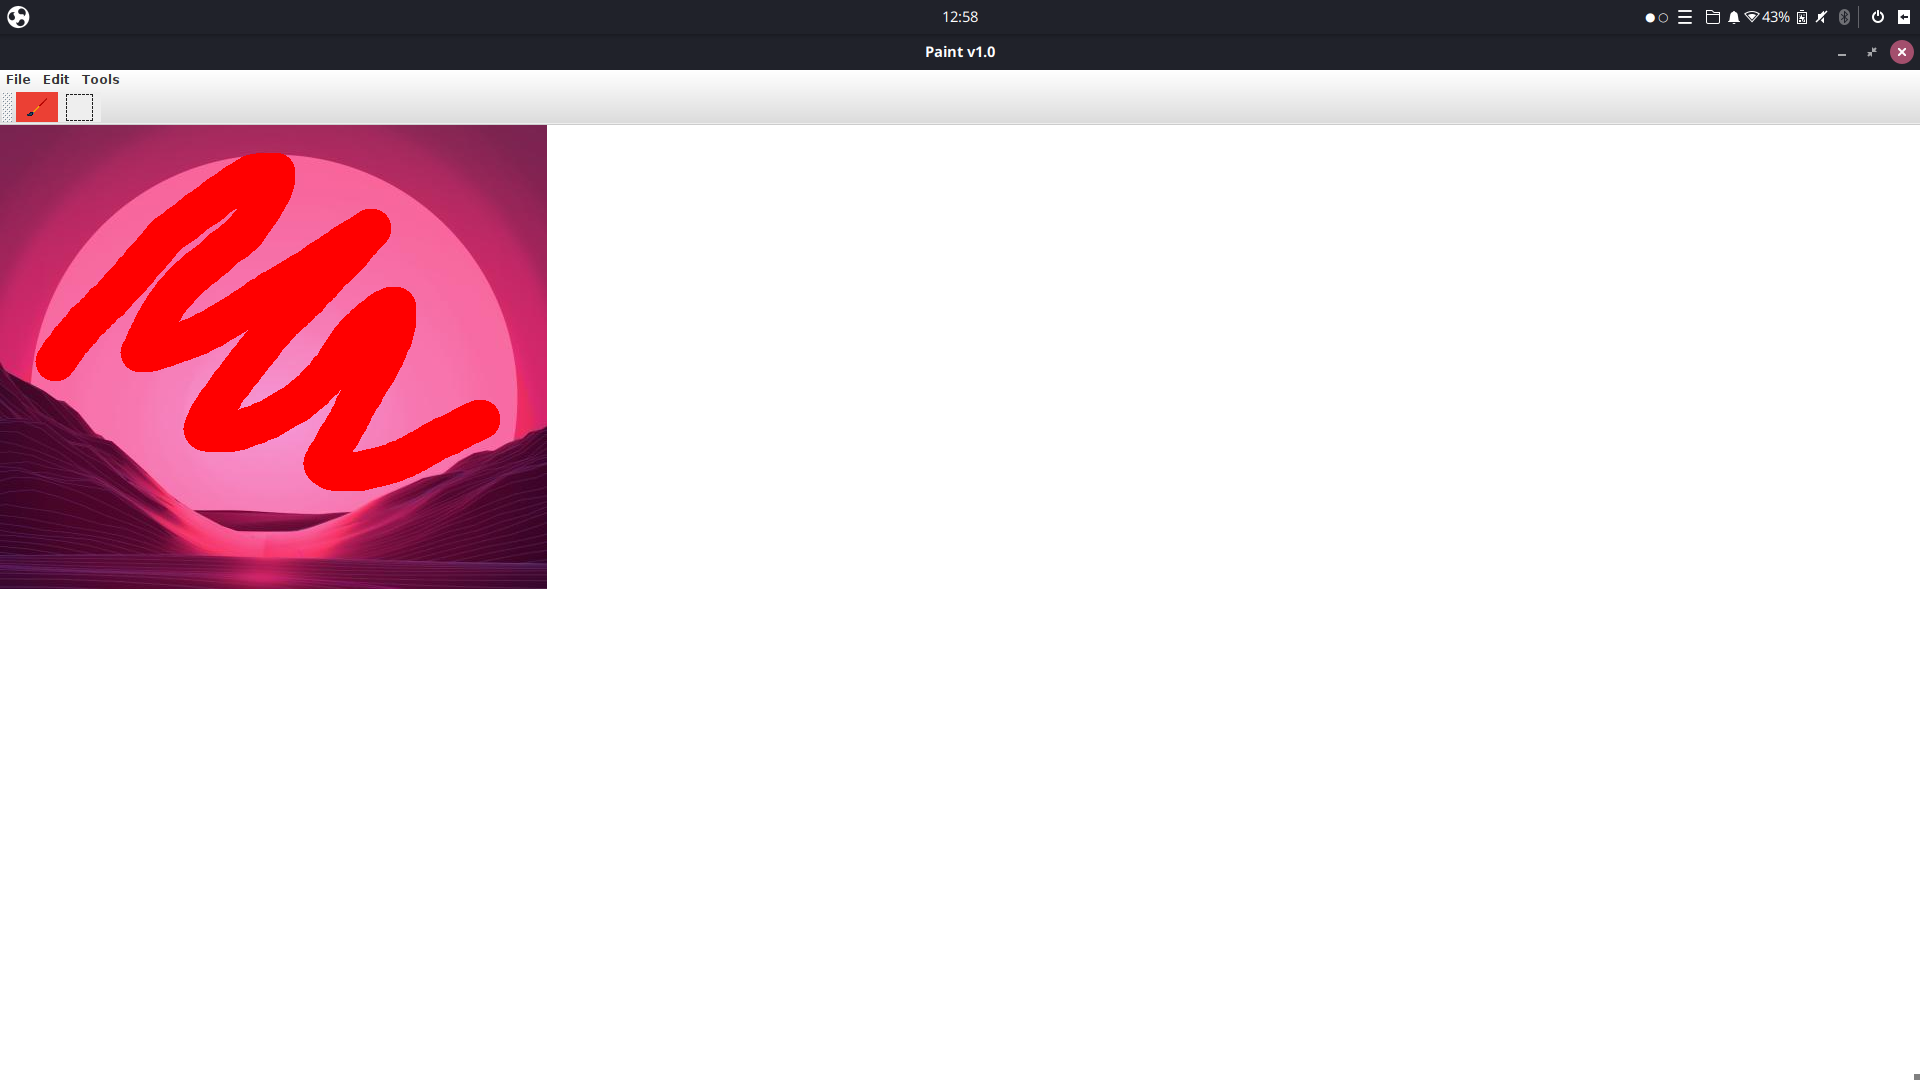
- Paint: The pencil button will allow you to open your image in an image editor that I created (paint.jar). Once inside you can draw on the image or modify it. Then save it. I invite you to see the link to this project: Paint
- Reset: the reset button will remove the effects you have applied to your image.
- Delete: The cross allows you to delete the image.
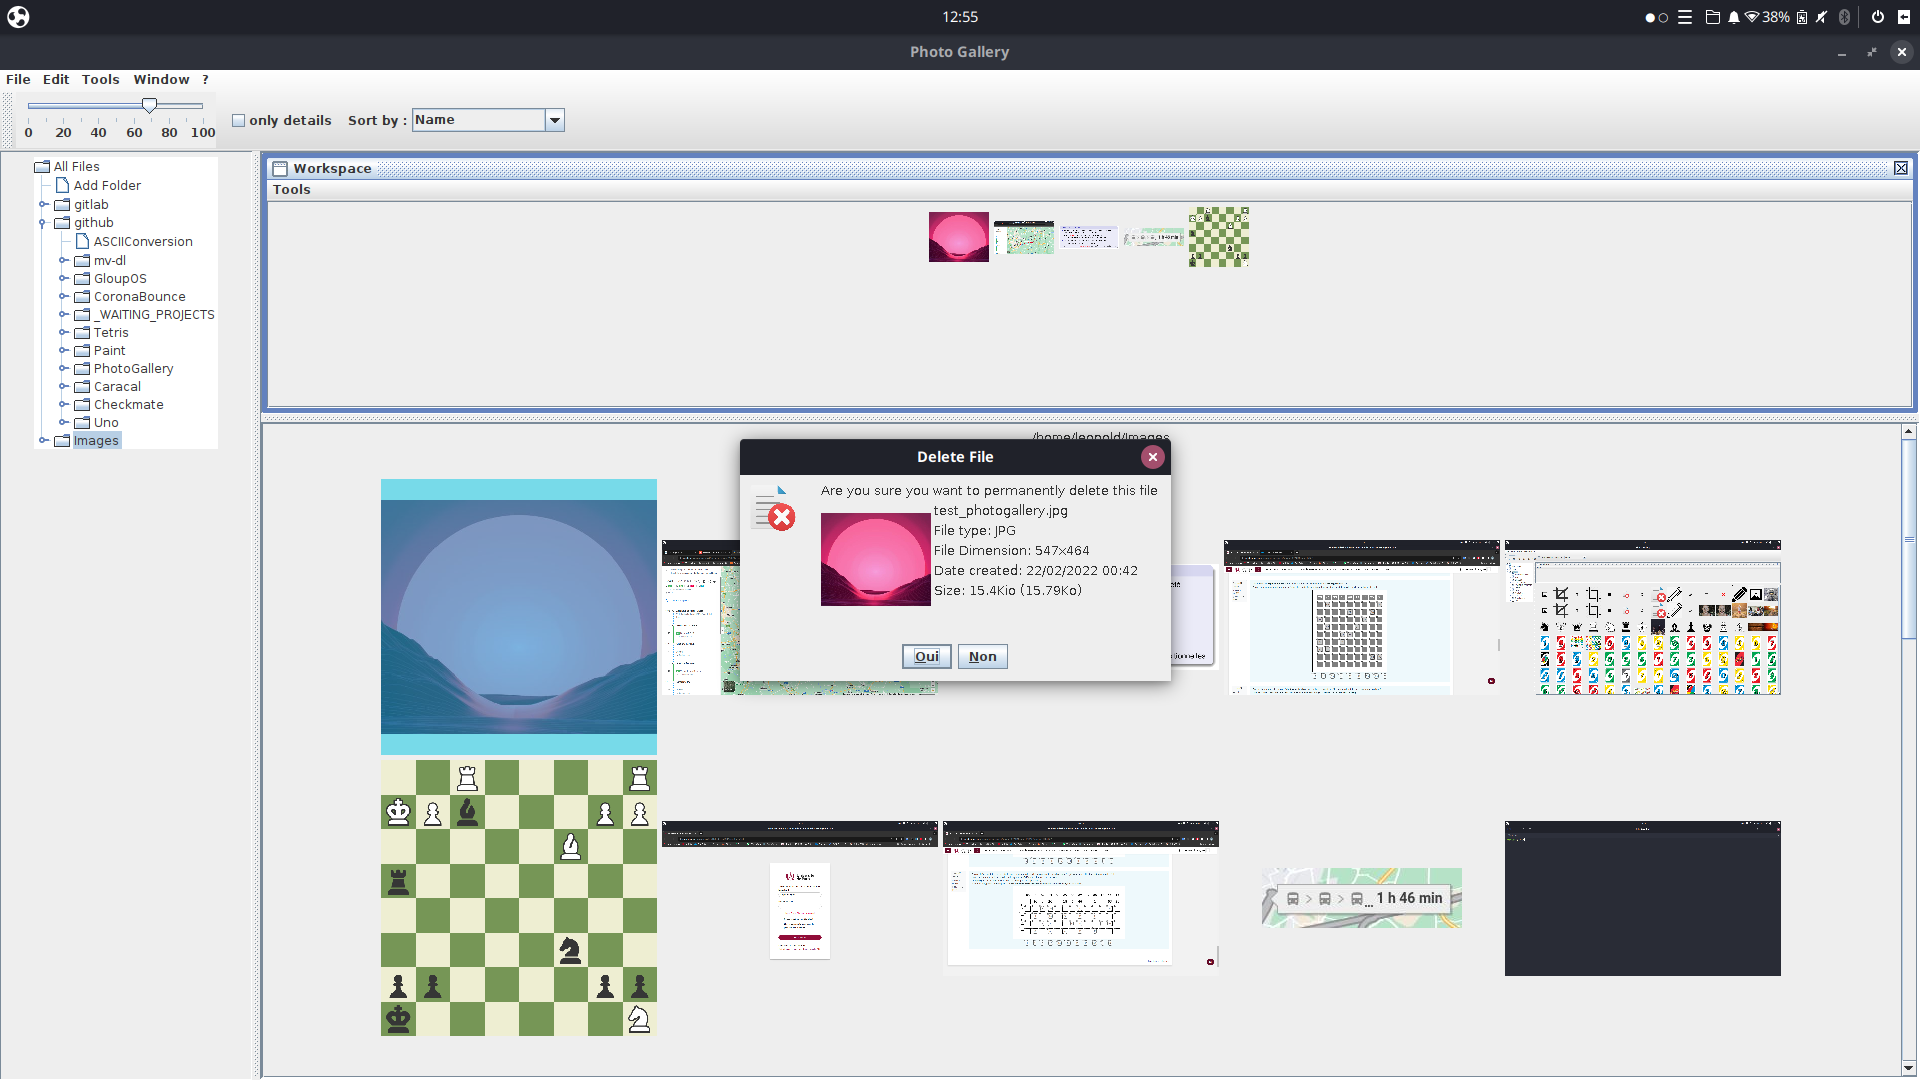
- Suppr : Delete an image.
- Left/right arrow : browse the images.
- Escape : Quit the photoGallery or the PictureViewer.
- Enter : open an image in the PictureViewer.