The desktop app serves as the central system for managing inventory, purchase requests, and issuances, while also generating reports for the supply office.
⚠️ Note: This project is built and tested for Windows desktop only.
Cross-platform support (Linux/macOS) is not included in this version.
- Dashboard: Overview of inventory and requests summary.
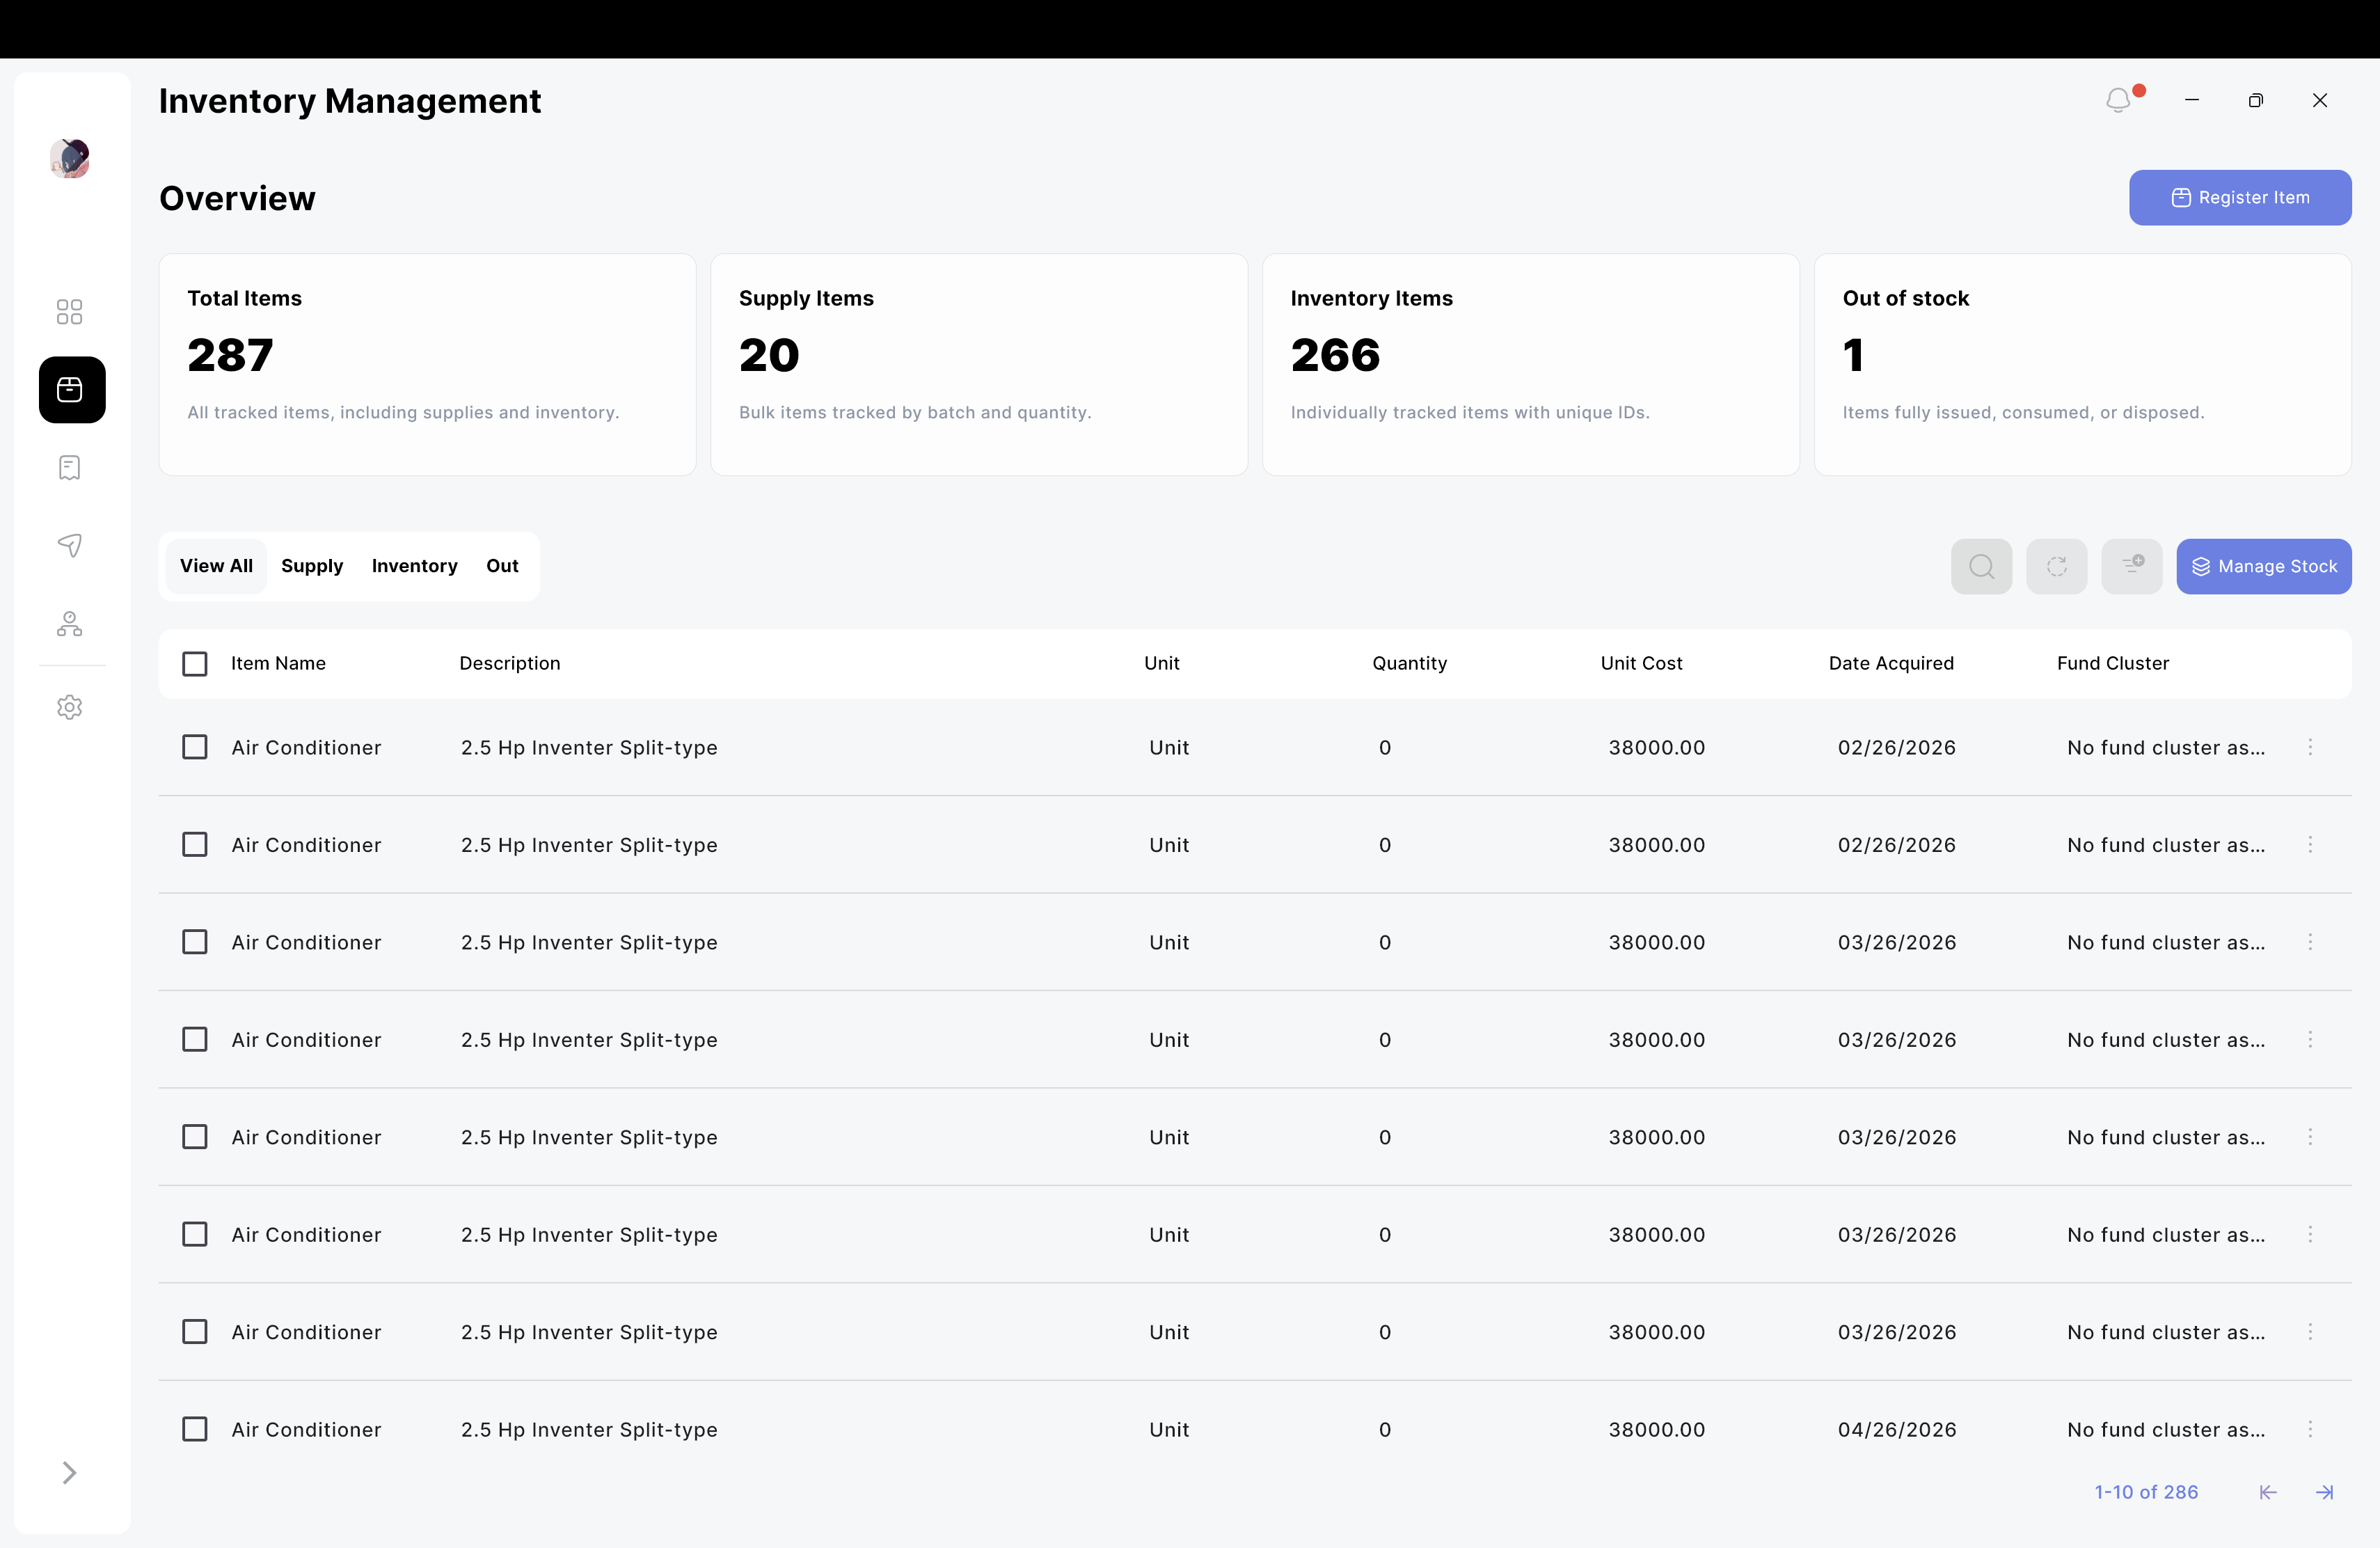
- Inventory Management: Register
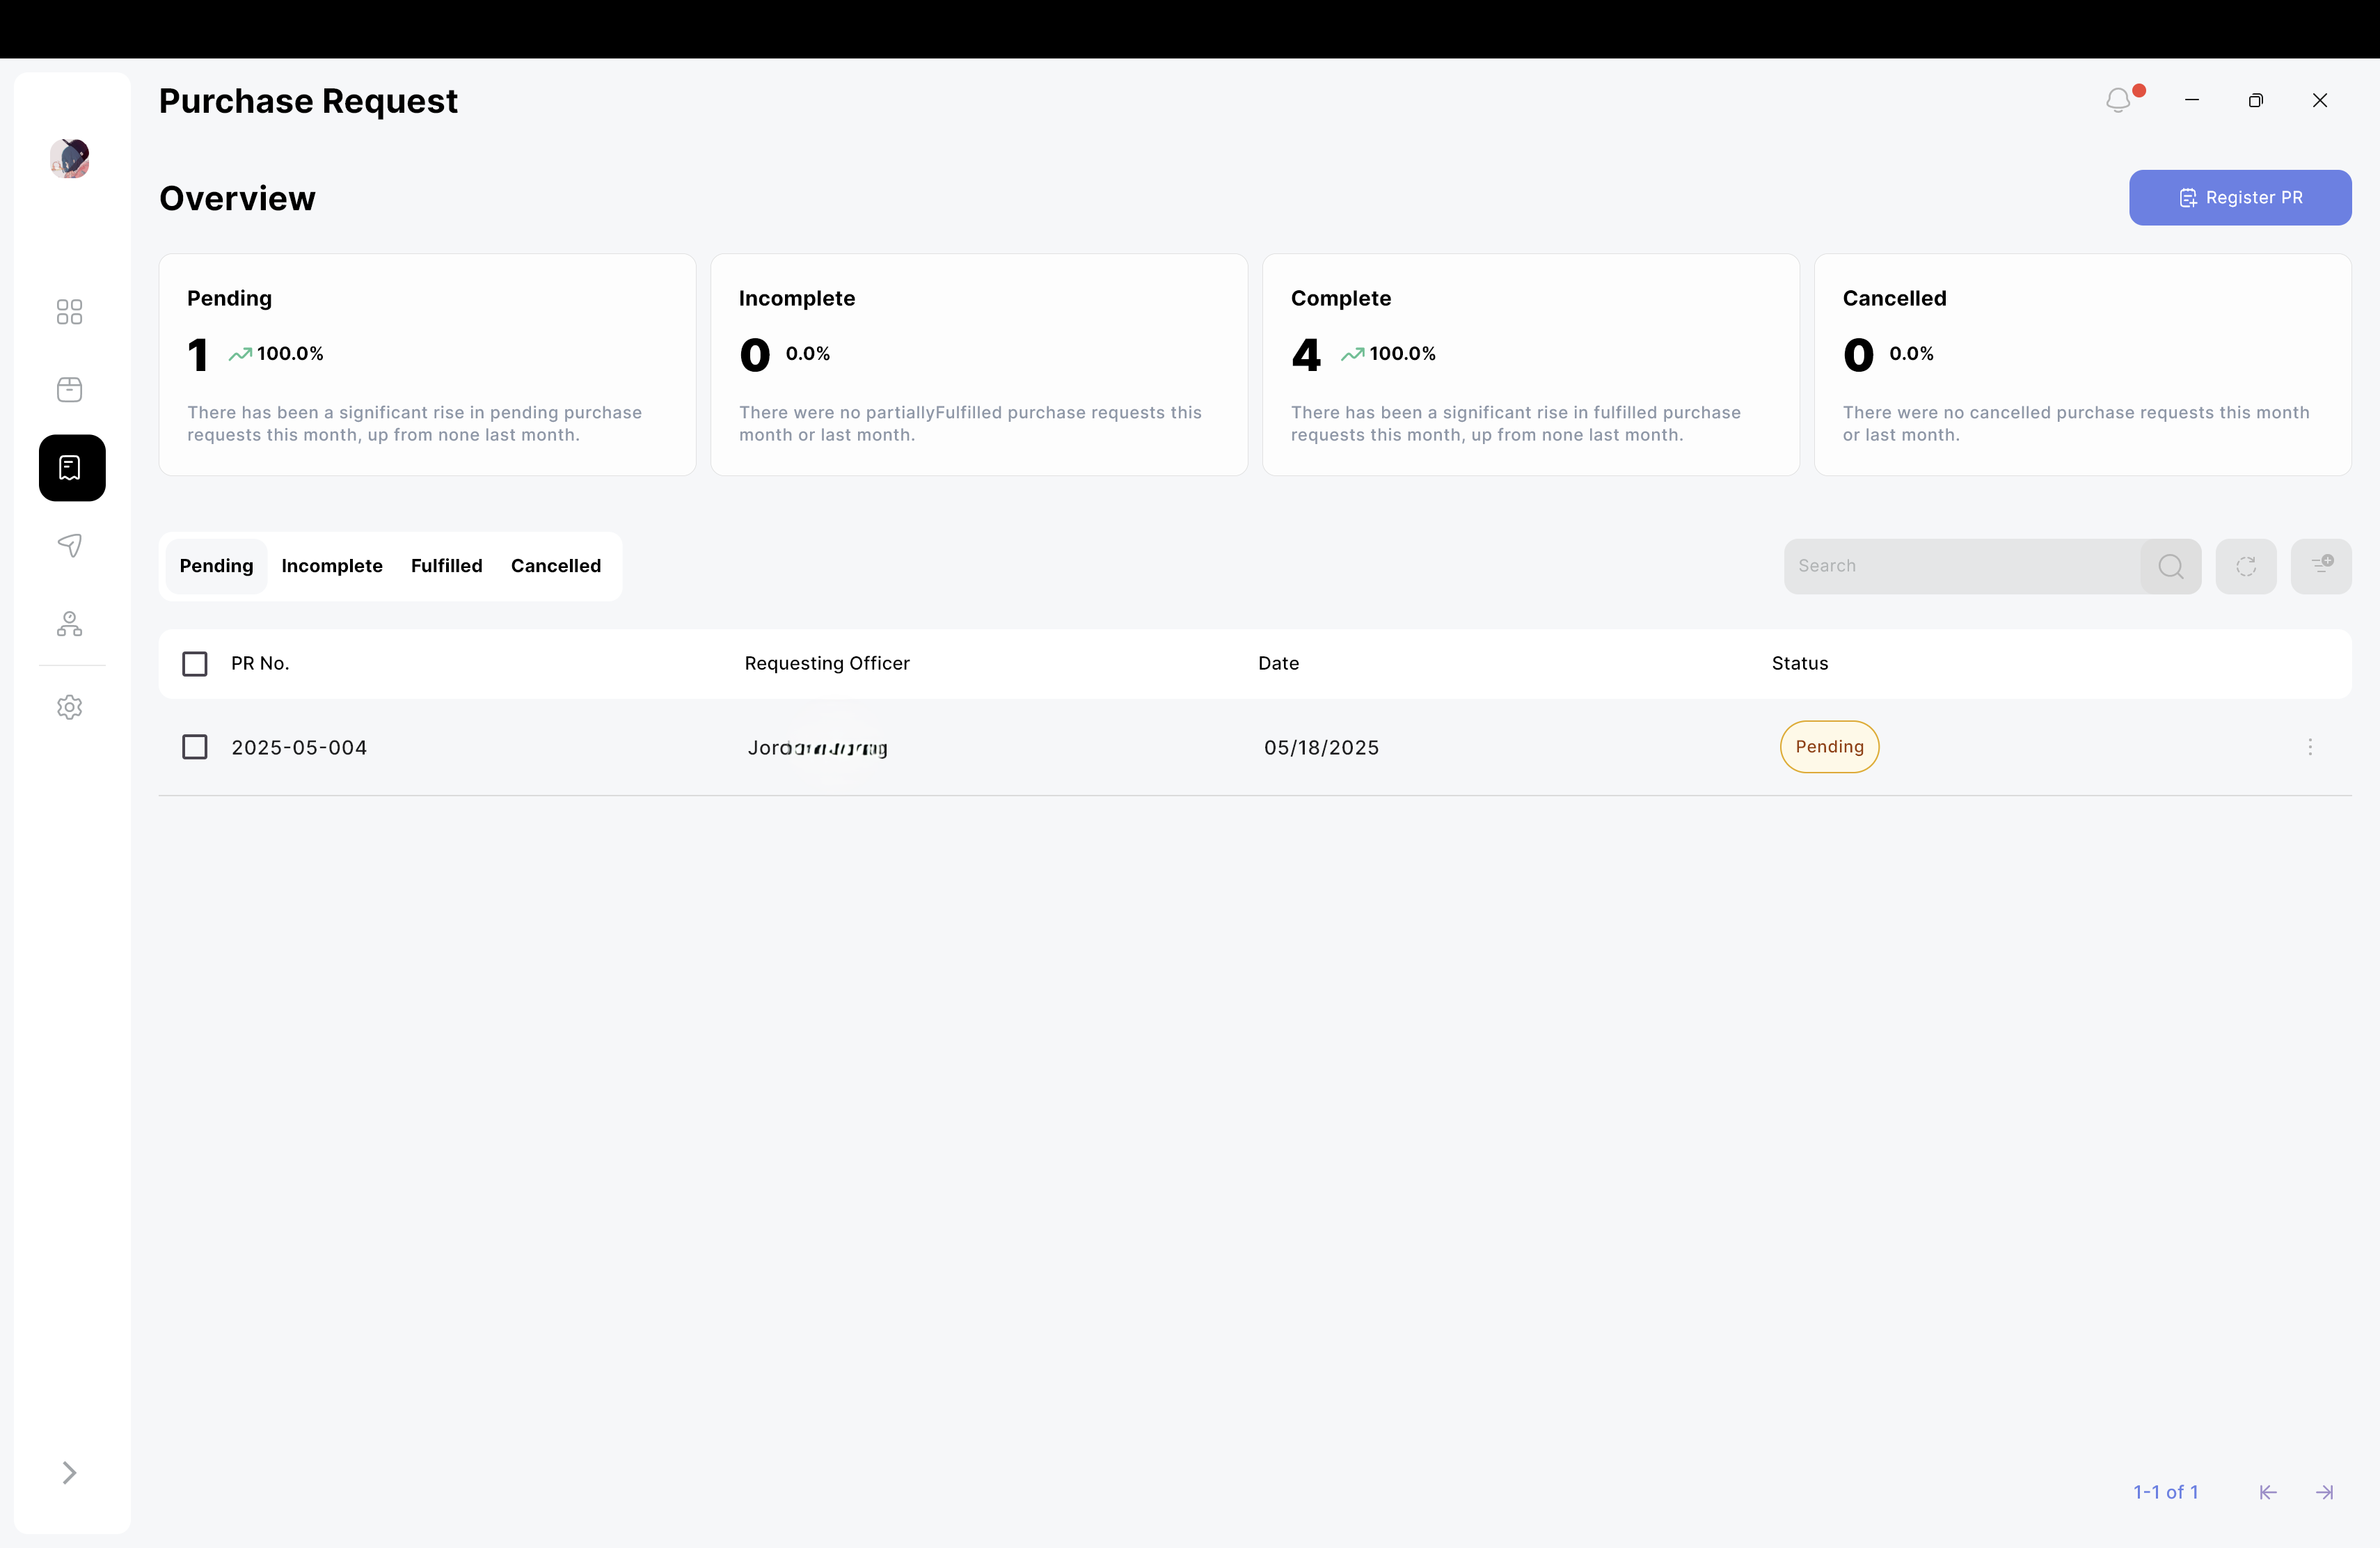
supply(consumables) andinventory(often issued or tracked manually, containing different properties e.g., serial no. for simplified tracking and management) items, generate QR codes, update item details, and view records. - Purchase Request Management: Track officers' requests, validate issuance by comparing items to be issued with the requested item, and simplify report generation by extracting information from purchase requests.
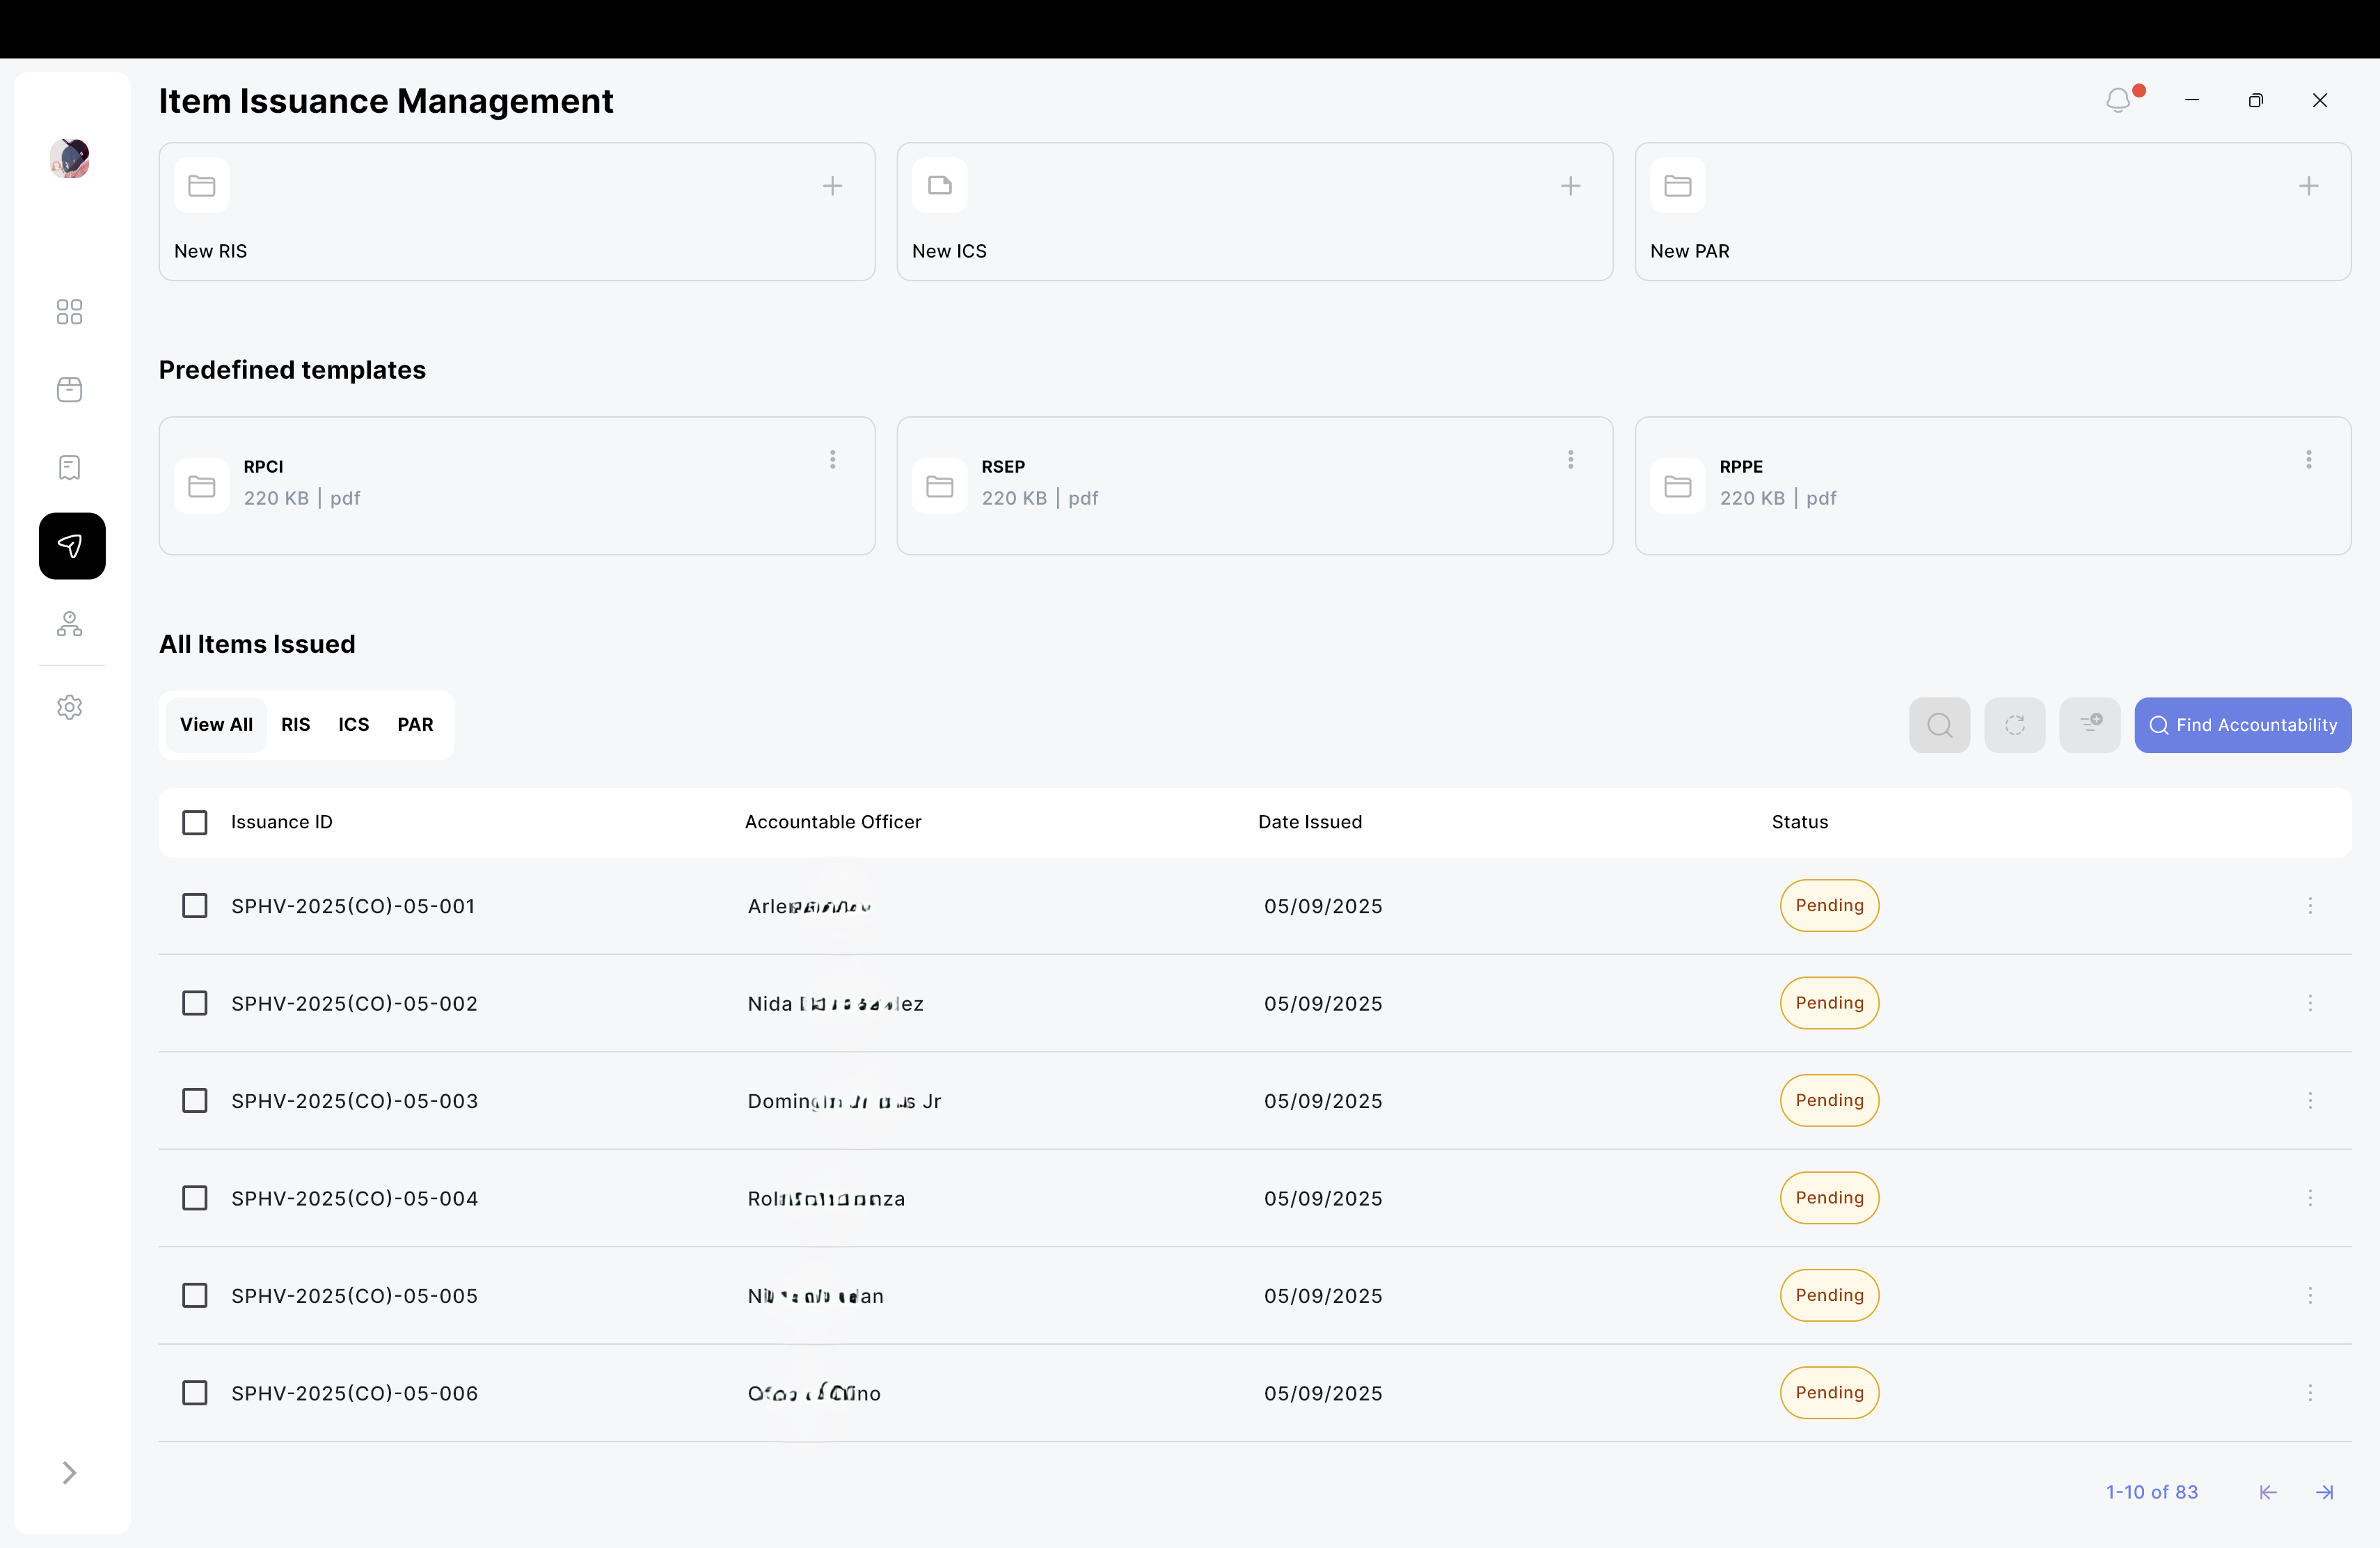
- Item Issuance Management: View and initiate item issuances, and generate issuance reports like
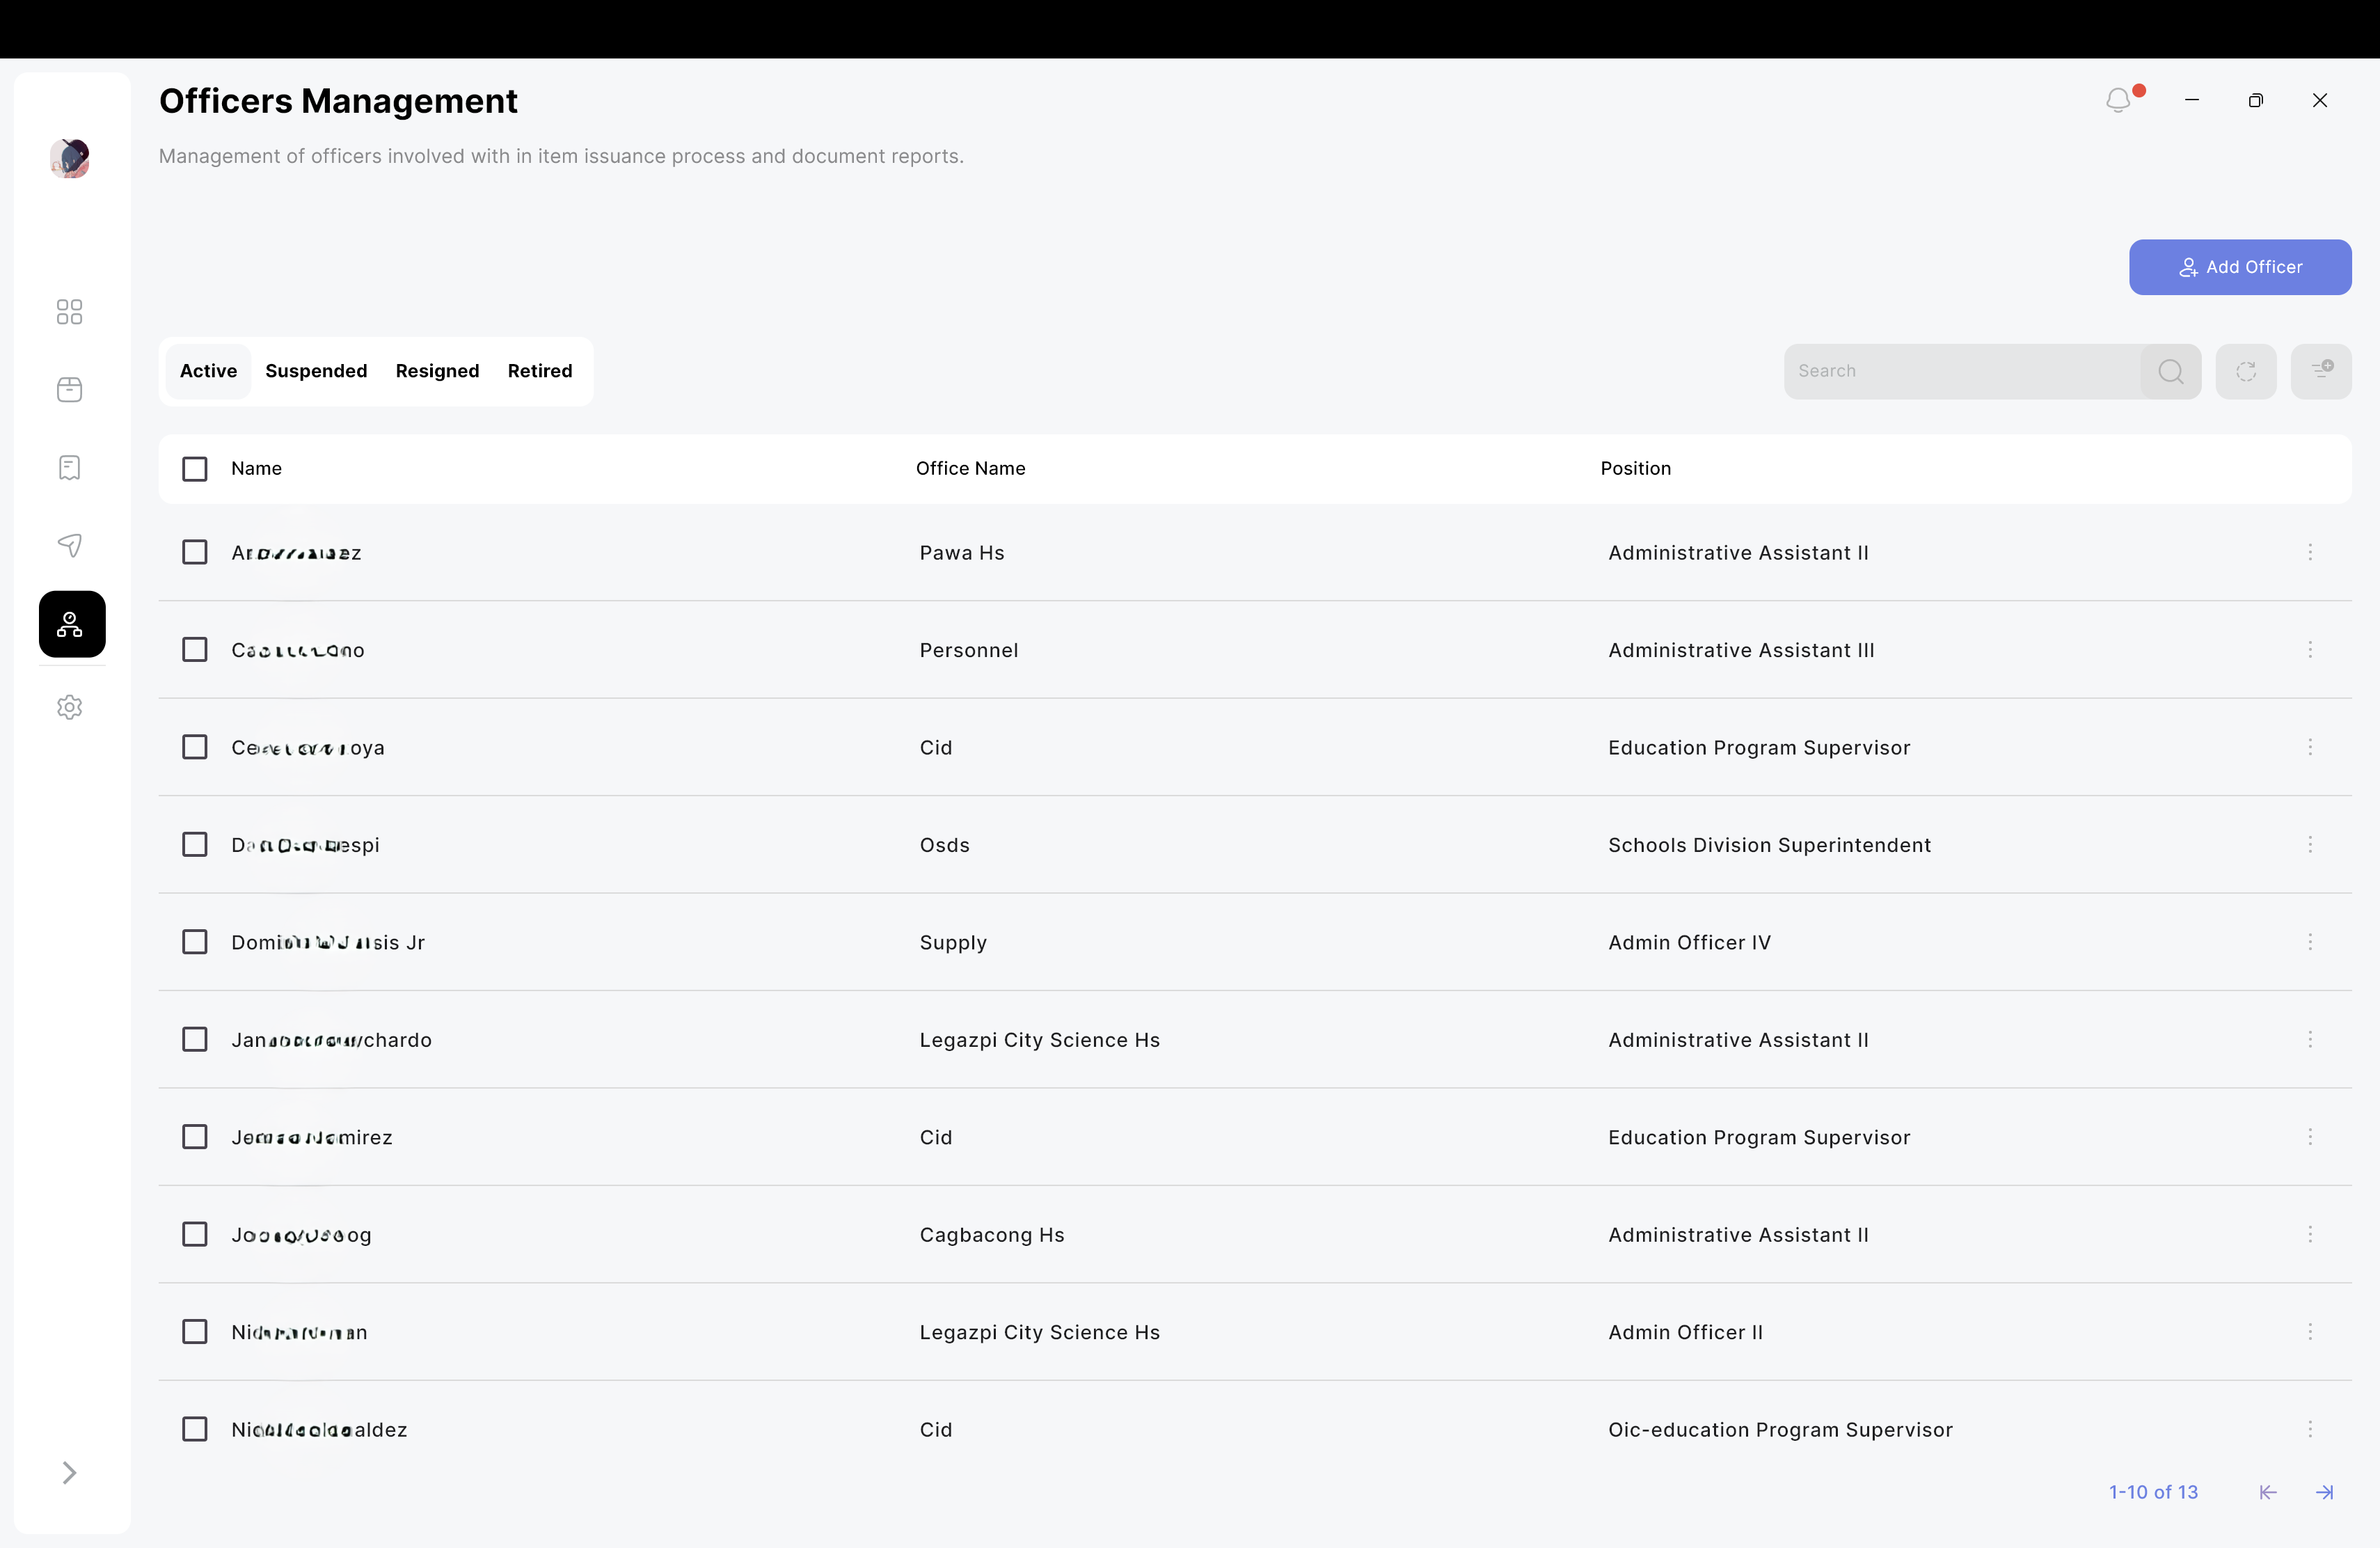
ICS(Inventory Custodian Slip (items below Php 50,000.00)),PAR(Property Acknowledgement Receipt (items above Php 50,000.00)),RIS(supply items or consumables), stickers to be attached to the items, and inventory document reports:Report on the Physical Count of Inventories,Report on the Physical Count of Semi-Expendable Property, andReport on the Physical Count of Property, Plant, and Equipment. - Officer Management: Manage officer records associated with purchase requests or item issuances.
- User Management: Admin-specific tab that allows viewing desktop and mobile users, revoking user access, updating archive statuses, and approving pending mobile user requests.
- Archive Management: Admin-specific tab to store and manage archived data securely.
Tools, language, and frameworks used in the project:
- Frameworks: Flutter, Dart Frog
- Language: Dart
- Database: PostgreSQL
- Version Control: Git & GitHub
- State Management: BLoC
- IDE: Android Studio / VS Code
A step-by-step instructions to set up and run the desktop project:
- Flutter SDK: Download Flutter SDK
- Dart: Pre-installed with Flutter
- Dart Frog: Install dart_frog cli
- Code Editor: VSCode / Android Studio
- PostgreSQL (latest stable version recommended): Download PostgreSQL
- Clone this repository:
git clone https://github.com/kal-i/qrims_desktop.git cd qrims_desktop - Get Flutter dependencies:
flutter pub get
- Create
.envfile for Flutter (root project)API_BASE_URL = "http://localhost:8080" # or your server address
- Navigate to the api directory and get Dart dependencies:
cd api dart pub get - Create a
.envfile inside theapidirectory and fill in the following:HOST = "" DATABASE_NAME = "" USERNAME = "" PASSWORD = "" SENDER_EMAIL = "" APP_PASSWORD = ""
Note:
-
Database credentials (
HOST,DATABASE_NAME,USERNAME,PASSWORD) are required to connect the API to PostgreSQL. -
Email credentials (
SENDER_EMAIL,APP_PASSWORD) are used for sending OTPs (One-Time Passwords) to users during authentication flows.SENDER_EMAILis the Gmail/SMTP sender address.APP_PASSWORDis a generated app password (not your actual email password).
-
- Start the Dart Frog server:
-
For development (auto-reload on changes):
dart_frog dev
-
For production (build and run optimized server):
dart_frog build
dart run build/bin/server.dart
-
- Navigate back to the Flutter root project and run the application:
cd ..
flutter run
-
Create a PostgreSQL Database Open your PostgreSQL client (e.g., pgAdmin, DBeaver, or
psqlCLI) and create a new database:CREATE DATABASE qrims;
You can use a different name, but make sure it matches the
DATABASE_NAMEyou set in your.envfile. -
Configure Database User and Credentials
-
Create or use an existing PostgreSQL user.
-
Make sure the user has sufficient privileges (create, read, update, delete).
-
Save the username and password; you’ll need them for the
.envfile:USERNAME = "your_postgres_username" PASSWORD = "your_postgres_password" HOST = "localhost" # or your server's IP if deployed DATABASE_NAME = "qrims"
-
-
Set Up Tables and Relationships Inside this repo, go to the
databasedirectory.- Open the
qrims.sqlfile. - Copy all its contents and execute it against the
qrimsdatabase you just created. - This will create all the required tables, relationships, and initial setup.
Example using
psqlCLI:psql -U your_postgres_username -d qrims -f database/qrims.sql
Or paste the SQL script into your SQL editor (pgAdmin, DBeaver, etc.) and run it.
- Open the
-
Verify the Setup After execution, check if the tables were created:
\c qrims;       -- connect to database
\dt;            -- list all tables
You should see tables like
users,sessions, etc.
You can package the desktop app as a Windows .exe using Inno Setup:
-
Install Inno Setup Download and install the latest version from the official website.
-
Build the Windows Release In your Flutter project root, run:
flutter build windows
This will generate the release files in:
build\windows\runner\Release\ -
Create the Installer
- Open Inno Setup and choose Create a new script using the Script Wizard.
- Select the Application Folder as the
Releasefolder from step 2. - Fill in the application name, version, publisher, etc.
- Follow the wizard to generate the installer
.exe.
-
Distribute or Install The generated
.execan now be shared or installed on any Windows machine.
⚠️ Note: Make sure the PostgreSQL server and API are accessible if the app depends on a running backend.
Yes, adding a bit of context is a good idea—it helps readers understand what they’re looking at and why some data is blurred. Here’s a clean way to do it:
Note: I had to blur/distort some of the sensitive data such as name for confidentiality.
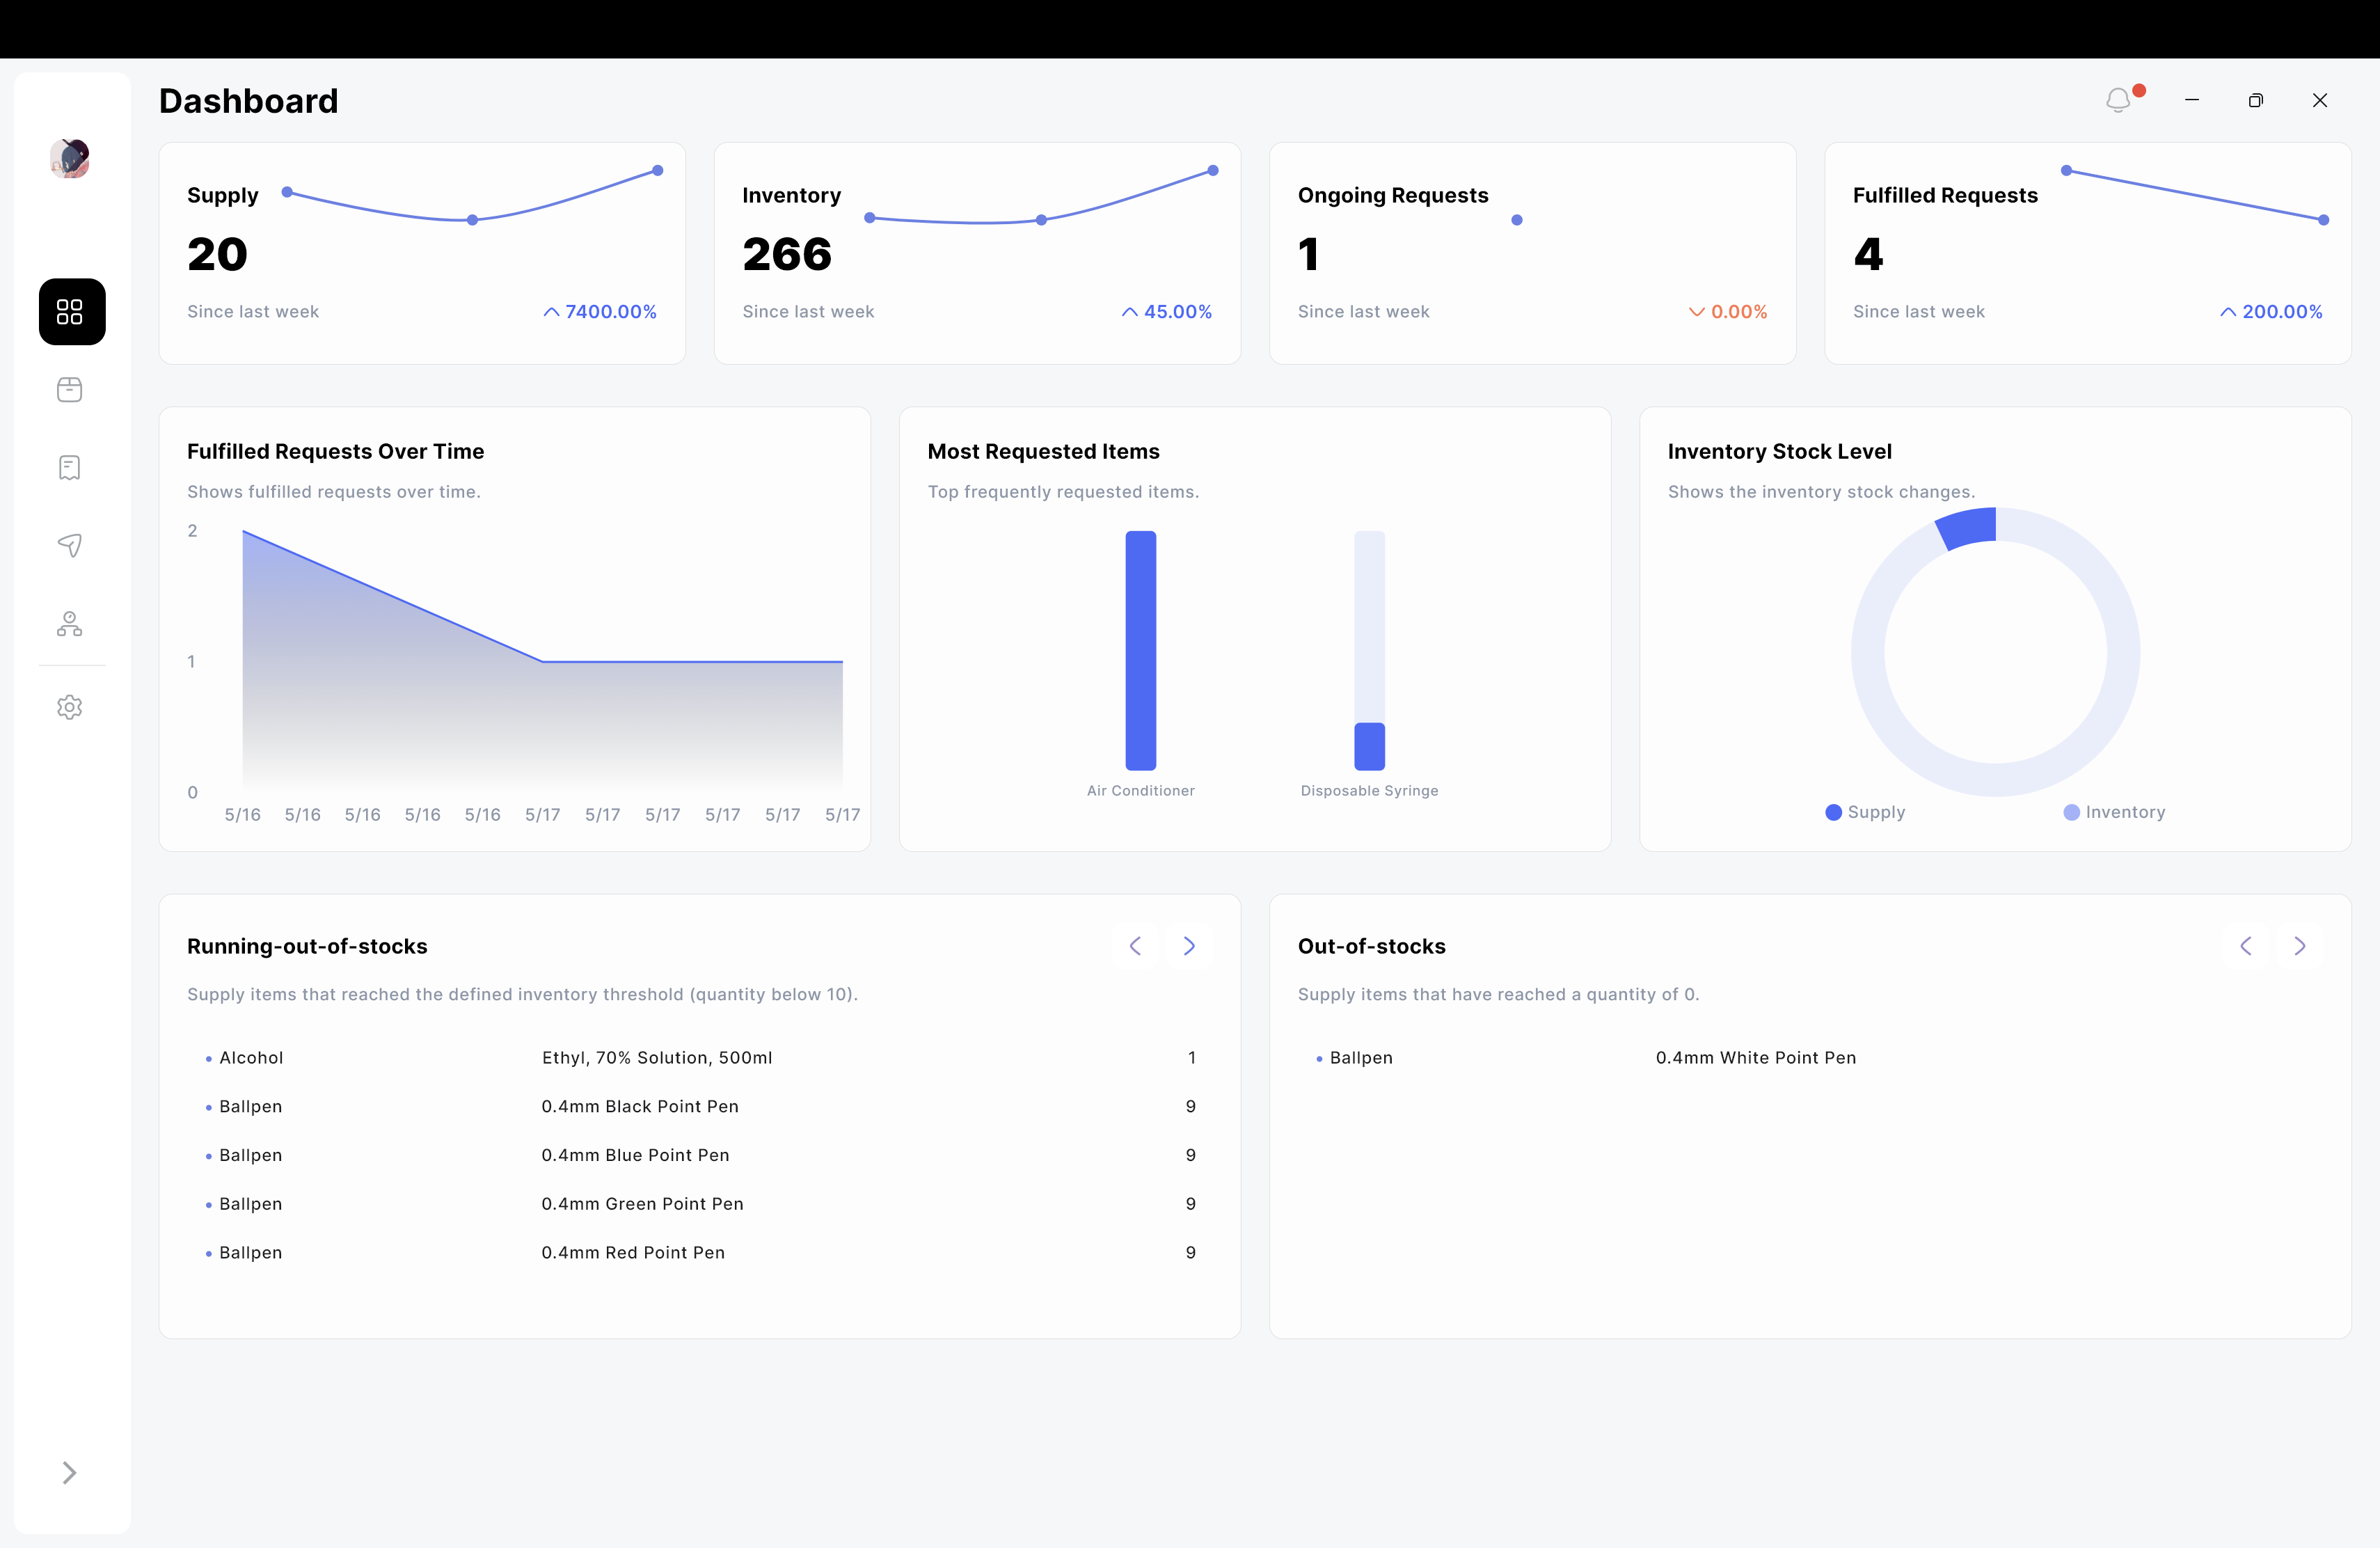
-
Dashboard View – Overview of inventory and request data.
-
Inventory Management View – Inteface for managing inventory items and supplies.
-
Purchase Request Management View – Interface for viewing and handling purchase requests.
-
Item Issuance View – Interface for tracking and managing item issuances.
-
Officers Management View – Inteface for managing officer records.