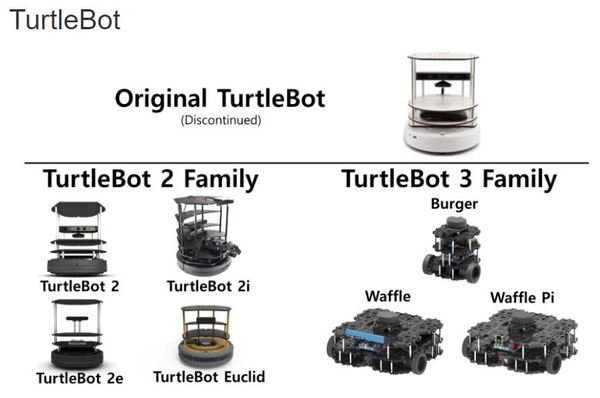
In this project, we are going to use turtlebot3 Waffle model and make the robot follow the yellow line which is created by Gazebo simulation world.
What is ROS and Why do we use ?
-> I already wrote it our previous project (ROS with C++ Examples).
-> You can check it from here
- Installing ROS noetic and Python3
- Configuring the catkin workspace
- Clone the Turtlebot3 packages
- Give the terminal the path to source ~./bashrc
- Export the Turtlebot3 Models (:heart: Waffle)
- In this project, I did all the steps that need to be done.
- We wrote our codes in catkin_ws/src/turtlebot3/turtlebot3_navigation/scripts/ folder
- In scripts folder we have created :
- tb3_lidar.py
- tb3_otonom.py
- cizgi_izleme.py
- Just install ROS-noetic version, my_workspace and our own package
- Apply all the remain parts.
- Don't forget to use the catkin_make command in the catkin workspace after making any changes to the files.
$ cd ~/catkin_ws/src/
$ git clone https://github.com/ROBOTIS-GIT/turtlebot3_msgs.git
$ git clone https://github.com/ROBOTIS-GIT/turtlebot3.git
$ cd ~/catkin_ws && catkin_make
$ gedit ~/.bashrc
- We are going to use Waffle model so write this command to bashrc the file and save it.
export TURTLEBOT3_MODEL=Waffle
- Now reload .bashrc so that you do not have to log out and log back in and we need to download the TurtleBot3 simulation files.
$ source ~/.bashrc
$ cd ~/catkin_ws/src/
$ git clone https://github.com/ROBOTIS-GIT/turtlebot3_simulations.git
$ git clone https://github.com/ROBOTIS-GIT/turtlebot3_autorace
$ cd ~/catkin_ws && catkin_make
- About Turtlebot3 Waffle
- Why do we use Gazebo and LIDAR Datas ?
- Autonomous Movement using LIDAR
- Line Tracking
- Turtlebot is an open source hardware platform and mobile base.
- When powered by ROS software, Turtlebot can handle vision, localization, communication and mobility.
- It can autonomously move anything on top of it to wherever that item needs to go, avoiding obstacles along the way.
- If you don't have a real robot, you can save your time and money using simulation.
- Gazebo is an open source software platform for which anyone can develop plug-in with model components.
- Gazebo can simulate complex systems. It is used especially in developing robots, used in interaction, to lift the grab objects, to push or for any other activity which requires recognition and localization in space.
Our robot has LIDAR sensor:
- It is a sensor technology for calculating distances to objects or surfaces using laser pulses.
- Distance = (speed of light * flight time ) / 2
- Light (laser) waves are used.
- It can rotate 360 degrees.
- LDS 01Model
- 2D
- The /scan topic is used.
We changed the laser_visual value from false to true in the turtlebot3_waffle.gazebo.xacro file to make the LIDAR data look more comfortable in the Gazebo environment.
- Let's run our launch file and script.
$ roslaunch turtlebot3_gazebo turtlebot3_world.launch
Let's open another terminal window and run our script:
$ python3 tb3_lidar.py
- As we see, Some lasers are shown in dark blue, while some lasers are shown in light blue according to the obstacles in the environment.
- Since the laser cannot reach behind the obstacles, it remains colorless.
- All lines written in the script are explained with a comment line in the code.
- Have a look at catkin_ws/src/turtlebot3/turtlebot3_navigation/scripts/tb3_otonom.py
-
First, we define the determined topics.
-
Then we do the masking process.
-
Masking : display images different from the yellow line. After the masking operation new window will open and shows the remain part of the image
-
Our cropped image shows the front of the robot.
-
In order to determine the yellow line that the robot will follow, we determine the middle point between the edges of the yellow line.
-
Determining yellow line using X - Y Points
- At this midpoint we place a red dot.
- We send our Twitst object to act according to this point. (explained in the script)
- We call our node, which will also be run in our main function.
Our Final ScreenShot of Project : Our robot is tracking the yellow line ! 🤖
