虽然Docker官方提供了公共的镜像仓库,但是从安全和效率等方面考虑,部署我们私有环境内的Registry也是非常必要的。
Harbor是由VMware公司开源的企业级的Docker Registry管理项目,相比Docker官方拥有更丰富的权限权利和完善的架构设计,适用大规模docker集群部署提供仓库服务。
它主要提供 Dcoker Registry 管理界面UI,可基于角色访问控制,镜像复制, AD/LDAP 集成,日志审核等功能,完全的支持中文。

-
基于角色的访问控制
用户与Docker镜像仓库通过“项目”进行组织管理,一个用户可以对多个镜像仓库在同一命名空间(project)里有不同的权限。
-
基于镜像的复制策略
镜像可以在多个Registry实例中复制(可以将仓库中的镜像同步到远程的Harbor,类似于MySQL主从同步功能),尤其适合于负载均衡,高可用,混合云和多云的场景。
-
图形化用户界面
用户可以通过浏览器来浏览,检索当前Docker镜像仓库,管理项目和命名空间。
-
支持 AD/LDAP
Harbor可以集成企业内部已有的AD/LDAP,用于鉴权认证管理。
-
镜像删除和垃圾回收
Harbor支持在Web删除镜像,回收无用的镜像,释放磁盘空间。image可以被删除并且回收image占用的空间。
-
审计管理
所有针对镜像仓库的操作都可以被记录追溯,用于审计管理。
-
RESTful API
RESTful API 提供给管理员对于Harbor更多的操控, 使得与其它管理软件集成变得更容易。
-
部署简单
提供在线和离线两种安装工具, 也可以安装到vSphere平台(OVA方式)虚拟设备。 Harbor 的所有组件都在 Docker 中部署,所以 Harbor 可使用 Docker Compose 快速部署。
注意: 由于 Harbor 是基于 Docker Registry V2 版本, docker 17.06.0-ce+ and docker-compose 1.18.0+
架构组件图:

1、Proxy:反向代理工具
2、Registry:负责存储docker镜像,处理上传/下载命令。对用户进行访问控制,它指向一个token服务,强制用户的每次docker pull/push请求都要携带一个合法的token,registry会通过公钥对token进行解密验证。
3、Core service:Harbor的核心功能:
UI:图形界面
Webhook:及时获取registry上image状态变化情况,在registry上配置 webhook,把状态变化传递给UI模块。
Token服务:复杂根据用户权限给每个docker push/p/ull命令签发token。Docker客户端向registry服务发起的请求,如果不包含token,会被重定向到这里,获得token后再重新向registry进行请求。
4、Database:提供数据库服务,存储用户权限,审计日志,docker image分组信息等数据
5、Log collector:为了帮助监控harbor运行,复责收集其他组件的log,供日后进行分析
-
Ubuntu
 uname -a
 lsb_release -a
-
CentOS
 uname -a
 cat /etc/redhat-release


docker -v
1)配置阿里的epel源
wget -O /etc/yum.repos.d/epel.repo http://mirrors.aliyun.com/repo/epel-7.repo2)安装并升级Python-pip
yum install python-pip -y
pip install --upgrade pip
3)安装docker-compose
pip install docker-compose4)查看docker-compose版本
docker-compose -v
1)可以在网站上下载离线安装包
地址:https://github.com/goharbor/harbor/releases

此处我们下载的是最新版:2.0.6版本:
https://github.com/goharbor/harbor/releases/download/v2.0.6/harbor-offline-installer-v2.0.6.tgz
2)国内harbor离线版镜像(版本可能不是最新,下载速度较快)
tar xf harbor-offline-installer-v2.0.6.tgz
cd harbor
ll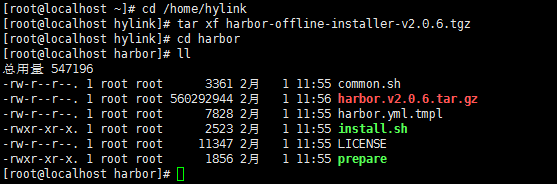
cp harbor.yml.tmpl  harbor.yml
mkdir -p /opt/application/harbor     //用于存放harbor的持久化数据

harbor.yml配置文件主要修改参数如下:

hostname: 192.168.3.128          //需要写IP地址或者域名
#http配置
http:
  # port for http, default is 80. If https enabled, this port will redirect to https port
  port: 8999

#https配置(如不需要可不配置)

# https related config
https:
  # https port for harbor, default is 443
  port: 443
  # The path of cert and key files for nginx
  certificate: /your/certificate/path
  private_key: /your/private/key/path

harbor_admin_password: Harbor12345         //admin密码


#数据库配置
database:
# The password for the root user of Harbor DB. Change this before any production use.
password: root123
# The maximum number of connections in the idle connection pool. If it <=0, no idle connections are retained.
max_idle_conns: 50
# The maximum number of open connections to the database. If it <= 0, then there is no limit on the number of open connections.
# Note: the default number of connections is 100 for postgres.
max_open_conns: 100


#持久化数据目录

data_volume: /opt/application/harbor

……
安装之前需要启动docker,然后执行安装脚本:


我的访问地址:http://192.168.3.128:8999
admin Harbor12345

[root@localhost harbor]# docker login 192.168.3.128
Username: admin
Password:
Error response from daemon: Get https://192.168.3.128/v2/: dial tcp 192.168.3.128:443: connect: connection refused
[root@localhost harbor]# - 报错内容:
Error response from daemon: Get https://192.168.3.128/v2/: dial tcp 192.168.3.128:443: connect: connection refused- 报错原因:
Docker自从1.3.X之后docker registry交互默认使用的是HTTPS,但是我们搭建私有镜像默认使用的是HTTP服务,所以与私有镜像交时出现以上错误。
- 报错解决:
修改Docker的配置文件/etc/docker/daemon.json:
vim /etc/docker/daemon.json

{
  "insecure-registries": [
   "192.168.3.128"
  ]
}
此时只设置域名或是IP,无需添加端口(默认的认证端口为5000)


systemctl restart docker
docker-compose start


[root@localhost harbor]# docker tag redis:latest 192.168.3.128:8999/private/redis:latest
[root@localhost harbor]# docker push 192.168.3.128:8999/private/redis:latest
The push refers to repository [192.168.3.128:8999/private/redis]
Get https://192.168.3.128:8999/v2/: http: server gave HTTP response to HTTPS client
[root@localhost harbor]# - 报错内容:
The push refers to repository [192.168.3.128:8999/private/redis]
Get https://192.168.3.128:8999/v2/: http: server gave HTTP response to HTTPS client- 报错解决:
修改Docker的配置文件/etc/docker/daemon.json:
vim /etc/docker/daemon.json

{
  "insecure-registries": [
   "192.168.3.128",
   "192.168.3.128:8999"
  ]
}
此时需设置域名或是IP:PORT,"192.168.3.128:8999"

systemctl restart docker
docker-compose start[root@localhost harbor]# docker push 192.168.3.128:8999/private/redis:latest
The push refers to repository [192.168.3.128:8999/private/redis]
3480f9cdd491: Preparing
a24a292d0184: Preparing
f927192cc30c: Preparing
1450b8f0019c: Preparing
8e14cb7841fa: Preparing
cb42413394c4: Waiting
unauthorized: unauthorized to access repository: private/redis, action: push: unauthorized to access repository: private/redis, action: push- 报错内容:
unauthorized: unauthorized to access repository: private/redis, action: push: unauthorized to access repository: private/redis, action: push- 报错解决:
查找/root/.docker/config.json文件
[root@localhost harbor]# find / -name config.json
/run/containerd/io.containerd.runtime.v2.task/moby/dbba78c2c6c6025974bb9a05802c38518b7e0215c2d2be53ba5190e233aa273e/config.json
/run/containerd/io.containerd.runtime.v2.task/moby/7e58d4684895bca4c41d98c9d480cdfad23bb12fc11e1550f2a46eef4d9cfd18/config.json
/run/containerd/io.containerd.runtime.v2.task/moby/86ffc4df4faca5ffec61a94837c64acba9b92b63720fc44010a049e1c4cb865c/config.json
/run/containerd/io.containerd.runtime.v2.task/moby/9981e93c42d1adfc5fe90c22c769d4bedca7668ad63427234a58841d65030883/config.json
/run/containerd/io.containerd.runtime.v2.task/moby/e1df115add04a86538f15220b4983db6ed11cd10a249cc6a1c3c91984abc1572/config.json
/run/containerd/io.containerd.runtime.v2.task/moby/670b0ec2b911fe18f63310562499f368d4d7c587a591273071832cc959a077a6/config.json
/run/containerd/io.containerd.runtime.v2.task/moby/f69ca0224543292dc8f51b9217b88cdb96b20f188ea6db760620142fc3d9fe9c/config.json
/run/containerd/io.containerd.runtime.v2.task/moby/40cf0b5affa08e4ff6d5fbea98646345512e6cc75bfb9b3f3caddfb5e7c2d068/config.json
/run/containerd/io.containerd.runtime.v2.task/moby/3dcff988661bca986d55a7cee6b8fcb2dafe48415662343782073c3d586defc0/config.json
/run/containerd/io.containerd.runtime.v2.task/moby/341046a4a3d715966537deeaf340c335eb09e45478ba1adf3d34ee7931df8f5c/config.json
/run/containerd/io.containerd.runtime.v2.task/moby/78b0896b128f873be47e6dcdea77773c3db4de43eef00c18c017a940a1ad4545/config.json
/run/containerd/io.containerd.runtime.v2.task/moby/16efdc87d2e53fd12ad2281ac82b5a67fa8d967514b01983903fd50bb7cc021f/config.json
/run/containerd/io.containerd.runtime.v2.task/moby/337801cae8d97ed8cc00f60f94d0395023ce9e15914def9020c70a957c09239a/config.json
/run/containerd/io.containerd.runtime.v2.task/moby/7fbda41ed5a68d2b352cf05f294f5747de1e2352f088c9cc073ea0262fe4a438/config.json
/run/containerd/io.containerd.runtime.v2.task/moby/d11b4c93b44f3c643bda726fe9ae514029c4023c9c3c9c3b9665679727dd9b92/config.json
/run/containerd/io.containerd.runtime.v2.task/moby/040325fb618f207459010470cf76c1c8a31cb21a1b54ab7aef92fce6cf52fa59/config.json
/run/containerd/io.containerd.runtime.v2.task/moby/140f24ab42a98e04c45020f89b2945628b9d578f482d9245e7ce2264362145f7/config.json
/run/containerd/io.containerd.runtime.v2.task/moby/6077f7920d3f463550631cad2ca53f02196ac247fc94e968c2e41c6a7a5e50a7/config.json
/run/containerd/io.containerd.runtime.v2.task/moby/4f630ba2bccab2986cf497e539da4d502283bcb3496d14afd8b2ad5fcbf9c11b/config.json
/run/containerd/io.containerd.runtime.v2.task/moby/7fb6016c32aa4ddea4cede1d09a211e5a4941f1f2df02699fa3a98d916af7e16/config.json
/run/containerd/io.containerd.runtime.v2.task/moby/9fb518769e2ac26061089406e238b05e6cb22766670da9c2b8eaa62cae15929e/config.json
/root/.docker/config.json
查看原/root/.docker/config.json配置
[root@localhost harbor]# cat /root/.docker/config.json
{
	"auths": {
		"192.168.3.128": {
			"auth": "YWRtaW46SGFyYm9yMTIzNDU="
		},
		"www.harbor.mobi:1443": {
			"auth": "YWRtaW46SGFyYm9yMTIzNDU="
		}
	}
}
修改/root/.docker/config.json,在其基础上新增以下内容:
vim /root/.docker/config.json

{
	"auths": {
		"192.168.3.128": {
			"auth": "YWRtaW46SGFyYm9yMTIzNDU="
		},
		"192.168.3.128:8999": {
			"auth": "YWRtaW46SGFyYm9yMTIzNDU="
		},
		"www.harbor.mobi:1443": {
			"auth": "YWRtaW46SGFyYm9yMTIzNDU="
		}
	}
}
最后形成以下文件:
[root@localhost harbor]# cat /root/.docker/config.json
{
	"auths": {
		"192.168.3.128": {
			"auth": "YWRtaW46SGFyYm9yMTIzNDU="
		},
		"192.168.3.128:8999": {
			"auth": "YWRtaW46SGFyYm9yMTIzNDU="
		},
		"www.harbor.mobi:1443": {
			"auth": "YWRtaW46SGFyYm9yMTIzNDU="
		}
	}
}
然后重新启动Docker:
systemctl restart docker
docker-compose start[root@localhost harbor]# systemctl restart docker
[root@localhost harbor]# docker-compose start
/usr/lib/python2.7/site-packages/paramiko/transport.py:33: CryptographyDeprecationWarning: Python 2 is no longer supported by the Python core team. Support for it is now deprecated in cryptography, and will be removed in the next release.
from cryptography.hazmat.backends import default_backend
Starting log ... done
Starting postgresql ... done
Starting redis ... done
Starting portal ... done
Starting registry ... done
Starting core ... done
Starting jobservice ... done
Starting proxy ... done
Starting registryctl ... done
[root@localhost harbor]# docker login 192.168.3.128
Username: admin
Password:
WARNING! Your password will be stored unencrypted in /root/.docker/config.json.
Configure a credential helper to remove this warning. See
https://docs.docker.com/engine/reference/commandline/login/#credentials-store
Login Succeeded
[root@localhost harbor]# docker push 192.168.3.128:8999/private/redis:latest
The push refers to repository [192.168.3.128:8999/private/redis]
3480f9cdd491: Pushed
a24a292d0184: Pushed
f927192cc30c: Pushed
1450b8f0019c: Pushed
8e14cb7841fa: Pushed
cb42413394c4: Pushed
latest: digest: sha256:7ef832c720188ac7898dbd8d1e237b0738e94f94fc7e981cb7b8efe84555e892 size: 1572
注:高版本(14以上)docker执行login命令,默认使用https,且harbor必须使用域名,只是用ip访问是不行的。
假设使用的网址是:www.harbor.mobi,本机ip是192.168.3.27
因为这个网址是虚拟的,所以需要在本机hosts文件中添加
echo "192.168.3.27 www.harbor.mobi" >> /etc/hosts把yourdomain.com换成实际使用的域名或者ip或者ip:port,要跟harbor.yml文件中的配置信息保持一致
#set hostname
hostname: www.harbor.mobi

http:
  port: 8999

https:
  # https port for harbor, default is 443
  port: 443
  # The path of cert and key files for nginx
  certificate: /data/cert/www.harbor.mobi.crt
  private_key: /data/cert/www.harbor.mobi.key
# 注意证书路径此处分为Ubuntu版本和CentOS版本
#!/bin/bash

# 在该目录下操作生成证书,正好供harbor.yml使用
mkdir -p /data/cert
cd /data/cert

openssl genrsa -out ca.key 4096
openssl req -x509 -new -nodes -sha512 -days 3650 -subj "/C=CN/ST=Beijing/L=Beijing/O=example/OU=Personal/CN=www.harbor.mobi" -key ca.key -out ca.crt
openssl genrsa -out www.harbor.mobi.key 4096
openssl req -sha512 -new -subj "/C=CN/ST=Beijing/L=Beijing/O=example/OU=Personal/CN=www.harbor.mobi" -key www.harbor.mobi.key -out www.harbor.mobi.csr

cat > v3.ext <<-EOF
authorityKeyIdentifier=keyid,issuer
basicConstraints=CA:FALSE
keyUsage = digitalSignature, nonRepudiation, keyEncipherment, dataEncipherment
extendedKeyUsage = serverAuth
subjectAltName = @alt_names

[alt_names]
DNS.1=www.harbor.mobi
DNS.2=harbor
DNS.3=ks-allinone
EOF

openssl x509 -req -sha512 -days 3650 -extfile v3.ext -CA ca.crt -CAkey ca.key -CAcreateserial -in www.harbor.mobi.csr -out www.harbor.mobi.crt

openssl x509 -inform PEM -in www.harbor.mobi.crt -out www.harbor.mobi.cert

sudo cp www.harbor.mobi.crt /usr/local/share/ca-certificates/
sudo update-ca-certificates
补充知识点:
ubuntu系统上如何添加新的根证书?
如果自己部署了一个CA系统,或者使用openssl生成了一个自签名的证书,如何让ubuntu系统信任这些证书呢

添加证书:
首先,复制pem格式的根证书,重命名为 .crt格式
然后,执行下边的命令
$sudo cp 证书路径.crt /usr/local/share/ca-certificates
$sudo update-ca-certificates

update-ca-certificates命令将PEM格式的根证书内容附加到/etc/ssl/certs/ca-certificates.crt ,而/etc/ssl/certs/ca-certificates.crt 包含了系统自带的各种可信根证书.

删除证书:
$sudo rm -f /usr/local/share/ca-certificates/证书名称.crt
$sudo update-ca-certificates#!/bin/bash
# 在该目录下操作生成证书,正好供harbor.yml使用
mkdir -p /data/cert
cd /data/cert
openssl genrsa -out ca.key 4096
openssl req -x509 -new -nodes -sha512 -days 3650 -subj "/C=CN/ST=Beijing/L=Beijing/O=example/OU=Personal/CN=www.harbor.mobi" -key ca.key -out ca.crt
openssl genrsa -out www.harbor.mobi.key 4096
openssl req -sha512 -new -subj "/C=CN/ST=Beijing/L=Beijing/O=example/OU=Personal/CN=www.harbor.mobi" -key www.harbor.mobi.key -out www.harbor.mobi.csr
cat > v3.ext <<-EOF
authorityKeyIdentifier=keyid,issuer
basicConstraints=CA:FALSE
keyUsage = digitalSignature, nonRepudiation, keyEncipherment, dataEncipherment
extendedKeyUsage = serverAuth
subjectAltName = @alt_names
[alt_names]
DNS.1=www.harbor.mobi
DNS.2=harbor
DNS.3=ks-allinone
EOF
openssl x509 -req -sha512 -days 3650 -extfile v3.ext -CA ca.crt -CAkey ca.key -CAcreateserial -in www.harbor.mobi.csr -out www.harbor.mobi.crt
openssl x509 -inform PEM -in www.harbor.mobi.crt -out www.harbor.mobi.cert
cp www.harbor.mobi.crt /etc/pki/ca-trust/source/anchors/www.harbor.mobi.crt
update-ca-trust# 把这三个复制到docke下
mkdir -p /etc/docker/certs.d/www.harbor.mobi/
cp www.harbor.mobi.cert /etc/docker/certs.d/www.harbor.mobi/
cp www.harbor.mobi.key /etc/docker/certs.d/ywww.harbor.mobi/
cp ca.crt /etc/docker/certs.d/www.harbor.mobi/
最终docker目录结构:
/etc/docker/certs.d/
└── www.harbor.mobi
├── www.harbor.mobi.cert <-- Server certificate signed by CA
├── www.harbor.mobi.key <-- Server key signed by CA
└── ca.crt <-- Certificate authority that signed the registry certificate
# 重启docker
systemctl restart docker.service
# 停止
docker-compose down -v
# 重新生成配置文件
./prepare --with-notary --with-clair --with-chartmuseum
# 启动
docker-compose up -dhylink@hylink-System-Product-Name:~/harbor$ docker login https://www.harbor.mobi:1443
Authenticating with existing credentials...
WARNING! Your password will be stored unencrypted in /home/hylink/.docker/config.json.
Configure a credential helper to remove this warning. See
https://docs.docker.com/engine/reference/commandline/login/#credentials-store
Login Succeeded
hylink@hylink-System-Product-Name:~/harbor$ docker tag containous/whoami:latest www.harbor.mobi:1443/private/whoami:latest
hylink@hylink-System-Product-Name:~/harbor$ docker push www.harbor.mobi:1443/private/whoami:latest
The push refers to repository [www.harbor.mobi:1443/private/whoami]
d39a8d45d503: Pushed
ef02b53d2c9c: Pushed
dc788139f06c: Pushed
latest: digest: sha256:e6d0a6d995c167bd339fa8b9bb2f585acd9a6e505a6b3fb6afb5fcbd52bbefb8 size: 948报错内容:
Traceback (most recent call last):
  File "/usr/bin/pip", line 9, in <module>
    load_entry_point('pip==21.0', 'console_scripts', 'pip')()
  File "/usr/lib/python2.7/site-packages/pkg_resources.py", line 378, in load_entry_point
    return get_distribution(dist).load_entry_point(group, name)
  File "/usr/lib/python2.7/site-packages/pkg_resources.py", line 2566, in load_entry_point
    return ep.load()
  File "/usr/lib/python2.7/site-packages/pkg_resources.py", line 2260, in load
    entry = __import__(self.module_name, globals(),globals(), ['__name__'])
  File "/usr/lib/python2.7/site-packages/pip/_internal/cli/main.py", line 60
    sys.stderr.write(f"ERROR: {exc}")
解决办法:
yum remove python-pip

cd /usr/local/src
wget https://bootstrap.pypa.io/2.7/get-pip.py
python get-pip.py

pip -V报错内容:
docker push www.harbor.mobi:1443/private/whoami:latest
x509: cannot validate certificate for www.harbor.mobi because it doesn't contain any IP SANs
解决办法:
检查harbor.yml文件中hostname变量的值是否跟生成证书使用的一致② Error saving credentials: error storing credentials - err: exit status 1, out: Error calling StartServiceByName for org.freedesktop.secrets: Timeout was reached
ubuntu18.10 报错内容:
Error saving credentials: error storing credentials - err: exit status 1, out: Error calling StartServiceByName for org.freedesktop.secrets: Timeout was reached解决办法:
sudo apt install gnupg2 passhylink@hylink-System-Product-Name:~/harbor$ docker login https://www.harbor.mobi:1443
Username: admin
Password:
WARNING! Your password will be stored unencrypted in /home/hylink/.docker/config.json.
Configure a credential helper to remove this warning. See
https://docs.docker.com/engine/reference/commandline/login/#credentials-store
Login Succeeded