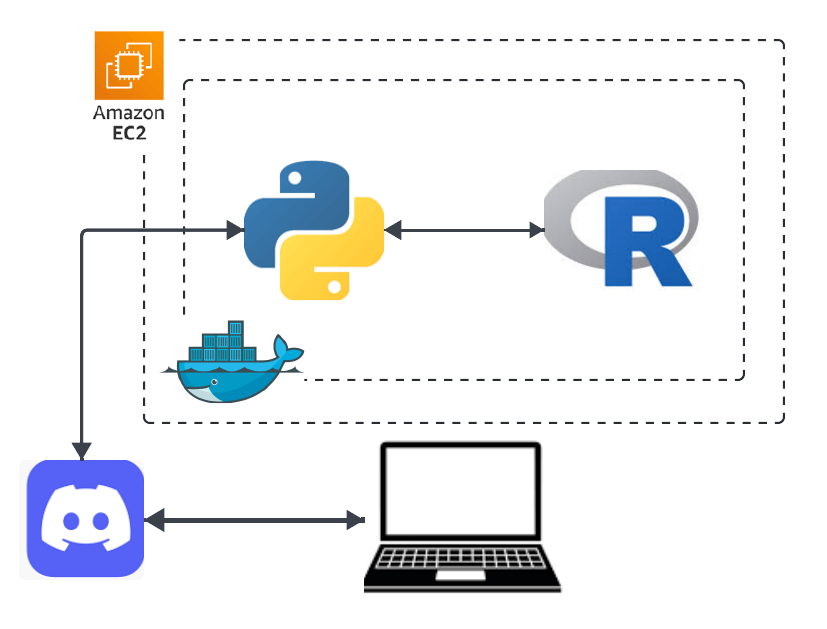
Chickwts R Discord Bot is designed for users to interact with the Chickwts dataset in a discord text channel. Users can request information about the dataset, as well as issue commands to produce visualizations of the Chickwts data through 3 different plot types.
- Yousuf Kanan
- Saul Sanchez
- Alan Fuentes
Upon connection to the discord guild, the bot will output a connection message listing the available commands:
!options- Provides a list of commands to return plot visualizations of Chickwts data!info- Summary information regarding Chickwts dataset and usage.
The plot command options detailed by the !options command include:
!plot barplot- Barplot of the Chick Feed Types!plot boxplot- Boxplot of the Chick Weights by Feed Types!plot histogram- Histogram of the Chick Weights
Discord Bot Tutorial Followed for Project
Credentials for the Bot Token are managed in a .env file. This file must be created by the user and added to the /bot directory.
The .env file structure is as follows:
DISCORD_TOKEN=<INSERT BOT TOKEN>
DISCORD_GUILD=<INSERT DISCORD NAME>
- Install R on your local machine if necessary: Installation Link
- Ensure you are in the
/botdirectory - Create the
.envfile as instructed in the Credentials section - Create the virtual environment:
python3 -m venv .venv
- Activate the virtual enviornment:
source .venv/bin/activate
- Install dependencies:
pip3 install requirements.txt
- Run the program:
python3 bot.py
- Ensure that you are currently in the
/botdirectory - Create
.envfile if it doesn't exist as instructed in the Credentials section - Run this command to start the container in detached mode and build it:
docker-compose up --build -d
- Check logs:
docker-compose logs
- Stop and remove the container:
docker-compose down
- Run this command to install git on the ec2 instance and clone the repo:
sudo yum install -y git
- Run the script to install and start docker and give the user docker access:
sh EC2InstanceDocker.sh
- Log out then log back in to your EC2 instance
- Navigate to the
/botdirectory in the repo and create the.envfile - Start the container and build it:
docker-compose up --build -d
- Stop and remove the container:
docker-compose down
To resolve SSL Verification Error that may occur, run:
pip install --upgrade certifi
Note: The provided solution is only for MacOS.