NOIR Games is a web application that allows users to interact with a gaming catalogue. This includes having a dashboard, a store, and a login system. There are two components within this documentation:
This step will go through installing the neccesary applications and packages/dependencies that are needed to run Noir Games. In addition, this section will also show how to setup the database.
- Visual Studio Code
- pgAdmin 4
To download Visual Studio Code, visit this link and download the software based on your operating system: https://code.visualstudio.com/download
To download pgAdmin 4, visit this link and download the software based on your operating system: https://www.pgadmin.org/download/
Install the following software in order:
- PostgreSql
- Node.js
- EXPRESS
- React
- React-router-dom
To install PostgreSql, visit this link and download the software based on your operating system: https://www.postgresql.org/download/
To install Node.js, visit this link and download the software based on your operating system: https://nodejs.org/en/download/
To install EXPRESS, run the following command in your console/terminal window:
npm install express
To install React, run the following command in your console/terminal window:
npm install react
To install React-router-dom, run the following command in your console/terminal window:
npm install react-router-dom
To clone the repository, run the following command in your console/terminal window:
git clone https://github.com/Tibbitin/CSE-412.git
- Open pgAdmin 4
- Create a password
- Open Servers -> PostgreSQL -> Databases
- Right click on Database, then open Create -> Database...
- Name the database, select "Save"
- Right click on your database and select "PSQL Tool"
- Run this command under "PSQL Tool"
CREATE EXTENSION "uuid-ossp"; - Right click on your database and select "Query Tool"
- Wherever you cloned the repository, open the file "middlePhase.pgsql" using the Visual Studio Code IDE
- Copy and paste all commands in that file and paste it onto the "Query Tool" in pgAdmin 4.
- Execute the commands in the "Query Tool"
The user is able to view the landing screen once the setup is complete and the application has been run. The landing page is the sign in page, where the user must enter their username and password in order to log in to their account. Pressing the submit button with a valid username and password takes you to the dashboard, which is the “My Games” page, that displays all the games the user has.
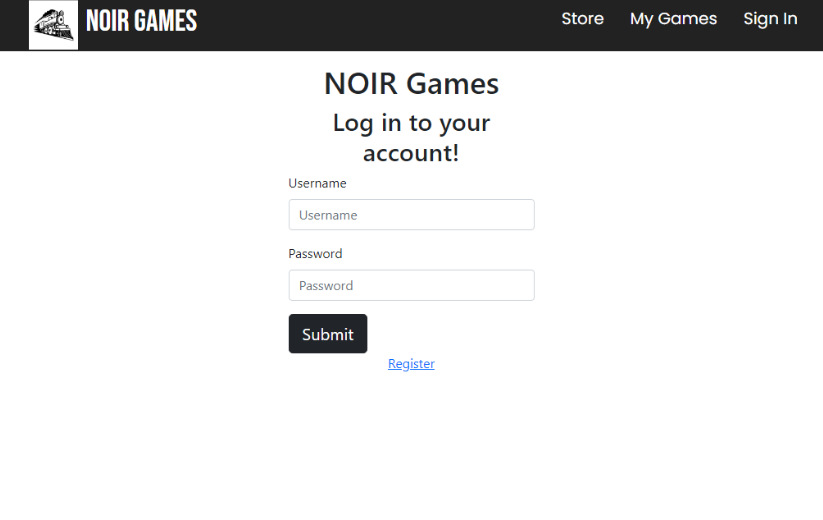
If the user does not have an account, they are able to click the register link in order to create an account. To create an account, the user must enter a username and a password and click the Register button. This will create their account and take them to the dashboard, which is the “My Games” page which will be blank since they don’t have any games yet.

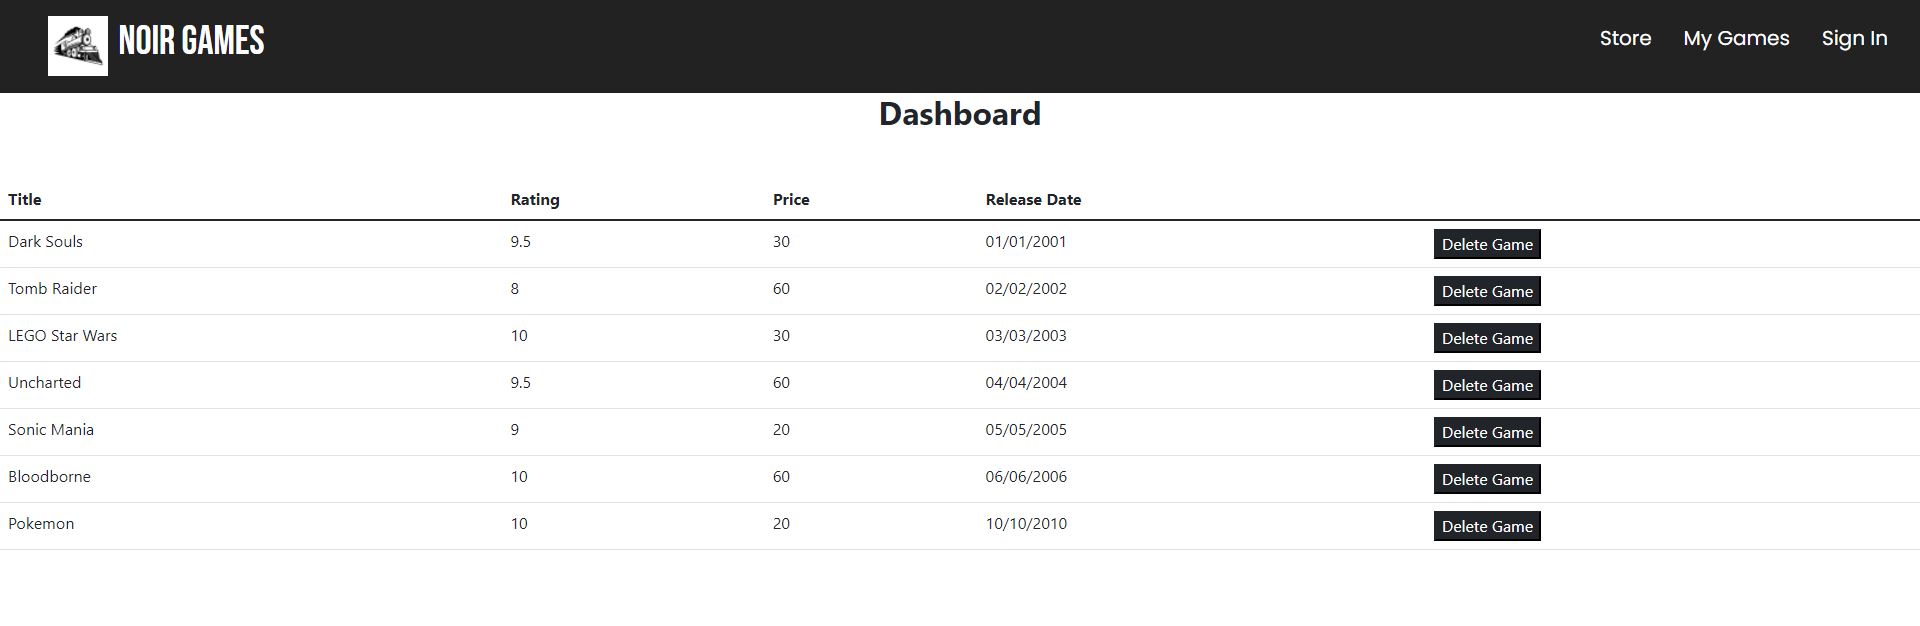
On the dashboard, the user can view all games that are in their wishlist. In order to remove a game from your wishlist, press the "Delete Game" button and it will be removed from your list.
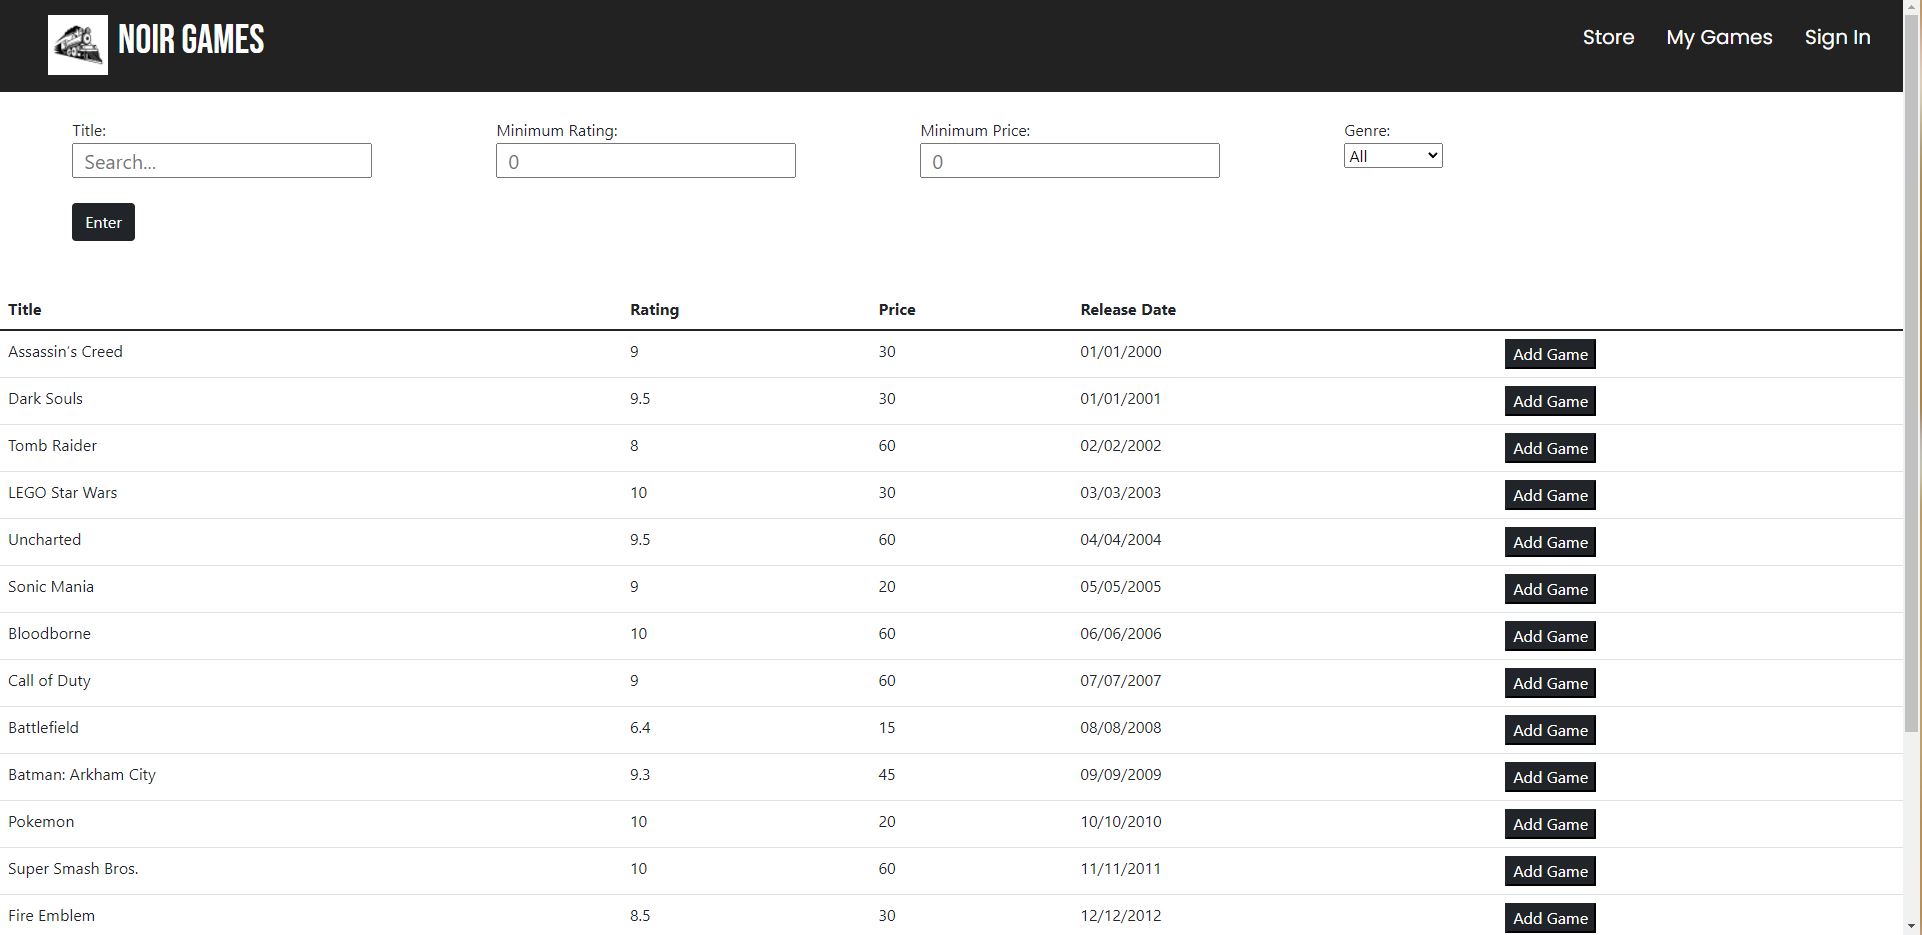
The store page has all the games available in the store. There is a search bar at the top of the page that allows you to search for a specific game based on the title. In order to filter the list of games based on genre, rating, or price, you can use the buttons on the top and press enter. The games that match the criteria will remain on the page. In order to add a game to your wishlist, you simply have to press the “Add Game” button beside the game, which will add a copy of it to the “My Games” page.
Clicking the “Store” button takes you to the store page. Clicking the “My Games” button takes you to the dashboard. Clicking the “Sign In” page takes you to the login page.

In order to end the application, simply close the tab on your browser.