Subscription Offers
In the beta for iOS 12.2, Apple announced a new feature for subscription developers called [“Subscription Offers.”](“Subscription Offers.”) Subscription offers allow developers to apply custom pricing and trials to existing and lapsed subscriptions.
With this guide, I’m going to explain what offers are, explore some potential use cases, and then, as usual, share my signature juicy hot take on the state of iOS in-app subscriptions.
Special thx Jacob Eiting The copy of https://www.revenuecat.com/blog/ios-subscription-offers articles will be used to make this guide
There are two parts to a subscription offer:
- A configuration in App Store Connect
- A collection of StoreKit classes for applying the offer
In the App Store Connect interface, Offers (called promotional offers in ASC), can be configured as part of the pricing of an in-app purchase product.
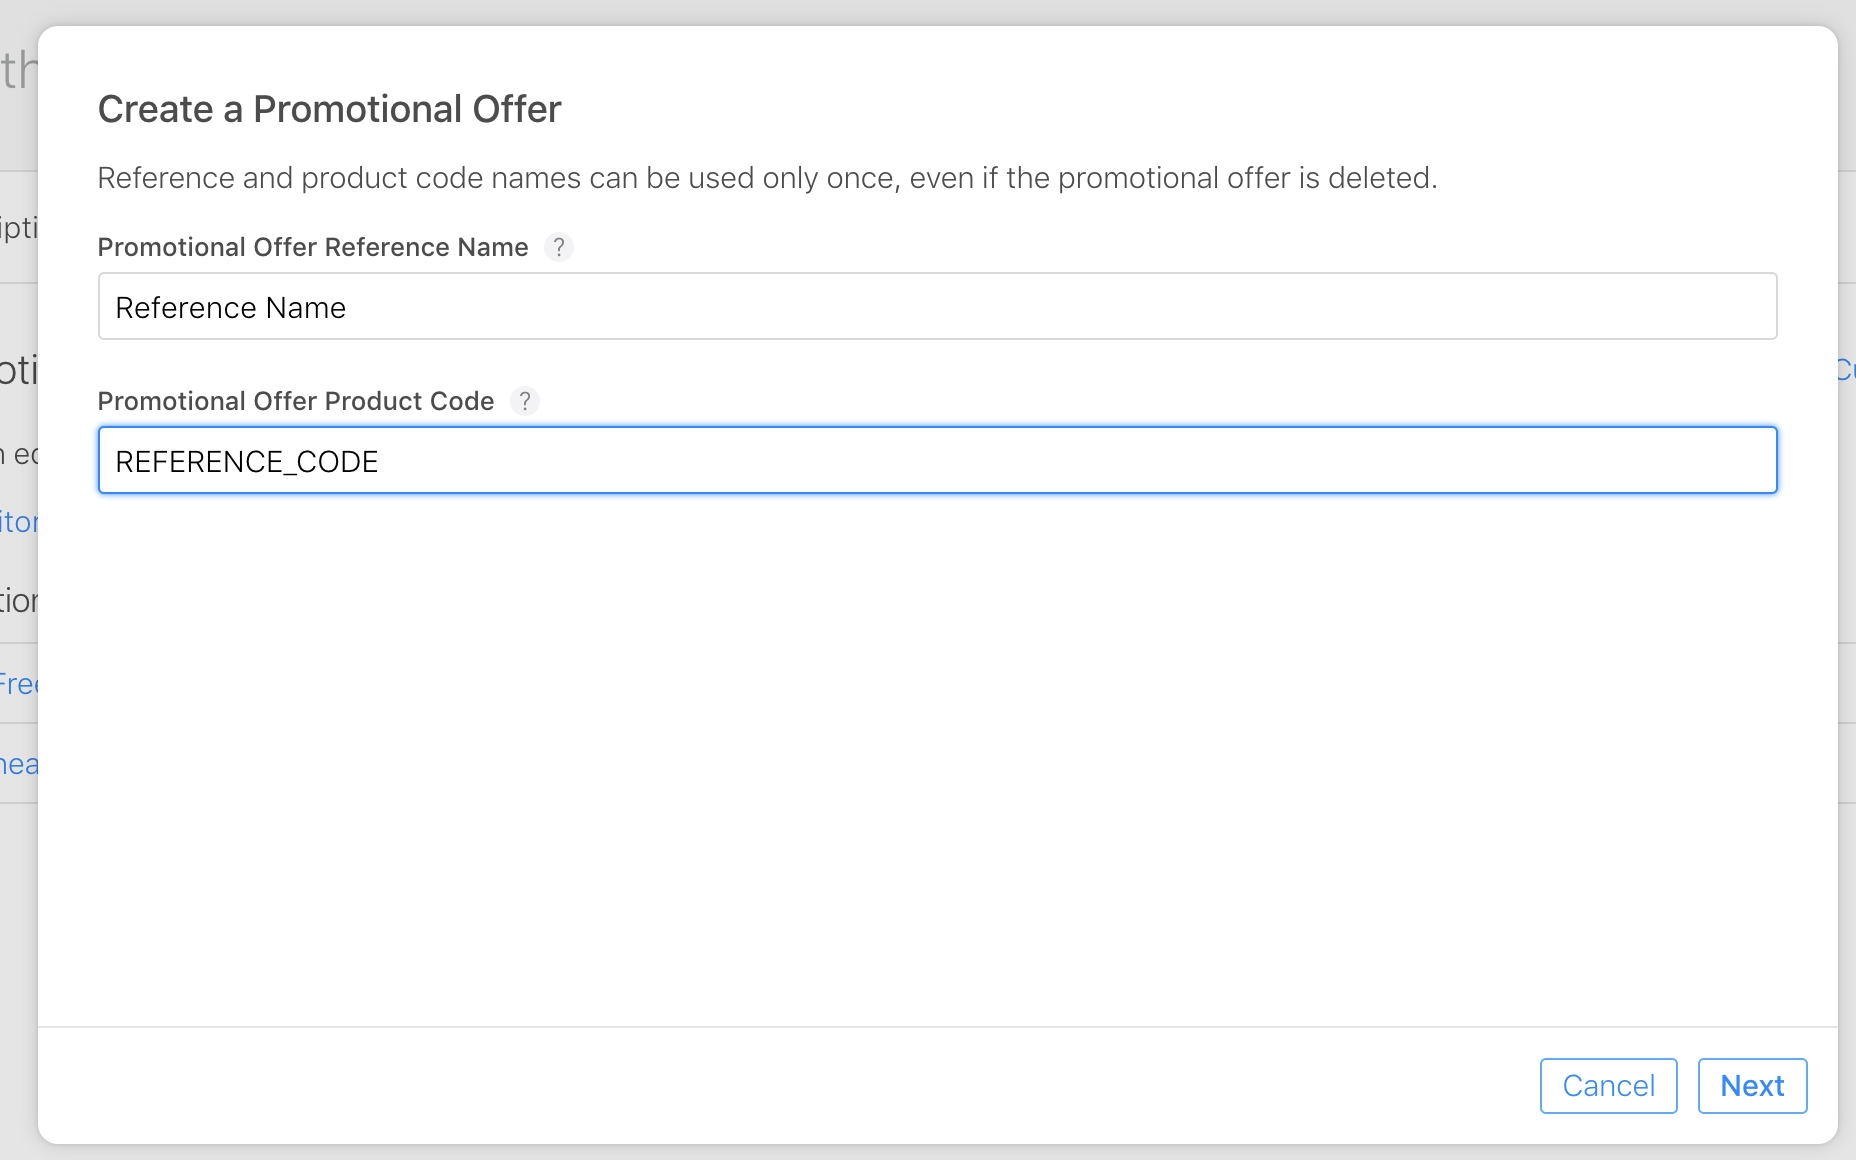 There are two fields that you need to specify: the “Reference Name” which is just used in the ASC UI and the “Promotional Offer Product Code” which is what you will actually use to reference and activate an offer in your app.
Just like introductory offers, there are three types of subscription offers:
- Pay-up-front — The customer pays once for a period of time, e.g. .99 for 3 months. Allowed durations are 1, 2, 3, 6 and 12 months.
- Pay-as-you-go — The customer pays a reduced rate, each period, for a number of periods, e.g. .99 per month for 3 months. Allowed durations are 1-12 months. Can only be specified in months.
- Free — This is analogous to a free trial, the user receives 1 of a specified period free. Just to keep things interesting the allowed durations are 3 days, 1 week, 2 weeks, 1 month, 2 months, 3 months, 6 months, and 1 year.
- Once you’ve added a promotional offer, make sure to hit “save” in the top right corner. Once this is done, you should be able see your offers on any device using 12.2 or later.
For how easy it is to configure offers, actually using them is a different story. In order to prevent fraud, Apple has required that an offer first be cryptographically signed with the newly introduced subscription keys before it’s consumed.
I’ll explain step-by-step how to fetch, sign, generate, and apply an offer.
Our journey begins with an ISN_SKProductDiscount. These will represent an impotent version of the promotional offer you set up in ASC. To access the available offers, you need to check the newly added Discounts array on ISN_SKProduct. The SKProductDiscount class is the same class used for introductory offers and includes information like the price, the payment mode, number of periods, period duration, and the identifier.
Using the identifier, iterate through the discounts array to find the product discount you want to apply. Then we get it ready for application.
In order for an offer to be applied, a user either needs to have an active or lapsed subscription. To determine this you need to verify and check the StoreKit receipt on the device or rely on some other record of the users subscription history.
Once you know a user is eligible you can use the SKProductDiscount to display to the user the appropriate UI, price, etc for giving them the offer.
This is where it really gets fun. Before we can apply the offer we need to convert our ISN_SKProductDiscount into an ISN_SKPaymentDiscount. The constructor for SKPaymentDiscount provides some clue to what we’ll need to achieve that:
- identifier — The identifier of the subscription offer
- keyIdentifier — The identifier of the subscription key used to sign the offer
- nonce — A throwaway value generated along with the signature
- signature — The signature itself
- timestamp — The timestamp when the signature was generated.
First generate your subscription key, you can do this from the “Users and Access” section of App Store Connect.

Configuring your key will trigger a one-time download of a p8 file of your private key. Don’t lose it! You will need this key every time you want any user to redeem an offer. Apple provided a signing guide for doing so but it’s light on specifics. But don’t worry! We don’t have to learn the Elliptic Curve Digital Signature Algorithm, we can use Python.
First, install the ecdsa package for Python:
pip install ecdsa
Next we need to convert your p8 key file into a DER file readable by the ecdsa library. Luckily the OpenSSL command line tool can do this.
openssl pkcs8 -nocrypt -in SubscriptionKey_XWSXTGQVX2.p8 -out cert.der -outform der
With the converted key, the following will generate the needed signature:
import json
import uuid
import time
import hashlib
import base64

from ecdsa import SigningKey
from ecdsa.util import sigencode_der

bundle_id = 'com.myapp'
key_id = 'XWSXTGQVX2'
product = 'com.myapp.product.a'
offer = 'REFERENCE_CODE' # This is the code set in ASC
application_username = 'user_name' # Should be the same you use when
                                   # making purchases
nonce = uuid.uuid4()
timestamp = int(round(time.time() * 1000))

payload = '\u2063'.join([bundle_id,
                         key_id,
                         product,
                         offer,
                         application_username,
                         str(nonce), # Should be lower case
                         str(timestamp)])

# Read the key file
with open('cert.der', 'rb') as myfile:
  der = myfile.read()

signing_key = SigningKey.from_der(der)

signature = signing_key.sign(payload.encode('utf-8'),
                             hashfunc=hashlib.sha256,
                             sigencode=sigencode_der)
encoded_signature = base64.b64encode(signature)

print(str(encoded_signature, 'utf-8'), str(nonce), str(timestamp), key_id)
This is just a proof of concept. You will want this on your server and perhaps have some logic to determine, for a given user, the requested offer is appropriate. This forces the developer to use off device control for granting offers.
Once you’ve generated the signature, nonce and timestamp send these along with the key_id back to your app where we can create an SKPaymentDiscount.
Using the values generated on our server, we can now initialize an ISN_SKPaymentDiscount. This is probably the simplest step, just call the init method with the values generated by your server. Ensure that the values you receive back from the server are cast to the correct Cocoa types before passing on to the init method, otherwise, it may fail silently (this cost me a day).
No matter the validity of the signature, the init will produce an ISN_SKPaymentDiscount.
- Applying the Offer
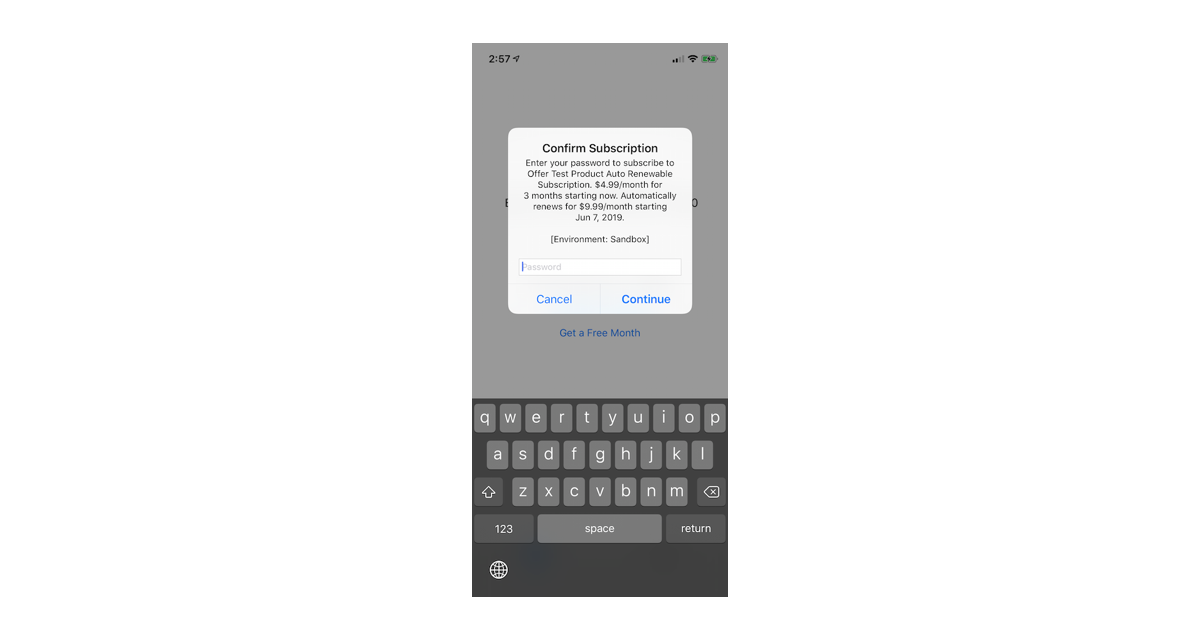
To apply an offer, you need to initiate a purchase with StoreKit just like a normal purchase, but you also apply your offer by using an ISN_SKMutablePayment and setting the PaymentDiscount property with the SKPaymentDiscount generated from your signature.
var payment = new ISN_SKMutablePayment(product);
payment.ApplicationUsername = appUserID;
payment.PaymentDiscount = discount;

ISN_SKPaymentQueue.AddPayment(payment);
If you did everything correctly, you should see an Apple generated pop-up explaining the offer. For instance, here is an offer for 1-month