The Semantic HVAC Tool Documentation provides a comprehensive guide for setting up and utilizing the tool. It introduces the tool's microservice-oriented architecture and details the setup process for each service. The documentation includes user flows for applying the tool in real-world and conceptual building models, highlighting its versatility in compliance checking with different BIM platforms. This guide is essential for understanding the tool's functionalities and effectively using it in various scenarios.
The Semantic HVAC Tool is a microservice-oriented web application, designed at the Technical University of Denmark's Department of Mechanical Engineering to perform compliance checking using Semantic Web technologies. The tool features a four-layer architecture consisting of 5 services.
This layer employs a Graphical User Interface (GUI), developed using React, to offer an intuitive experience. Users can initiate tasks like conformance checking, hydraulic calculations, and view detailed results of these operations.
Acting as the nervous system of the application, this layer facilitates seamless communication between various services. It uses an orchestrator, developed with ExpressJS and NodeJS, to manage interactions between the presentation, business, and database layers.
This is where the application's intelligence resides. Divided into multiple microservices like the Capacity Service and Rule Service, it handles the core logic for HVAC design and rule compliance. These services are built using FastAPI and are responsible for essential tasks such as hydraulic calculations and conformance checks.
Underpinning the application, this layer uses a Jena Fuseki server to manage RDF data efficiently. It provides a robust foundation for storing and retrieving HVAC data, ensuring data integrity and facilitating advanced queries.
-
Capacity Service:
- Handles hydraulic calculations and pressure drop analyses for various HVAC components.
-
Rule Service:
- Ensures compliance with HVAC design rules and standards, providing validation reports and conformance checks.
-
Orchestrator Service:
- Coordinates the workflow between different services, ensuring smooth data flow and task execution.
-
Apache Jena Fuseki Database:
- Serves as the central repository for storing and managing HVAC system data, supporting complex queries for data retrieval and manipulation.
- Prerequisites: Python 3.8
- Installation:
- Clone the repository:
git clone https://github.com/Semantic-HVAC-Tool/Capacity-Service.git - Navigate to the directory:
cd Capacity-Service - Create and activate the virtual environment:
- Windows:
python38 -m venv venvandvenv\Scripts\activate - Linux/Mac:
python3.8 -m venv venvandsource venv/bin/activate
- Windows:
- Install requirements:
pip install -r requirements.txt - Start the service:
uvicorn server:app --reload
- Clone the repository:
- Prerequisites: Python 3.8
- Installation:
- Clone the repository:
git clone https://github.com/Semantic-HVAC-Tool/Rule-Service.git - Navigate to the directory
cd Rule-Service - Create and activate the virtual environment:
- Windows:
python38 -m venv venvandvenv\Scripts\activate - Linux/Mac:
python3.8 -m venv venvandsource venv/bin/activate
- Windows:
- Start the service:
uvicorn server:app --port 8080 --reload
- Clone the repository:
- Prerequisites: Node.js, Visual Studio Build Tools, Nodemon
- Installation:
- Clone the repository:
git clone https://github.com/Semantic-HVAC-Tool/Orchestrator-Service.git - Set up environment:
export PATH="/c/users/username/appData/local/programs/python/Python38:$PATH" - Install dependencies:
npm install - Start the service:
npm run dev
- Clone the repository:
- Prerequisites: Java 8, Apache Jena Fuseki (version 4.2.0)
- Installation:
- Download and configure Apache Jena Fuseki.
- Obtain the configuration file
ny-db.ttlfrom this GitHub repository. - Add the
ny-db.ttlfile to the configuration directory:yourPath\apache-jena-fuseki-4.2.0\run\configuration. - Update the
tdb2:locationpath in theny-db.ttlfile with your specific path. - Run the
fuseki-server.batfile to start the server. - Open your web browser and navigate to localhost:3030 to access the database interface.
- Prerequisites: Revit 2021, Revit Lookup, Visual Studio 2019
- Requirements: Orchestrator and Database services must be running.
- Steps:
- Set up the development environment in Visual Studio 2019.
- Add the RDF plugin to Revit by following this tutorial My First Revit Plug-in tutorial.
- Open the BIM model (available here).
- Run the plugin to convert BIM data using the parser, with Orchestrator and Database services active.
- Requirements: Database running on port 3030 (named ny-db) and the Data-model.ttl in the same folder.
- Steps:
- Clone the repository containing the
postDataToTriplestore.pyscript (link). - Create and activate the virtual environment:
- Windows:
python38 -m venv venvandvenv\Scripts\activate - Linux/Mac:
python3.8 -m venv venvandsource venv/bin/activate
- Install requirements:
pip install requests - Execute the script to upload data to the database, ensuring the database is correctly configured.
- Clone the repository containing the
- Prerequisites: Node.js
- Installation:
- Clone the repository:
git clone https://github.com/Semantic-HVAC-Tool/Client.git - Navigate and install dependencies:
cd clientand `npm install - Start the application:
npm start - Troubleshooting: If you encounter the error 0308010C:digital envelope, resolve it by setting an environment variable with git bash:
export NODE_OPTIONS=--openssl-legacy-provider, then runnpm startagain. - Access the UI at
localhost:3000/validationOverviewTable.
- Clone the repository:
This section showcases the practical application of the Semantic HVAC Tool, as explored in the journal paper "Efficient Management and Compliance Check of HVAC Information in the Building Design Phase Using Semantic Web Technologies," currently under review at the Semantic Web Journal. It involves a detailed sequence of steps, from downloading and opening the BIM model in Revit to performing multifaceted validation checks to pinpoint and rectify HVAC-related violations within the BIM model.
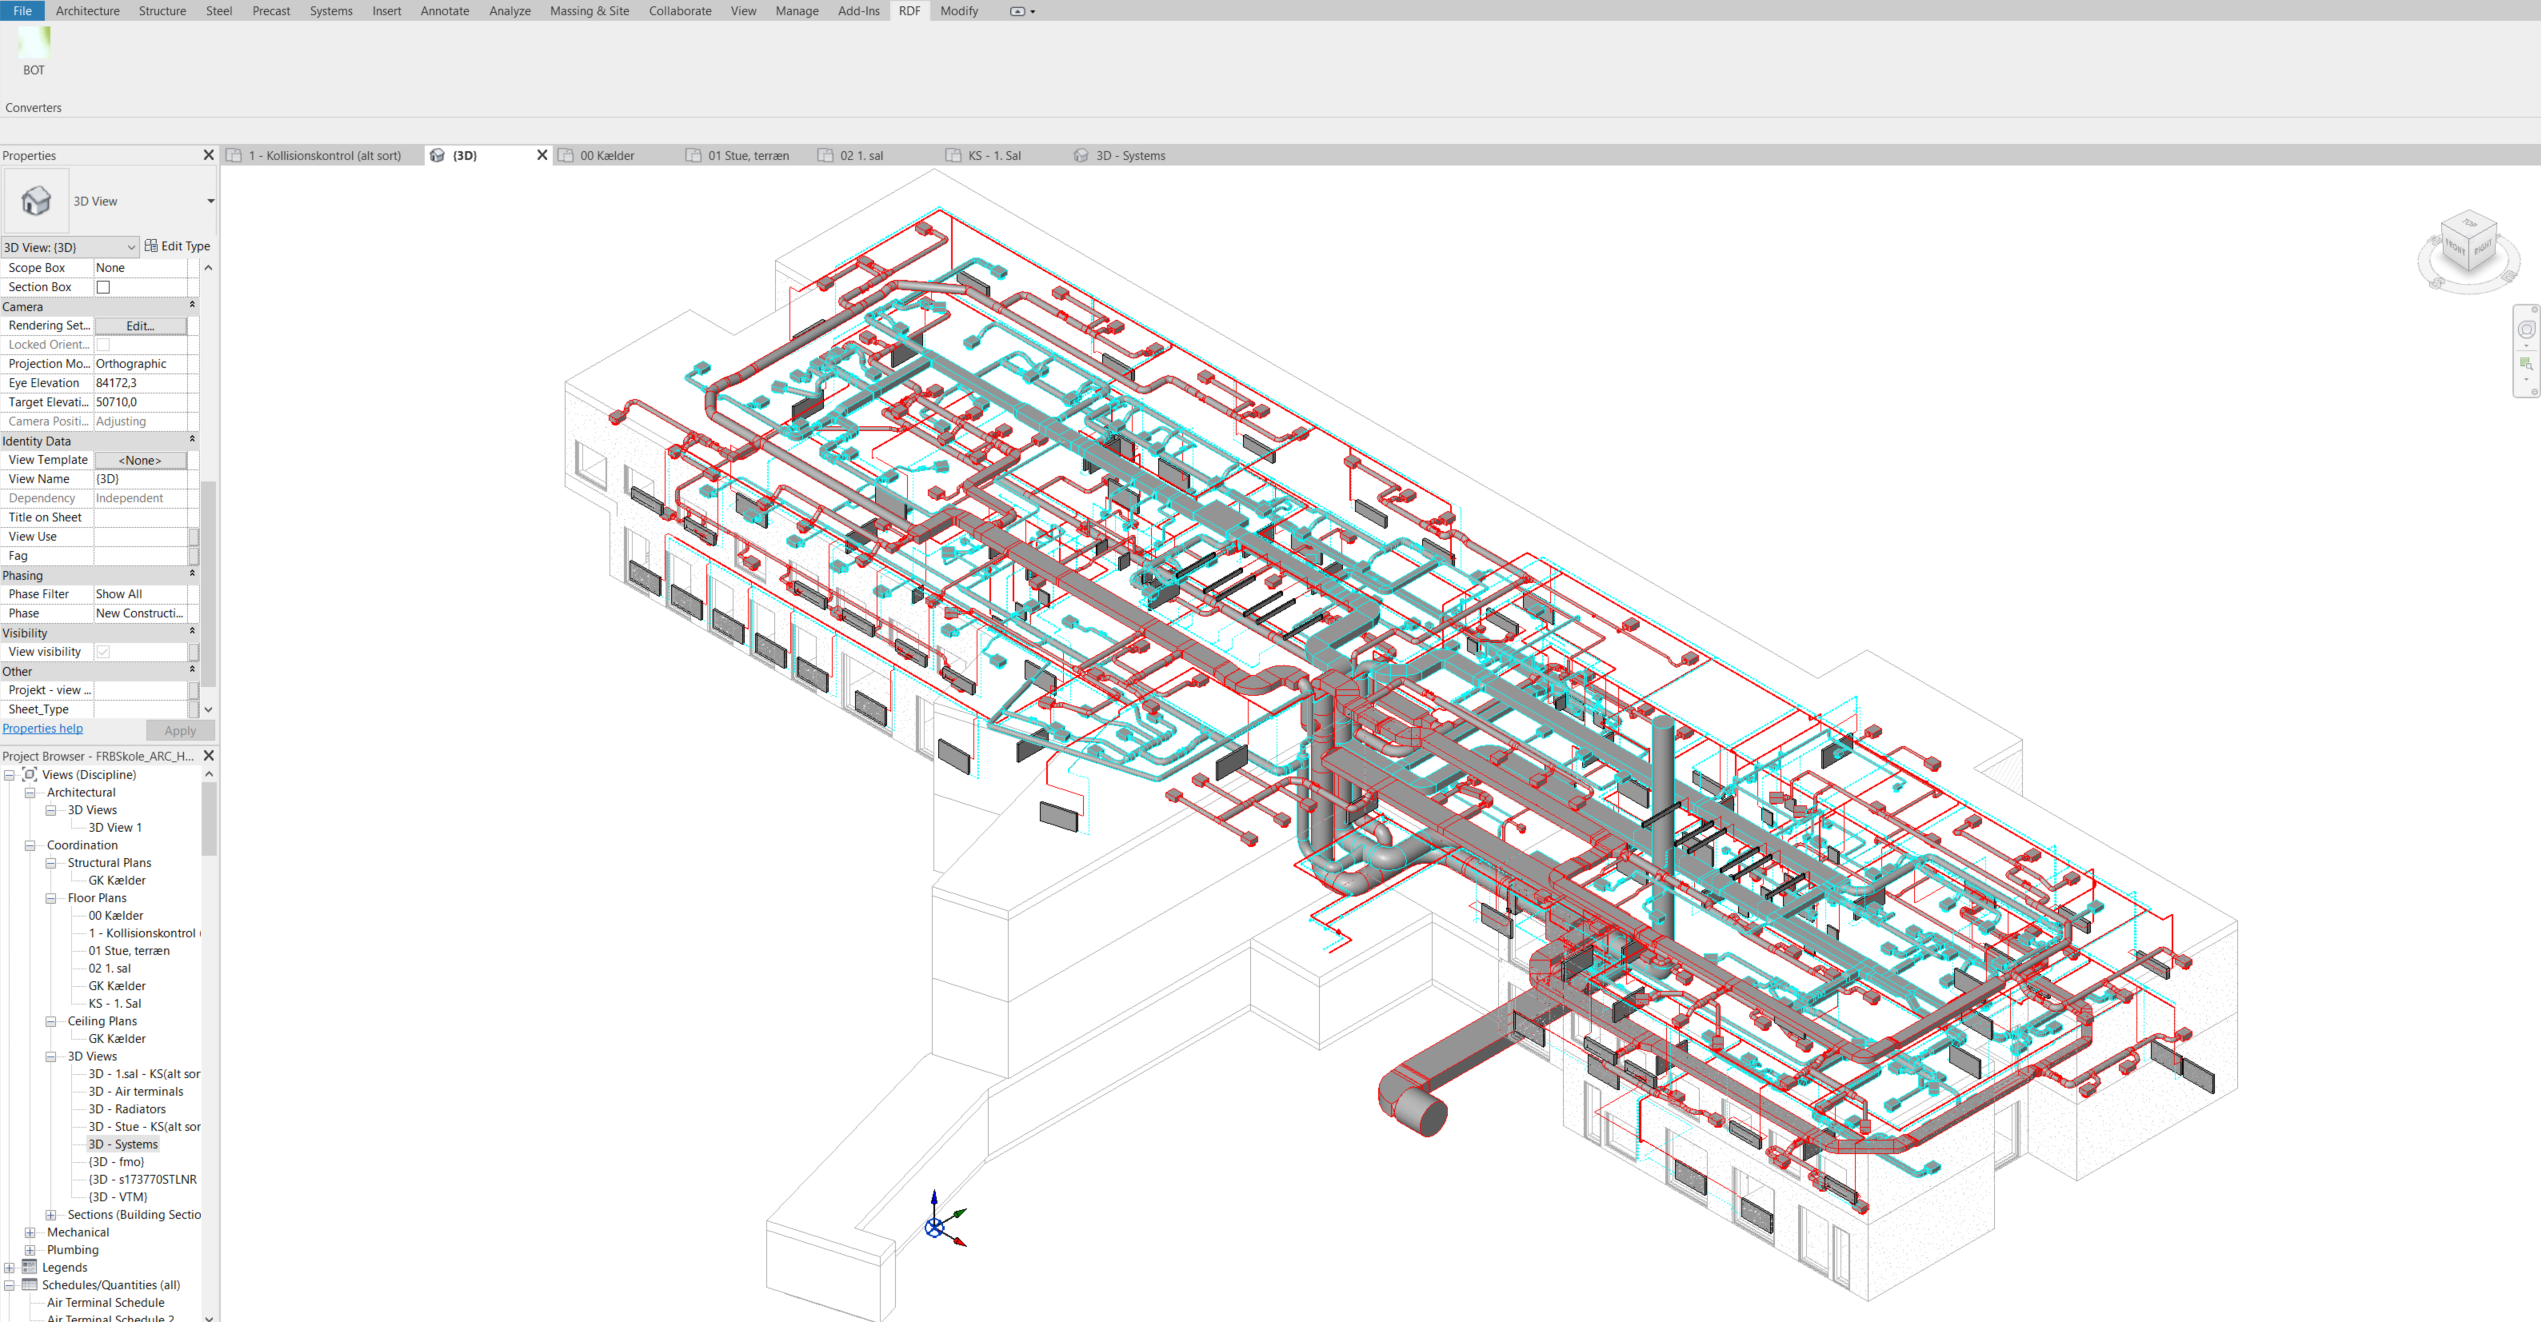
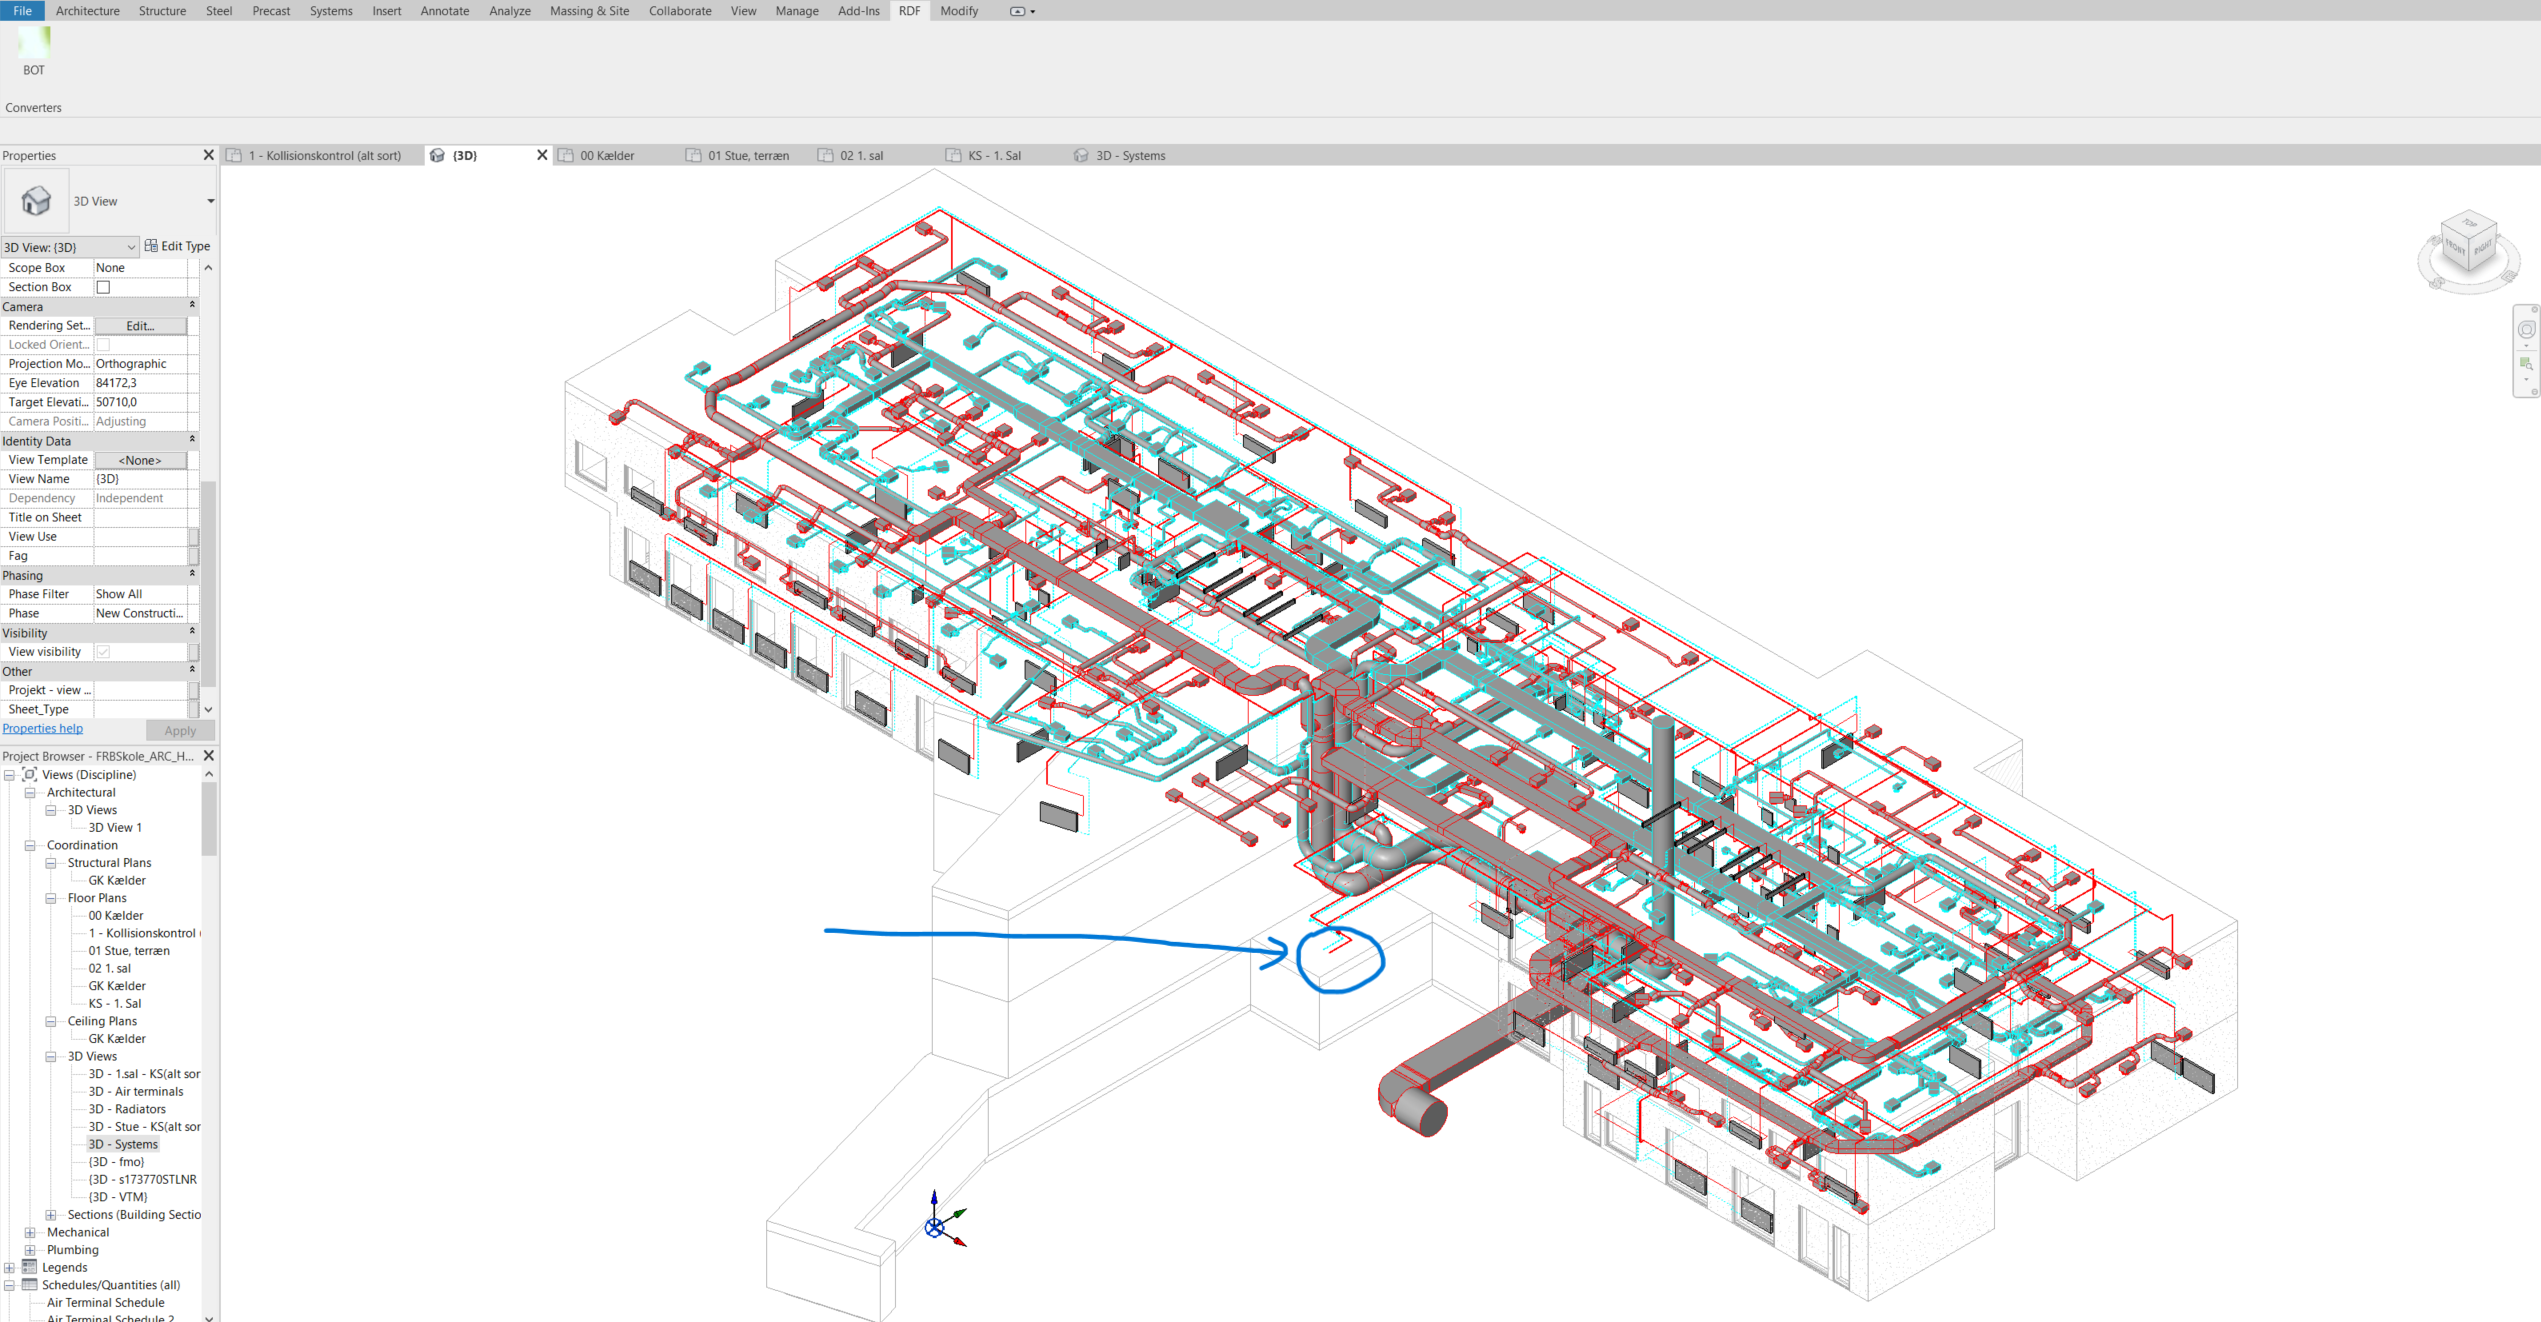
The initial step in the user flow involves parsing BIM data into a triplestore using Apache Jena Fuseki, facilitated by FSO, FPO, and BOT ontologies. This process starts by downloading the BIM model from the following GitHub link: BIM Model, and opening it in Revit. In Revit's UI, there's a Ribbon tab labeled "RDF" containing a tool named "BOT." By clicking on this tool, the parser is executed, BIM data is converted into RDF format, encompassing FSO, FPO, and BOT instances, and subsequently transferring them into the database. The accompanying image illustrates the full BIM model, including the building and HVAC components, made partially transparent for clearer visibility of the HVAC elements. This depiction highlights the complexity of an HVAC model in real-world building projects.
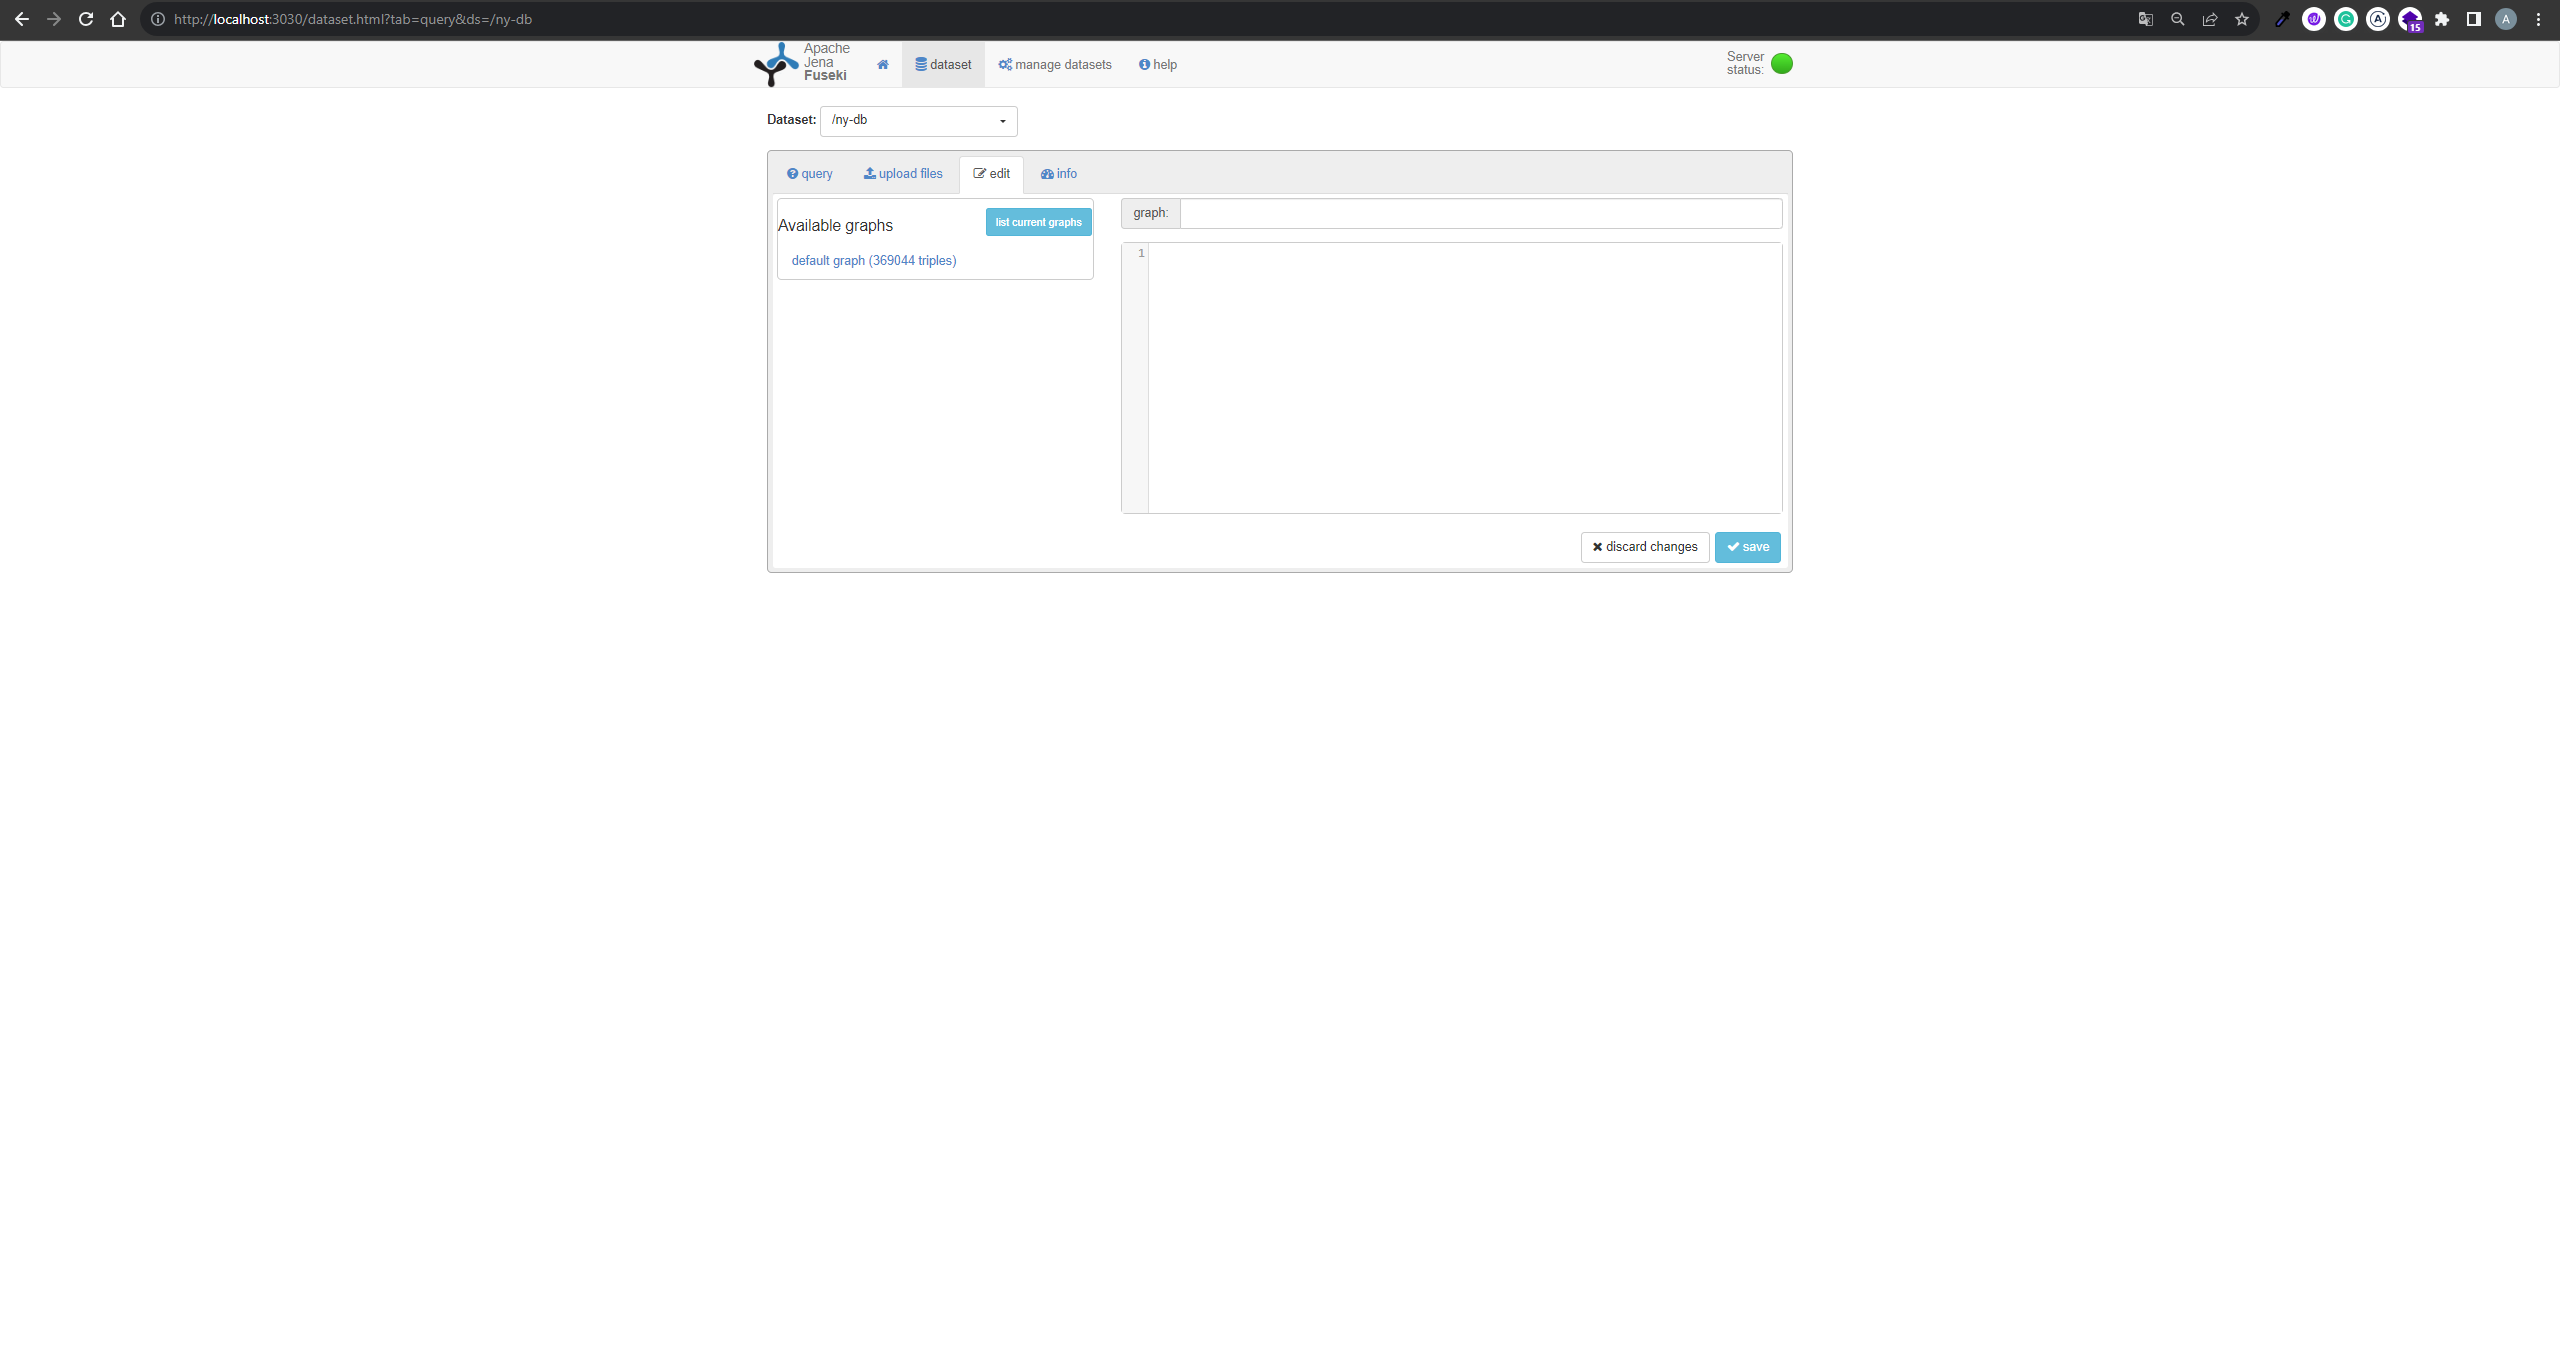
To verify that all data has been correctly transferred to the triplestore, navigate to localhost:3030. Here, you can check that 369,044 triples have been successfully transferred.
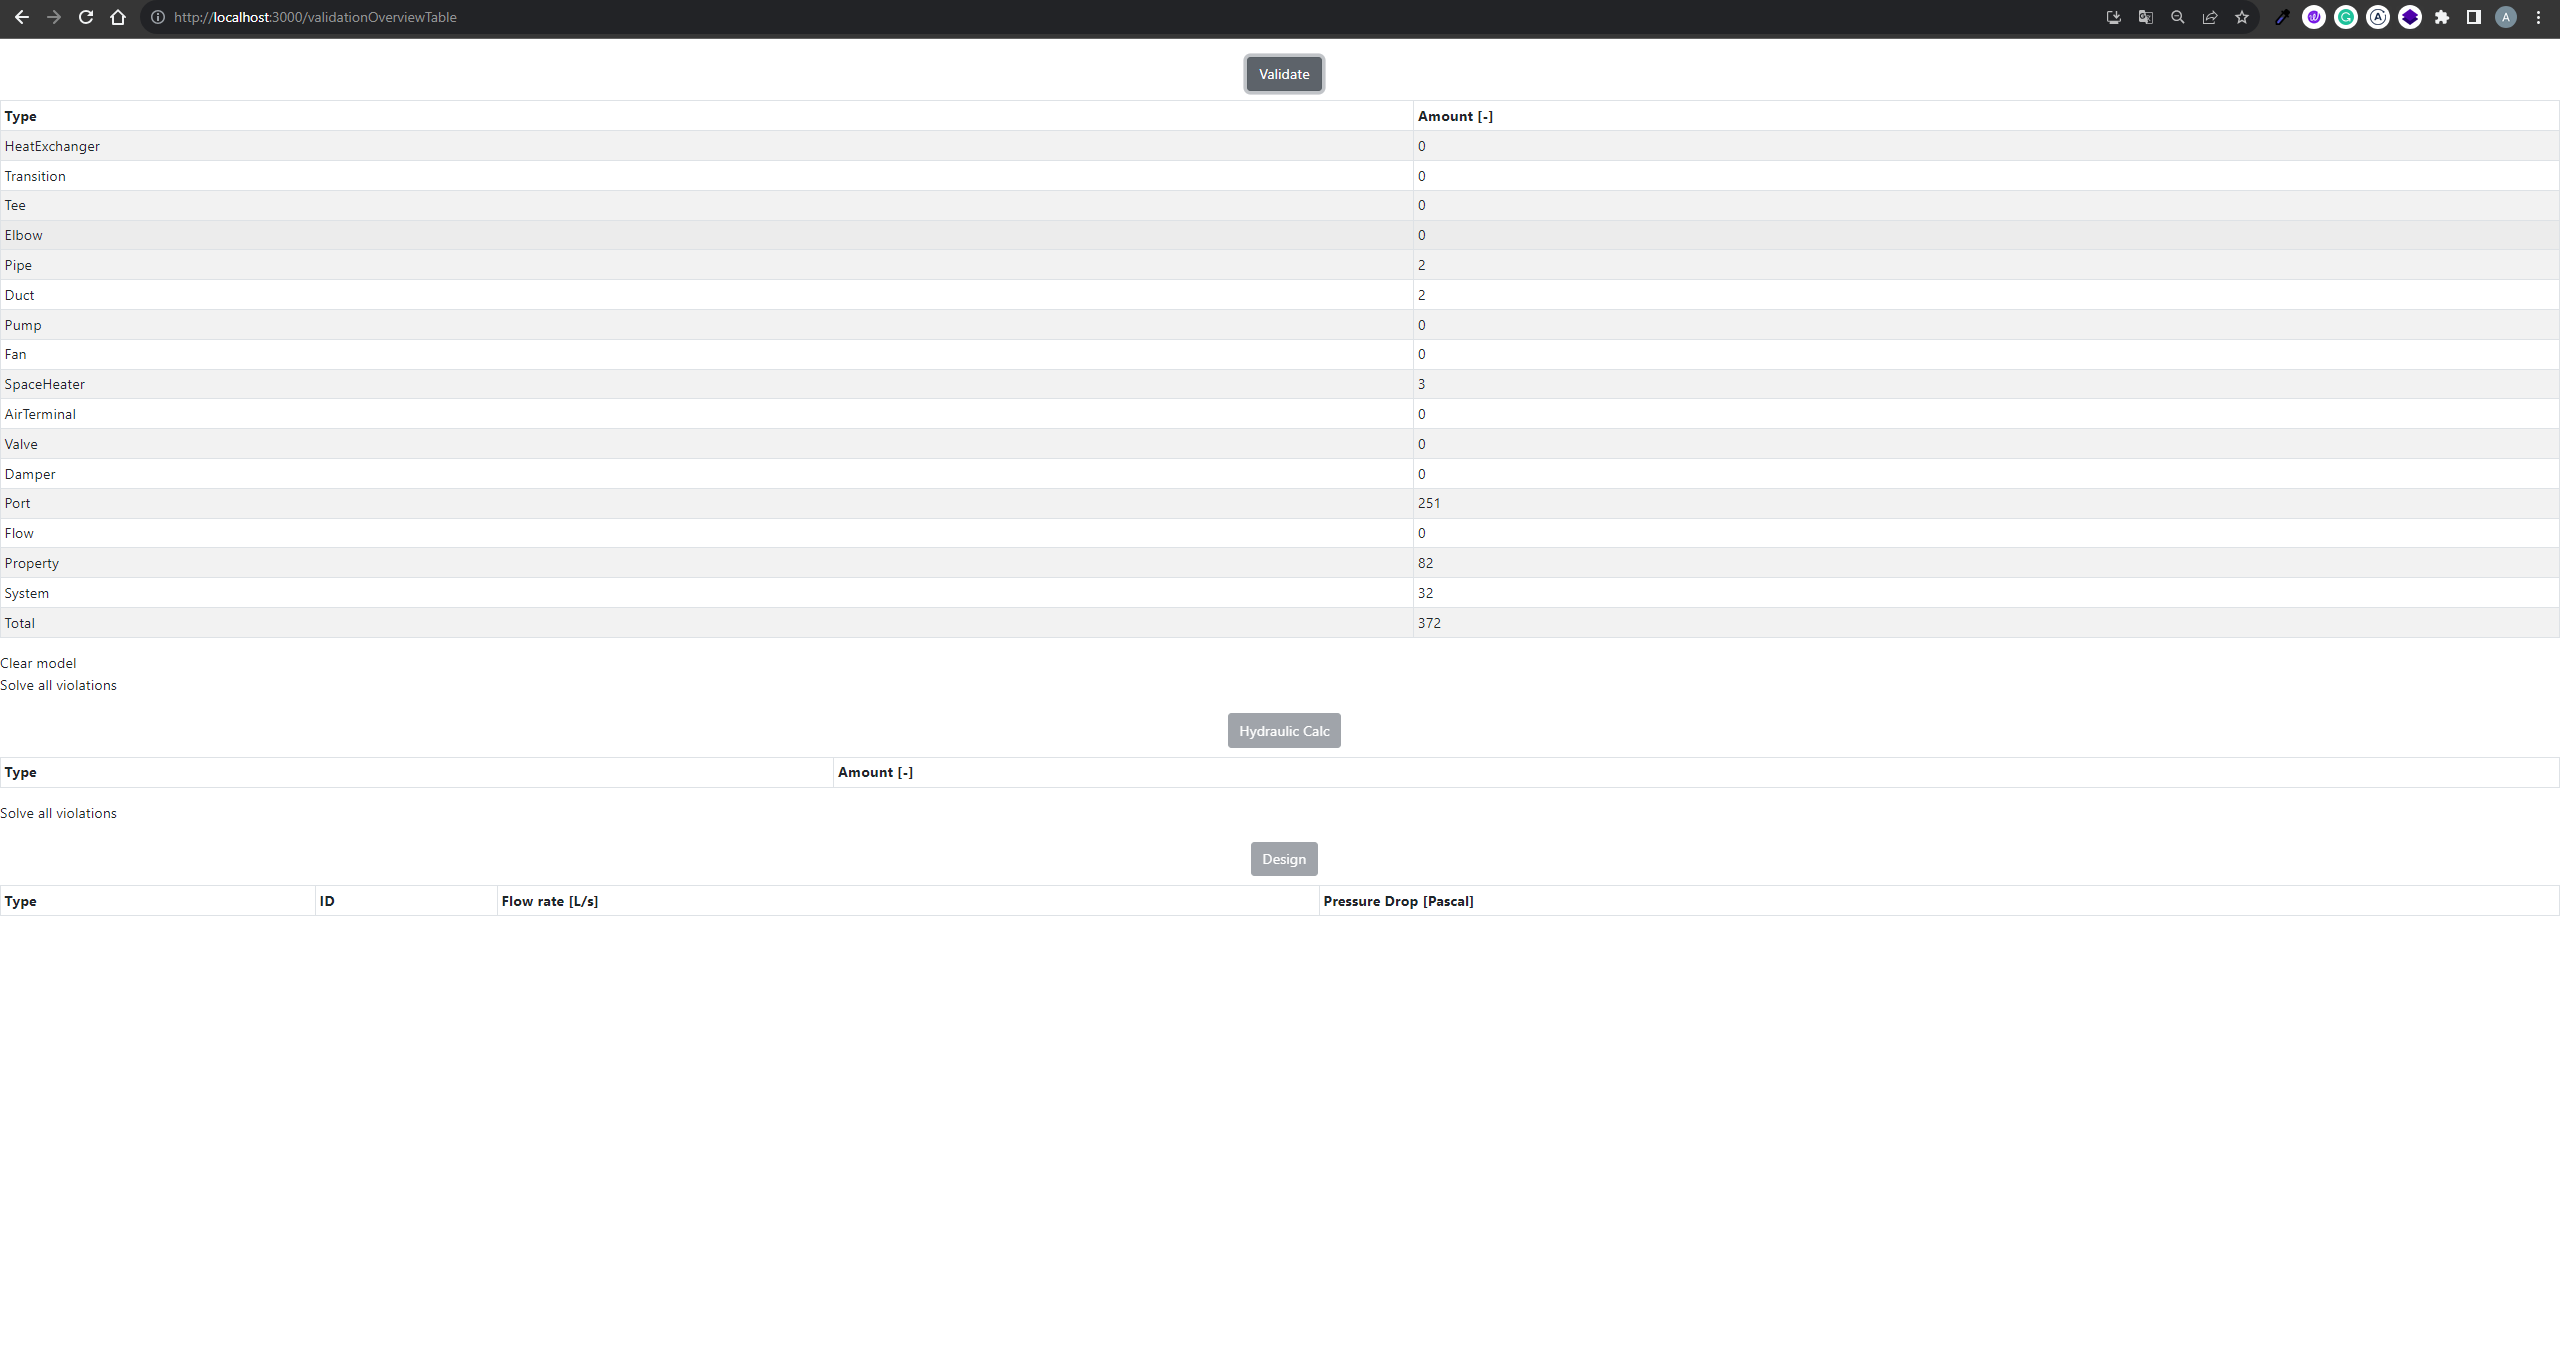
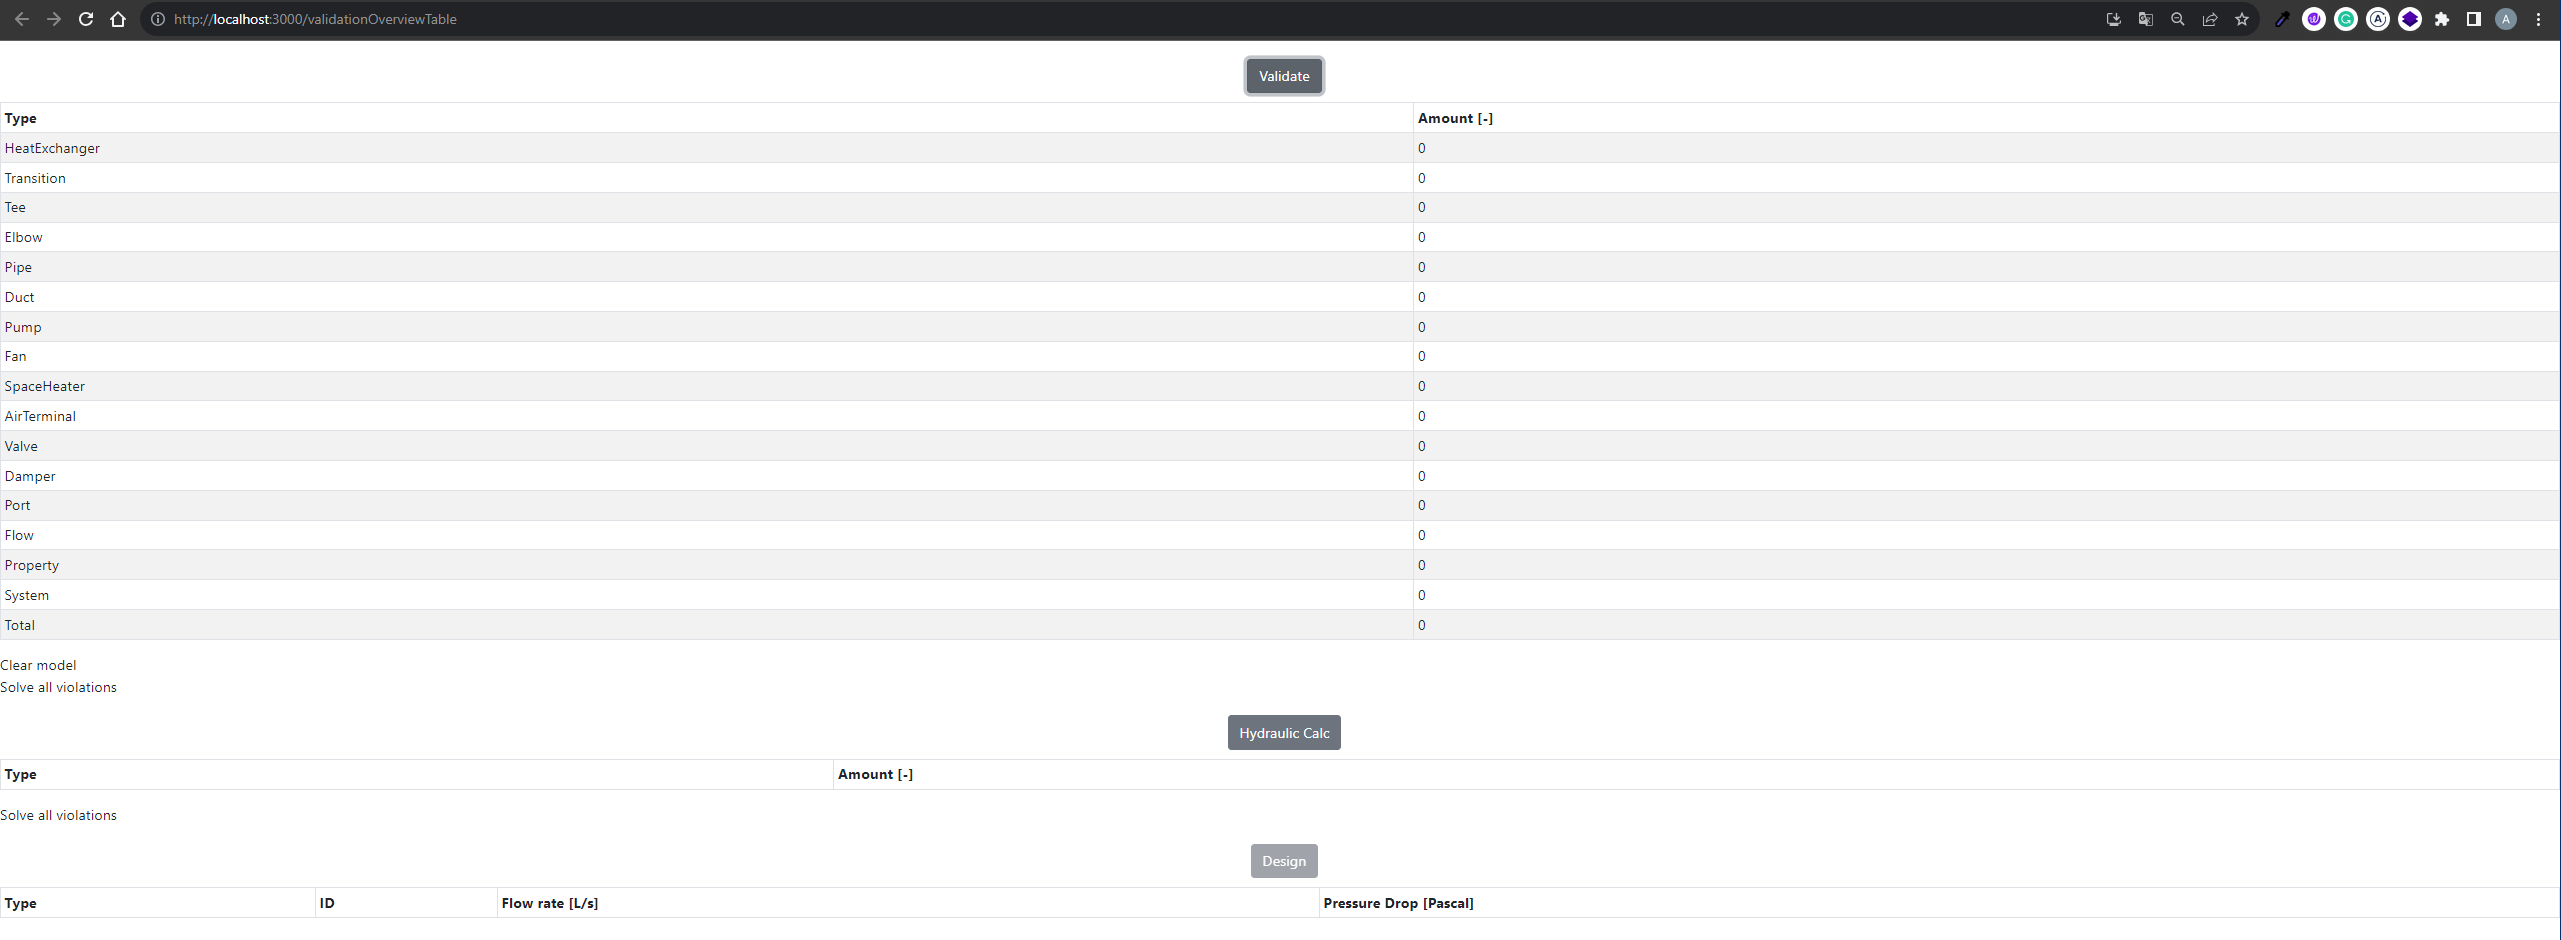
Once all triples are transferred, we can perform the first validation check at localhost:3000/validationOverviewTable. The UI is intentionally minimalistic, focusing on practicality over aesthetics. The UI enables users to efficiently carry out critical functions like validation checks, overviewing violations, conducting hydraulic calculations, and designing the capacity of flow-moving devices utlizing Semantic Web technologies.
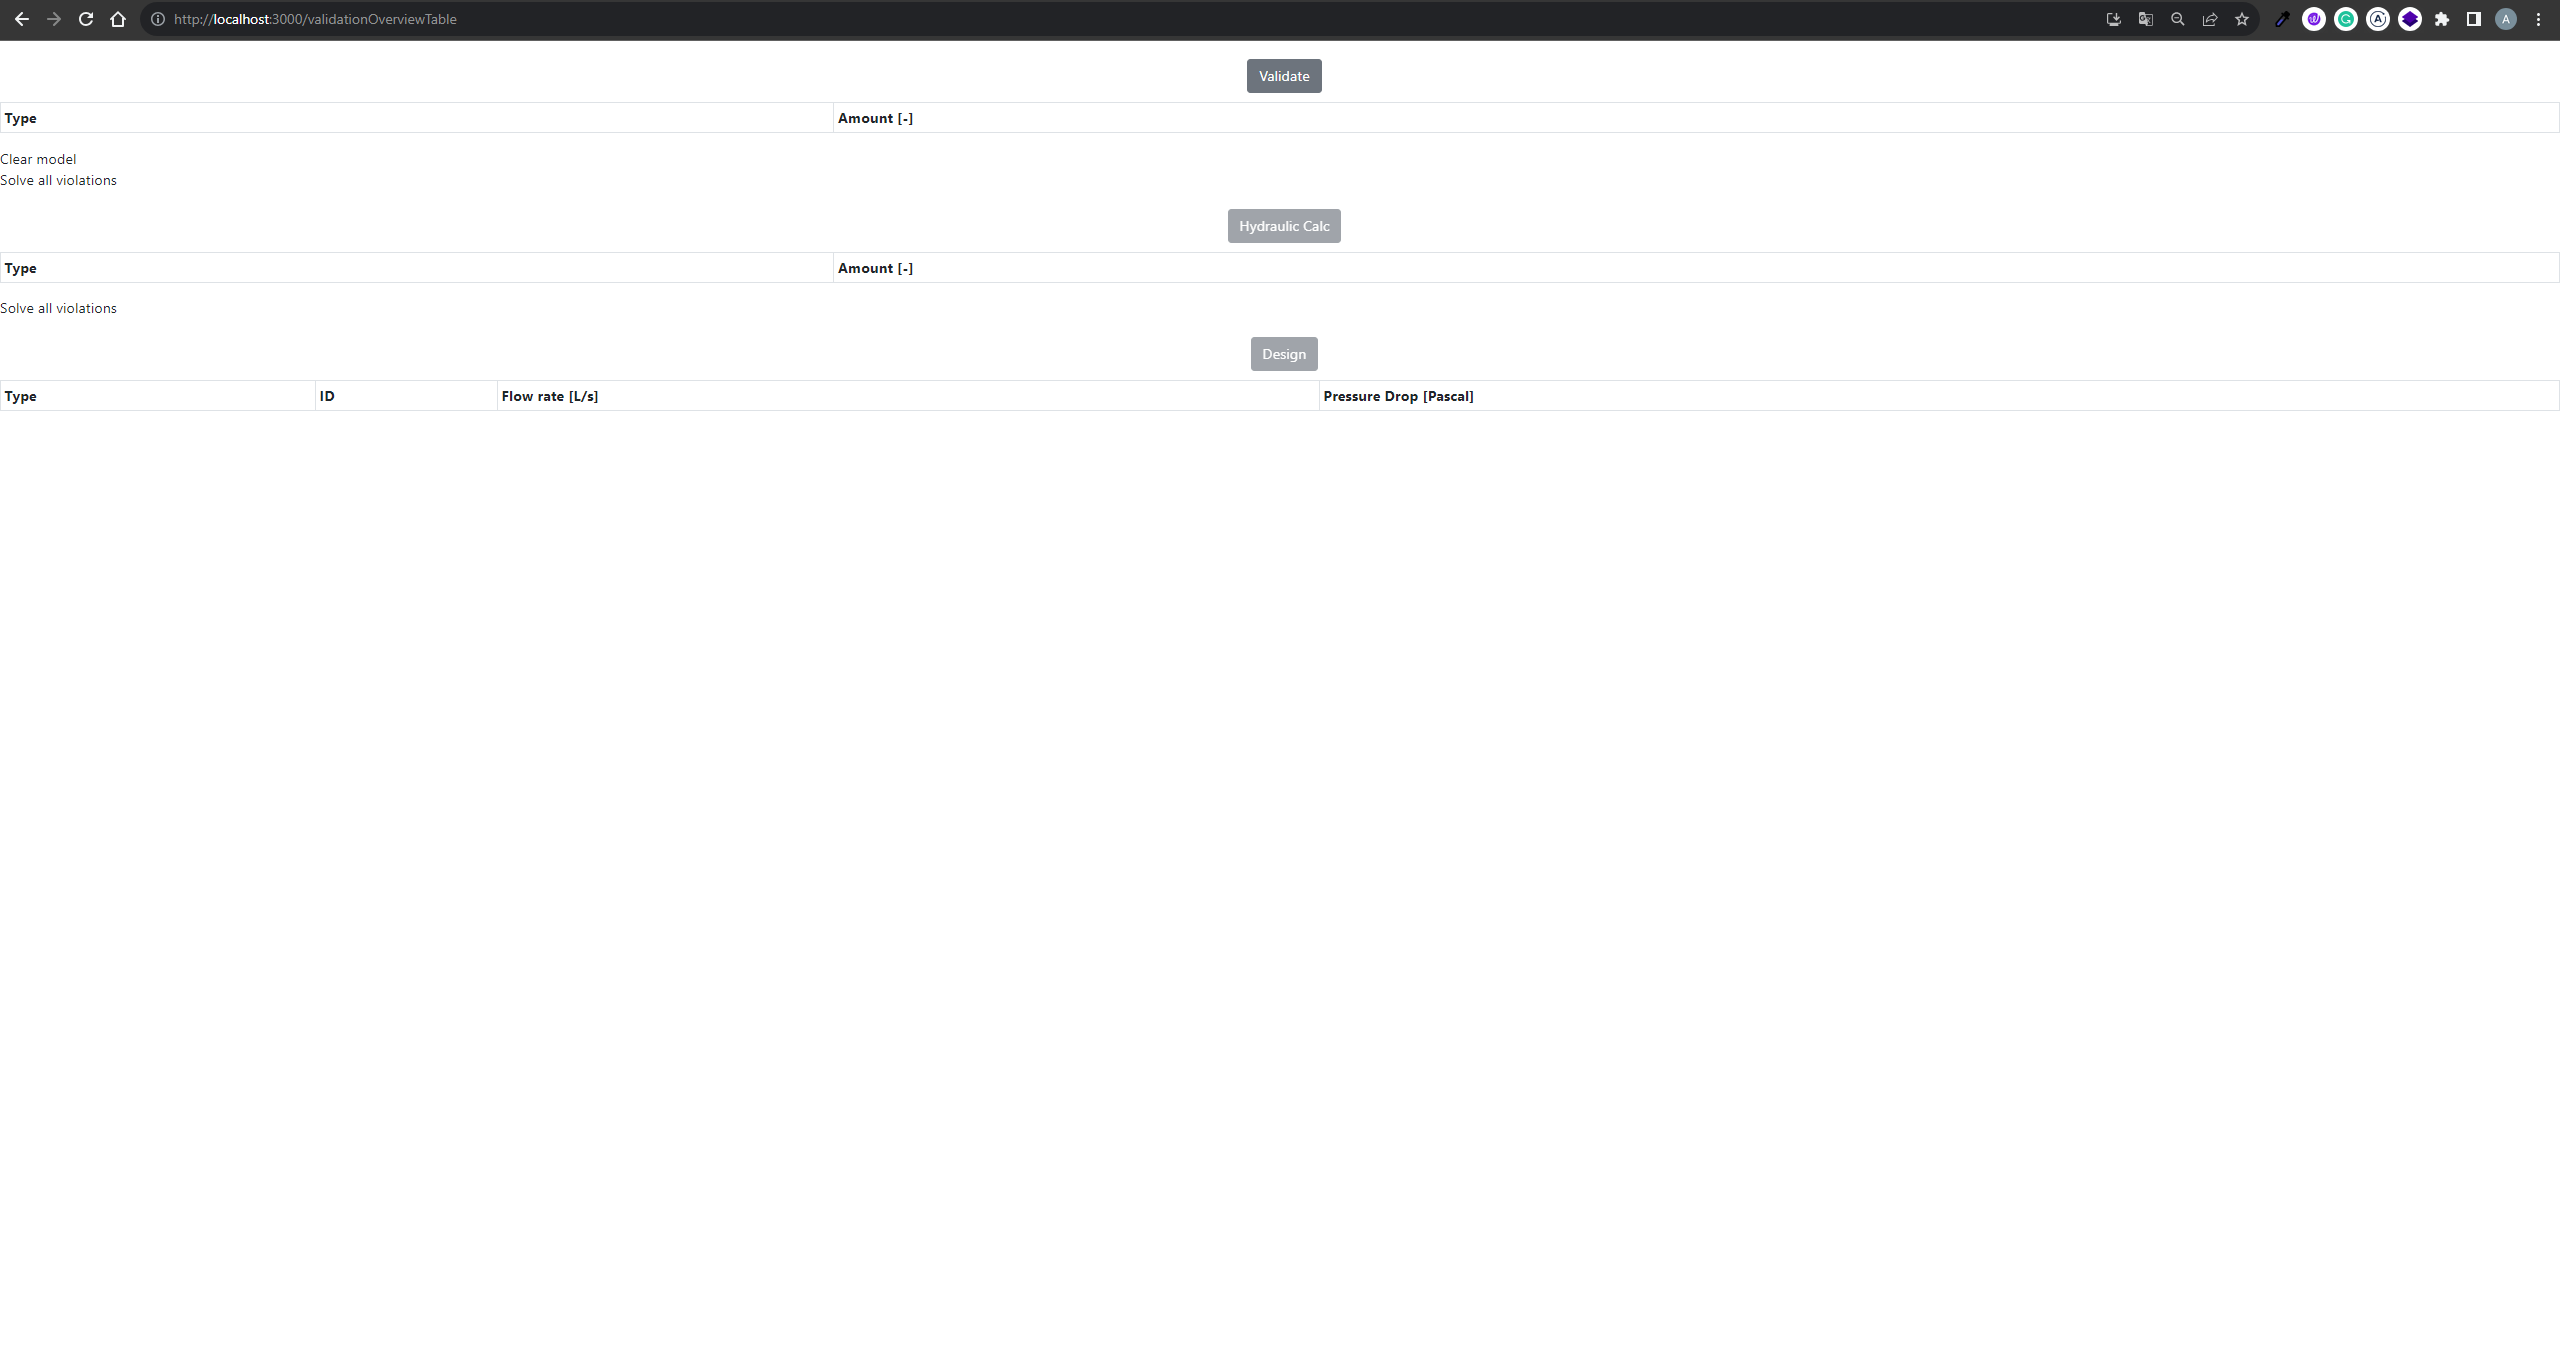
Clicking "Validate" in the Semantic HVAC Tool initiates the first validation check, producing an overview table that categorizes violations into HVAC component types. This table not only provides a total count of 372 violations but also details how many violations each specific HVAC component type has committed. This structured categorization is important to pinpoint areas within the BIM model that need attention.
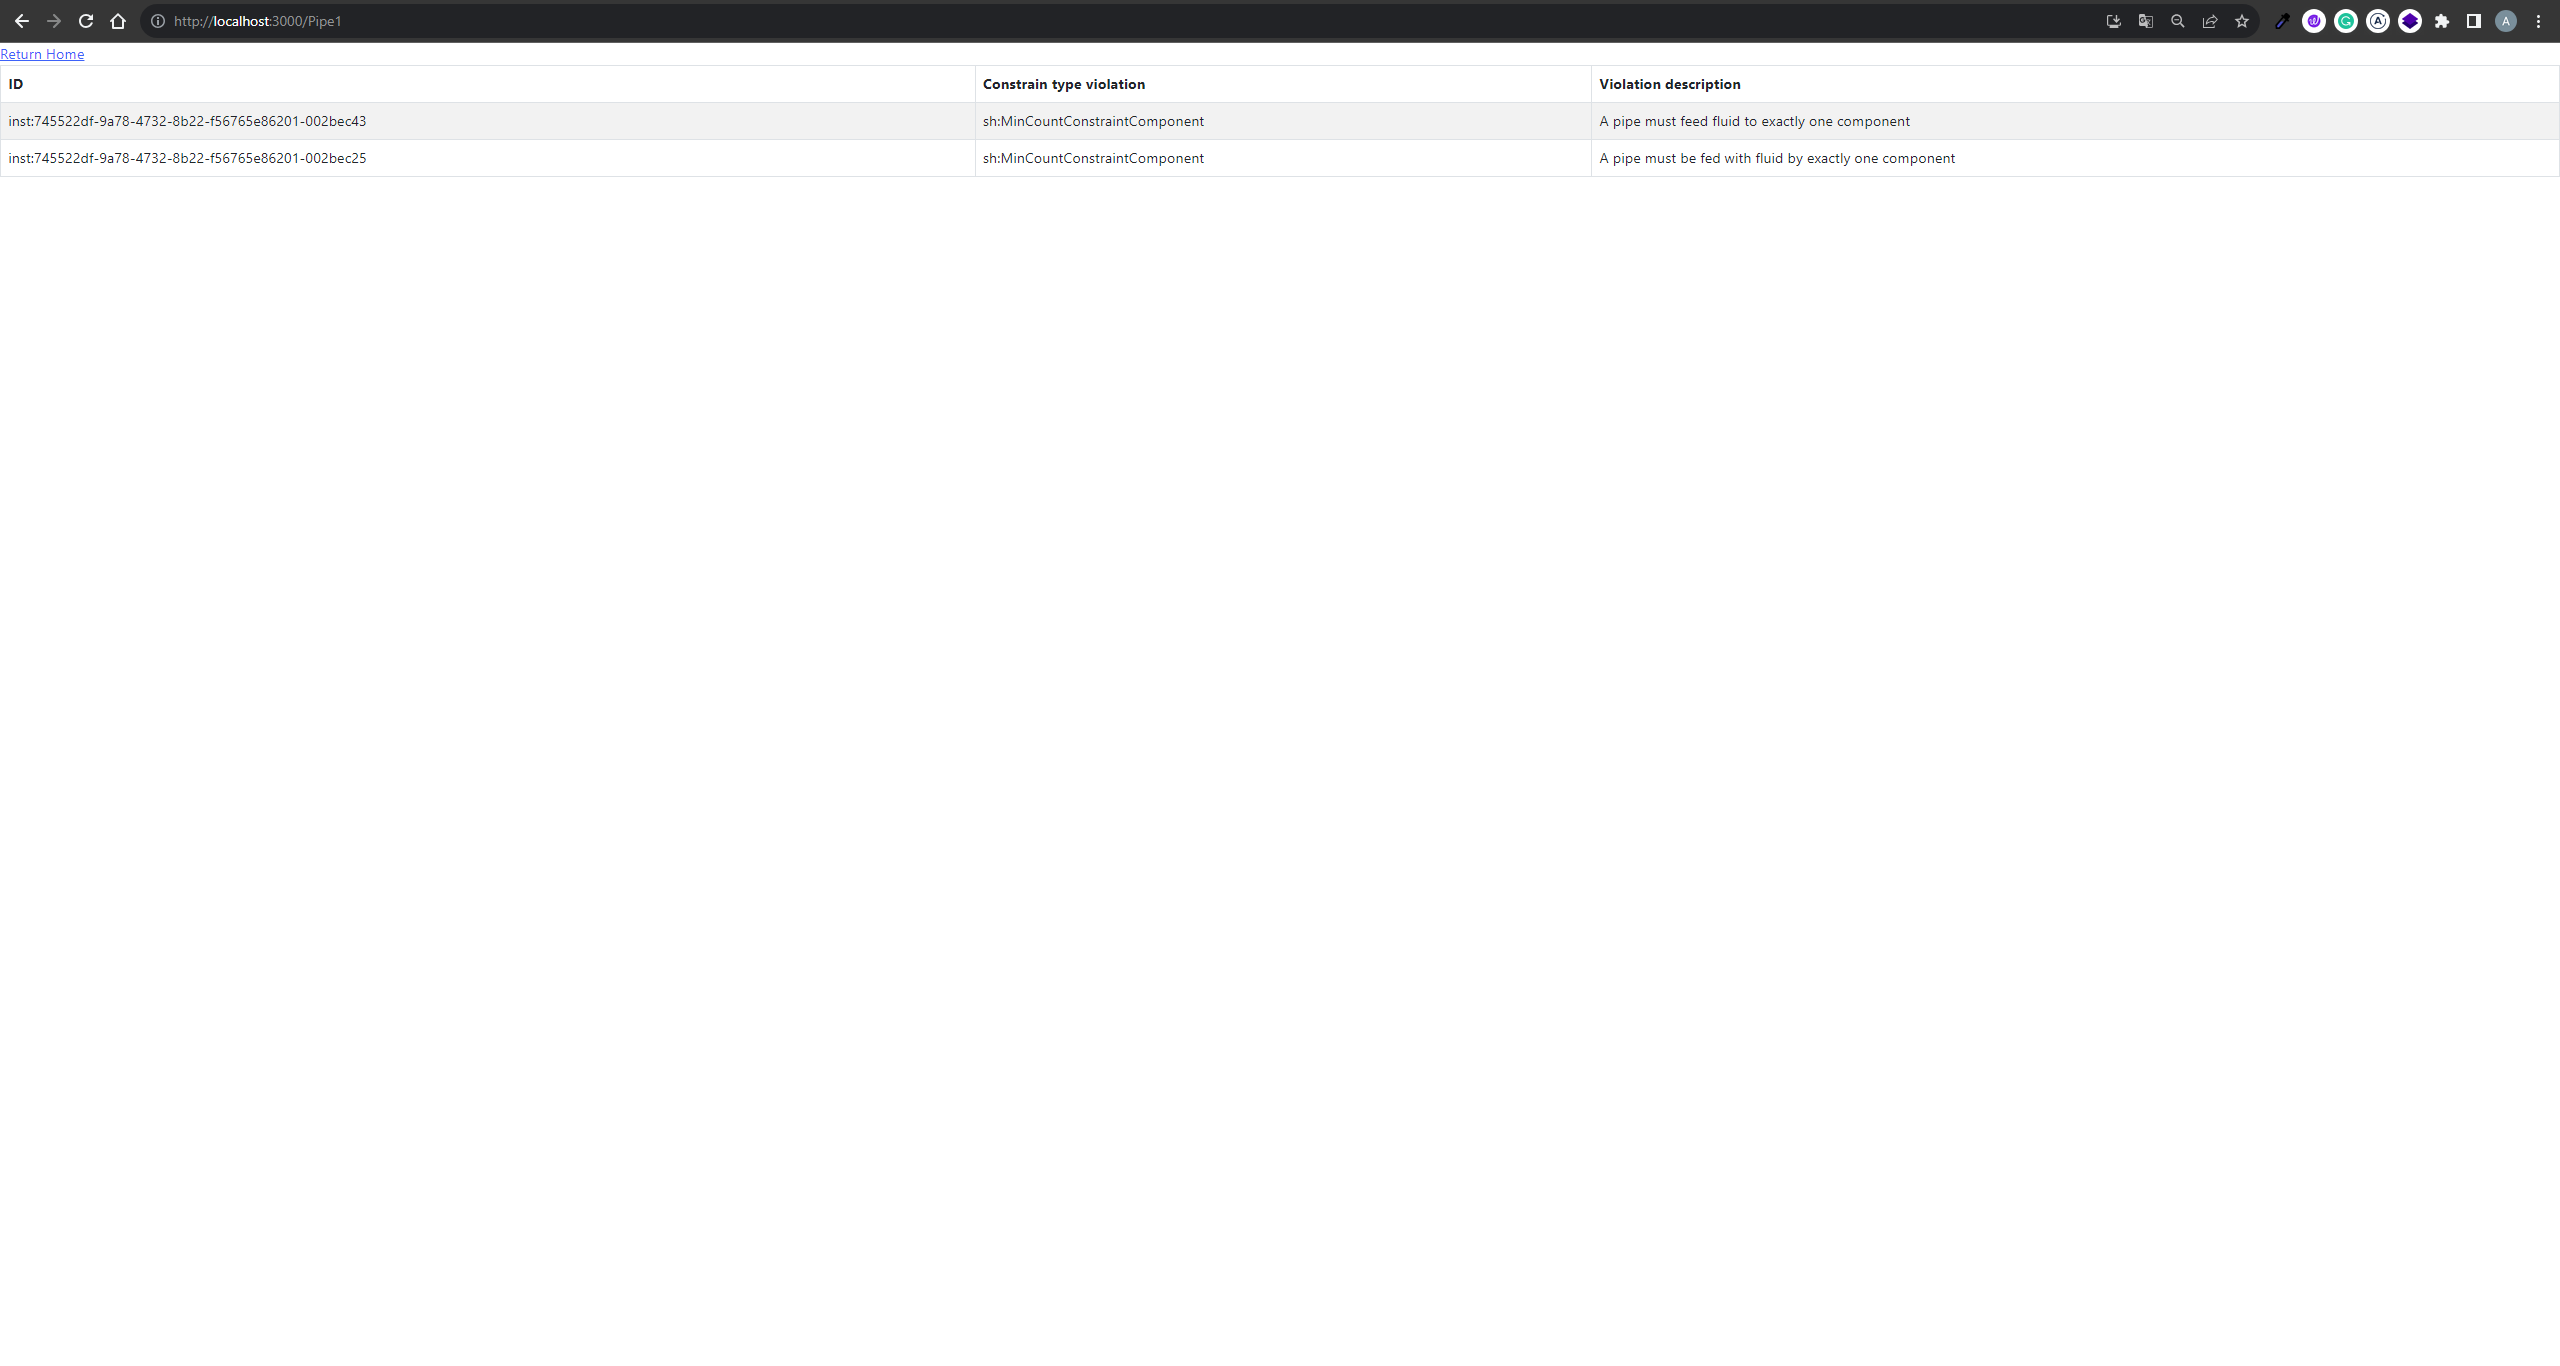
Now, we have the option to click on the "Pipe" row in the first table . This action redirects to a new page, which specifically identifies which instances have violatioted and the reasons behind these violations. This detailed breakdown facilitates a deeper understanding of the violations associated with the fso:Pipe components, allowing for targeted and effective resolutions.
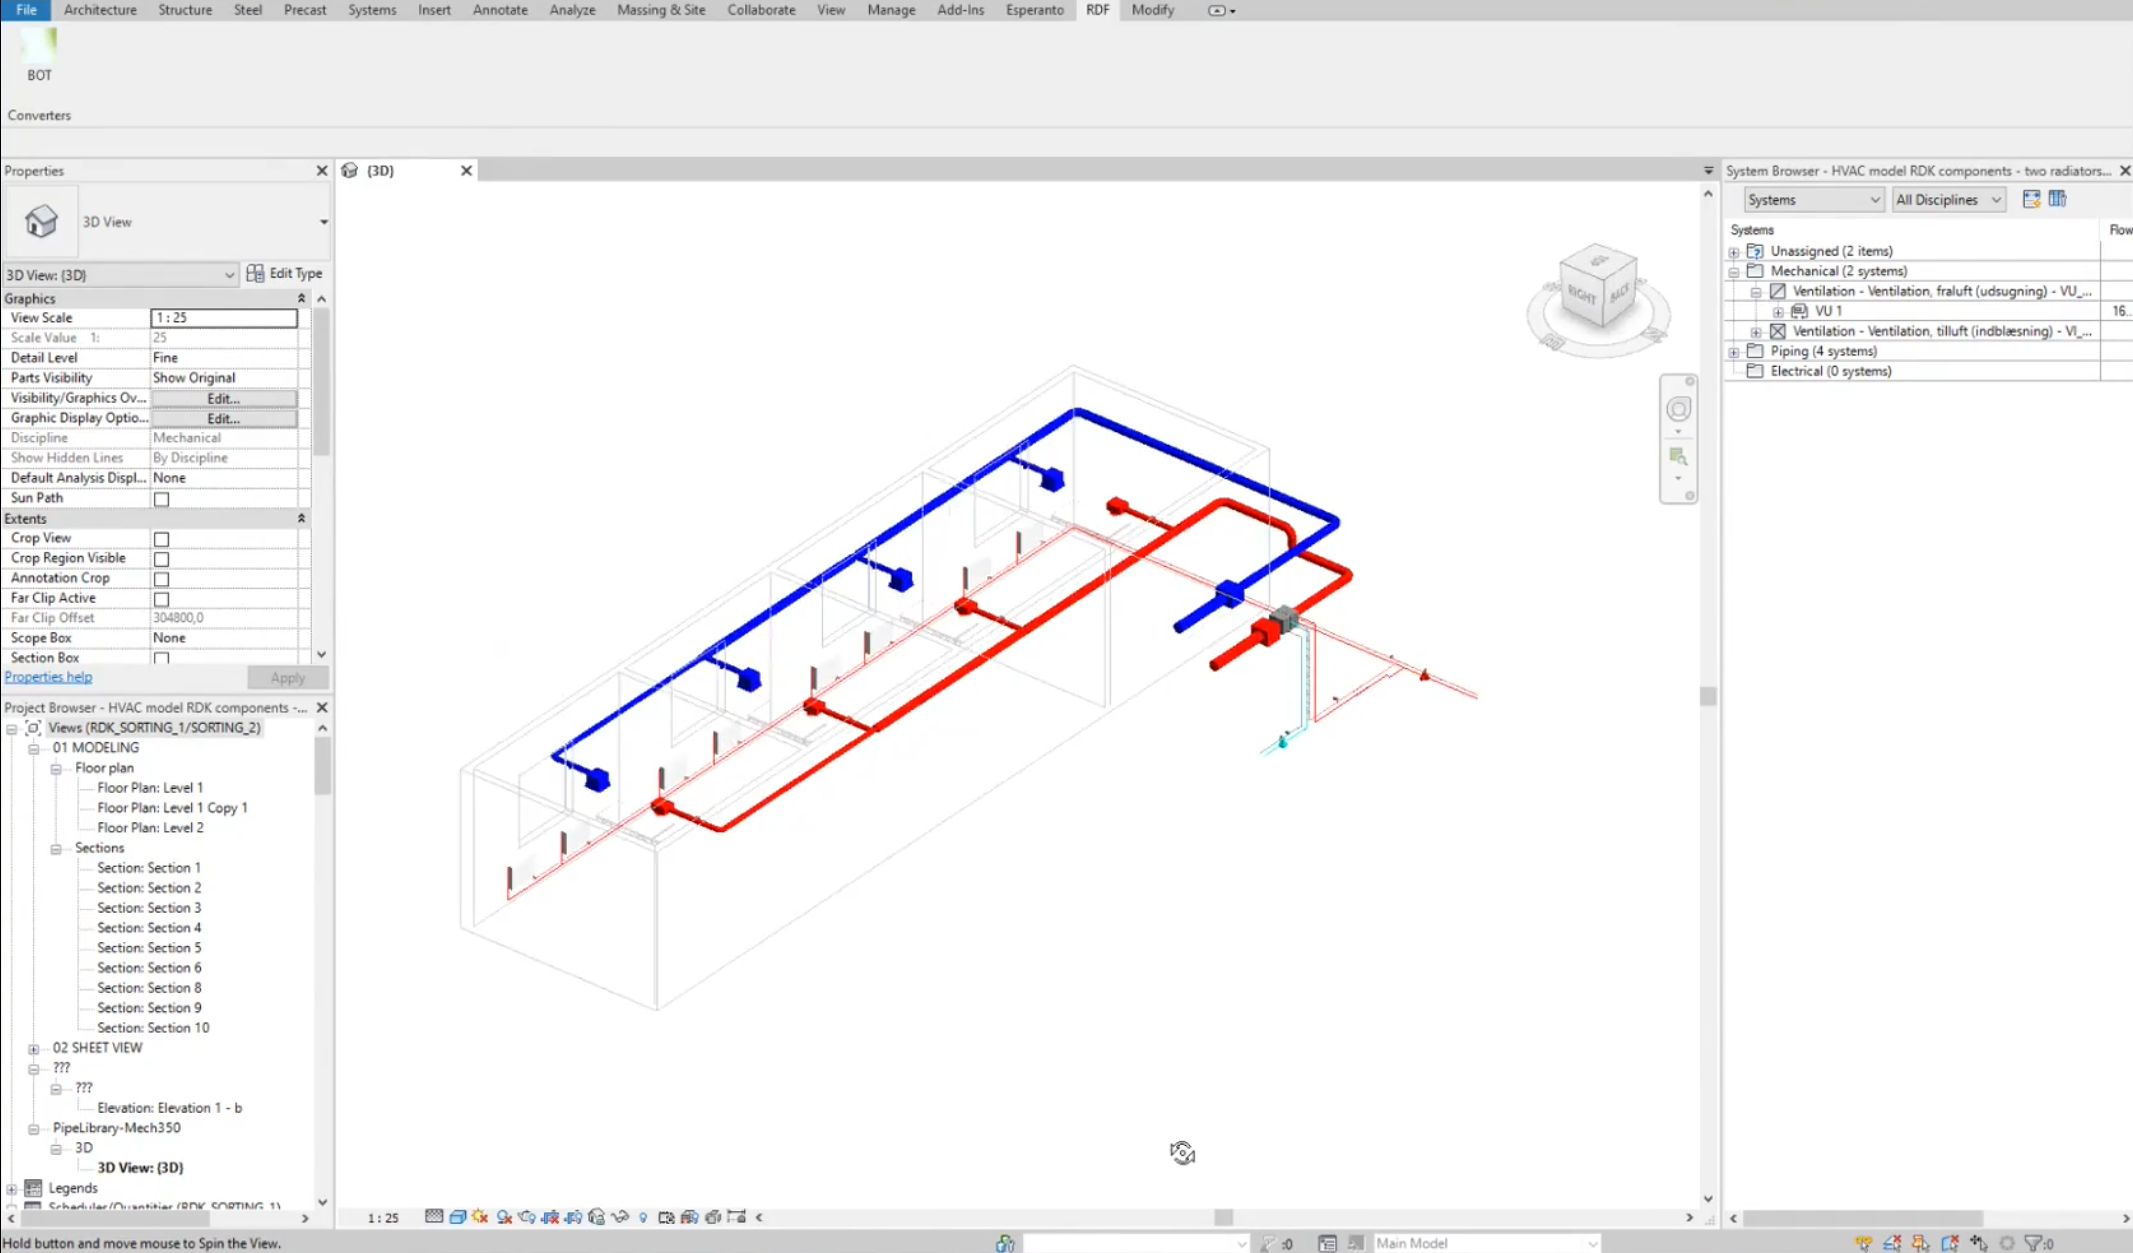
We can return to the BIM model in Revit and locate instances causing violations using their UniqueID numbers. Upon examination, it's found that the heating pipes leading to and from the building, depicted in the image below, are open-ended. Since open ends in a water-based heating system are not permissible in hydraulic calculations, this results in a violation. To rectify this error, caps can be added to the pipe ends to seal them. Correcting this, and rerunning the validation model, reduces the number of violations from 2 to 0.
We can also click on the "SpaceHeater" row in the overview table to access a detailed description of which fso:SpaceHeater instances are violating and the reasons for these violations. The detailed table provides an in-depth view of each specific violation, enabling a thorough understanding of violations related to spaceheater components in the BIM model.
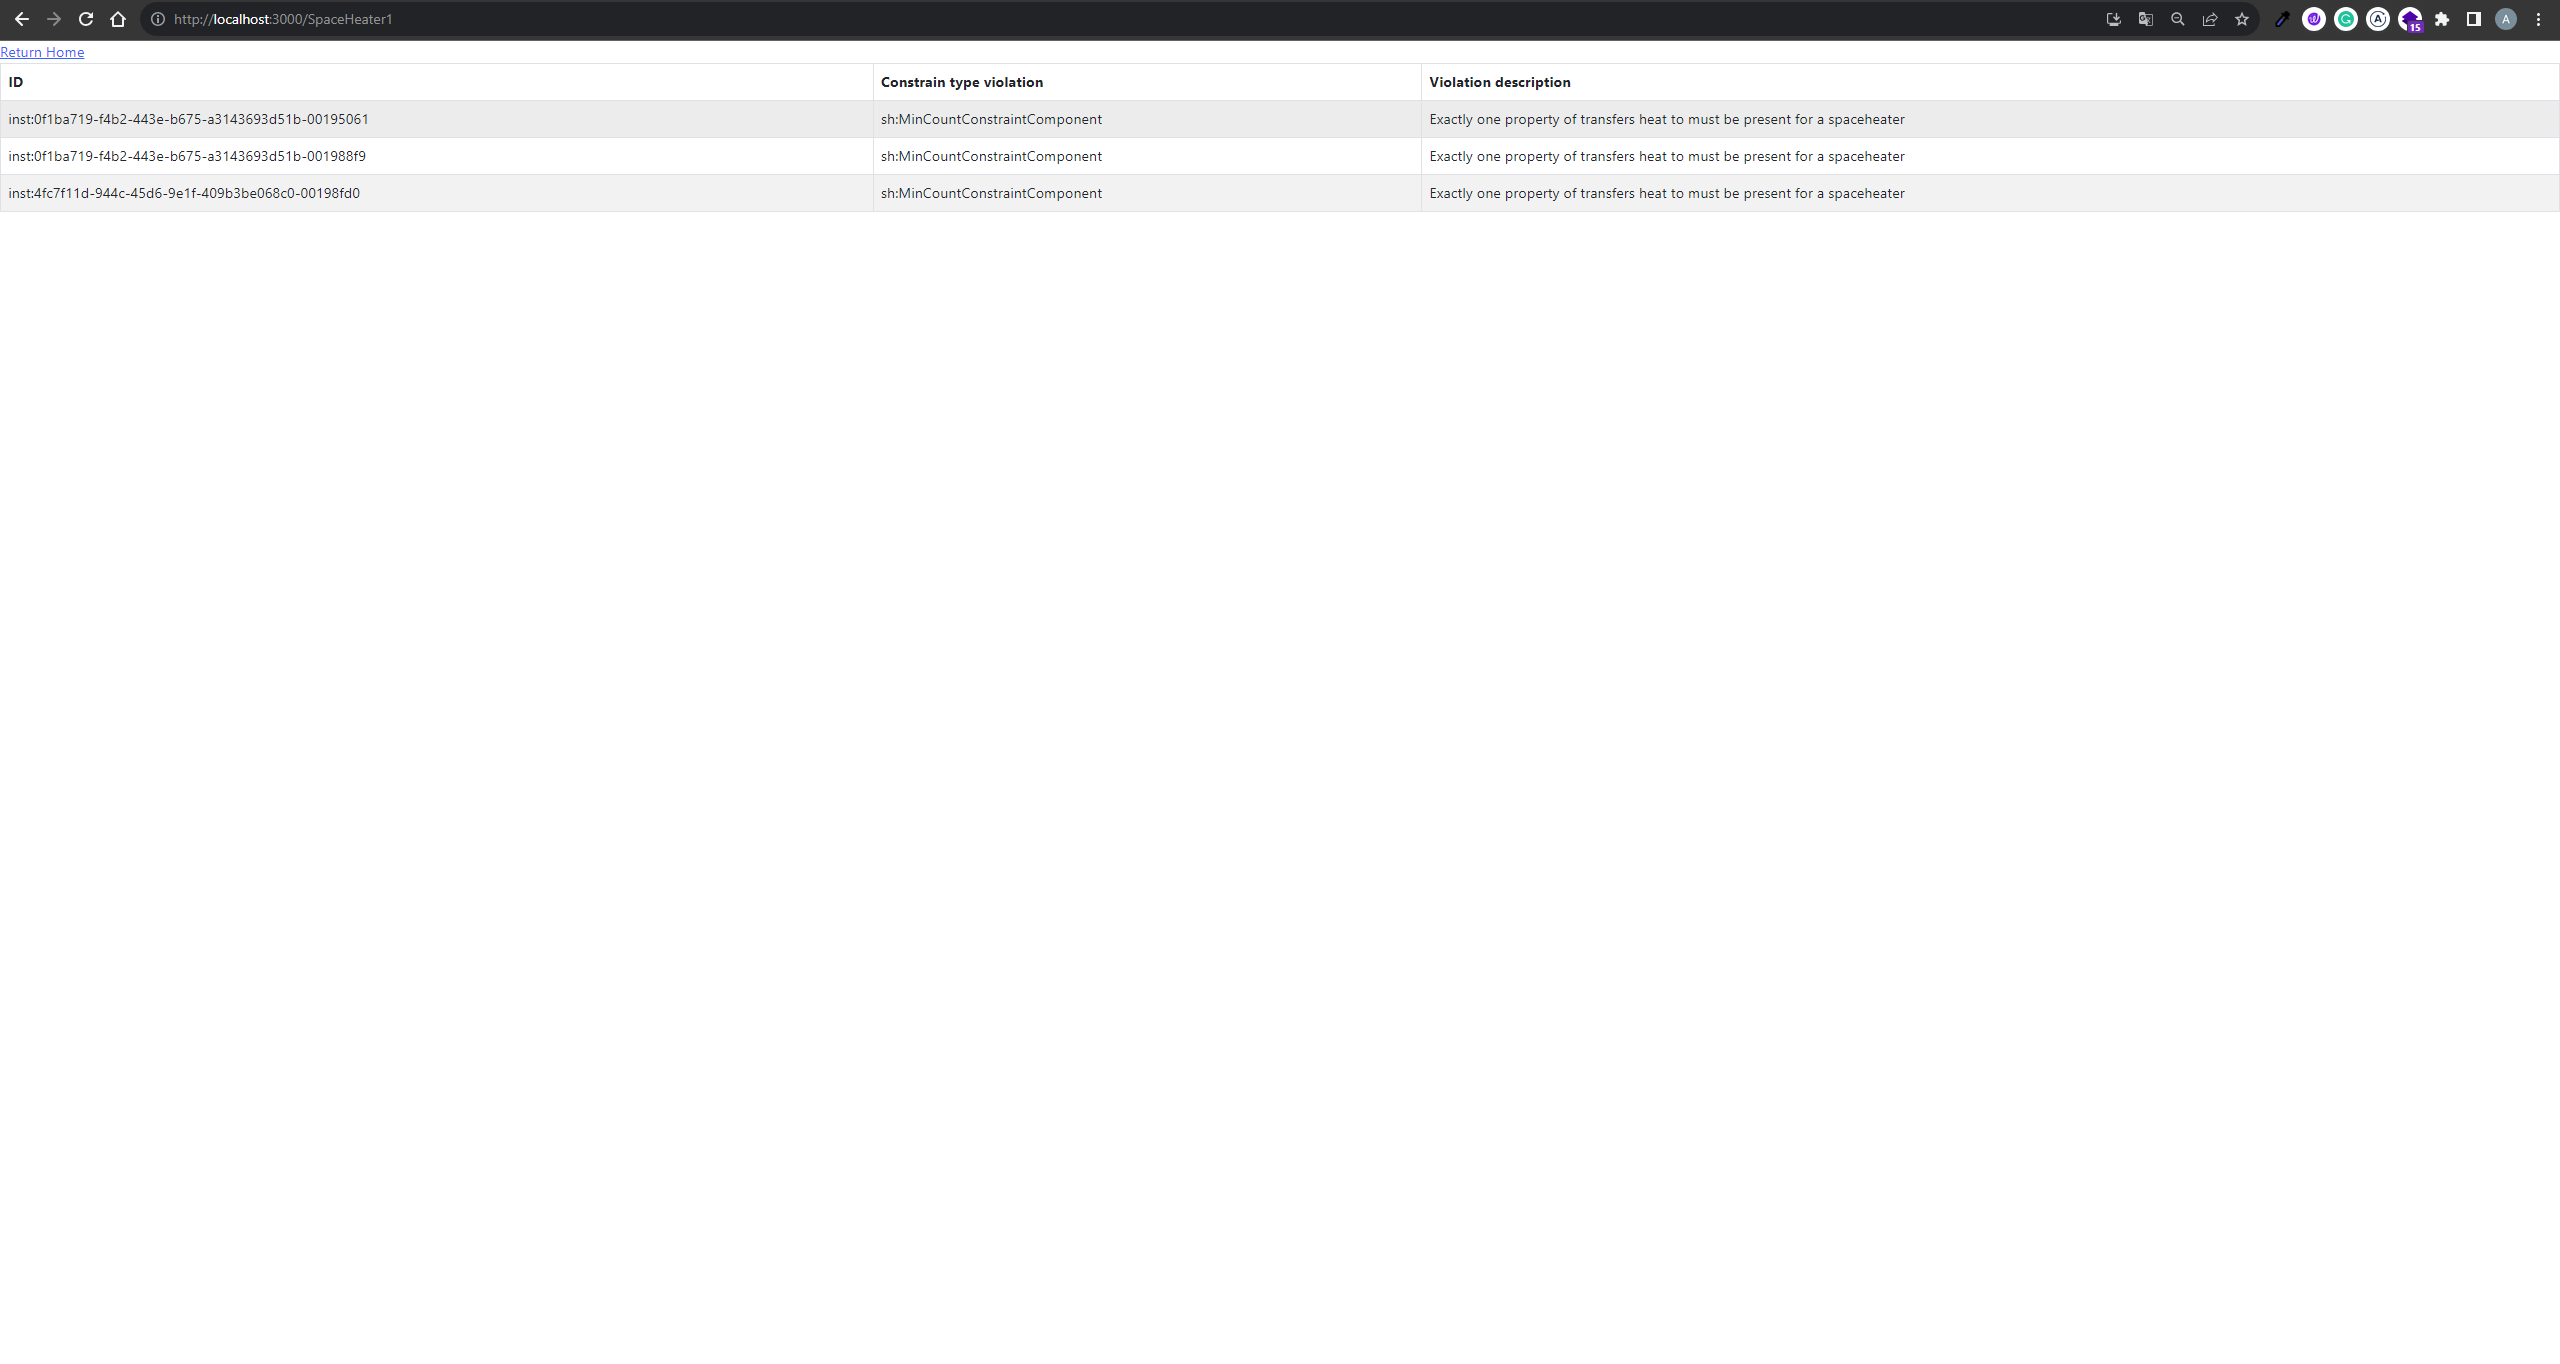
Reading the detailed violation table reveals that certain fso:SpaceHeater instances lack the "transfers heat to" property, meaning they do not service a room. To rectify this, we can manually locate and correct these specific space heaters within the BIM model. Utilizing Revit Lookup, we can find these components in Revit's database by entering their IDs.
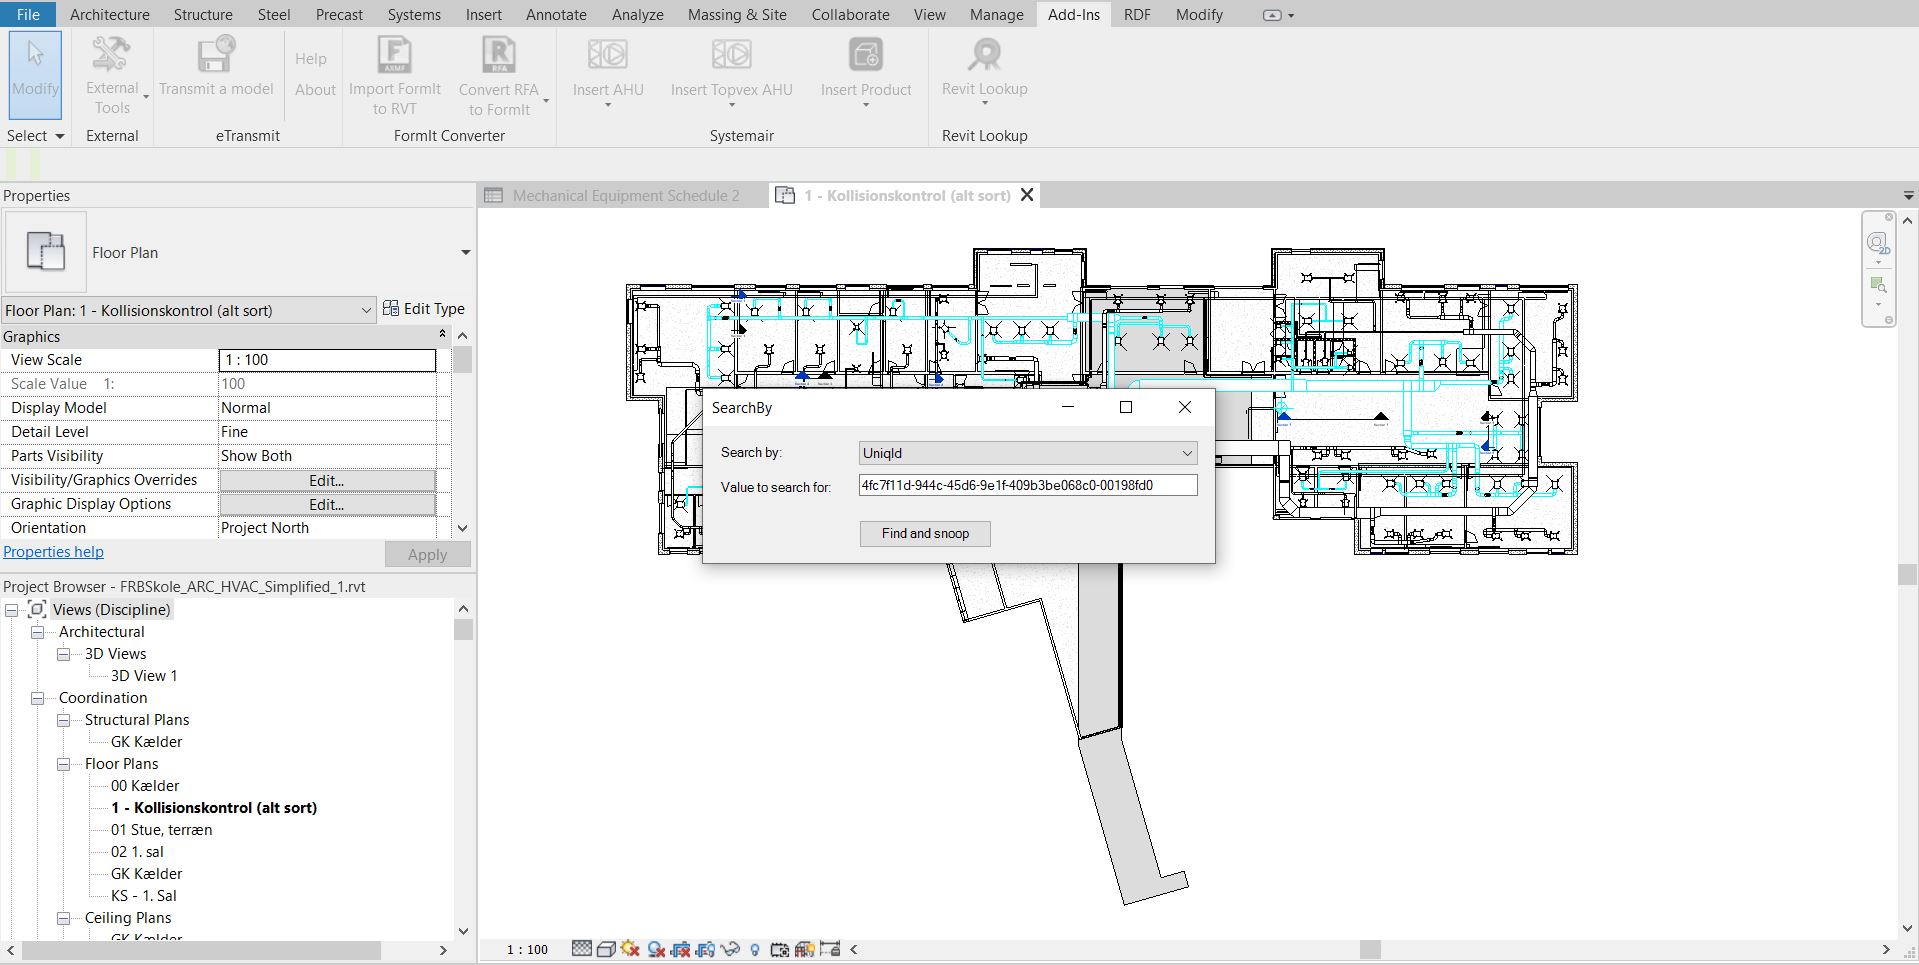
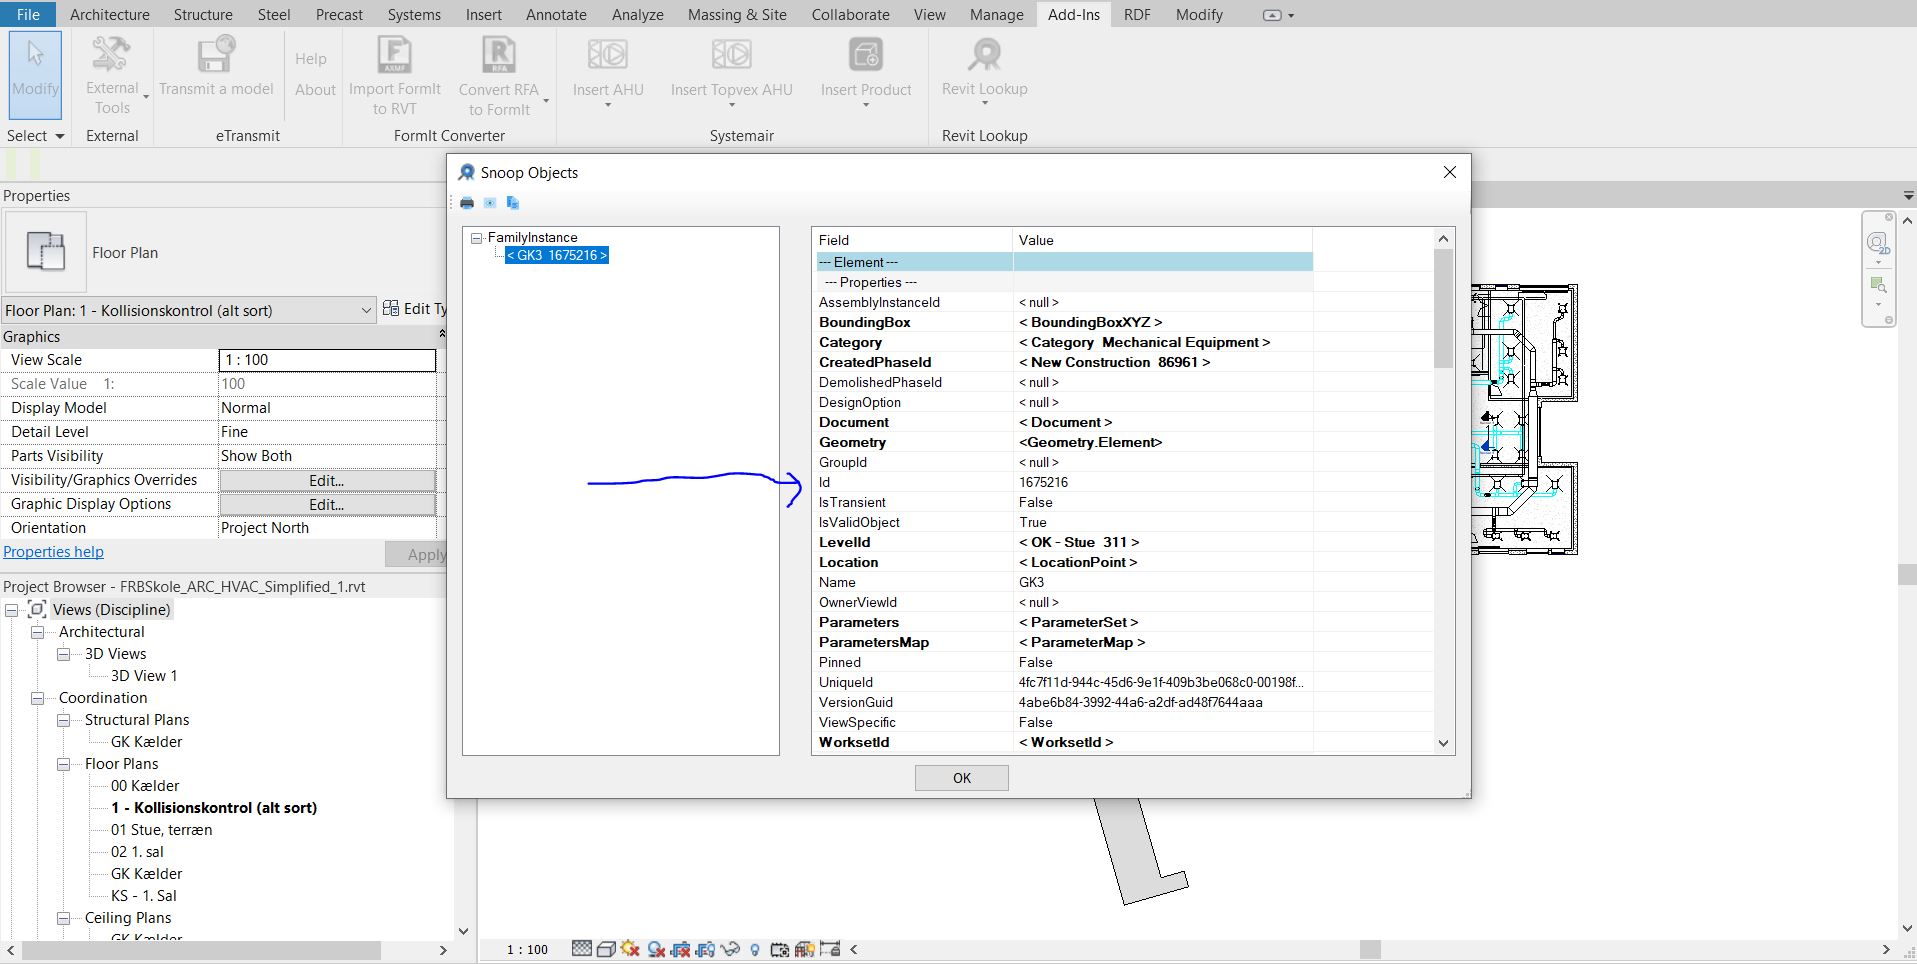
Every Revit object has both a UniqueID, which we use, and an ID, serving different purposes. The ID is essential for locating a component's position in the 3D model. This identification is achieved through Revit Lookup. Once the ID is found, it is copied and pasted into the "Select By ID" tool under the "Manage" Ribbon. This process is crucial for precise localization and modification of specific components within the BIM model, aligning with the tool's strategy for manual correction.
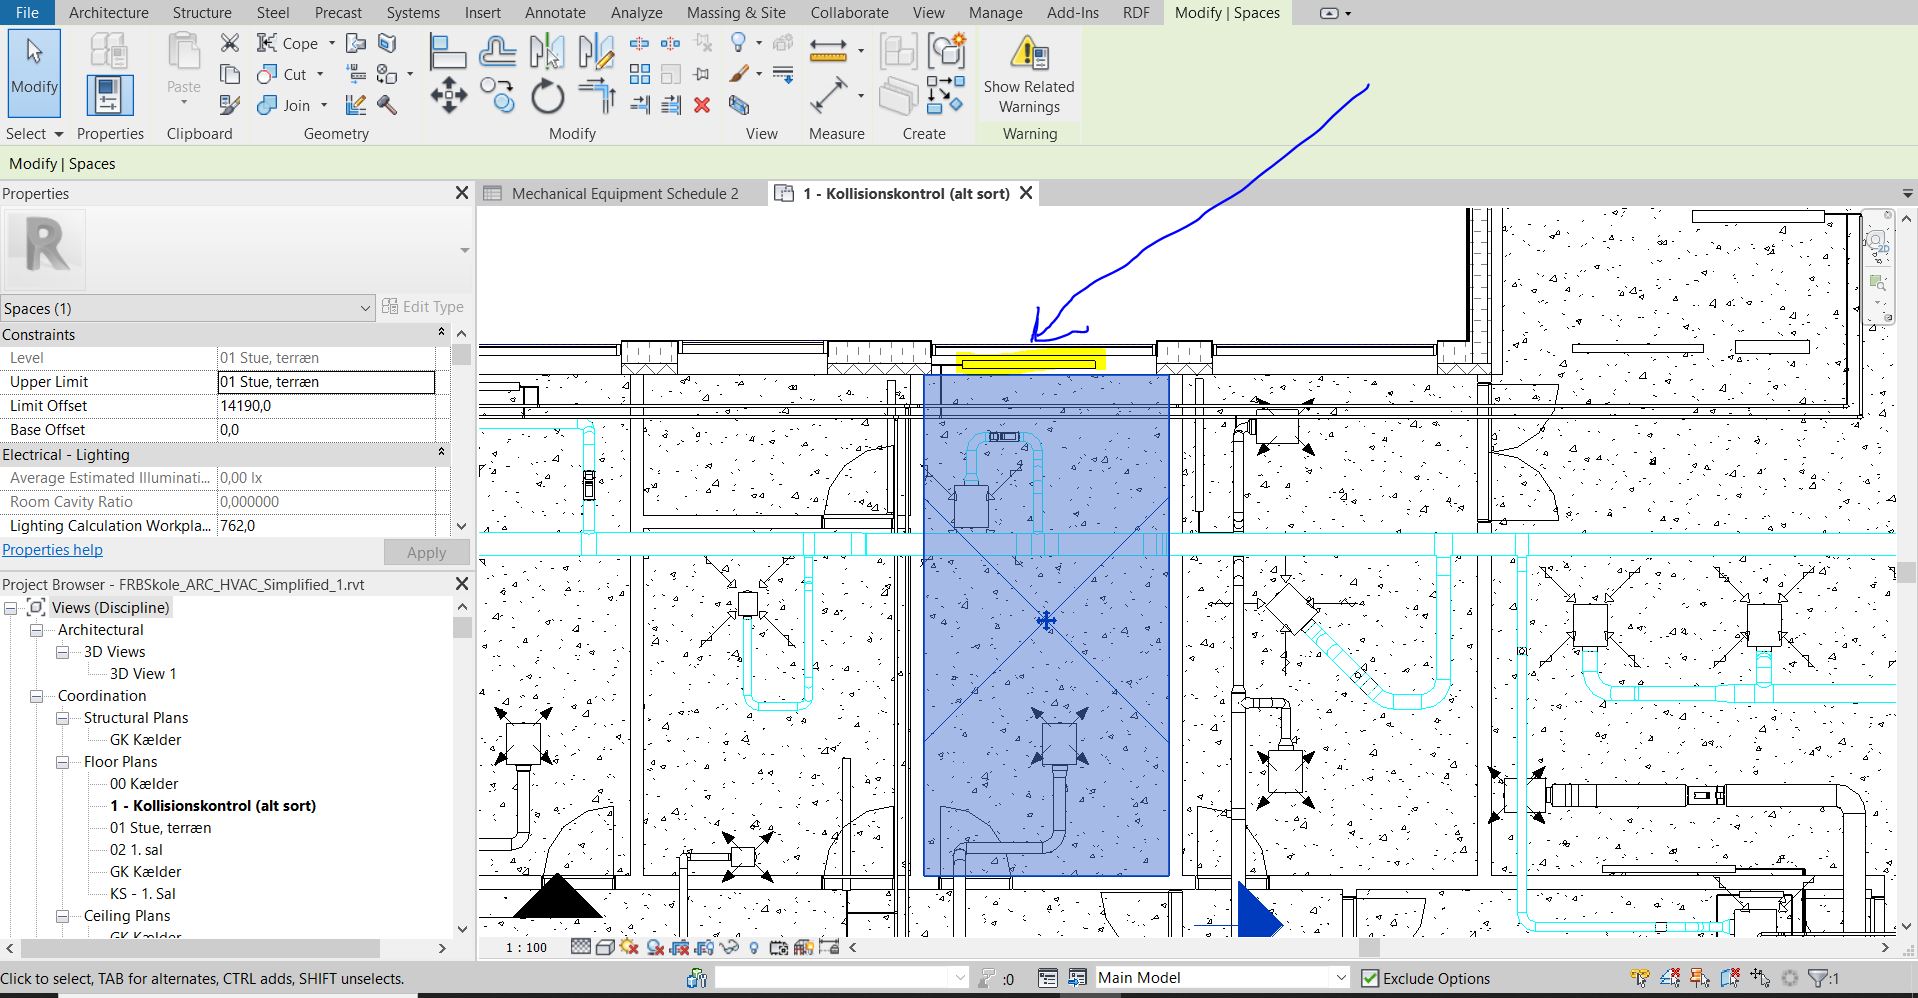
By using Revit's "Show" feature to visualize the selected fso:SpaceHeater instances within a 3D viewer, we can confirm their exact placement in relation to the room boundaries. If found outside, adjusting the boundaries to include the heaters ensures they fulfill their functional requirement in the HVAC system. This method, when applied to all non-compliant fso:SpaceHeater instances and followed by a re-validation in the Semantic HVAC Tool, effectively resolves the identified violations. For example for the fso:SpaceHeater instance, that has the ID "4fc7f11d-944c-45d6-9e1f-409b3be068c0-00198fd0" it is observed that the heater is positioned outside the room's boundary. This misplacement is critical as it prevents the fso:SpaceHeater instance from serving any room, which is essential in hydraulic calculations. Adjusting the room's boundary to include the fso:Spaceheater instance, ensures compliance.
To enable you to test the application without manually correcting violations in Revit, a "Solve All" function is integrated into the frontend. Clicking this button executes a series of SPARQL queries (available at this GitHub repository) to resolve all violations. Some of these queries, like "insertMissingConnectionBetweenSpaceheaterAndSpace.ttl," are hardcoded for this specific project, linking space heaters to their respective rooms. Others, such as "deleteSystemsWithoutComponents.ttl," are not hardcoded and applicable across various projects to correct specific violations. This functionality in the UI allows you to efficiently resolve all violations in the data graph (triplestore) without needing to manually adjust the BIM model.
Returning to the overview page (localhost:3000/validationOverviewTable) and selecting "Solve all violations" beneath the first table triggers the execution of the SPARQL queries, effectively resolving the listed violations. Subsequently, clicking the "Validate" button again displays a table, now showing zero violations, indicating the successful resolution of all violations in the Semantic HVAC Tool's interface.
Having completed the first validation check with zero violations, we proceed to the next step: conducting a hydraulic calculation followed by a second validation check. This check will determine if any fso:Pipe instances have an excessively high pressure drop, exceeding 100 Pa/m. Clicking the "Hydraulic Calc" button reveals the result, indicating 14 instances of fso:Pipe with violations due to high pressure drops.
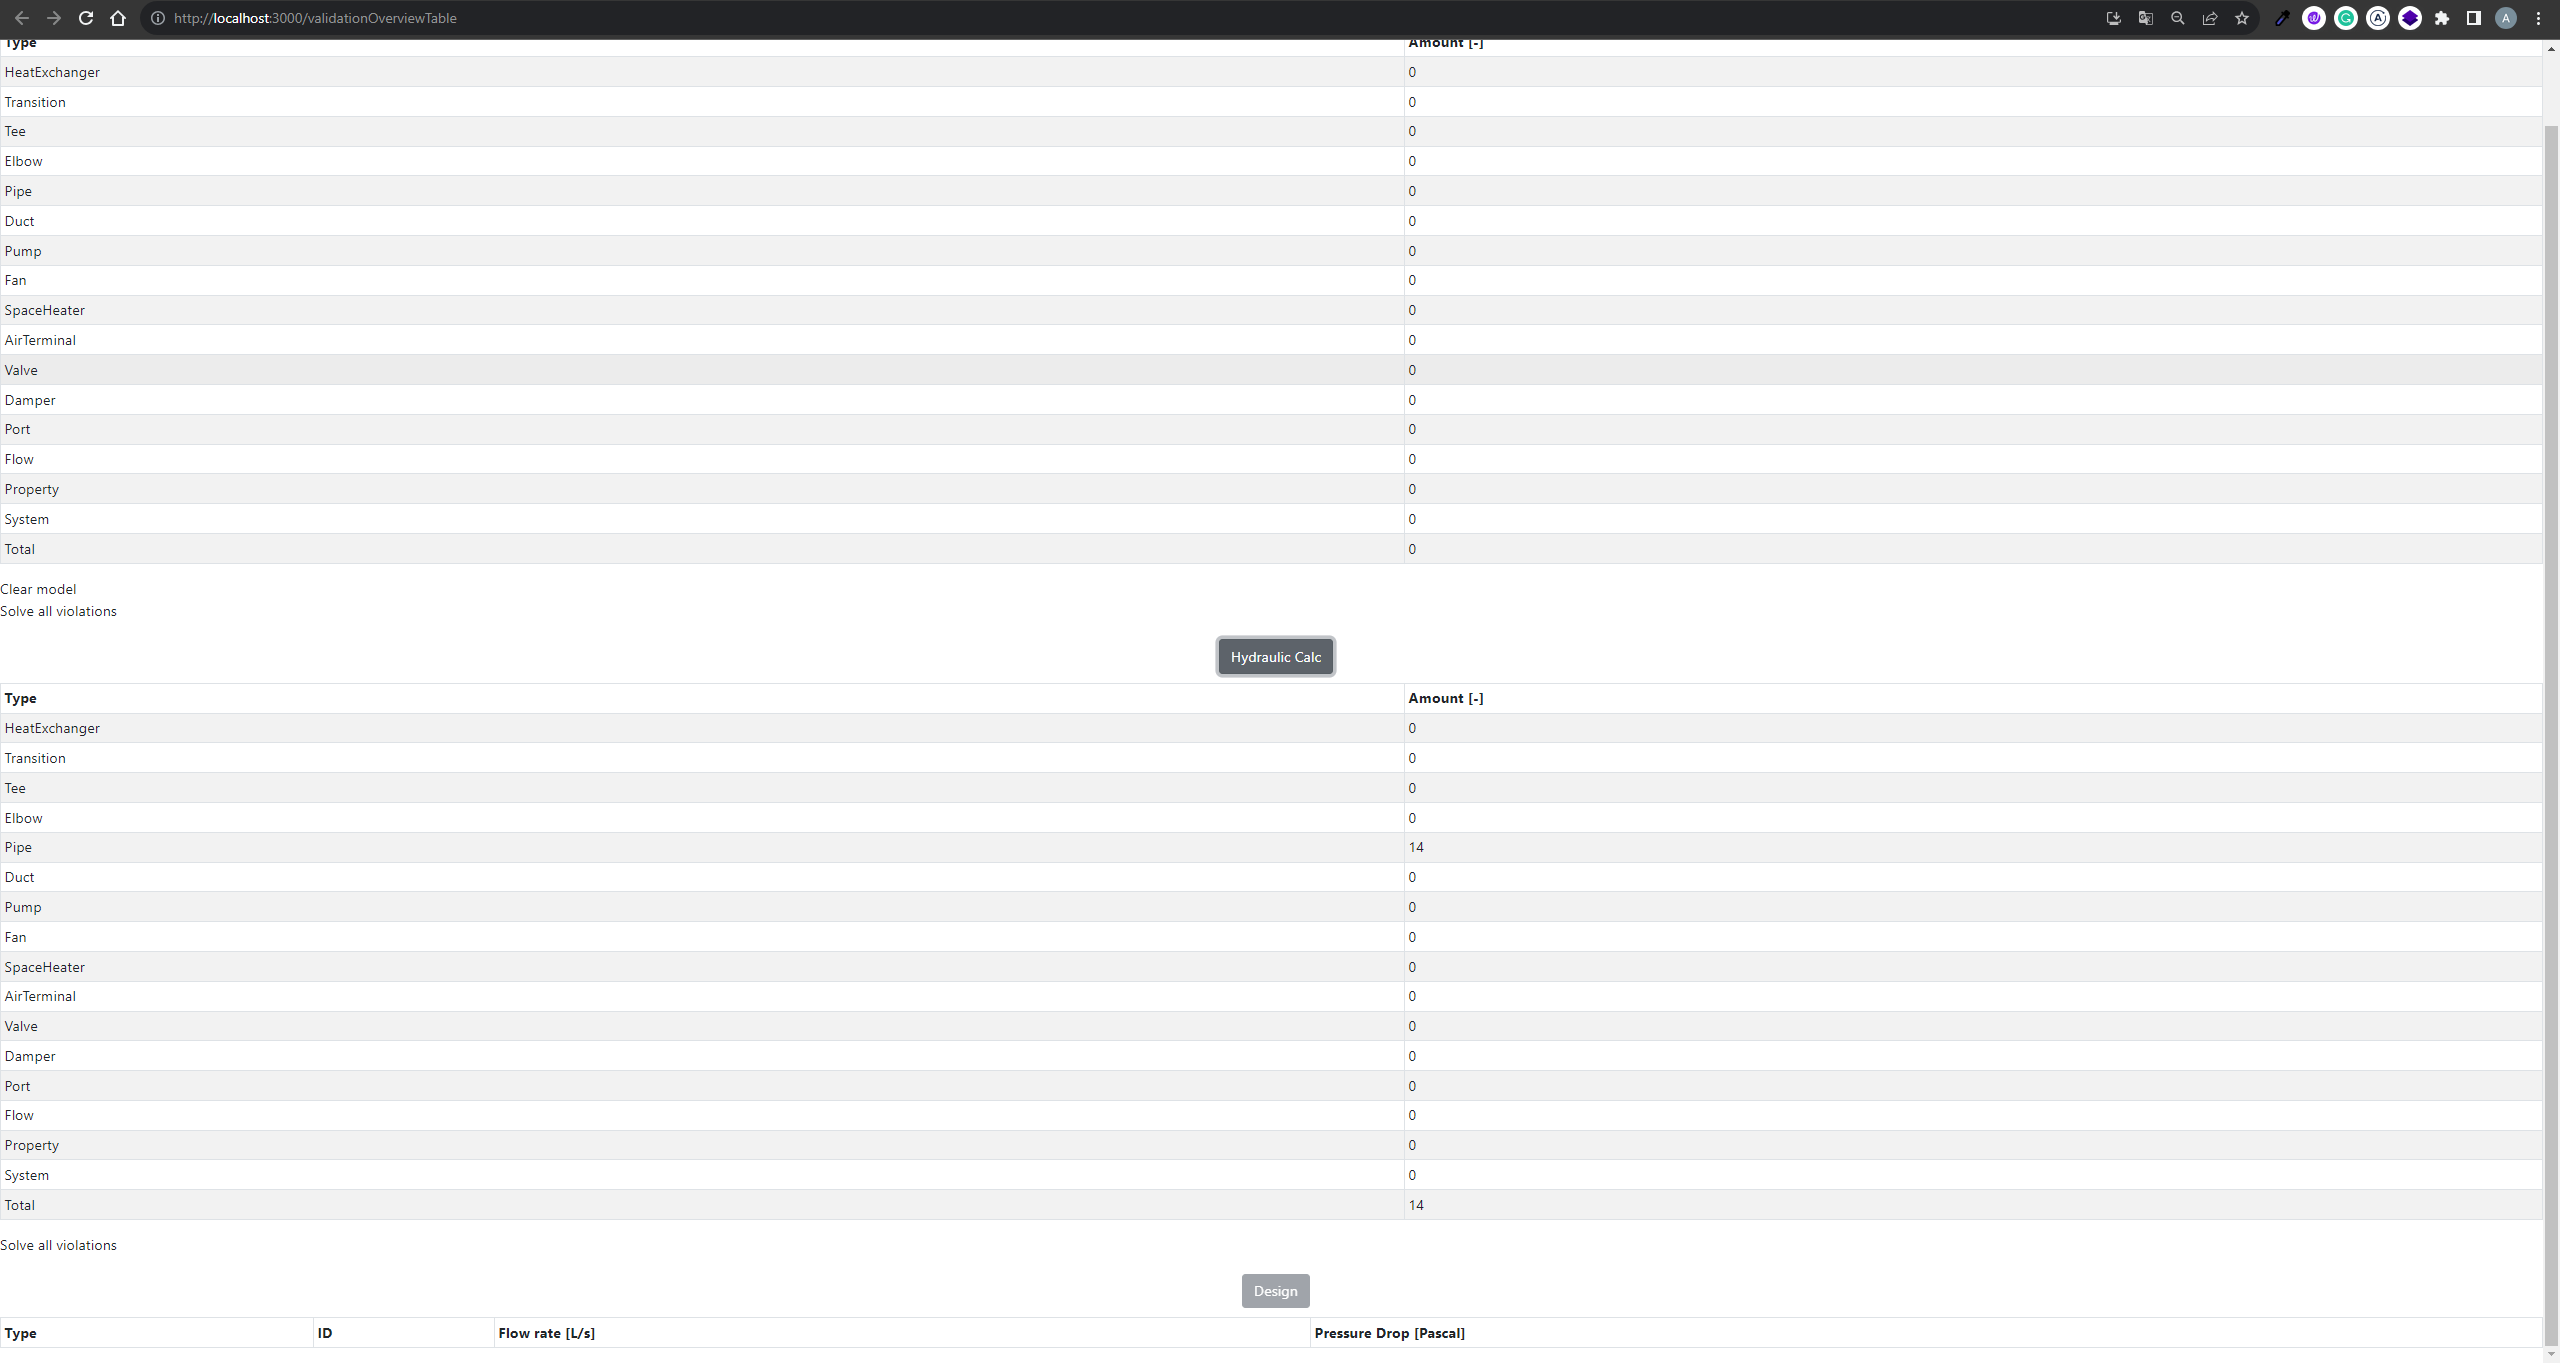
Clicking on the "Pipe" row redirects to a page detailing these specific violations. This page provides insights into which fso:Pipe instances exceed the pressure drop threshold of 100 Pa/m, offering a focused view on areas requiring attention for compliance.

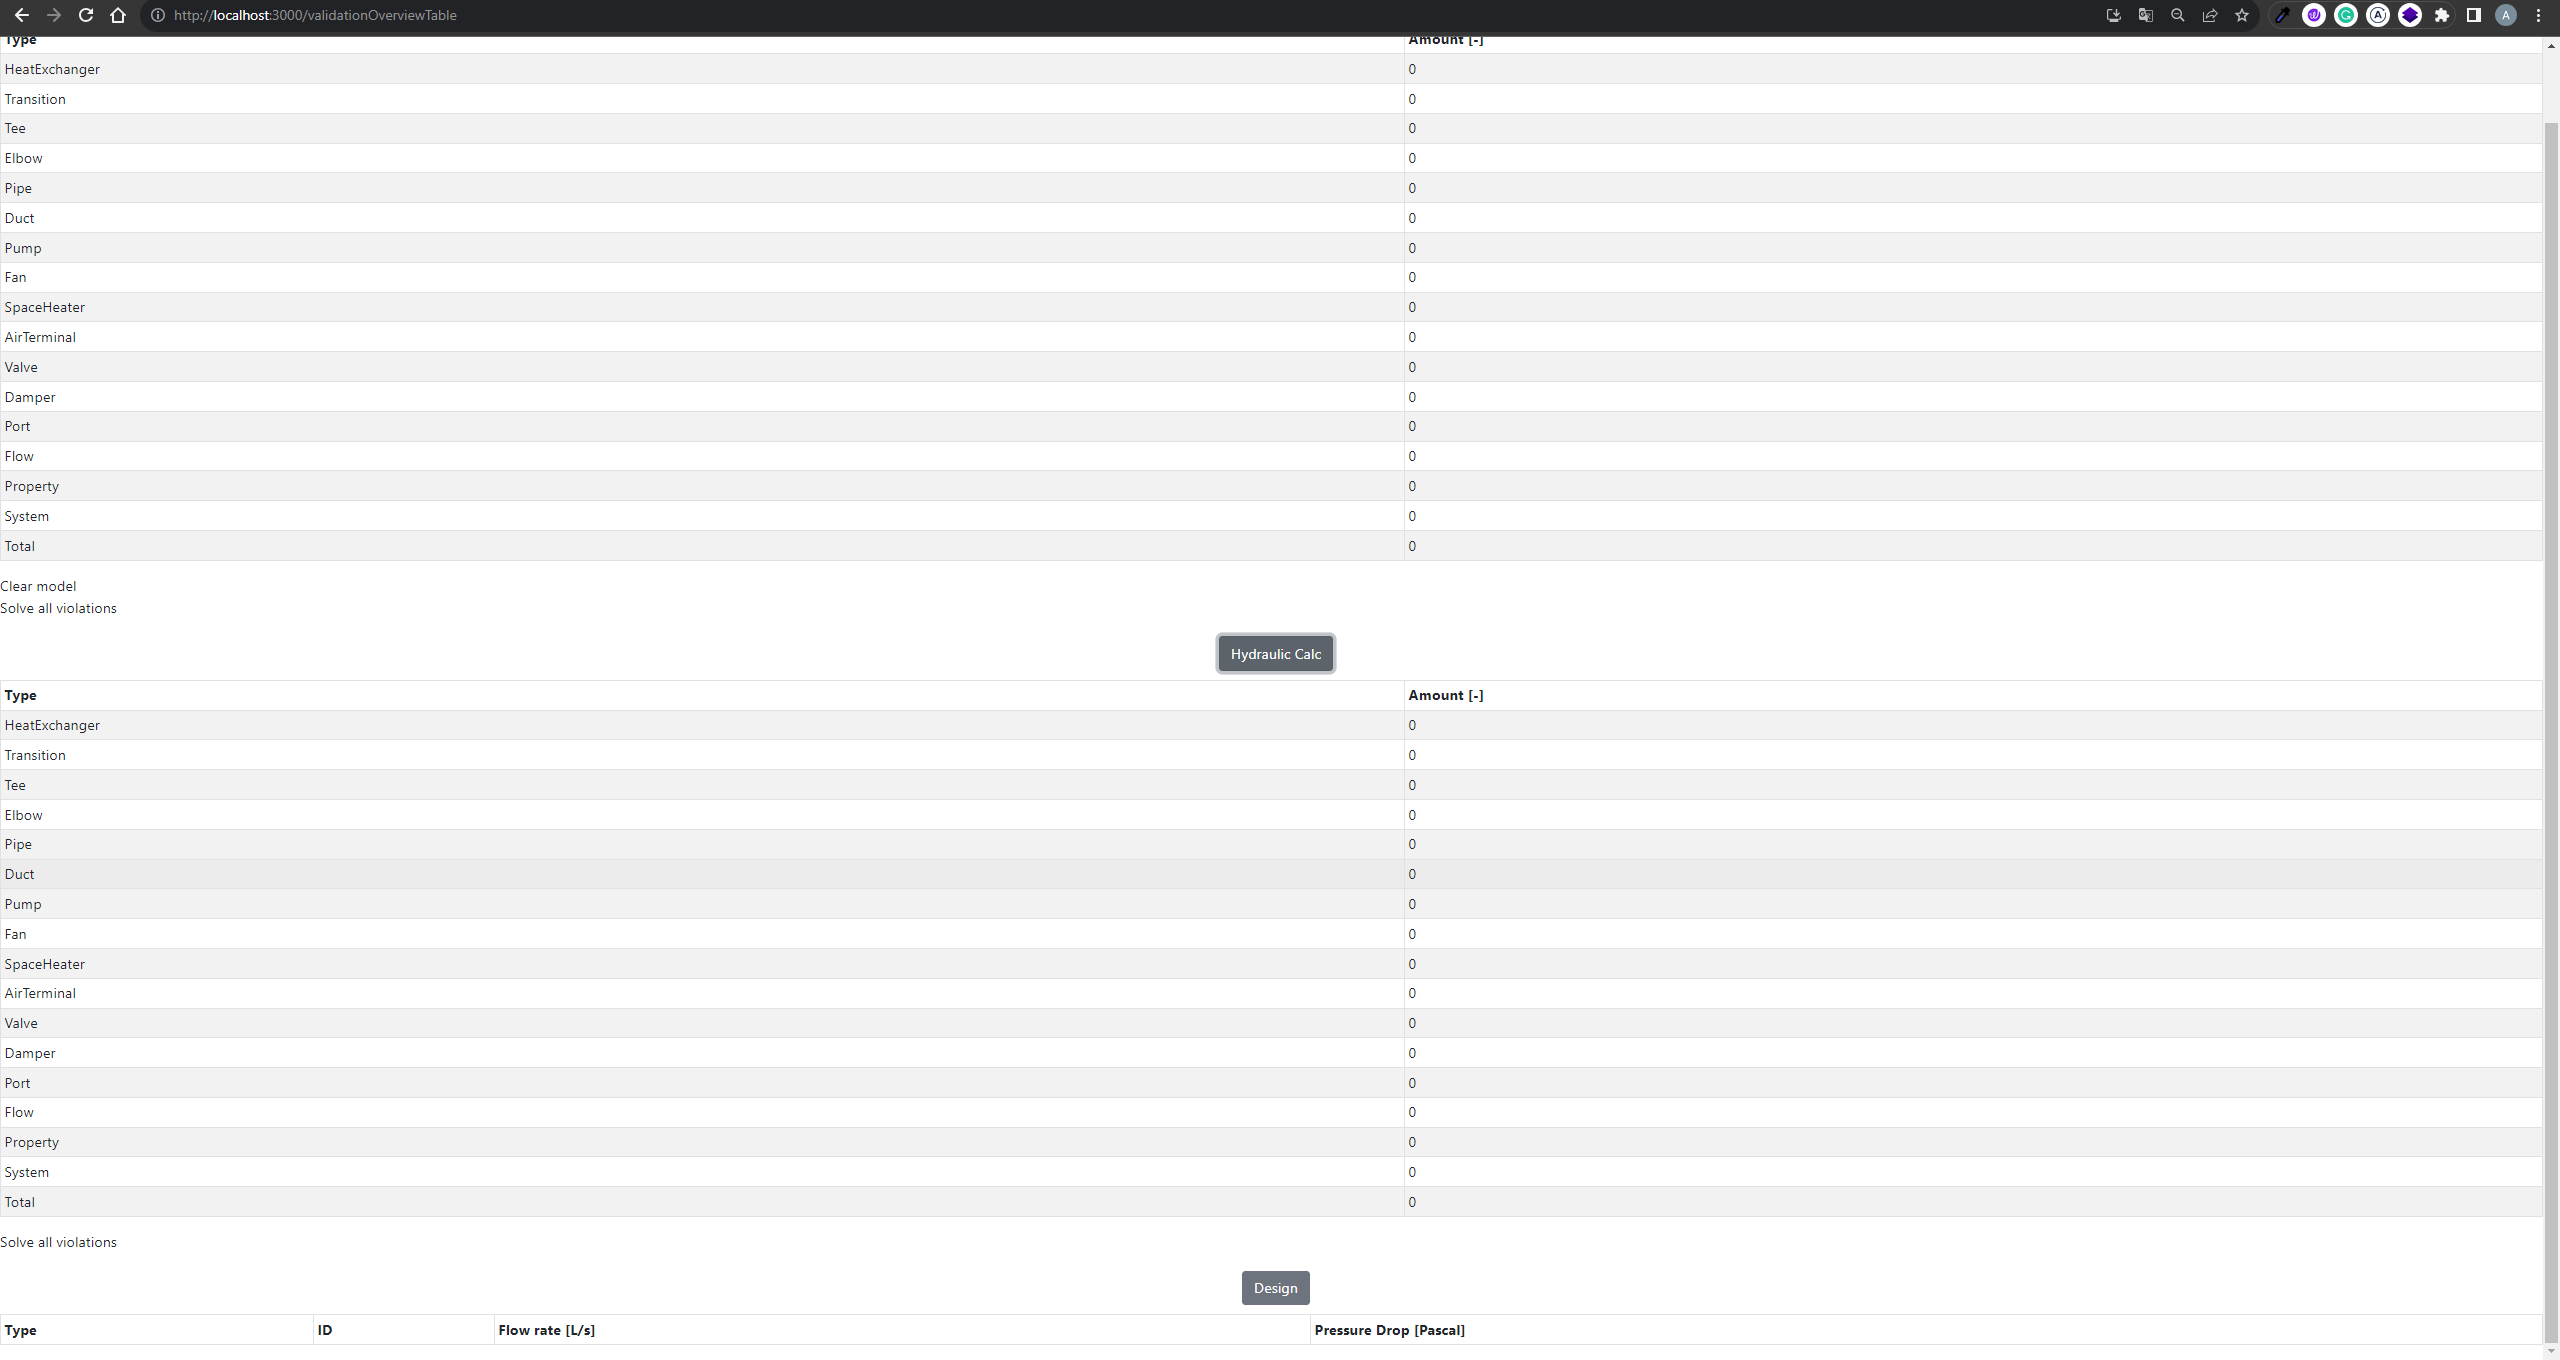
Returning to the overview page ((localhost:3000/validationOverviewTable)), clicking "Solve all violations" under the second table and then re-running the "Hydraulic Calc" leads to zero violations in the table. This occurs because the "Solve all violations" action executes the SPARQL query "autossize.ttl." (avaiable at this GitHub repository) This generic query, applicable to various projects, identifies and adjusts fso:Pipe instances exceeding 100 Pa/m in pressure drop. Re-calculating the hydraulic pressure drop for these components with their new sizes results in compliance, as the adjusted sizes no longer exceed the 100 Pa/m threshold.
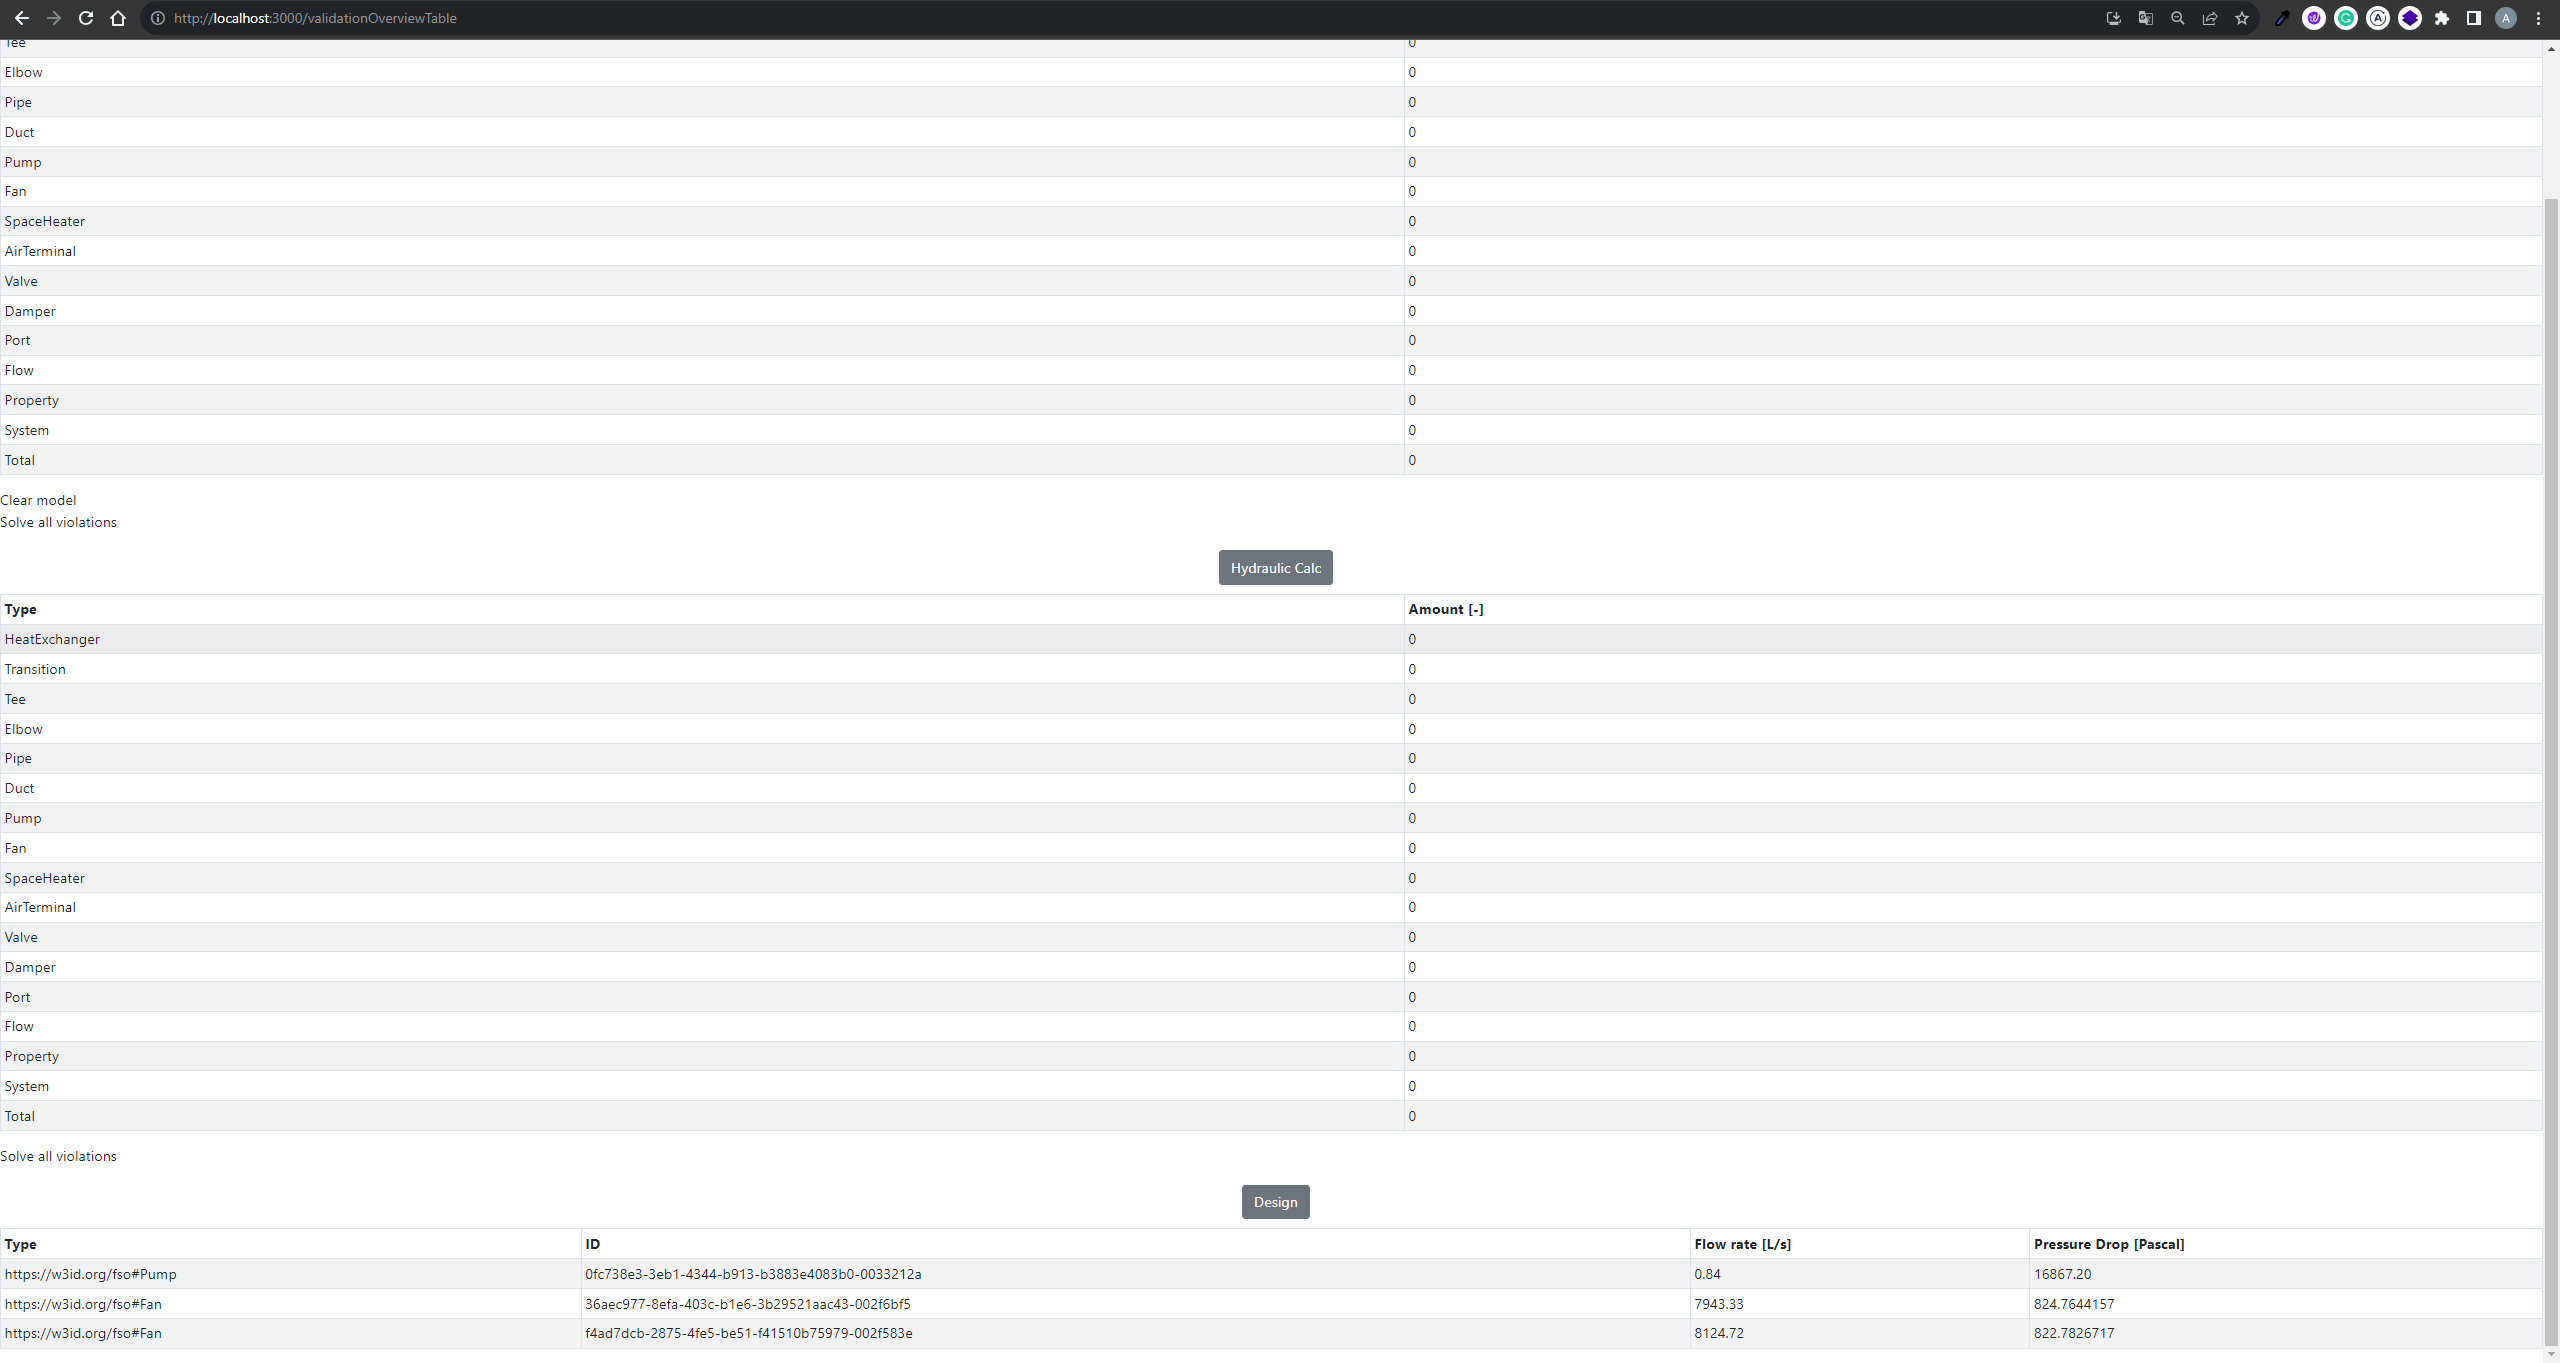
With zero violations now in the second table, we have the necessary data to design the capacity of our flow-moving devices. Clicking "Design" executes three queries: "PumpPressureDrop.ttl," "FanPressureDrop.ttl," and "FlowMovingDeviceFlowRate.ttl," (available at this GitHub repository). These queries address the total pressure drop calculations for water-based and air-based systems separately. The first two queries determine the total pressure loss, while the last one calculates the total flow rate for each flow-moving device. The resulting table displays the capacity of each device after 1.5 minutes.
This video is part of a conference presentation for the paper "Taking Advantage of Semantic Web Ontologies and Constraints for Heating, Cooling, and Ventilation System" presented at IBPSA BuildSim Nordic 2022. It showcases the application of the Semantic HVAC Tool in conjunction with LD-BIM, offering a new perspective compared to the previous use case that utilized Revit as the BIM tool. Unlike the Revit-based BIM tool, this approach utilizes LD-BIM app with an IFC file (GitHub repository) and a data graph (GitHub repository). It highlights how violations identified by the Semantic HVAC Tool can be visually emphasized in LD-BIM using SPARQL, streamlining the process of targeted corrections in BIM models within the HVAC domain.