- Creating a scene using WebGL
- Simulating Depth of Field effect on the custom scene
- Using shaders to create the DoF effect
Depth of Field is the effect in which objects within some range of distances of a scene appear in focus. The objects nearer and farther than this range will appear out of focus.
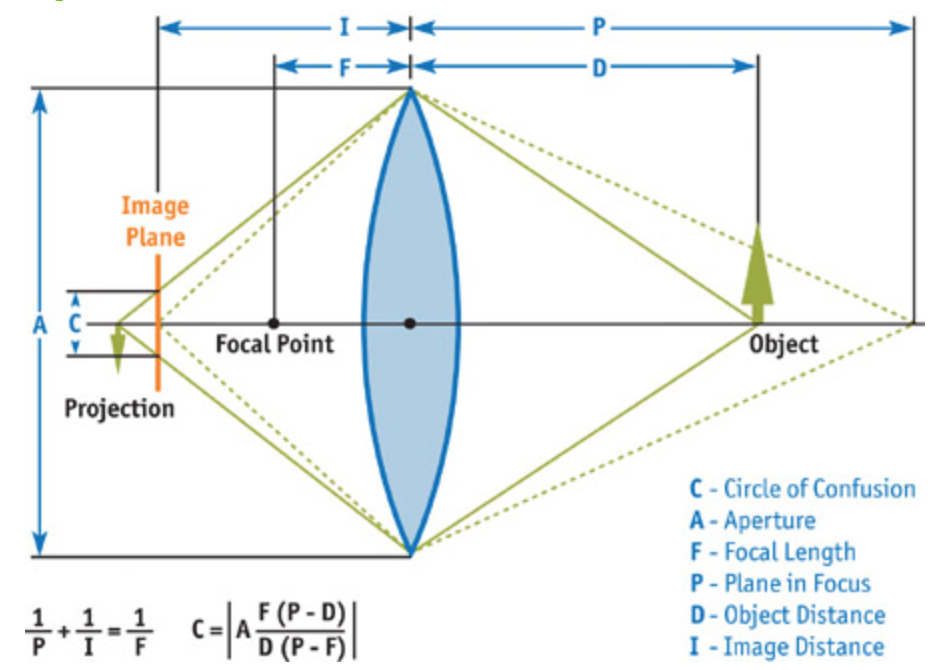
A lens usually let the light pass through a film or the retina: when the light converges to a single point in the film, the light’s source will appear in focus. Everything else will be projected to an area called Circle of Confusion.
This area defines what part of the object will appear in focus or not.
The figure below shows how a lens captures an object and creates a Circle of Confusion; it also shows the parameters involved.
The project has been implemented in WebGL: particularlly, the scene has been created by using three.js. Three.js is a cross-browser Open Source Javascript library that uses WebGL to create and display animated 3D computer graphics scene. It simplifies the creation of complex 3D scenes (which could be difficult using only Javascript). Three.js creates a scene adding objects defined by a geometry (which corresponds to a vertex shader) and a material (which corresponds to a fragment shader). It also provides method to implement user controls, post-processing effects, etc.. The Depth of Field effect has been implemented by a fragment shader.
- Camera
- Controls (Pointer Lock Controls, provided by three.js)
- Light and Chandelier
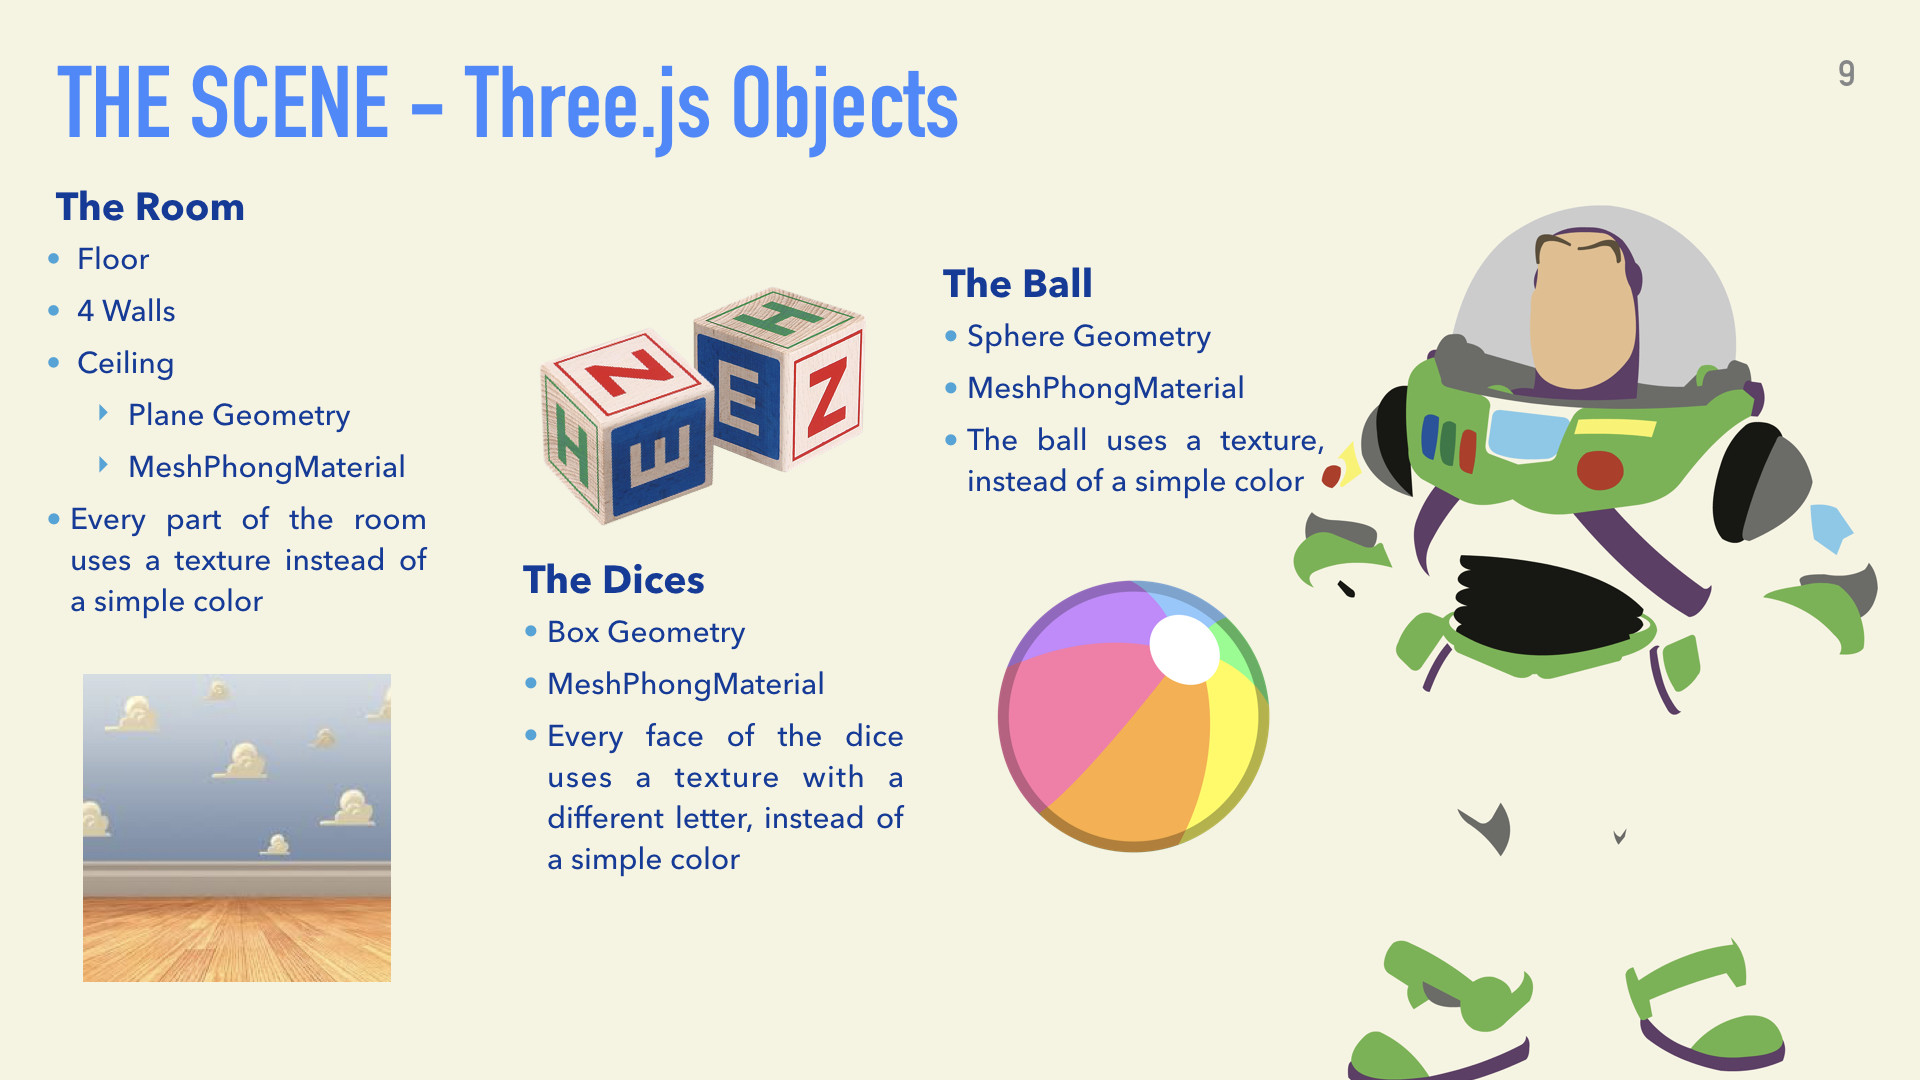
- Room
- Dices
- Ball
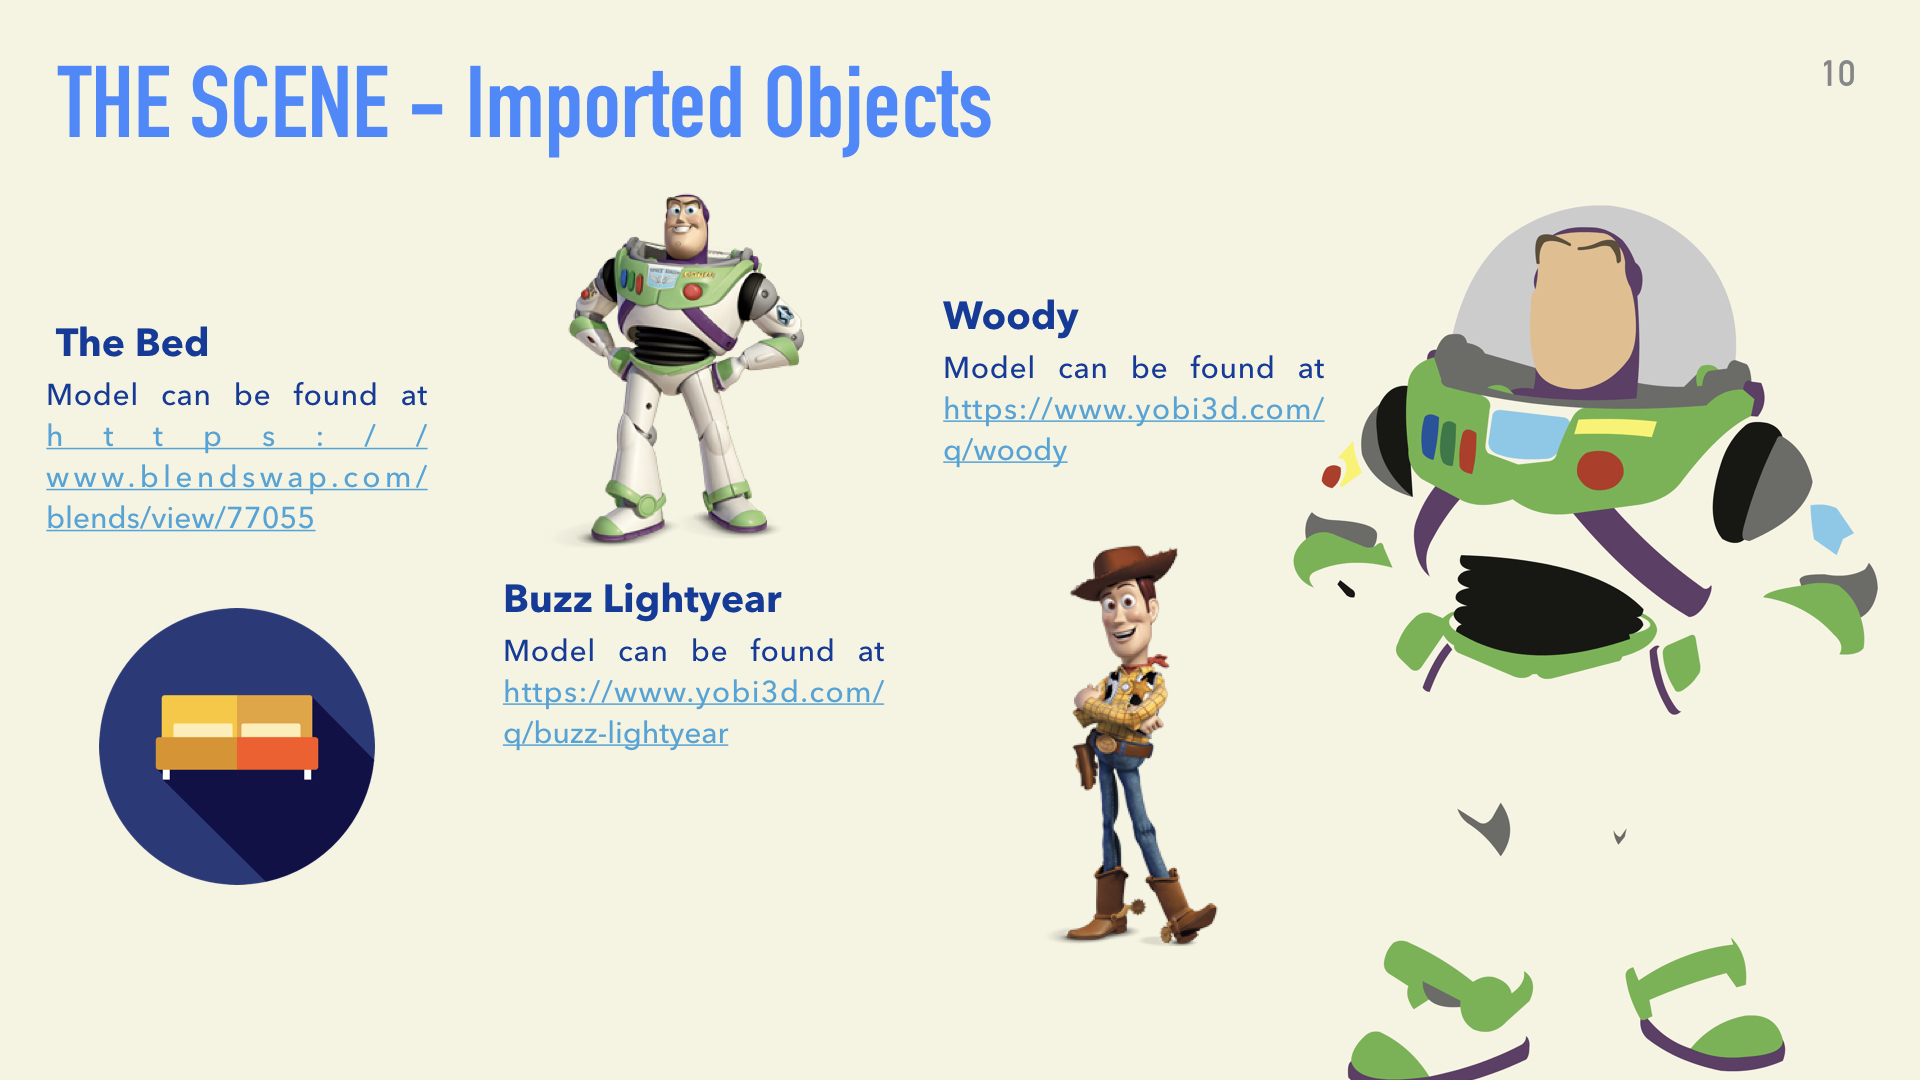
- Bed
- Woody
- Buzz Lightyear
To detect room walls and bed, so that the user can't pass through them
- 'Hai un amico in me' - Riccardo Cocciante, from Toy Story Soundtrack
- GUI that let the user change Aperture and Plane in Focus
- Step 1. Implement a routine that let apply external GLSL shaders to a three.js scene.
- Step 2. Implement the fragment shader that simulates the DoF effect.
To apply a fragment shader to a three.js scene, Render to Texture technique has been used. The scene has been processed separately from what the user truly see. Once this scene has been rendered, it is displayed in a texture consisting of a fixed plane (rendered too). Thus, the user can see the Toy Story scene with Depth of Field applied, on this plane.
To simulate the Depth of Field, it is only necessary to change the value of color's pixels. The vertex shader does not have to do anything:
  <script type="x-shader/x-vertex" id="DOFVertexShader">
     varying vec2 vUv;
     void main(){
         vUv = uv;
         gl_Position = projectionMatrix * modelViewMatrix * vec4( position, 1.0 );
     }
</script>
The most common way to create a Depth of Field effect is by using Gaussian Blur. For each pixel, we take the surrounding neighbors and we make an average of their values, weighted by a bivariate Gaussian distribution. Once we get the new value, we change the original one with it. The number of neighbors depends on the size of the kernel used. The variables values of the Gaussian Distribution represent the location of a neighbor at a certain offset distance from the pixel we want to process. This offset is passed to the method that compute the weights. For different values of the offset, it is possible to get a greater (or smaller) amount of blur: the more (less) the neighbor is far (near) from the pixel we're processing, the more (less) it should appear blurred. The offset value is the product of aperture and distanceFromPlaneInFocus variables. If one of these is set to zero, all the scene will appear in focus. By this way, all the pixels that are on the plane in focus will appear in focus, while all the pixels that are far from this plane will appear blurred, with an amount of blur that is directly proportional to the distance from the plane (computed by subtraction of depth value from planeInFocus variable). At the same time, changing Aperture value, the user can increase or decrease the DoF effect.
  <script type="x-shader/x-vertex" id="DOFFragmentShader">
    #define PI 3.1415926

    varying vec2 vUv;

    //textures for DoF
    uniform sampler2D tColor;
    uniform sampler2D tDepth;

    //variables needed to process the textures
    uniform float screenWidth;
    uniform float screenHeight;
    uniform float zFar;
    uniform float zNear;
    uniform float planeInFocus;
    uniform float aperture;

    vec2 tSize = vec2(screenWidth, screenHeight);

    //function to get linearized depth
    float getDepth(float depth){
        float d = (2.0 * zNear) / (zFar + zNear - depth * (zFar - zNear));
        return d;
    }

    //function to compute gaussian weight
    float gaussianKernel(float i, float j, float variance){
        float kernelValue = (1.0/(2.0*PI*variance))*exp(-(i*i + j*j)/(2.0*variance));
        return kernelValue;
    }

    //function to compute the new color
    vec4 computeBlurredColor(vec2 sizeSteps, float variance){
        vec4 colorSum = vec4(0.0);
        for(int i = -2; i <= 2; i++){
            for(int j = -2; j<= 2; j++){
                    vec2 offset = sizeSteps*vec2(i,j);
                    colorSum = colorSum + texture2D(tColor, vUv + offset)*gaussianKernel(offset.y,offset.x,variance);
            }
        }
        return colorSum;
    }

    void main() {
        float depth = getDepth(texture2D(tDepth, vUv.xy).x);

        float distanceFromFocusPlane = planeInFocus - depth;

        float blurWeight = distanceFromFocusPlane * aperture;

        vec2 sizeSteps = vec2(1.0, 1.0)*(blurWeight/150.0);

        vec4 blurredColor = computeBlurredColor(sizeSteps, 4.0);

        gl_FragColor = blurredColor;
        gl_FragColor.a = 1.0;

    }
</script>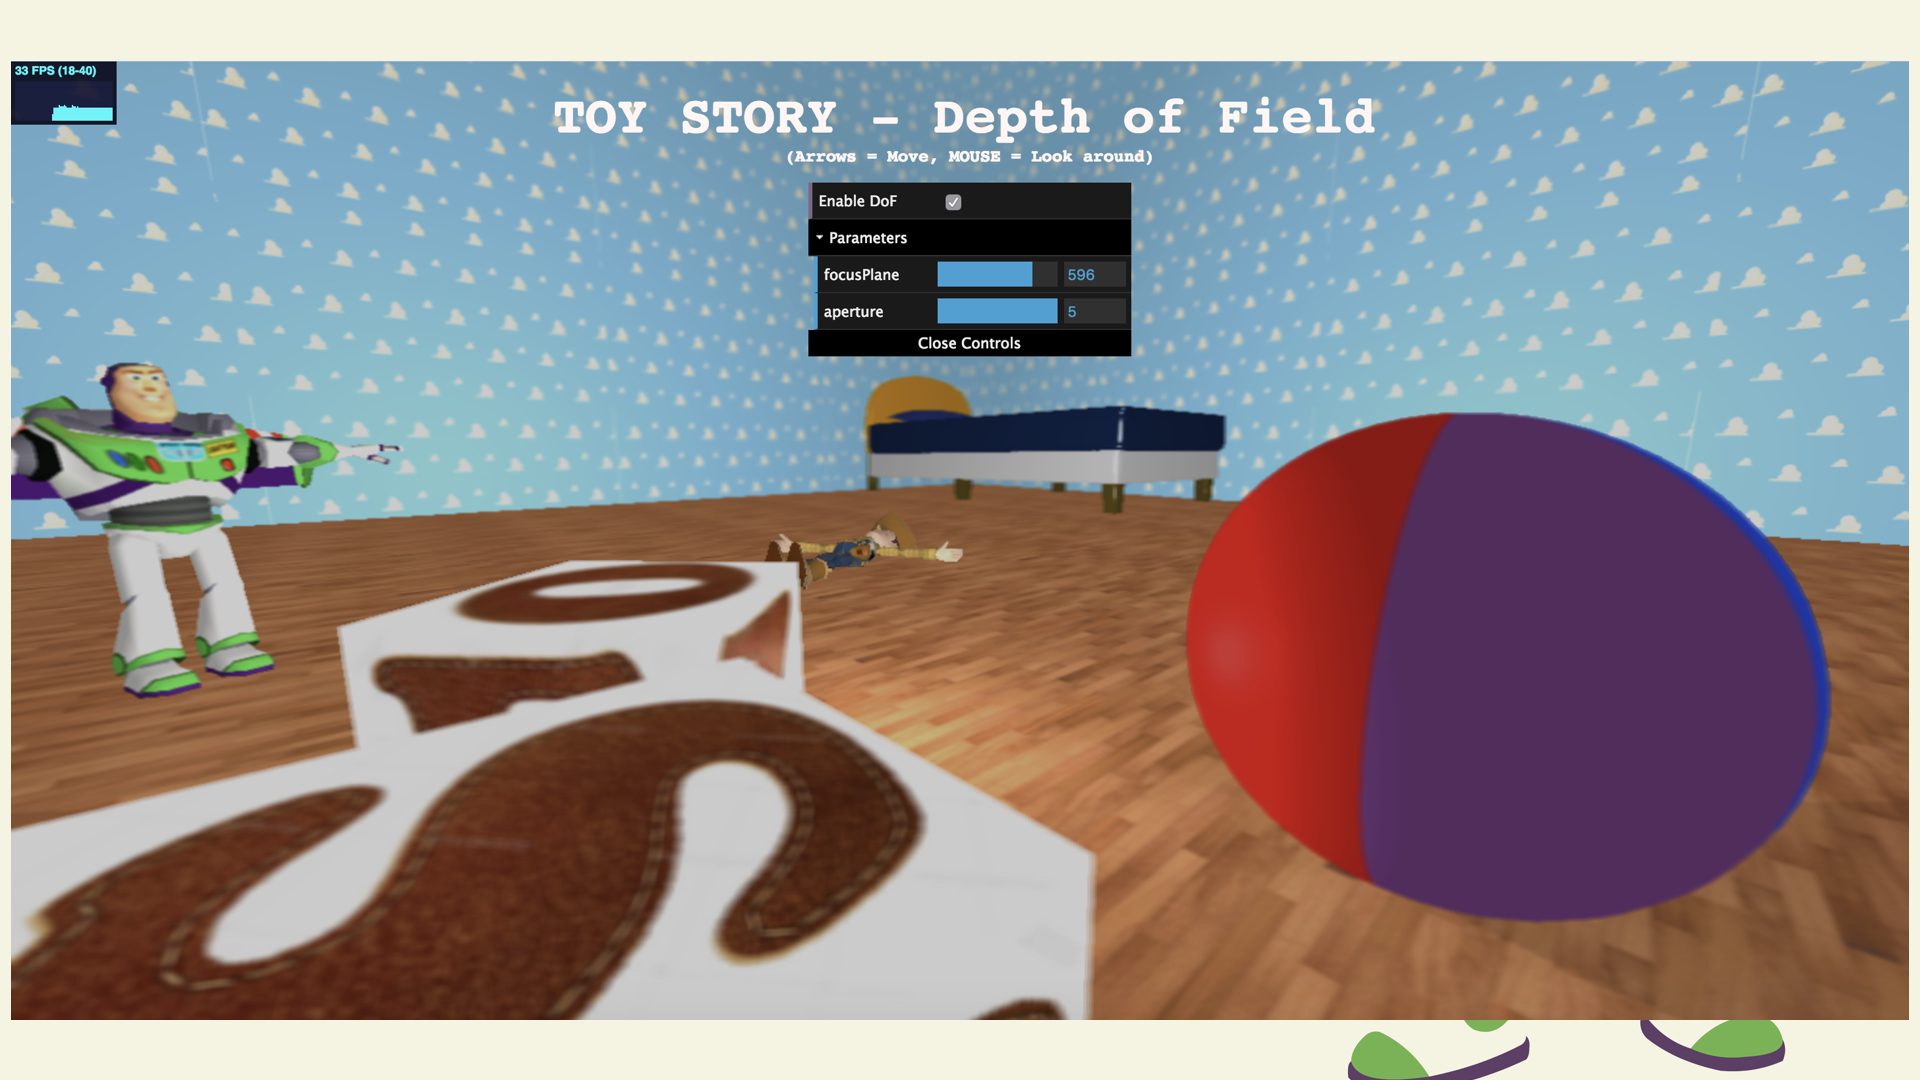
Best performances were reached using a MacBook Pro 2015 and Google Chrome: despite the 36 fps, the scene has been rendered without twitches. Safari has performed a highest frame rate (45 fps), but the scene always twitched, bringing to an unpleasant experience.
It is recommended to use Google Chrome as browser to host the project.
Licensed under the term of MIT License. See attached file LICENSE.