![]()


Or you could:
-
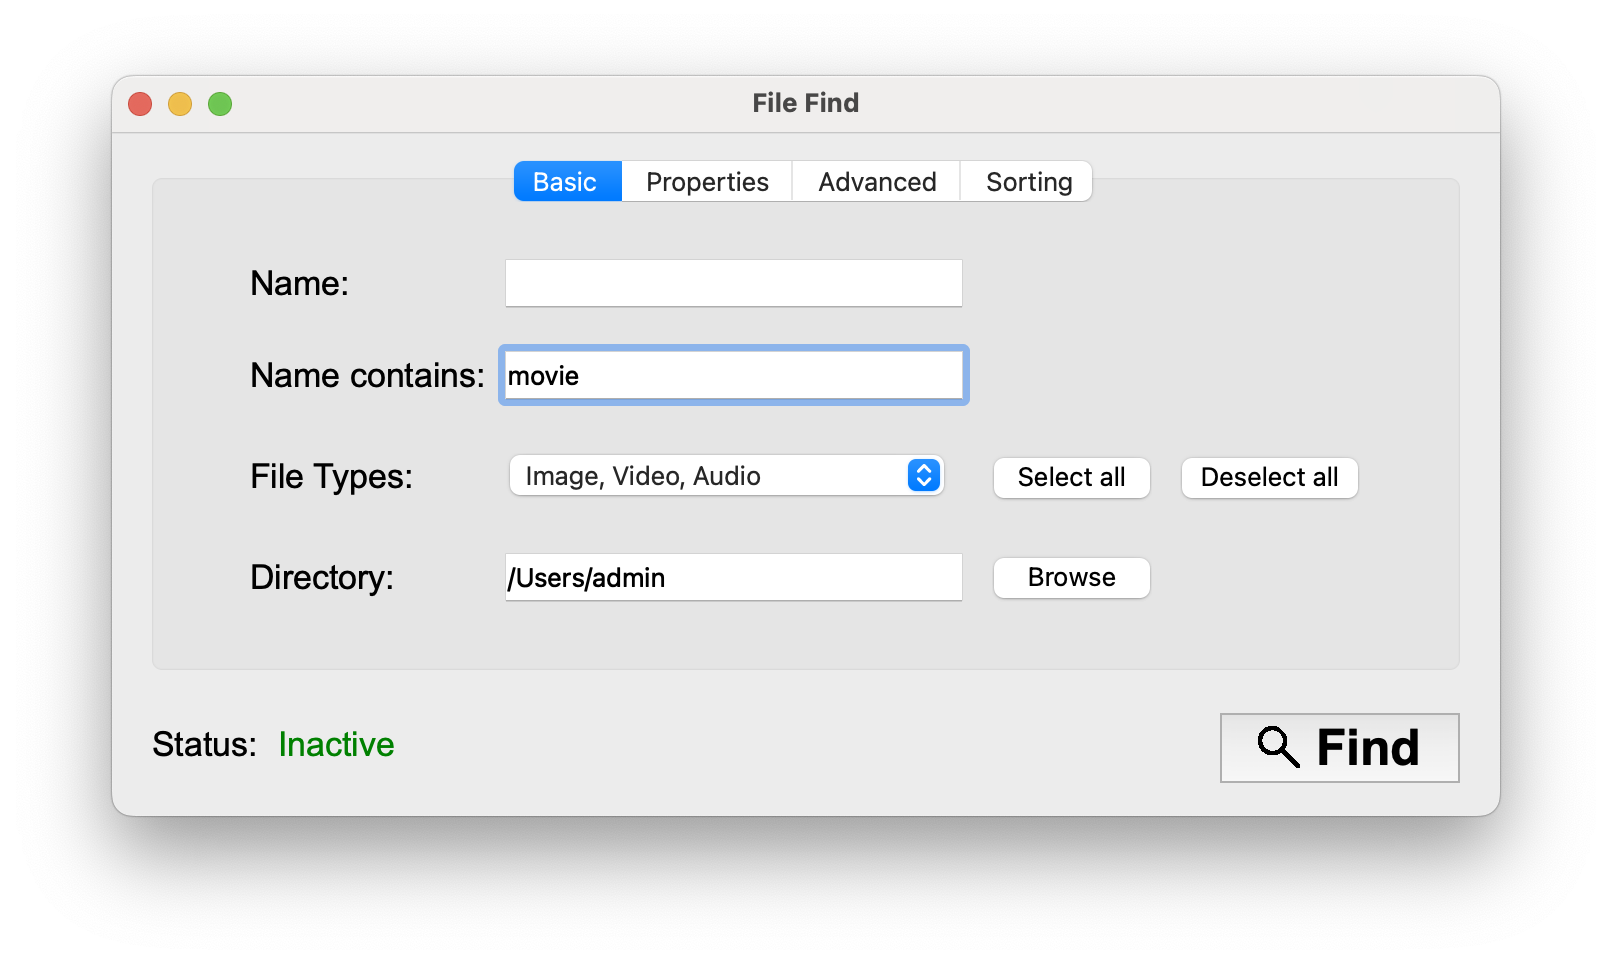
Basic

- Name: Multiple different modes are available.
-
Name is: Input needs to match the file name exactly. Also supports unix shell-style wildcards, which are not the same as regular expressions.
-
Usage:
Pattern Meaning * matches everything ? matches any single character [seq] matches any character in seq [!seq] matches any character not in seq
-
-
Name contains: The file name must contain the input.
-
Name begins with: The file name must start with the input.
-
Name ends with: The file name (without the file ending) must end with input. So
mplewould match withExample.txt. -
Name is similar to: Performs a fuzzy search. So
ampmatches withExample.txt. Matching percentage can be set separately. -
Name doesn't contain: Input must not be included in its entirety in the file name.
-
Name in RegEx: Does a regular expression pattern matching. For a detailed explanation refer to: https://regular-expressions.info
-
- File Types: Select groups of file types that should be included in search results. Click
Customto change selection mode and input a file type (e.g. pdf) without the.that needs to match the file ending of a file exactly, ignoring case. Multiple possible file types can be separated with a semicolon (for example:png;jpg;heic) ClickPredefinedto switch back. Only the currently visible mode will be taken into account. - Directory: The directory to search in. Excluding subdirectory is possible in
Advanced.
- Name: Multiple different modes are available.
-
Properties

- Date created and modified: Specify a date range for the date the file has been created / modified, leave at default to ignore.
- File size: Input specifies file size in a range from min to max. Select the unit (Byte, Megabyte, Gigabyte...) on the right. Select
No Limitto only set a minimum or maximum value.
-
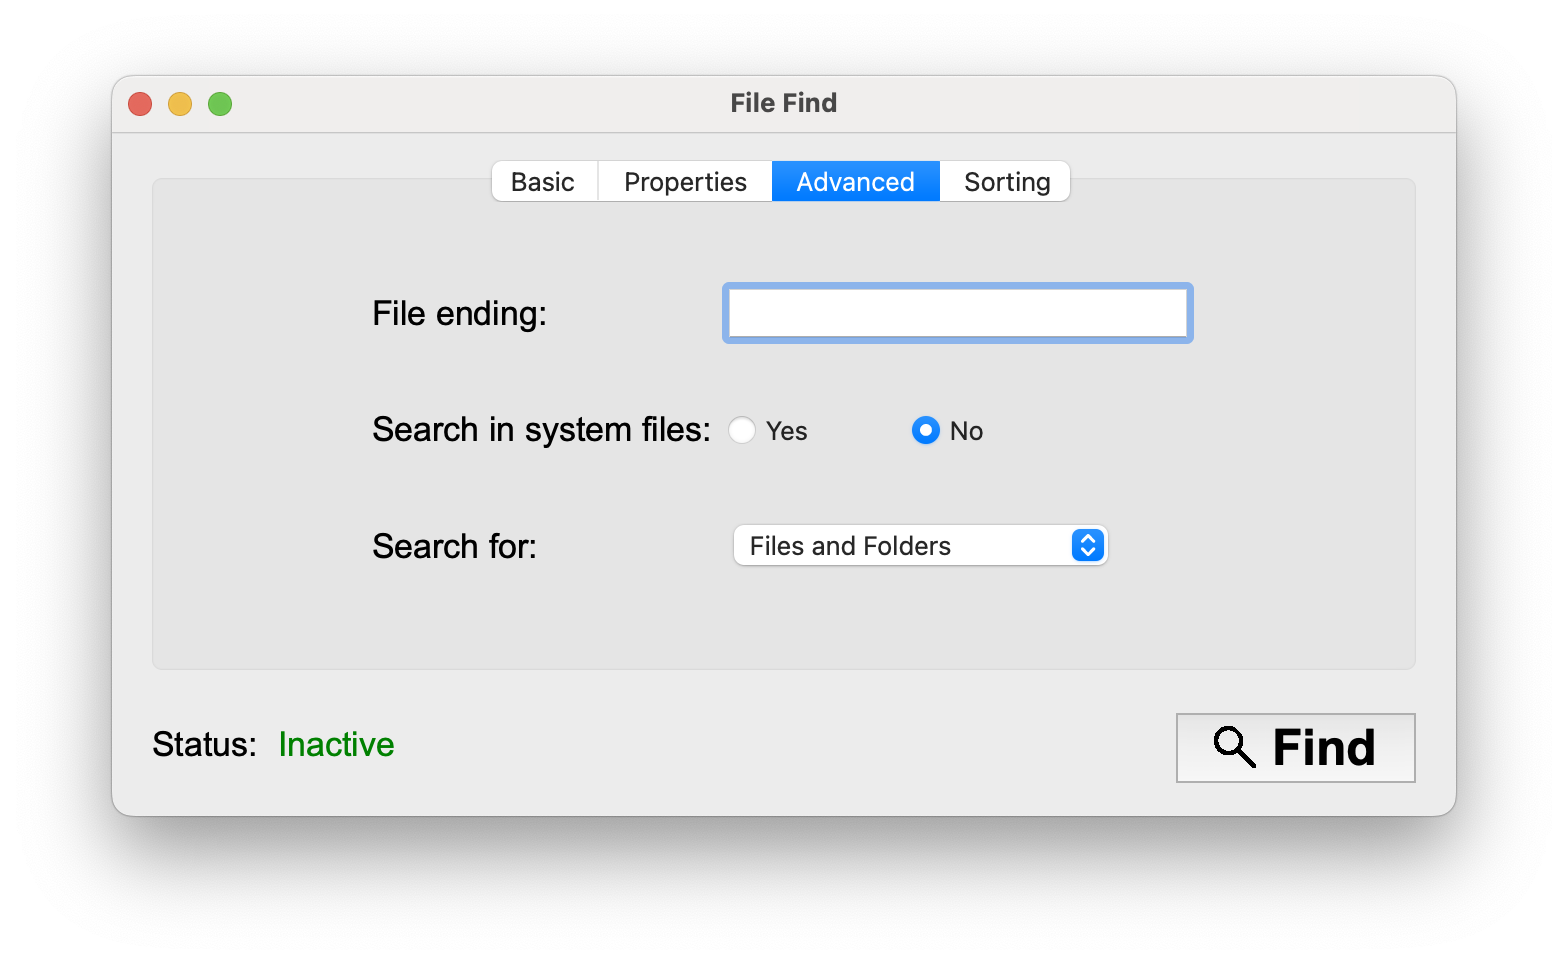
Advanced

- Limit folder depth: Toggle to include/exclude subdirectories or their subdirectories. Entering a custom number sets the maximum amount of subdirectories in which files are still included.
0orNo subfoldersmeans that ony the files directly in the specified directory will be included1means only the files in the folders that are directly in the specified dir will be considered...
- File contains: Allows you to search in files. Input must be in the file content. This option can take really long. The input is case-sensitive and only supports raw text files such as
.txt, MS-Office and PDFs are not supported. - Only search for folders or files: Toggle to only include folders or files in the search results.
- Search in system files: Toggle to include files in the system and library folders.
- Limit folder depth: Toggle to include/exclude subdirectories or their subdirectories. Entering a custom number sets the maximum amount of subdirectories in which files are still included.
-
Sorting

- Sorting: Possible sorting options:
- None (fastest)
- File size
- File name
- Date modified
- Date created
- Path: Sorting Path alphabetically
- Reverse Sort: Reverse the sorted search results (last comes first). Only appears if a search option is selected.
- Sorting: Possible sorting options:


- Export search results as a plain text file (.txt) or as a reloadable File Find Search (.FFSearch)
- Export your set filters as a .FFFilter file, load them again, share them or even set them as a default in the settings.
- Compare two searches and search for differences
- Find duplicated files
- Python 3.9 or higher (Python 3.13 does not work yet!)
- PySide6 6.4.1 or higher
- nuitka 2.0 or higher
- Only macOS: dmgbuild 1.1 or higher
-
Install Python:
Download the installer: here or use
Homebrew:
brew install python@3.12 -
Clone the File Find repository:
git clone https://github.com/Pixel-Master/File-Find.git -
cd into the repository:
cd File-Find -
Create a virtual environment:
- Create:
python3 -m venv ./venv - Activate the virtual environment:
source venv/bin/activate
- Create:
-
Install dependencies:
pip3 install -r requirements.txt -
Build using:
python3 build.py
-
Install Python:
With your favourite packet-manager
E.g.:
sudo apt install python3.12 -
Clone the File Find repository with git:
git clone https://github.com/Pixel-Master/File-Find.git -
cd into the repository:
cd File-Find -
Create a virtual environment:
- Create:
python3 -m venv ./venv - Activate the virtual environment:
source venv/bin/activate
- Create:
-
Install dependencies:
pip3 install -r requirements.txt -
Build using:
python3 build.py
-
Install Python:
Download the installer: here
-
Clone the File Find repository with git:
git clone https://github.com/Pixel-Master/File-Find.gitor download it from GitHub -
cd into the repository:
cd File-Find -
Create a virtual environment:
- Create:
python -m venv venv - Activate the virtual environment:
venv\Scripts\activate.bat
- Create:
-
Install dependencies:
pip3 install -r requirements.txt -
Build using:
python build.py
Q: What is File Find and how does it work?
A: File Find is an open-source Utility for macOS, Windows and Linux , that makes it easy to find files. To search fill in the filters you need and leave the filters that you don't need empty.
Q: Why doesn't File Find find my file/folder?
A: Try the following steps:
-
By default, (on a fresh install) File Find finds every file/folder except internal system files in the
LibraryorSystemfolders. You can enable them underAdvanced. -
Maybe you haven't granted all the permission necessary to find every file. There are also some files that are only accessible to File Find by granting Full Disk Access. To do this open System Preferences, go to
Security & Privacyand then add or activate File Find underFull Disk Access. -
File Find uses its own caching algorithm. Scanning results are stored and reused for a faster search. On default this cache gets cleared every two hours. You can clear the cache manually with
⌘ + Ton macOS (on Windows/Linux:Ctrl + T). Or right-click on theFindbutton and selectSearch and create new cache for selected folder. -
Check the excluded files list in the settings. Files listed there will not show up.
-
Press
⌘ + Ron macOS (on Windows/Linux:Ctrl + R) to reset all filter settings to default and make sure the file actually meets the given criteria. -
If none of these options help, create a Bug Report.
Q: Why can't I open File Find?
A: On macOS, if you get a message like
“File Find.app” Not Opened
Apple could not verify “File Find.app” is free of malware that may harm your Mac or compromise your privacy.
it is because File Find isn't signed with a Developer Certificate, which has to be acquired by Apple at around 99$.
I currently do not have one nor plan on buying one soon. MacOS flags everyone who doesn't have one as "potentially unwanted software".
To bypass this you have to press Done, open System Preferences, go to Privacy & Security, scroll down to "File Find.app" was blocked to protect your Mac. and press Open Anyway.
There is going to be another Popup, in which you'll have to press Open Anyway again.
Q: Why does File Find sometimes freeze?
A: It is possible that for example reloading files or building the UI at the end of a search can cause File Find to freeze. Just wait a few seconds!
Q: How do I clean the cache?
A: File Find uses its own caching algorithm. Scanning results are stored and reused for a faster search.
On default this cache gets cleared every two hours. You can change this behavior in the preferences. You can clear the cache manually with ⌘ + T on macOS (on Windows/Linux: Ctrl + T). Or right-click on the Find button and select Search and create new cache for selected folder.
Q: Why does File Find ask for permission for Contacts, Calenders, Photos, etc...?
A: File Find scans the entire specified directory, even if files are excluded they are scanned first and then sorted out.
Your photos, Calendar data, Contacts etc. are stored in a library folder, which means that File Find scans them.
File Find does not connect to the internet, everything stays on your machine. You can also press Do not allow, the associated files will not appear in your searches.
Q: Why does File Find ask for permission for Downloads, Desktop, Documents, etc...?
A: On macOS if an app scans a directory this popup will automatically appear.
If you press Don't allow, File Find will still be able to scan those files,
but you are not going to be able to save searches in those directories
Q: Does File Find connect to the Internet?
A: File Find does not connect to the Internet, everything stays on your machine.
-
File-Find.py- Main file, execute this for running File Find -
build.py- Build script, requires nuitka to be installed. See here
-
FF_Main_UI.py- This file contains the code for the main window -
FF_Search_UI.py- This file contains the code for the search-results window -
FF_Additional_UI.py- This file contains the code for additional UI components like dark mode icons or the tutorial -
FF_About_UI.py- This file contains the code for the About window -
FF_Menubar.py- Menu-bar for the search results, compare and duplicated window -
FF_Settings.py- Settings menu
-
FF_Search.py- This file contains the code for the search engine -
FF_Files.py- This file contains File operations and global variables -
FF_Duplicated.py- This file contains the code for the 'Find duplicated' feature and it's UI -
FF_Compare.py- This file contains the code for the 'Compare Search' feature and it's UI
-
assets/- Directory contains image assets for File Find -
File Find.entitlements- This is an entitlement file, which can be used to sandbox an app on macOS. Tough sandboxing is currently not supported.
It is recommended to use the GitHub Issue Tracker. If you don't want to use GitHub or want to write privately, email me: pixel_master.1@proton.me
If you found an unwanted behavior which you would classify as a bug.
Make sure you can reliably reproduce the bug. It is advised to use the Bug report template.
In your bug report include the following:
- If you think it would be helpful (it is in most cases) the log, access it by quitting the app and:
- On macOS: Open Terminal.app and paste
/Applications/File\ Find.app/Contents/MacOS/File-Findinto it, copy and paste the output into your bug report. Make sure that the log does not include confidential information such as your username. - On Windows: Open cmd or Terminal and paste
C:\path\to\File-Find.exe > output.txt 2>&1and run reproduce the bug. The log will be stored in output.txt on your user directory. copy and paste the output into your bug report. Make sure that the log does not include confidential information such as your username. - On Linux: Open Console and paste
/path/to/File-Find.bininto it, copy and paste the output into your bug report. Make sure that the log does not include confidential information such as your username.
- On macOS: Open Terminal.app and paste
- Step-by-Step guide on how to reproduce the bug
- Expected behavior
- Screenshot (only necessary with UI-Related bugs, always welcome)
- Installation Information
- OS and Version: [e.g. macOS 12]
- File Find Version (as seen in the about page) [e.g. 1.0 [25-july-2024]]
- Additional information
New functionality is wished.
Include in your feature request:
- Is the feature request related to a problem?
- The solution you'd like, clearly and concise
- How elaborate will the implementation be? (estimation)
- Alternatives (optional)
It is better if you create an issue or ask me before spending your time fixing an issue or developing something new.