开源库前缀统一修改为:RW,取义于Review一词,好的代码都是通过程序员一般般的review

零代码实现导航栏完美切换过渡效果
更多文章===>请查阅个人博客
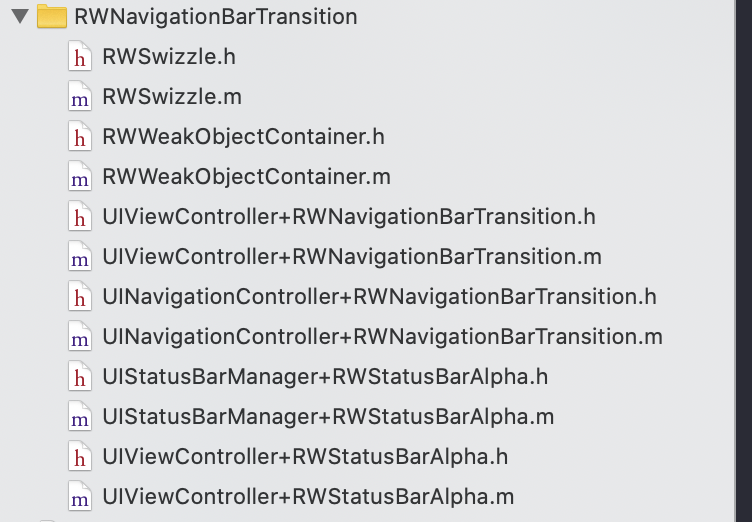
使用方法:将下面文件拉入项目中即可,但有几个注意点
- 请使用setBackgroundImage:forBarMetrics:设置导航栏背景颜色
- 禁止设置navigationBar.translucent的值
- 在viewDidLoad或viewWillAppear设置导航栏样式效果更佳
================================ 我是分割线 ================================
============================== 以下是博客正文 ===============================
UINavigationBar是每个项目不可避免要使用的控件,如果没有特殊的要求,直接定义系统的导航栏就很简单容易,也没什么问题,但如果出现导航栏颜色不同的跳转或者有导航栏和无导航栏之间的跳转 ,就会变成成一个棘手的问题,在跳转或者滑动返回的过渡很不友好,但又是必须优化的一部分。
UINavigationBar让人感觉棘手是由于navigaitonController.navigationBar是一个公用的控件,并且有且只有一个,只要一处修改了,那么全局的ViewController都会受影响,而在跳转和滑动返回的时候我们期待看到是两个不同的navigationBar,互不影响。
也就是说问题的关键是让每个ViewController的navigationBar都独立,互不影响。
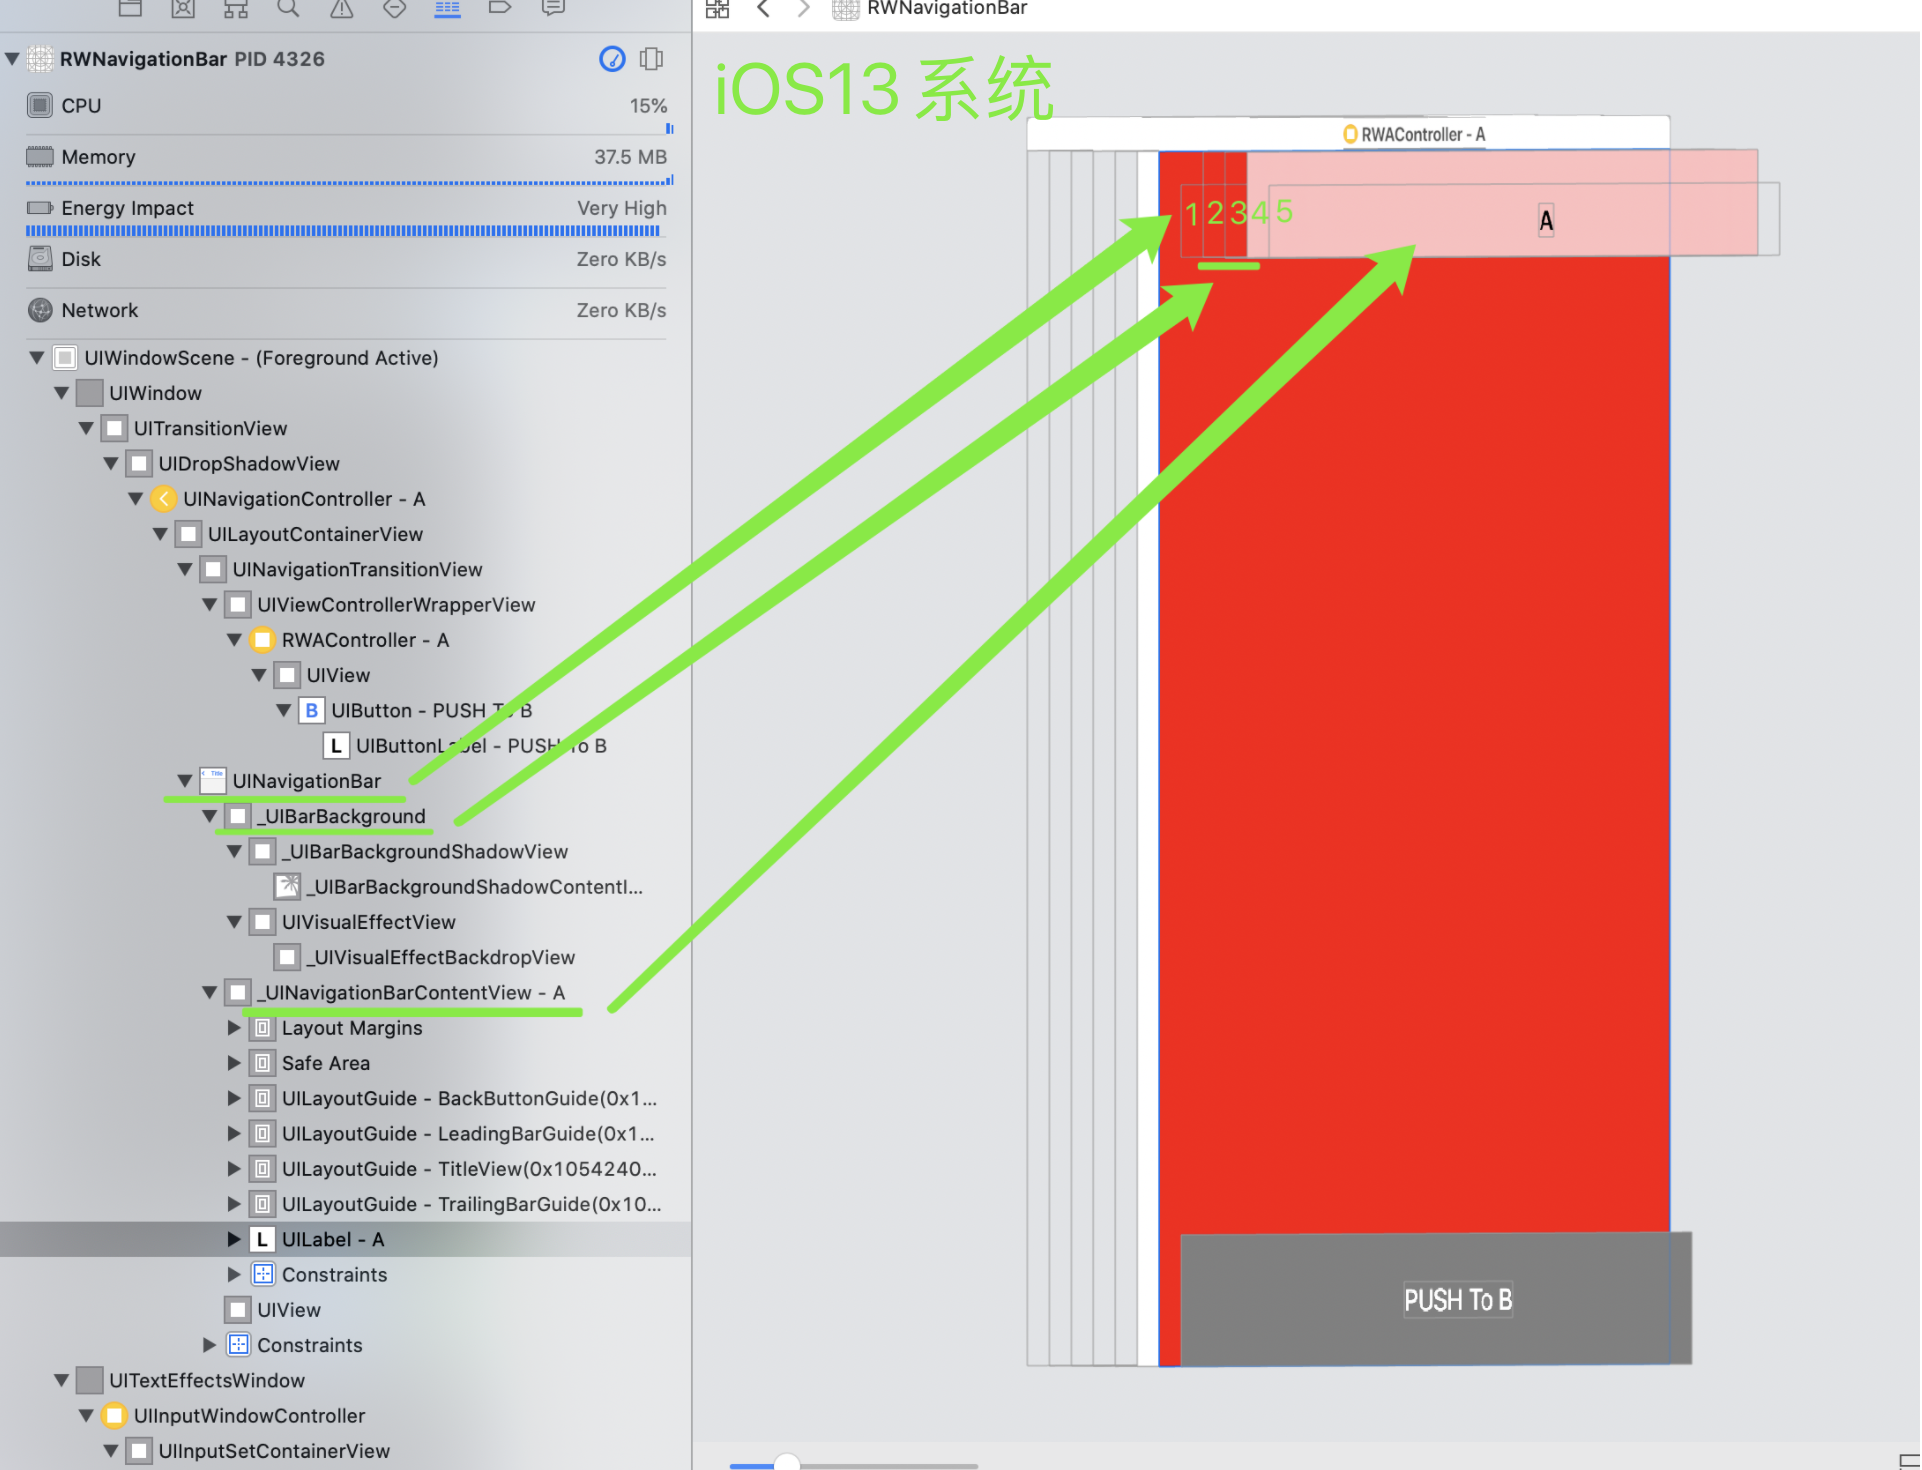
以下是navigationBar控件的基本结构

navigationBar常用的属性和方法
@property(nonatomic,assign,getter=isTranslucent) BOOL translucent;
@property(nullable, nonatomic,readonly,strong) UINavigationItem *topItem;
@property(nullable, nonatomic,readonly,strong) UINavigationItem *backItem;
@property(nullable,nonatomic,copy) NSArray<UINavigationItem *> *items;
@property(null_resettable, nonatomic,strong) UIColor *tintColor;
@property(nullable, nonatomic,strong) UIColor *barTintColor;
@property(nullable, nonatomic,strong) UIImage *shadowImage;
@property(nullable,nonatomic,copy) NSDictionary<NSAttributedStringKey, id> *titleTextAttributes;
@property(nullable, nonatomic, copy) NSDictionary<NSAttributedStringKey, id> *largeTitleTextAttributes;

- (void)setBackgroundImage:(nullable UIImage *)backgroundImage forBarMetrics:(UIBarMetrics)barMetrics;
- (nullable UIImage *)backgroundImageForBarMetrics:(UIBarMetrics)barMetrics;
苹果官方文档中对于如何使用导航栏控制器的导航栏,描述如下
To control a navigation bar when using a navigation controller, the following steps are required:

Create a navigation controller in Interface Builder or in the code.

Configure the appearance of the navigation bar using the navigationBar property on the UINavigationController object.

Control the content of the navigation bar by setting the title and navigationItem properties on each UIViewController you push onto the navigation controller’s stack.
翻译过来就是:
(1)使用UINavigationController对象中的navigationBar属性配置导航栏的外观
(2)通过设置每个UIViewController上的title和navigationItem属性来控制导航栏的内容
通过以上的描述,可以知道每个ViewController显示的导航栏navigationBar的内容是可以单独设置的,互不干扰,但是每个ViewController中导航栏的外观样式,都是需要通过self.navigationController.navigationBar设置,而每个viewController都共用一个navigationBar,只要一个修改了,那么其他的ViewController中导航栏navigationBar的样式也会修改。
Demo代码及注释都是以界面A PUSH==> 界面B 和 界面B Pop==>界面A为例,此处只做重要的代码解析,更为详情讲解的请查看代码注释。
这套方案是借鉴美团技术团队iOS系统中导航栏的转场解决方案与最佳实践 文章,在这里十分感谢。
整套方案核心的点是:
-
“隐藏”
navigationController.navigationBar,在A界面和B界面添加过渡的导航栏rw_transitionNavigationBar; -
navigationController.navigationBar的''隐藏''方式关键是将_UIBarBackground的透明度设置为0,这样设置的原因是:既能隐藏导航栏样式,又能不影响ViewController的布局 -
导航栏样式的设置最好是在
viewDidload或者viewWillAppeard方法中设置,这是因为创建过渡导航栏rw_transitionNavigationBar样式是在viewWillLayoutSubviews中执行的,也就说在这个方法中获取navigationController.navigationBar的样式来设置rw_transitionNavigationBar -
一定一定一定🙅♂️不要手动设置navigationBar.translucent的值,即使是设置为默认的YES,也不要,具体为什么请看Demo代码
- 非常不建议修改默认的navigationBar.translucent,具体原因请看Demo代码,都有详情备注
- 导航栏背景颜色必须使用这个方法:[self.navigationController.navigationBar setBackgroundImage:[UIImage imageWithColor:UIColor.yellowColor] forBarMetrics:UIBarMetricsDefault];
- 上面的方法能满足大部分场景的使用,是没问题的。不过有时会发现在viewcontroller中设置navigationbar的样式不起作用了。为什么会这样?
当AViewController嵌套若干个BViewController,并且将嵌套的BVewController添加到AViewController的ChildViewController,这时页面导航栏显示的样式最终由BViewController中设置的导航栏样式决定。
比如:类型今日头条中分段控制器中嵌套多个ViewController,而要实现嵌套的ViewController的View生命周期也起作用,那么就要将嵌套的ViewController添加到外层的ViewController的ChildViewController中
如果是状态栏隐藏的情况,会导致状态栏上移,及viewController.view上移,查阅了许多文章,比较好的解决方案是获取状态栏statusBar并将其透明度alpha设置为1,这样即可隐藏状态栏也不会影响布局,但是在iOS13系统以后已经是不能通过以下的代码获取状态栏,因为状态栏已经转为由windowScene.statusBarManager管理,虽然statusBarManager这个类并没有提供属性或者接口获取到状态栏,但是通过Swizzle方法能打印其内部私有的属性和方法,详情如下:
/// iOS13之前
[[[UIApplication sharedApplication] valueForKey:@"statusBarWindow"] valueForKey:@"statusBar"];
statusBarManager 所有属性
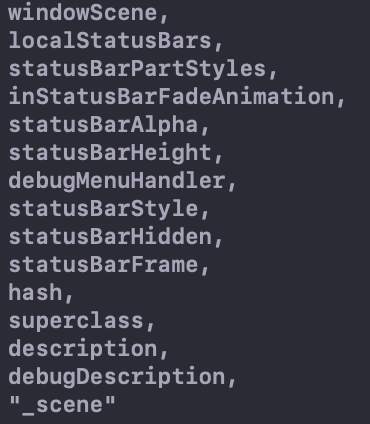
statusBarManager 所有方法

/// iOS 13之后获取状态栏
UIView *_statusBar = nil;
 if (@available(iOS 13.0,*)) {
     UIStatusBarManager *statusBarManager = [UIApplication sharedApplication].keyWindow.windowScene.statusBarManager;
     if ([statusBarManager respondsToSelector:NSSelectorFromString(@"createLocalStatusBar")]) {
            UIView *_localStatusBar = [statusBarManager performSelector:NSSelectorFromString(@"createLocalStatusBar")];
            if ([_localStatusBar respondsToSelector:NSSelectorFromString(@"statusBar")]) {
                _statusBar = [_localStatusBar performSelector:NSSelectorFromString(@"statusBar")];
            }
        }
    }
 else{
     _statusBar = [[[UIApplication sharedApplication] valueForKey:@"statusBarWindow"] valueForKey:@"statusBar"];
 }
但是获取到的statusBar直接设置器alpha,是不起作用的,估计内部还有其他逻辑更新其透明度,这部分还没搞清楚,接下来会接续研究,如有更好的解决方式,欢迎留言,感谢
解决的思路还是跟上面描述的方式一样,不是直接设置隐藏hidden的方式去除状态栏,而是通过设置状态栏的透明度。iOS13根据上面的方式获取到状态栏再设置其透明度是行不通的,这就很纳闷了。不行那怎么办,网上也没有找到对应的方法解决,那么有时就只能靠猜了(其实苹果官方设置属性和方法名字,都是比较通俗易懂的,知其名知其意),根据我们上面打印StatusBarManager的属性和方法,知道有几个属性和方法都涉及到alpha的值,最终通过以下的方法解决,暂时未出现BUG。
留意到StatusBarManager有一个statusBarAlpha属性,那么心里会想是不是可以直接设置这个属性来改变状态栏的透明度?测试后,结果是不行的。
但同时也注意到方法列表中有一个
_updateAlpha,为什么注意到它了,除了字面的意思外,还有一个就是它的typeCoding是B16@0:8,表示它会返回一个BOOL类型的值,并且除了消息发送的基本参数self、_cmd外没有带其他的参数了,这对于我们要Swizzle是非常友好的。结合起来可能内部的逻辑就是:状态栏的透明是否更新是通过这个方法返回的为准。事实证明确实可行
/// 创建一个UIStatusBar的分类,Swizzle“_updateAlpha”方法

#import "UIStatusBarManager+RWStatusBarAlpha.h"
#import "RWSwizzle.h"

@implementation UIStatusBarManager (RWStatusBarAlpha)

+ (void)load {
    static dispatch_once_t onceToken;
    dispatch_once(&onceToken, ^{
        RWSwizzleMethod([self class], NSSelectorFromString(@"_updateAlpha"), [self class], NSSelectorFromString(@"rw_updateAlpha"));
    });
}

/// 适配iOS13以后的状态栏透明度修改
- (BOOL)rw_updateAlpha {
    return YES;
}

@end
状态栏的隐藏通过以下方式修改,而不通过prefersStatusBarHidden设置
/// 创建一个ViewController的分类,扩展一个"rw_statusBarAlpha"属性,直接可以设置状态栏的透明度
/// 这里选择通过ViewController添加分类的方式扩展此功能,是因为修改状态栏透明度之后还需要调用viewController的setNeedsStatusBarAppearanceUpdate方法

@interface UIViewController (RWStatusBarAlpha)
/// 状态栏透明度(默认值:1)
@property (nonatomic, assign) CGFloat  rw_statusBarAlpha;
@end


#import "UIViewController+RWStatusBarAlpha.h"
#import <objc/runtime.h>
#import "RWSwizzle.h"

@implementation UIViewController (RWStatusBarAlpha)

+ (void)load {
    static dispatch_once_t onceToken;
    dispatch_once(&onceToken, ^{
        RWSwizzleMethod([self class],
                        @selector(init),
                        [self class],
                        @selector(rw_init));
    });
}

- (instancetype)rw_init {
  	/// 设置其初始值为1
    self.rw_statusBarAlpha = 1;
    return [self rw_init];
}

- (CGFloat)rw_statusBarAlpha {
    return [objc_getAssociatedObject(self, @selector(rw_statusBarAlpha)) floatValue];
}

- (void)setRw_statusBarAlpha:(CGFloat)rw_statusBarAlpha {
    objc_setAssociatedObject(self, @selector(rw_statusBarAlpha), @(rw_statusBarAlpha), OBJC_ASSOCIATION_RETAIN_NONATOMIC);
    if (@available(iOS 13.0,*)) {
        UIStatusBarManager *statusBarManager = [UIApplication sharedApplication].keyWindow.windowScene.statusBarManager;
        [statusBarManager setValue:@(rw_statusBarAlpha) forKey:@"statusBarAlpha"];
    }
    else{
        UIView *statusBar = [[[UIApplication sharedApplication] valueForKey:@"statusBarWindow"] valueForKey:@"statusBar"];
        statusBar.alpha = rw_statusBarAlpha;
    }
    [self setNeedsStatusBarAppearanceUpdate];
}

@end正确的设置导航栏控制中导航栏的背景颜色
请查阅iOS NavigationBar 导航栏背景颜色设置 + iOS11 适配一文中,关于设置navigationBar.tinkColor、navigationBar.backgroundColor、navigationBar.BarTinkColor的区别
推荐写法(视觉上是看不出有任何差别的)
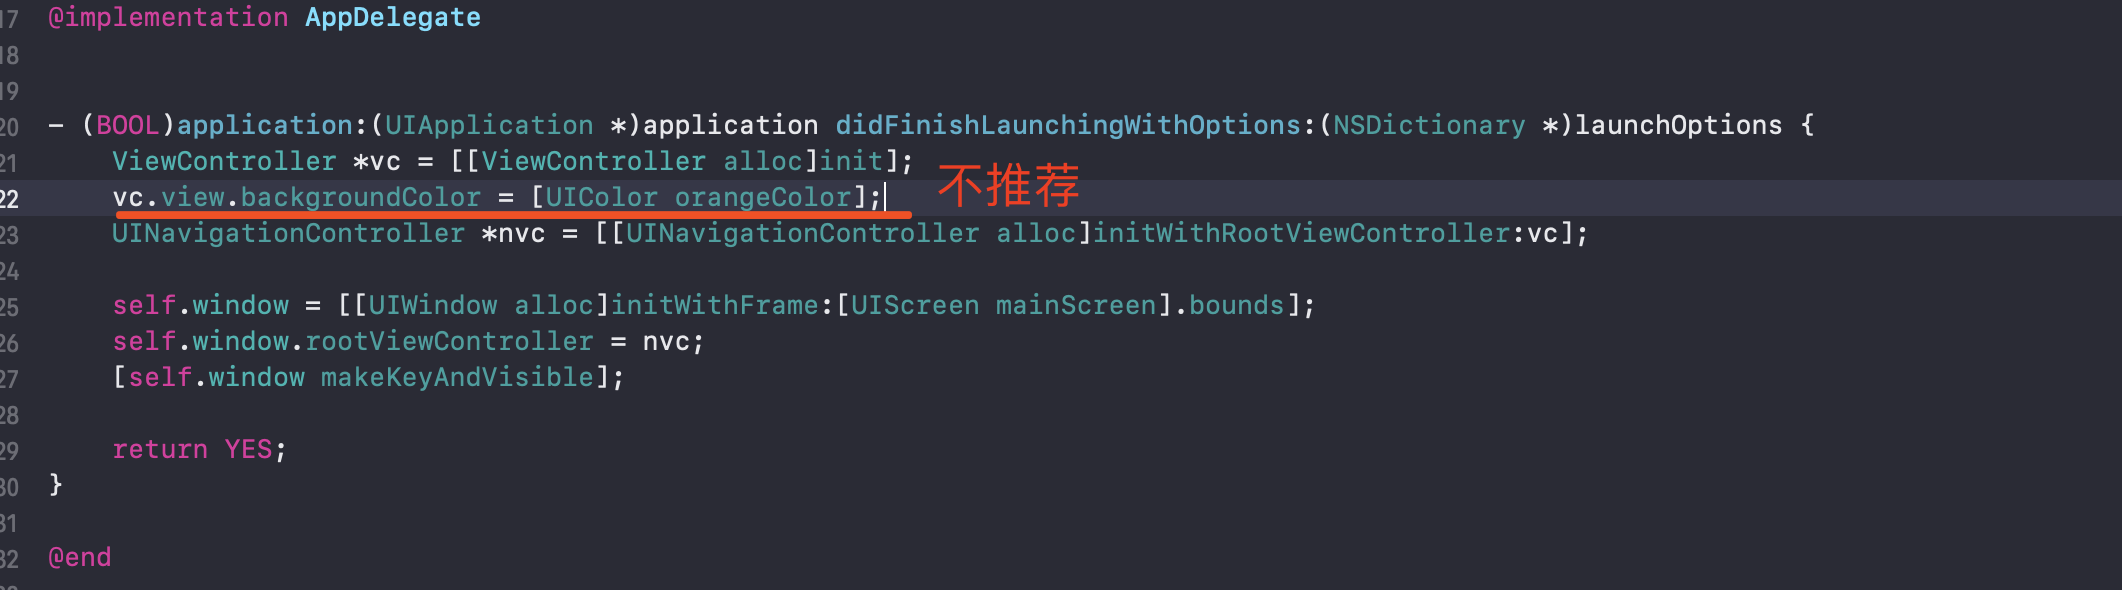
[self.navigationController.navigationBar setBackgroundImage:[UIImage imageWithColor:UIColor.yellowColor] forBarMetrics:UIBarMetricsDefault];NavigationController 设置 RootViewController时,rootViewController创建时避免设置view相关的属性,如果设置了view相关的属性,那么就会提前调用viewController的viewDidLoad方法,导致viewController还没入栈navigation Stack,在viewDidLoad设置导航栏时,获取导航栏控制器为空

在iphone6 12.4的系统上,出现以下的“断层”的问题

BUG分析如下:
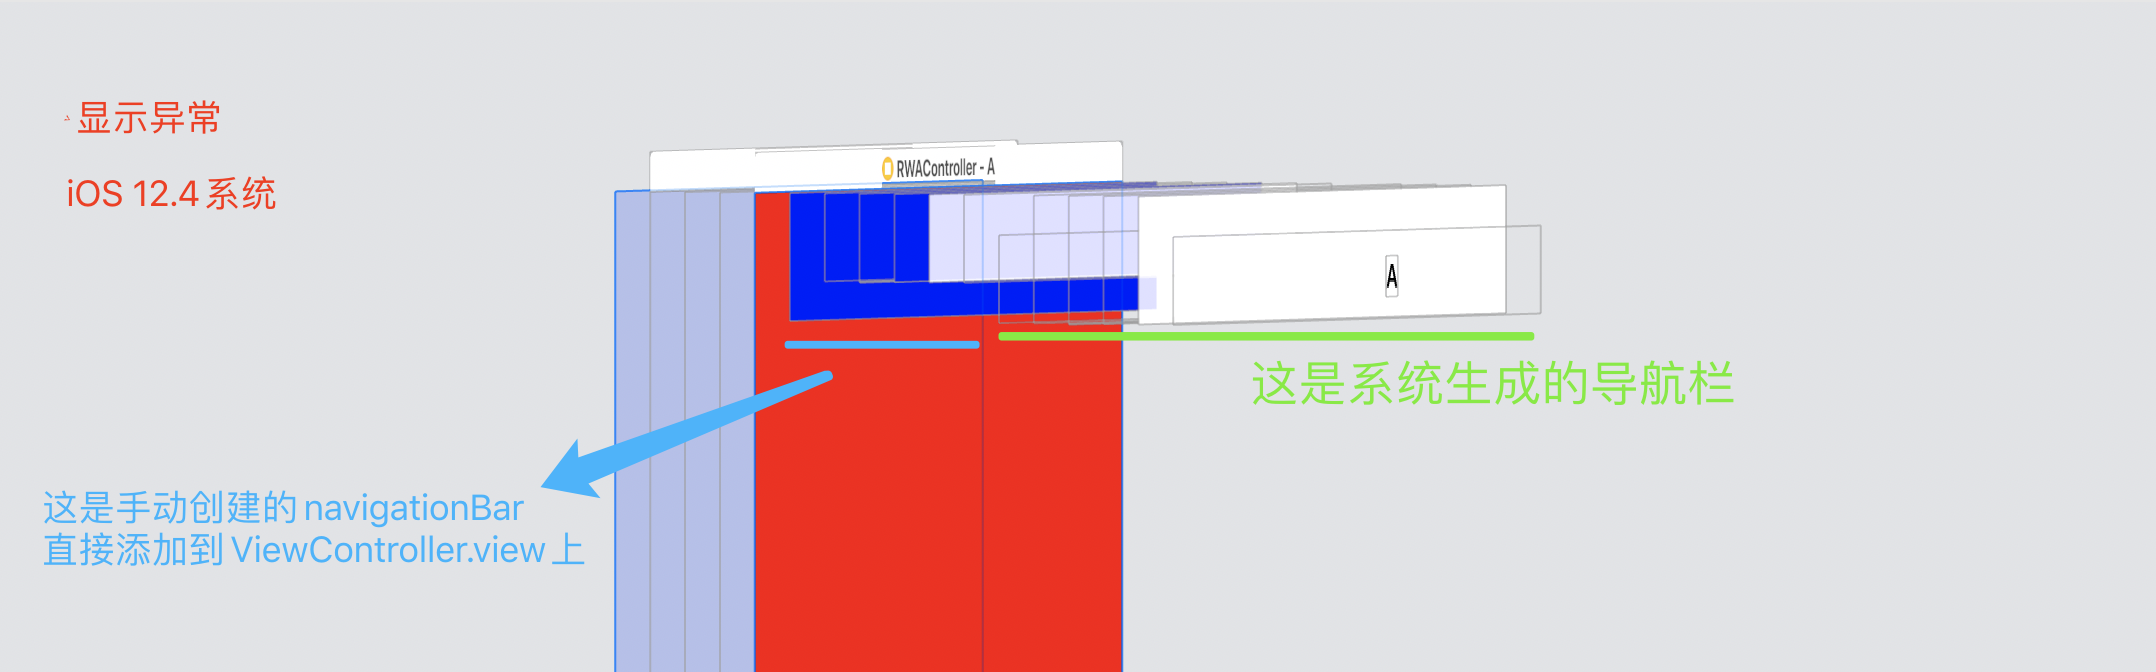
/// 自定义的导航栏代码
UINavigationBar *tempBar = [[UINavigationBar alloc]initWithFrame:CGRectMake(0, 0, self.view.frame.size.width, 64)];
tempBar.backgroundColor = UIColor.blueColor;
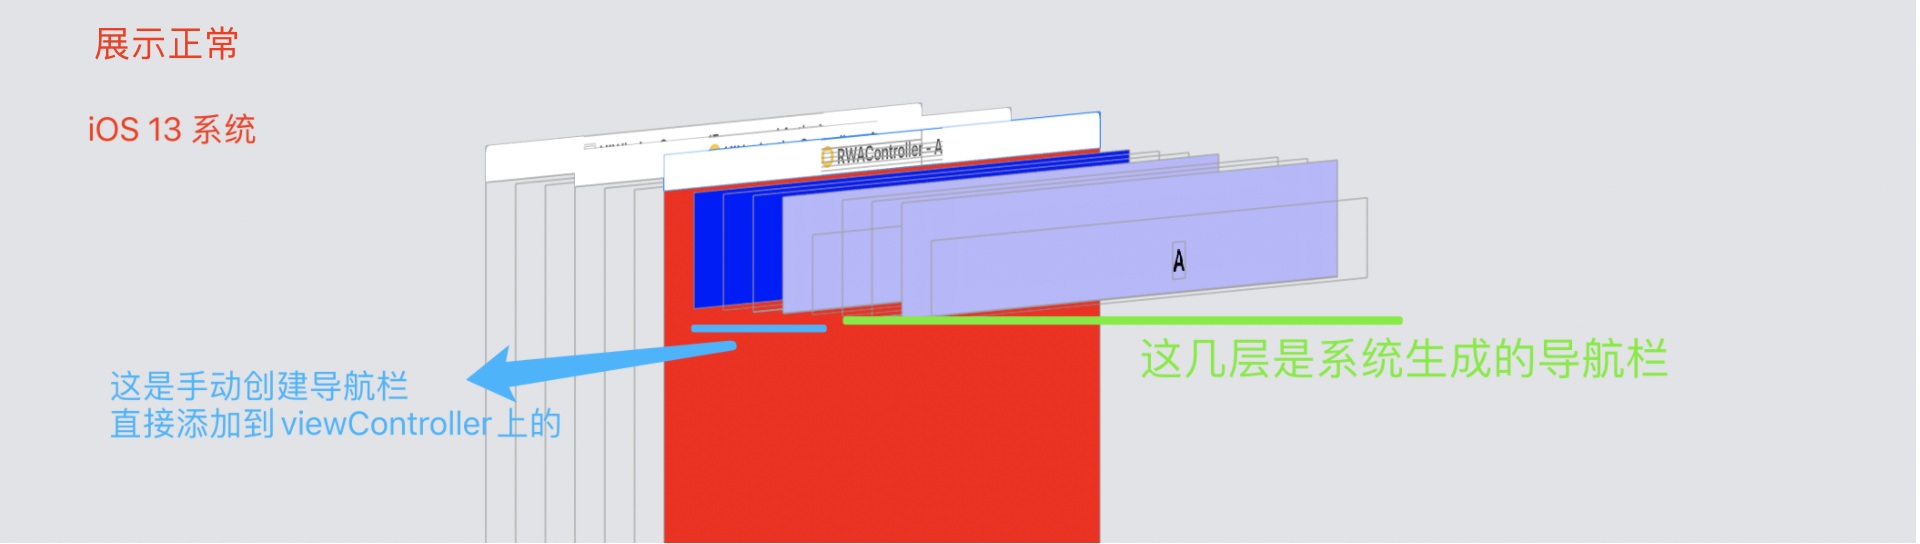
[self.view addSubview:tempBar];从上面的navigationBar的层级截图可以看得出来两张图的结构有所不同,主要体现在设置导航栏样式的层级_UIBarBackground的大小和坐标(蓝色上一层的框框就是 _UIBarBackground),而我们在设置创建的过渡导航栏的导航栏样式,或者是说设置navigationController.navigationBar的也好,都是通过设置backgroundImage完成的,也就是设置 _UIBarBackground上的子视图完成,所以才会出现iOS12.4断层的BUG
(推测:
1、手动创建的navigationBar和导航栏navigationController自带的navigationBar是不一样的,navigationController在创建navigationBar的时候应该是有对_UIBarBackground的frame进行设置
2、新版本的navigationBar中对_UIBarBackground的frame默认是navigationBar.bounds
)
思路就是将_UIBarBackground的大小设置跟UINavigationBar的一样,以下是两个关键带代码片段
/// 第一
/// UIViewController+RWNavigationBarTransition.m 文件
/*
	在设置过渡导航栏rw_transitionNavigationBar.frame的时候,拿的是UIBarBackground的frame
	这样做的目的是让创建的导航栏rw_transitionNavigationBar的高度能覆盖到状态栏,这样便于设置第二步中的UIBarBackground的高度
*/
UIView *backgroundView = self.navigationController.navigationBar.rw_backgroundView;
CGRect rect = [backgroundView.superview convertRect:backgroundView.frame toView:self.view];
self.rw_transitionNavigationBar.frame = rect;/// 第二
@implementation UINavigationBar (RWNavigationBarTransition)
+ (void)load {
static dispatch_once_t onceToken;
dispatch_once(&onceToken, ^{
RWSwizzleMethod([self class],
@selector(layoutSubviews),
[self class],
@selector(rw_layoutSubviews));
});
}
- (void)rw_layoutSubviews {
[self rw_layoutSubviews];
/// 这里就兼容了上面截图出现的两种情况
UIView *backgroundView = self.rw_backgroundView;
CGRect frame = backgroundView.frame;
frame.size.height = self.frame.size.height + fabs(frame.origin.y);
backgroundView.frame = frame;
}
- (UIView *)rw_backgroundView {
/// 适配iOS10之前后iOS10之后的
__block UIView *backgroundView = nil;
[self.subviews enumerateObjectsUsingBlock:^(__kindof UIView * _Nonnull obj, NSUInteger idx, BOOL * _Nonnull stop) {
if ([obj isKindOfClass:NSClassFromString(@"_UIBarBackground")] || [obj isKindOfClass:NSClassFromString(@"_UINavigationBarBackground")]) {
backgroundView = obj;
*stop = YES;
}
}];
return backgroundView;
}
@end
美团技术团队--iOS系统中导航栏的转场解决方案与最佳实践 [github代码](