THE ORIGINAL PROJECT CAN BE FOUND here.
NVIDIA has a bug that makes 24/7 recording on Linux not really feasible due to high power consumption... To find out more: https://forums.developer.nvidia.com/t/nvdec-forces-gpu-into-p2-cuda-state-much-higher-power-consumption-than-with-vdpau/55466 https://forums.developer.nvidia.com/t/whats-the-situation-with-vdpau-vaapi-nvdec/61031
This version of GPU Screen Recorder has some small changes so I can run it 24/7.
The original awesome version can be found here. I think this is a really great tool, the quality of the recordings is really good and the performance impact is minimal - thank you dec05eba!
I found some cases where the program would not crash but also would not record anything.
Since I don't know enough about how to fix this issue in a proper way, I just added the option to crash in those cases.
An additional parameter -e (fail-fast) was added to the program to enable this behavior.
This fixes the case where the recording fails when the screen saver is activated or the screen is locked and switched off.
After Standby or Hibernation I had another issue, that could be easier fixed by following the instructions in the Arch Wiki.
Basically I did the following:
- Enabled the following services (and ensure that one is disabled as it should be):
systemctl enable nvidia-suspend.service
systemctl enable nvidia-hibernate.service
systemctl disable nvidia-resume.service # this one should be already disabled- Add one line to
nvidia-power-management.conf:
mkdir -p /etc/modprobe.d
echo "options nvidia NVreg_PreserveVideoMemoryAllocations=1 NVreg_TemporaryFilePath=/tmp" > /etc/modprobe.d/nvidia-power-management.conf- After that regenerate the initramfs (on Arch Linux) with
mkinitcpio -Pand reboot.
This also fixed some other glitches that I usually had after standby or hibernate. (e.g. steam friends only showing a black window)
I added my watcher script to the repo, which is a simple bash script that restarts the recording if it fails - see replay247.sh.
I also added a global hotkey to save the last 5 minutes of the recording by executing
killall -SIGUSR1 gpu-screen-recorderThe recording "survives" all my monitor setup changes (1 Monitor for gaming, 3 Monitors for work, 4 with some Mirroring).
This repository includes a systemd service file, which can be used to run the program as a service.
The service file is located in scripts/gpu-screen-recorder.service, and should be copied to a location where systemd can find it, e.g. $HOME/.config/systemd/user.
It is recommended to run the service in user mode.
The service can be configure by modifying the service environment file, which is read from $HOME/.config/gpu-screen-recorder.env.
The following environment variables can be set:
| Variable | Description | Default |
|---|---|---|
| FAILFAST | If set to true, the program will exit if capture errors occur, which can help service reliability. |
true |
| WINDOW | The window to capture. See the binary documentation for more details. | screen |
| CONTAINER | The container format to use. | mp4 |
| QUALITY | The quality to use. | very_high |
| CODEC | The video codec to use. | auto |
| AUDIO_CODEC | The audio codec to use. | opus |
| FRAMERATE | The framerate to record in. | 60 |
| REPLAYDURATION | The duration of the replay buffer in seconds. | 300 |
| OUTPUTDIR | The directory to save the recordings to. | $HOME/Videos |
| ADDITIONAL_ARGS | Additional arguments to pass to the binary. | N/A |
After placing the service file in a location where systemd can find it, the service can be enabled and started with the following commands:
systemctl --user daemon-reload # Reload systemd (not strictly necessary on first install)
systemctl --user enable gpu-screen-recorder.service # Enable the service
systemctl --user start gpu-screen-recorder.service # Start the serviceThe program can be installed by running install.sh as root: sudo ./install.sh, but you need to manually install the dependencies, as described below in the original README.
Cheers ~Horo
This is a screen recorder that has minimal impact on system performance by recording a window using the GPU only, similar to shadowplay on windows. This is the fastest screen recording tool for Linux.
This screen recorder can be used for recording your desktop offline, for live streaming and for nvidia shadowplay-like instant replay, where only the last few seconds are saved.
This software works only on x11.
If you are using a variable refresh rate monitor, then choose to record "screen-direct". This will allow variable refresh rate to work when recording fullscreen applications. Note that some applications such as mpv will not work in fullscreen mode. A fix is being developed for this.
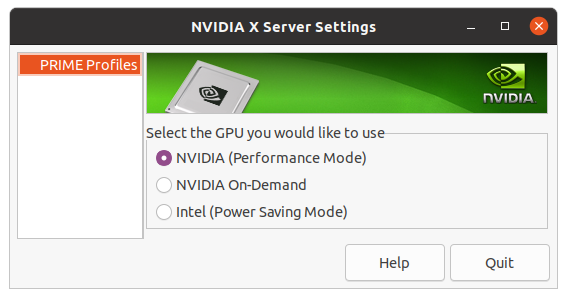
For screen capture to work with PRIME (laptops with a nvidia gpu), you must set the primary GPU to use your dedicated nvidia graphics card. You can do this by selecting "NVIDIA (Performance Mode) in nvidia settings:
and then rebooting your laptop.
screen-direct capture has been temporary disabled as it causes issues with stuttering. This might be a nvfbc bug.
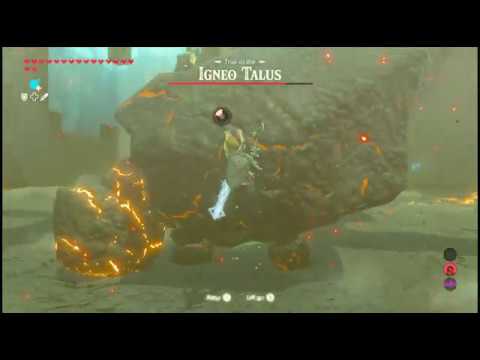
When recording Legend of Zelda Breath of the Wild at 4k, fps drops from 30 to 7 when using OBS Studio + nvenc, however when using this screen recorder the fps remains at 30.
When recording GTA V at 4k on highest settings, fps drops from 60 to 23 when using obs-nvfbc + nvenc, however when using this screen recorder the fps only drops to 55. The quality is also much better when using gpu-screen-recorder.
It is recommended to save the video to a SSD because of the large file size, which a slow HDD might not be fast enough to handle.
If you are running an Arch Linux based distro, then you can find gpu screen recorder on aur under the name gpu-screen-recorder-git (yay -S gpu-screen-recorder-git).
If you are running an Ubuntu based distro then run install_ubuntu.sh as root: sudo ./install_ubuntu.sh. You also need to install the libnvidia-compute version that fits your nvidia driver to install libcuda.so to run gpu-screen-recorder and libnvidia-fbc.so.1 when using nvfbc. But it's recommended that you use the flatpak version of gpu-screen-recorder if you use an older version of ubuntu as the ffmpeg version will be old and wont support the best quality options.
If you are running another distro then you can run install.sh as root: sudo ./install.sh, but you need to manually install the dependencies, as described below.
You can also install gpu screen recorder (the gtk gui version) from flathub.
libglvnd (which provides libgl and libegl), (mesa if you are using an amd or intel gpu), ffmpeg (libavcodec, libavformat, libavutil, libswresample, libavfilter), libx11, libxcomposite, libpulse. You need to additionally have libcuda.so installed when you run gpu-screen-recorder and libnvidia-fbc.so.1 when using nvfbc.\
Run scripts/interactive.sh or run gpu-screen-recorder directly, for example: gpu-screen-recorder -w $(xdotool selectwindow) -c mp4 -f 60 -a "$(pactl get-default-sink).monitor" -o test_video.mp4 then stop the screen recorder with Ctrl+C, which will also save the recording. You can change -w to -w screen if you want to record all monitors or if you want to record a specific monitor then you can use -w monitor-name, for example -w HDMI-0 (use xrandr command to find the name of your monitor. The name can also be found in your desktop environments display settings).
Send signal SIGUSR1 (killall -SIGUSR1 gpu-screen-recorder) to gpu-screen-recorder when in replay mode to save the replay. The paths to the saved files is output to stdout after the recording is saved (note that all other text it output to stderr so you can ignore that text).
You can find the default output audio device (headset, speakers (in other words, desktop audio)) with the command pactl get-default-sink. Add monitor to the end of that to use that as an audio input in gpu-screen-recorder.
You can find the default input audio device (microphone) with the command pactl get-default-source. This input should not have monitor added to the end when used in gpu-screen-recorder.
Example of recording both desktop audio and microphone: gpu-screen-recorder -w $(xdotool selectwindow) -c mp4 -f 60 -a "$(pactl get-default-sink).monitor" -a "$(pactl get-default-source)" -o test_video.mp4.
A name (that is visible to pipewire) can be given to an audio input device by prefixing the audio input with <name>/, for example dummy/alsa_output.pci-0000_00_1b.0.analog-stereo.monitor.
Note that if you use multiple audio inputs then they are each recorded into separate audio tracks in the video file. If you want to merge multiple audio inputs into one audio track then separate the audio inputs by "|" in one -a argument,
for example -a "alsa_output.pci-0000_00_1b.0.analog-stereo.monitor|bluez_0012.monitor".
There is also a gui for the gpu-screen-recorder called gpu-screen-recorder-gtk.
Run the script scripts/start-replay.sh to start replay and then scripts/save-replay.sh to save a replay and scripts/stop-replay.sh to stop the replay. The videos are saved to $HOME/Videos.
You can use these scripts to start replay at system startup if you add scripts/start-replay.sh to startup (this can be done differently depending on your desktop environment / window manager) and then go into hotkey settings on your system and choose a hotkey to run the script scripts/save-replay.sh. Modify scripts/start-replay.sh if you want to use other replay options.
OBS only uses the gpu for video encoding, but the window image that is encoded is copied from the GPU to the CPU and then back to the GPU (video encoding unit). These operations are very slow and causes all of the fps drops when using OBS. OBS only uses the GPU efficiently on Windows 10 and Nvidia.
This gpu-screen-recorder keeps the window image on the GPU and sends it directly to the video encoding unit on the GPU by using CUDA. This means that CPU usage remains at around 0% when using this screen recorder.
The plugin does everything on the GPU and gives the texture to OBS, but OBS does not know how to use the texture directly on the GPU so it copies the texture to the CPU and then back to the GPU (video encoding unit). These operations are very slow and causes a lot of fps drops unless you have a fast CPU. This is especially noticable when recording at higher resolutions than 1080p.
FFMPEG only uses the GPU with CUDA when doing transcoding from an input video to an output video, and not when recording the screen when using x11grab. So FFMPEG has the same fps drop issues that OBS has.
- Support AMD and Intel, using VAAPI. Currently there are a lot of driver bugs with both AMD and Intel that causes video encoding to either fail, performance issues or causes the entire driver to crash.
- Dynamically change bitrate/resolution to match desired fps. This would be helpful when streaming for example, where the encode output speed also depends on upload speed to the streaming service.
- Show cursor when recording. Currently the cursor is not visible when recording a window.
- Implement opengl injection to capture texture. This fixes VRR without having to use NvFBC direct capture.
- Always use direct capture with NvFBC once the capture issue in mpv fullscreen has been resolved (maybe detect if direct capture fails in nvfbc and switch to non-direct recording. NvFBC says if direct capture fails).