
SAB or Simple Applications Bot is a Discord bot designed in Python to streamline and manage application processes within Discord servers. It allows server administrators to create custom application forms, manage submissions, and review applications that comes with a intuitive web dashboard.
At it's current iteration each running instance of the bot only supports managing one guild (or server). This likely what the next major feature update would be.
- Application Panels: Create application panels with select menus for different positions to make it extremely intuitive for the end user!
- High customisability: Configure pretty much every aspect of the bot!
- Web Dashboard: Bot comes with a powerful yet simple internal dashboard to manage the various aspects of the bot!
- Thread Creation: Automatically create threads to discuss applicants with your staff members!
Dashboard


Bot


- Clone the repository
git clone https://github.com/Cirkutry/application-bot.git
cd application-bot- Install dependencies
pip install -r requirements.txt- Set up environment variables by copying the example environment file to a file named
.envand filling in your details.- For Linux:
cp .env.example .env
- For Windows:
copy .env.example .env
- Start the bot
python main.pyThe bot will start and connect to your Discord server. You should see output confirming:
- Bot connection to Discord
- Web dashboard availability
- Registration of bot views if any
Required environment variables:
-
TOKEN: Discord bot's token - (See #discord-developer-portal-setup for more info) -
SERVER_ID: ID of your Discord server - This will requireDeveloper Modeenabled under theAdvancedsection in Discord settings, after which you can right-click your server and clickCopy Server IDand paste it's value in this variable. -
WEB_HOST: Host IP for the web dashboard - Set this to localhost for testing locally or set it to your public facing IP of your host (withouthttp://orhttps://) -
WEB_PORT: Port for the web dashboard - Make sure your firewall has this port open if you're accessing the dashboard from outside the host IP. -
OAUTH_CLIENT_ID: Discord OAuth client ID - (See #discord-developer-portal-setup for more info) -
OAUTH_CLIENT_SECRET: Discord OAuth client secret - (See #discord-developer-portal-setup for more info) -
OAUTH_REDIRECT_URI: Discord OAuth redirect URI - (See #discord-developer-portal-setup for more info)
Optional environment variables:
WEB_EXTERNAL: External URL for the web dashboard - If set (e.g., "https://application.org" or "http://application.org"), it will be used as the base URL for application links and the dashboard URL instead of the WEB_HOST:WEB_PORT combination. This is useful when your application is behind a reverse proxy or when you want to use a domain name instead of an IP address.
-
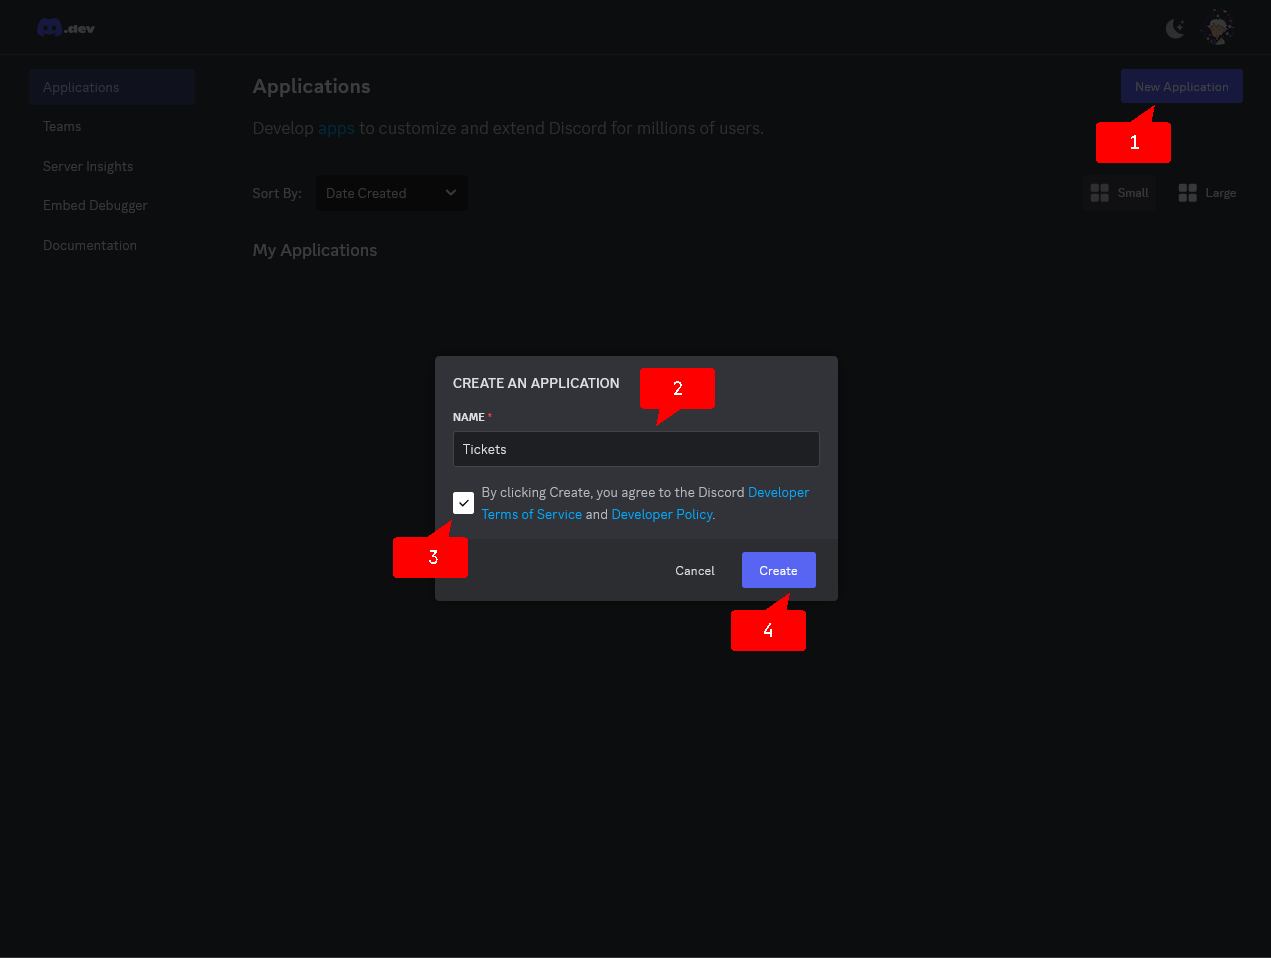
Go to the Discord Developer Portal
-
Create an application
- Click the
New Applicationbutton - Give your application a name, accept the terms of service and click
Create
Step 2
- Click the
-
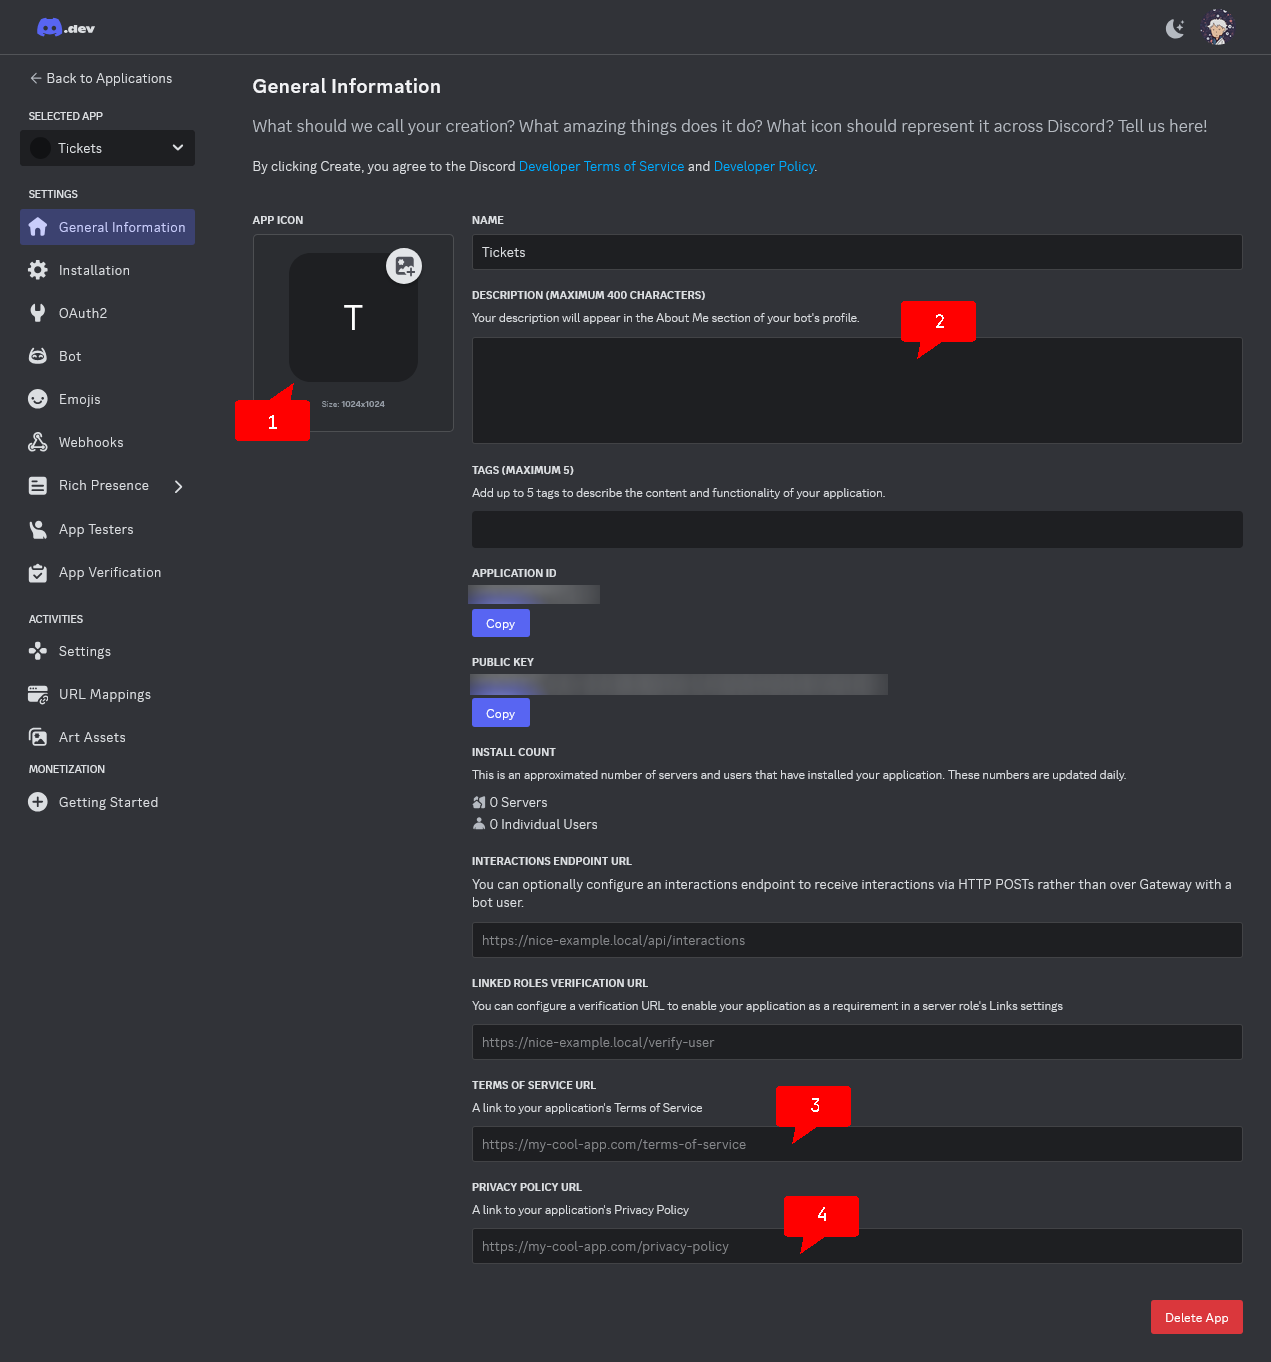
In the page that appears you can add a logo, description, or links to your terms of service and privacy policy if you wish to, and then click
Save Changes.Step 3 preview
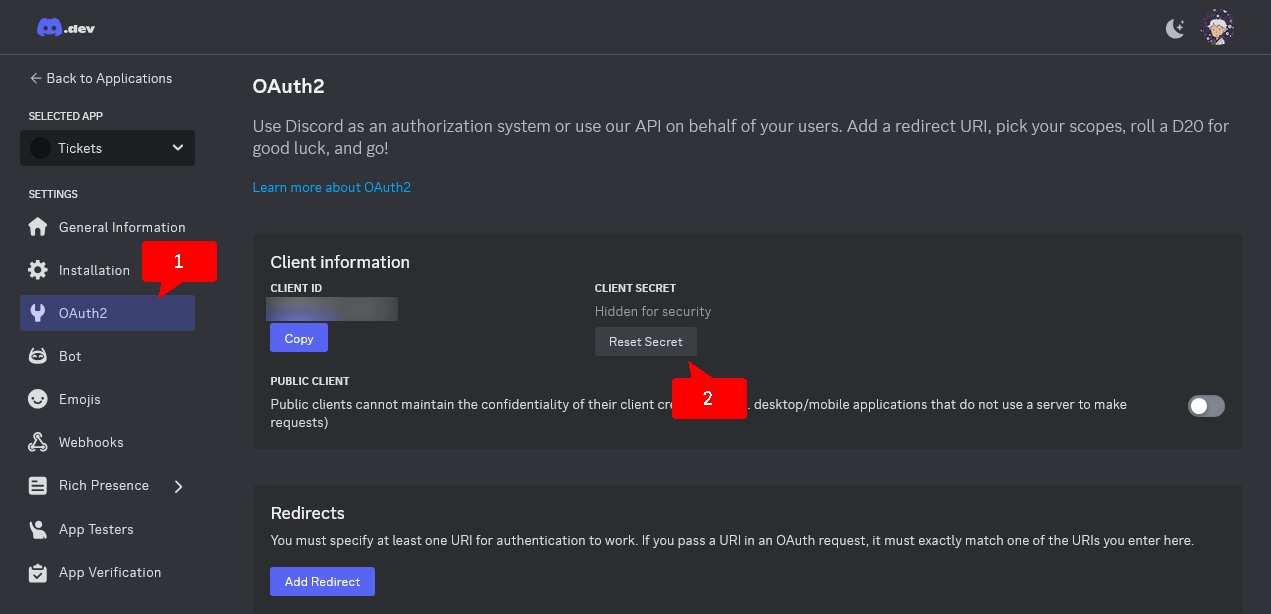
-
Go to the
OAuth2page and clickReset Secret, thenYes, do it!. Copy the new secret and set it as yourOAUTH_CLIENT_SECRETenvironment variable.Step 4 preview
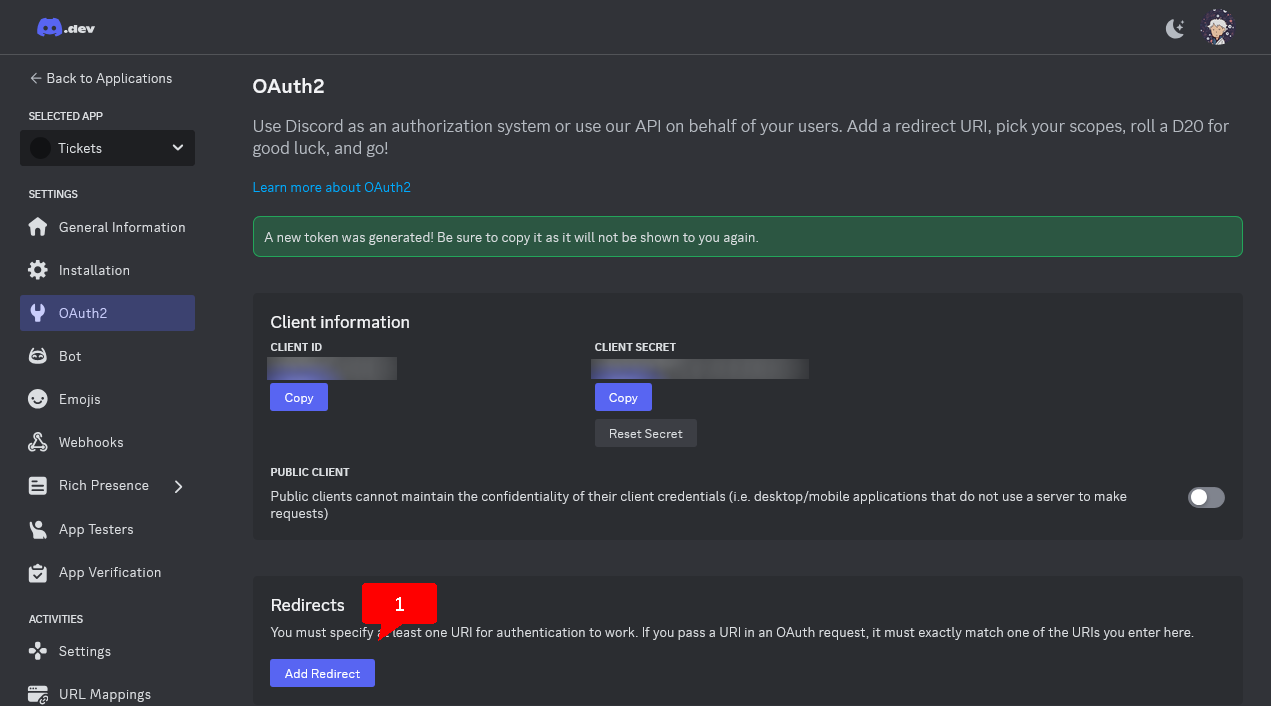
-
Click
Add Redirectand enter theWEB_HOSTfollowed byWEB_PORT, preceeded by eitherhttp://orhttps://environment variable, followed by/auth/callback. Then clickSave Changes.Step 5 preview
Important
Examples:
http://12.345.67.89:8080/auth/callbackhttp://localhost:8080/auth/callbackhttps://example.com/auth/callback
-
Also in the same page copy the
CLIENT IDby hitting theCOPYbutton and set it as yourOAUTH_CLIENT_IDenvironment variable. -
Navigate to the
Botpage- Click
View Token, then copy the token and set it as yourTOKENenvironment variable. - We highly recommend disabling the "Public Bot" option to prevent other people from adding your bot to their servers. Before you can do so, you will need to go to to the
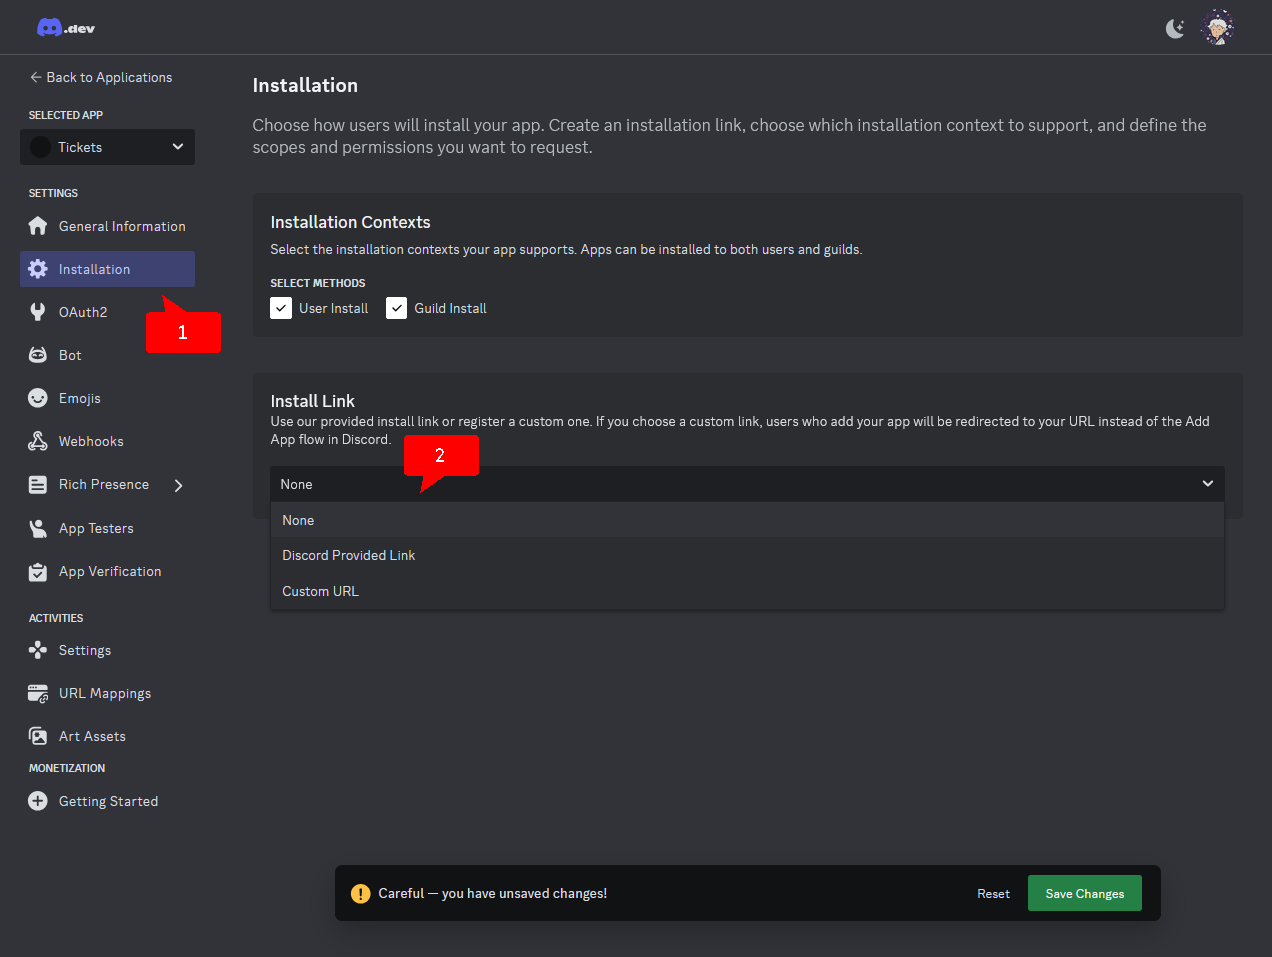
Installationpage and setInstall LinktoNone. After saving changes, return to theBotpage and disable the "Public Bot" option.
Step 7.2 preview
- Enable the
server membersandmessage contentintents.
- Click
To add the bot to your server, use the below URL after replacing the client_id= value with yours.
https://discord.com/oauth2/authorize?client_id=123456789&scope=botDiscord Developer Portal setup guide adapted from https://github.com/discord-tickets/docs
Simple Applications Bot is licensed under the GPLv3 license.
This is not an official Discord product. It is not affiliated with nor endorsed by Discord Inc.