Passing data from the child to parent
- React - Front-end JavaScript library for building user interfaces based on components
- Vite - Dev server used to build and package JavaScript applications
- ArcGIS Maps SDK for JavaScript - ArcGIS web mapping SDK
- Calcite Design System - Web components built by Esri
- TypeScript - can make the code easier for new developers, downside is autocasting with the ArcGIS SDK is not supported
- Make sure that Node is installed
- Create your Vite project
npm create vite@latest
Enter project name, select React as framework, optional, select TypeScript as variant
cd <project-name>
npm install
npm run dev
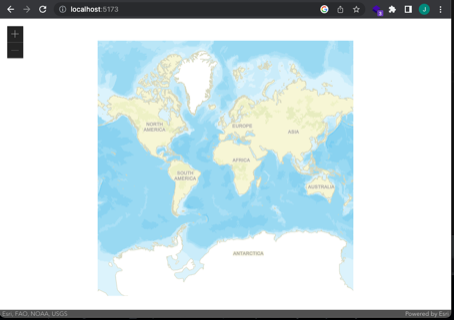
Go to http://localhost:5173
You have successfully created your first project in Vite!

- Open your project in Visual Studio Code
- Clear the index.css and main.css files
- Set App.tsx file to:
import './App.css'
function App() {
  return (
    <>
    </>
  )
  }
export default App
- Install dependancies
-
Install @arcgis/core
- npm install @arcgis/core
- add following line to index.css
@import "https://js.arcgis.com/4.27/@arcgis/core/assets/esri/themes/dark/main.css";
-Install Calcite
-
npm install --save @esri/calcite-components-react
-
Add the following lines to top of main.tsx
import { setAssetPath } from "@esri/calcite-components/dist/components"; // Local assets setAssetPath(window.location.href); -
copy assets locally
mkdir public/assets
cp -r node_modules/@esri/calcite-components/dist/calcite/assets/* ./public/assets/
- Define the container for the map in App.tsx
import { useRef } from 'react'
import './App.css'
function App() {
  const mapDiv = useRef<HTMLDivElement>(null)
  return (
    <>
      <div ref={mapDiv}></div>
    </>
  )
}
export default App
- Set an effect for when the app loads with the useEffect hook inside the function App() { }
useEffect(() => {

},[]);
- Create a folder to store controller files, I typically call this folder utils. *** This is just a recommendation to better separate your code.
- Create a TypeScript file named map.ts in this folder and add the following code:
import Map from "@arcgis/core/Map.js";
import MapView from "@arcgis/core/views/MapView.js";
const map: Map = new Map({
  basemap: 'streets-vector’
});
const view: MapView = new MapView({
    map: map
  });
export const initMap = (container: HTMLDivElement) => {
  view.container = container;
}
- Call the initMap function in useEFfect hook in App.tsx
useEffect(() => {
  if (mapDiv.current) {
    initMap(mapDiv.current);
  }
}, []);
- Set the app and map to take up the full browser add this to index.css
html, body, #root, .esri-view {
  width: 100%;
  height: 100%;
  margin: 0;
}
- Map should be visible in your browser
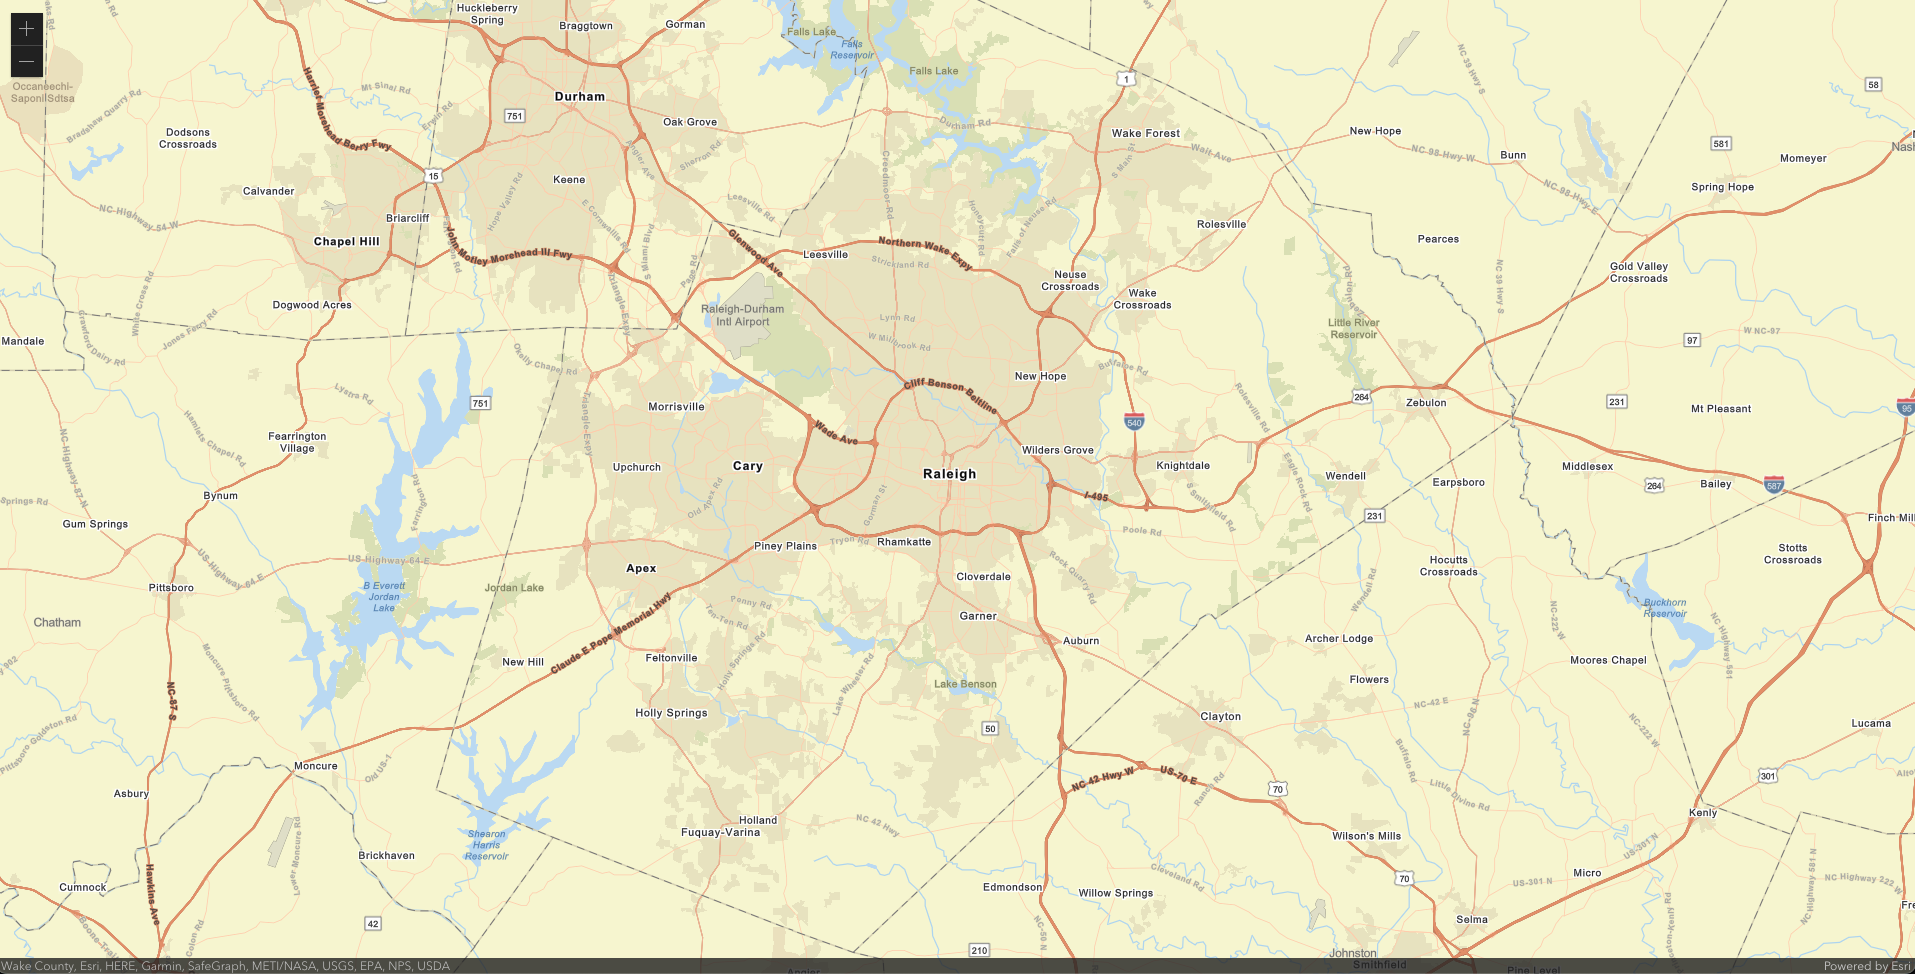
- Let's zoom to Raleigh by adding center and zoom attributes to MapView
new MapView({
  map: map,
  center: [-78.6382, 35.7796],
  zoom: 10
});
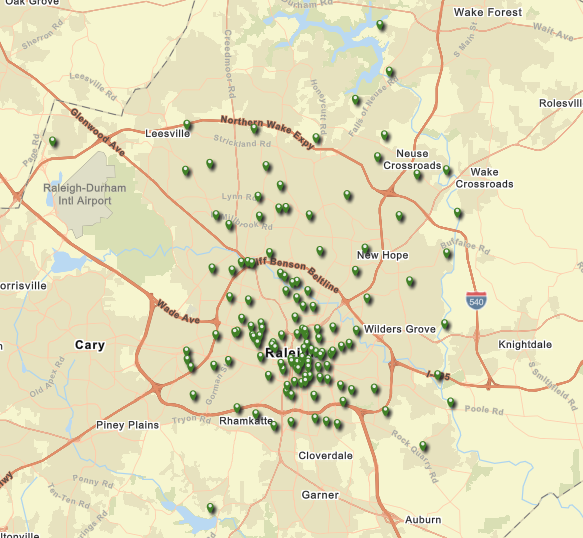
- Let's add a layer
- import FeatureLayer into map.ts
import FeatureLayer from "@arcgis/core/layers/FeatureLayer.js";
- create function to add parks layer
const addParksLayers = (map: Map) => {
    const parks: FeatureLayer = new FeatureLayer({
        portalItem: {
            id: '2162ade0b746456a84017175567c71b3'
        }
    });
    map.add(layer);
}
- call addParksLayers in initMap
addParksLayer(map);
- add another layer
const addParksLayers = (map: Map) => {
    const parks: FeatureLayer = new FeatureLayer({
        portalItem: {
            id: '2162ade0b746456a84017175567c71b3'
        }
    });
    const greenways: FeatureLayer = new FeatureLayer({
        portalItem: {
            id: '23836bb9145943d485252d9665020ff1'
        }
    });
    map.addMany([parks, greenways]);
}
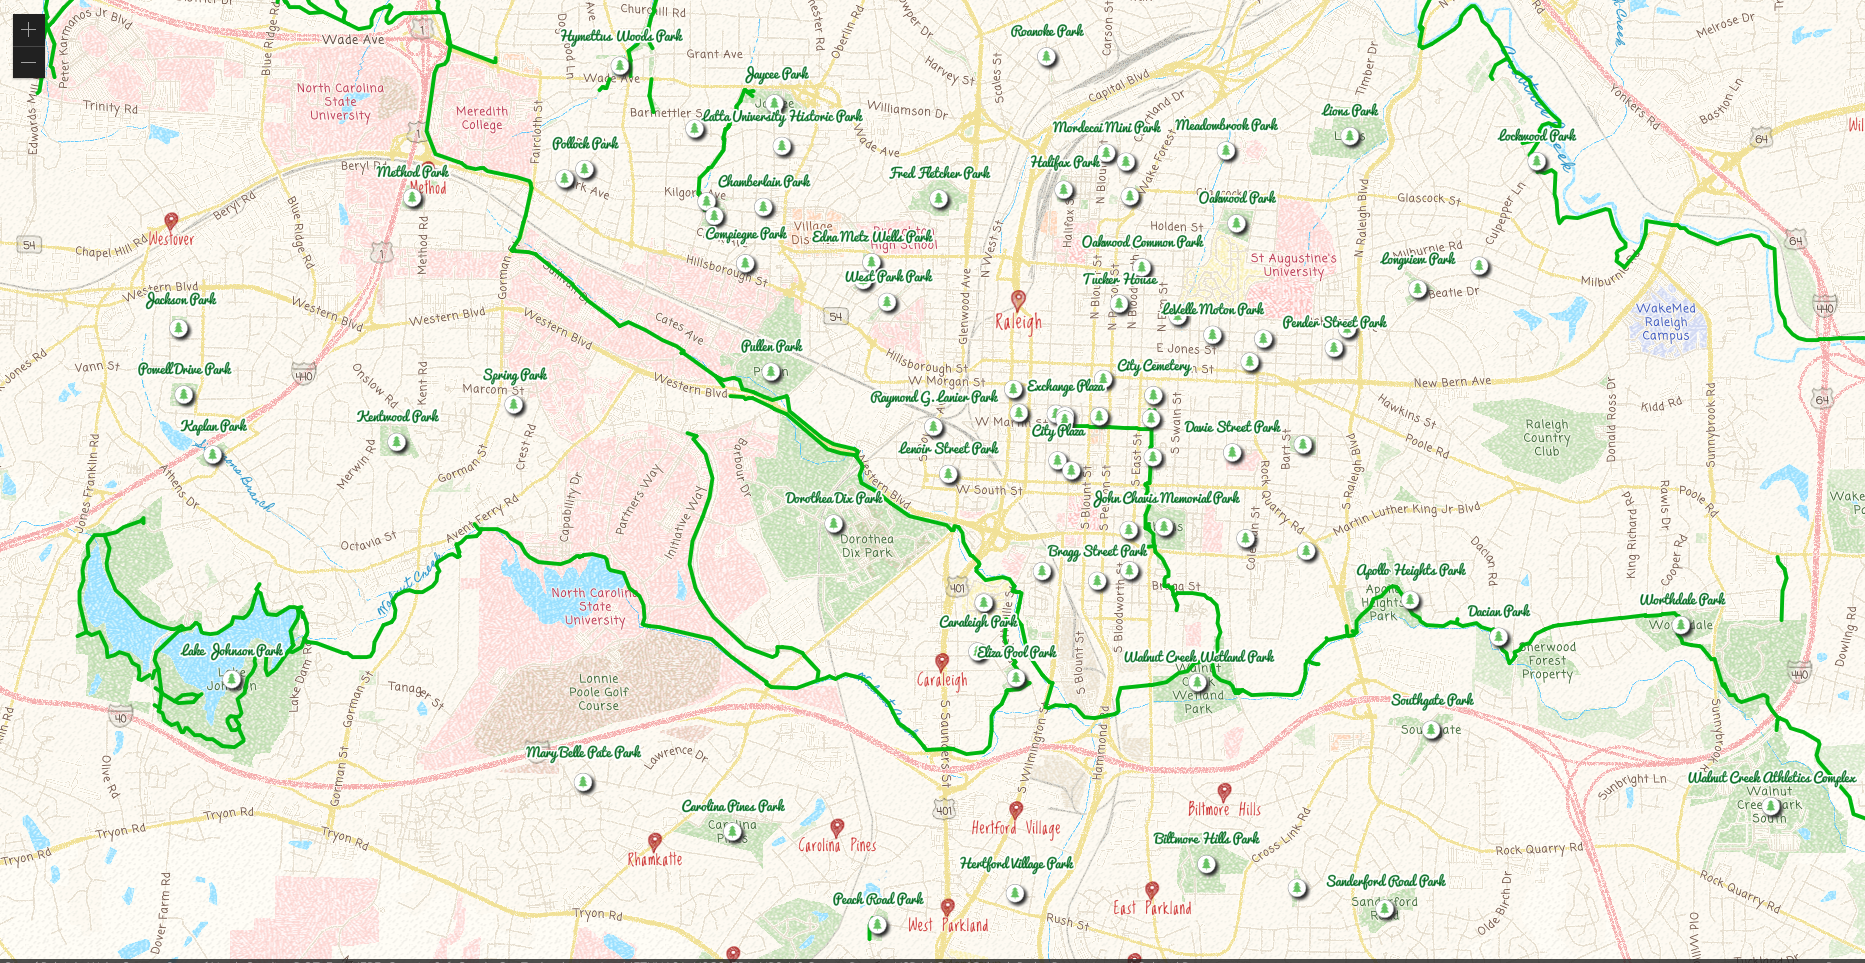
Symbology, popups, labeling and other layer settings don't have to be coded, you can configure a web map to load
- Create a web map in ArcGIS Online
- add the same layers we added above and customize the symbology
- Change the base map in the web map
- save the web map and share with Everyone
- Instead of importing Map, let's import WebMap. Also remove the FeatureLayer import since we are loading the feature layers in the web map.
import WebMap from "@arcgis/core/WebMap.js";
import MapView from "@arcgis/core/views/MapView.js";
- Remove the current map variable and replace with:
    const map: WebMap = new WebMap({
        portalItem: {
            id: 'de5331c548fb49388059d3bfb24f0aad'
        }
    });
- Since we want to use the extent set in the web map, remove the center and zoom properties from the MapView
- Remove the addParksLayers function
- One thing to note is that the map is actually getting loaded twice, this is due to the React.StrictMode. We can either remove this (not recommended) or we can work around it.
- define a loaded variable with useRef set to false by default
const loaded = useRef<boolean>(false);
- update the useEffect to only call initMap if loaded is false, set loaded to true after initMap is called
  useEffect(() => {
    if (mapDiv.current && !loaded.current) {
      initMap(mapDiv.current);
      loaded.current = true;
    }
  }, []);
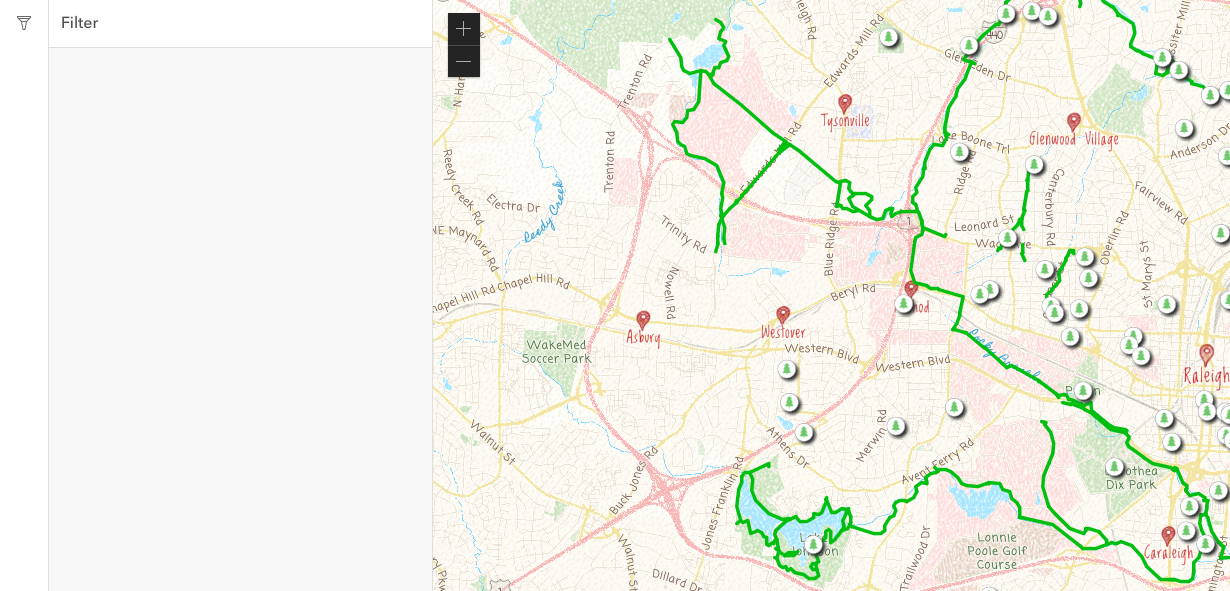
We are going to add a Calcite Shell, with a Calcite Action Bar and a Calcite Panel on the left
- In App.tsx, import the Calcite components that we need
import '@esri/calcite-components-react/dist/components/calcite-shell';
import '@esri/calcite-components-react/dist/components/calcite-shell-panel';
import '@esri/calcite-components-react/dist/components/calcite-action-bar';
import '@esri/calcite-components-react/dist/components/calcite-action';
import '@esri/calcite-components-react/dist/components/calcite-panel';
import {
  CalciteShell,
  CalciteShellPanel,
  CalciteActionBar,
  CalciteAction,
  CalcitePanel
} from "@esri/calcite-components-react";
- Add the Calcite Components in the JSX section of App.tsx, adding mapDiv into CalciteShell
  return (
    <>
      <CalciteShell>
        <CalciteShellPanel slot='panel-start' position='start'>
          <CalciteActionBar slot='action-bar'>
            <CalciteAction text='Filter' icon='filter'></CalciteAction>
          </CalciteActionBar>
          <CalcitePanel heading='Filter'></CalcitePanel>
        </CalciteShellPanel>
        <div ref={mapDiv}></div>
      </CalciteShell>
    </>
  )
- We want to be able to toggle the Filter panel
- Define a state variable to store the currently selected panel with useState hook. Define the following inside App()
const [selectedPanel, setSelectedPanel] = useState<string>('Filter');
- bind the state to the collapased property of the CalciteShellPanel
<CalciteShellPanel slot='panel-start' position='start' collapsed={selectedPanel === ''}>
- bind the state to the active property of the CalciteAction and update the state onClick
<CalciteAction
  text='Filter'
  icon='filter'
  active={selectedPanel === 'Filter' ? true : undefined}
  onClick={(e) => setSelectedPanel(e.currentTarget.text === "Filter" && e.currentTarget.active ? '' : 'Filter')}
>
</CalciteAction>
- set the CalcitePanel to be closable, bind the state to the closed property, update the state onClick
  <CalcitePanel heading='Filter'
    closable
    closed={selectedPanel !== 'Filter'}
    hidden={selectedPanel !== 'Filter'}
    onCalcitePanelClose={() => setSelectedPanel('')}
  ></CalcitePanel>
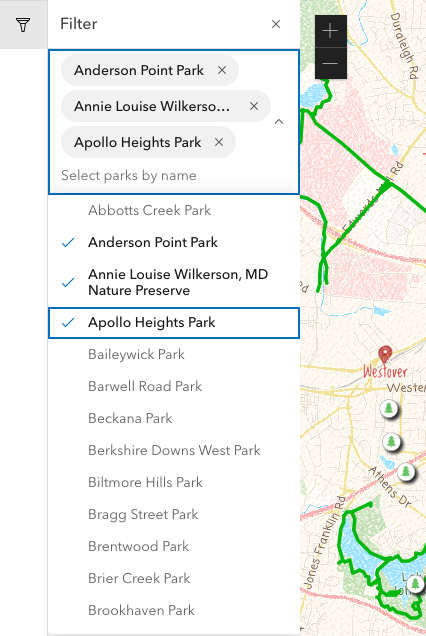
- We want the user to be able to filter by park name, let's use a Calcite Combobox
- import Calcite Combobox and Calcite ComboboxItem
import '@esri/calcite-components/dist/components/calcite-combobox';
import '@esri/calcite-components/dist/components/calcite-combobox-item';
import {
  CalciteShell,
  CalciteShellPanel,
  CalciteActionBar,
  CalciteAction,
  CalcitePanel,
  CalciteCombobox,
  CalciteComboboxItem
} from "@esri/calcite-components-react";
- add a CalciteCombobox to the Calcite Panel
<CalciteCombobox placeholder='Select parks by name' label={'Select parks by name'}>

</CalciteCombobox>
- Now we need to get a list of parks from the parks layer
- define another state to store the parks in
const [parks, setParks] = useState<__esri.Graphic[]>([]);
- Add function to get a list of the parks features sorted by name to maps.ts. This gets the layer by title (could also just use view.map.layerById, but since we used a web map we don't necessarily know the ID). Then queries for all features, returning the geometry and the PARK_NAME. The data is returned in order of PARK_NAME.
export const getParks = async (): Promise<__esri.Graphic[]> => {
    const layer = view.map.layers.find(layer => layer.title === 'Raleigh Park Amenities');
    let parks:__esri.Graphic[] = [];
    if (layer) {
        const results = await (layer as __esri.FeatureLayer).queryFeatures({
            where: '1=1',
            outFields: ['PARK_NAME'],
            returnGeometry: true,
            orderByFields: ['PARK_NAME']
        });
        if (results.features) {
            parks = results.features;
        }
    }
    return parks;
}
- After the view is ready, we want to send a request to the parks layer.
- set the initMap function to be async and return a the view in a promise in map.ts
export const initMap = async (container: HTMLDivElement): Promise<MapView> => {
  view.container = container;
  await view.when();
  return view;
}
- After initMap has returned the promise, set the parks state with the results of getParks
  useEffect(() => {
    if (mapDiv.current && !loaded.current) {
      initMap(mapDiv.current).then(async () => {
        setParks(await getParks());
      });
      loaded.current = true;
    }
  }, []);
- Now that we have our list of park features, we now have to create a CalciteComboboxInput for each feature. To do so, we want to use the array function map. Inside of the CalciteCombobox component add:
{parks.map(park => <CalciteComboboxItem key={park.getAttribute(`park-${park.getAttribute('OBJECTID')}`)} textLabel={park.getAttribute('PARK_NAME')} value={park} ></CalciteComboboxItem>)}
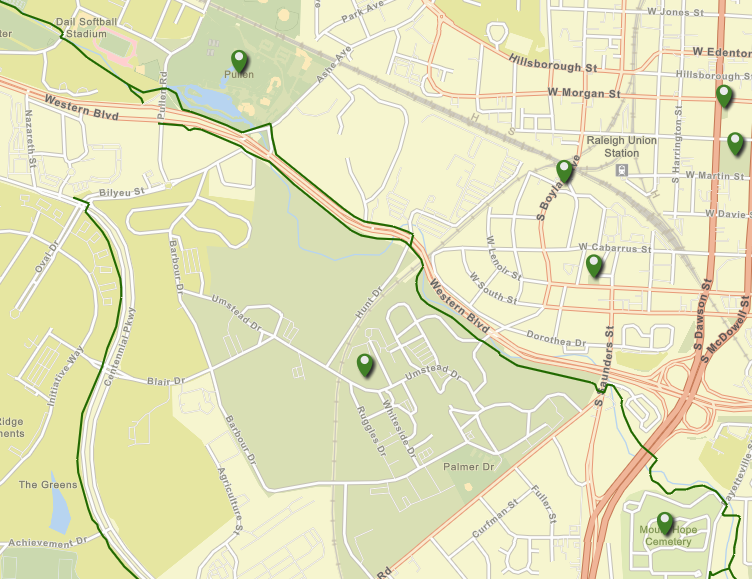
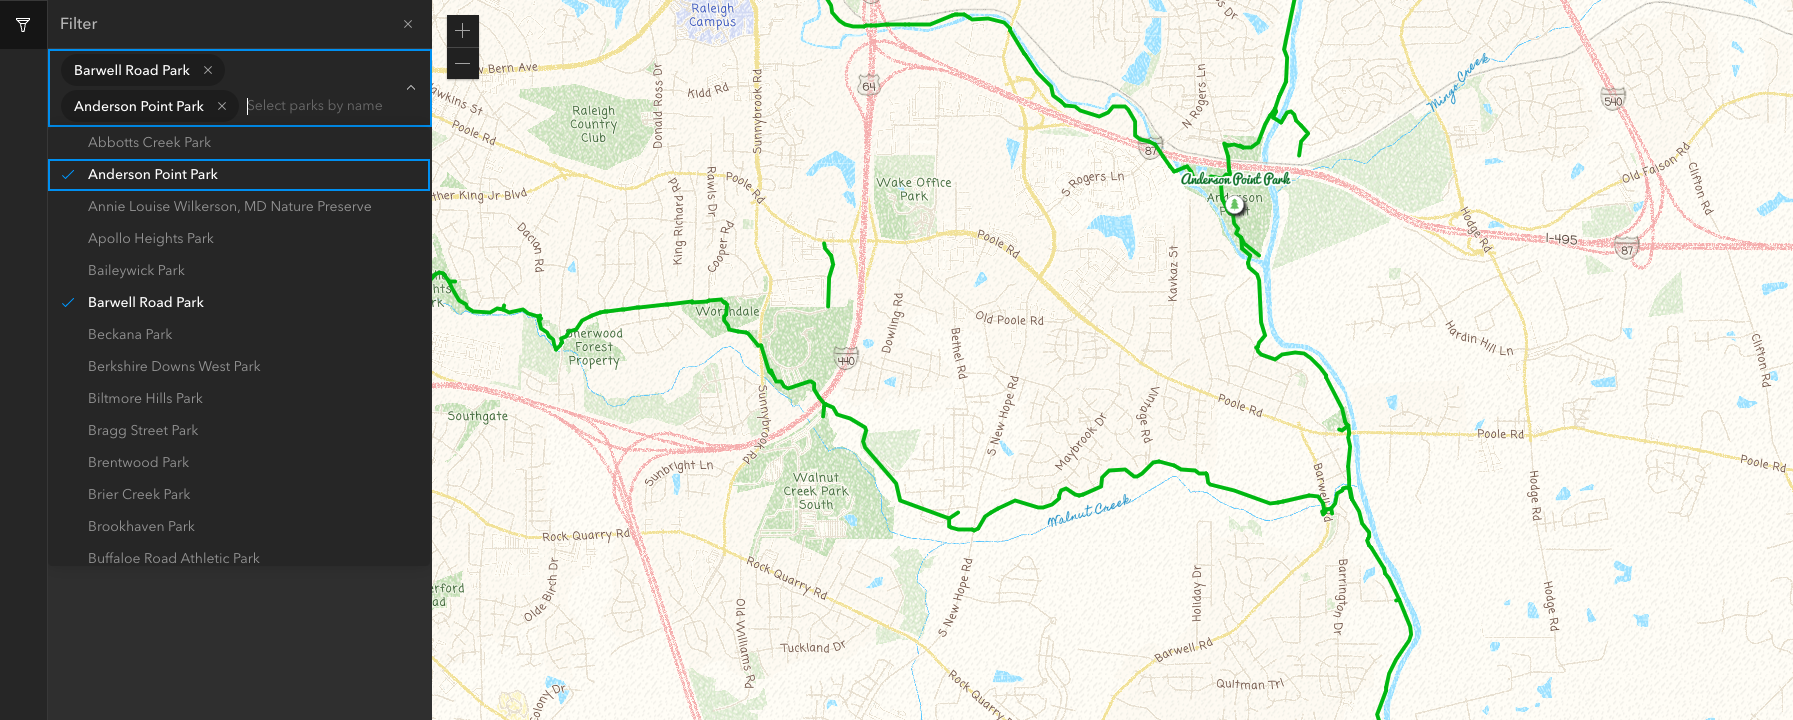
We now have a combo box that lets us select multiple park names
- Now lets filter the map when parks are selected
- add new function updateParks to map.ts, which gets the layer, sets its definitionExpression, refreshes and then zooms to the select parks' extent
export const updateParks = async (expression: string) => {
    const layer = view.map.layers.find(layer => layer.title === 'Raleigh Park Amenities') as __esri.FeatureLayer;
    if (layer) {
        layer.definitionExpression = expression;
        layer.refresh();
        const extent = await layer.queryExtent({where: expression});
        view.goTo(extent);
    }
}
- add onCalciteComboboxChange event to the CalciteCombobox component in App.tsx. In the function for this event, get an array of the select park names, then build a SQL expression to select those parks, then pass the expression to the updateParks function
onCalciteComboboxChange={e => {
  const selectedParks = e.target.selectedItems.map(p => p.value.getAttribute('PARK_NAME'));
  const expression = `PARK_NAME in ('${selectedParks.join("','")}')`;
  updateParks(expression);
}}
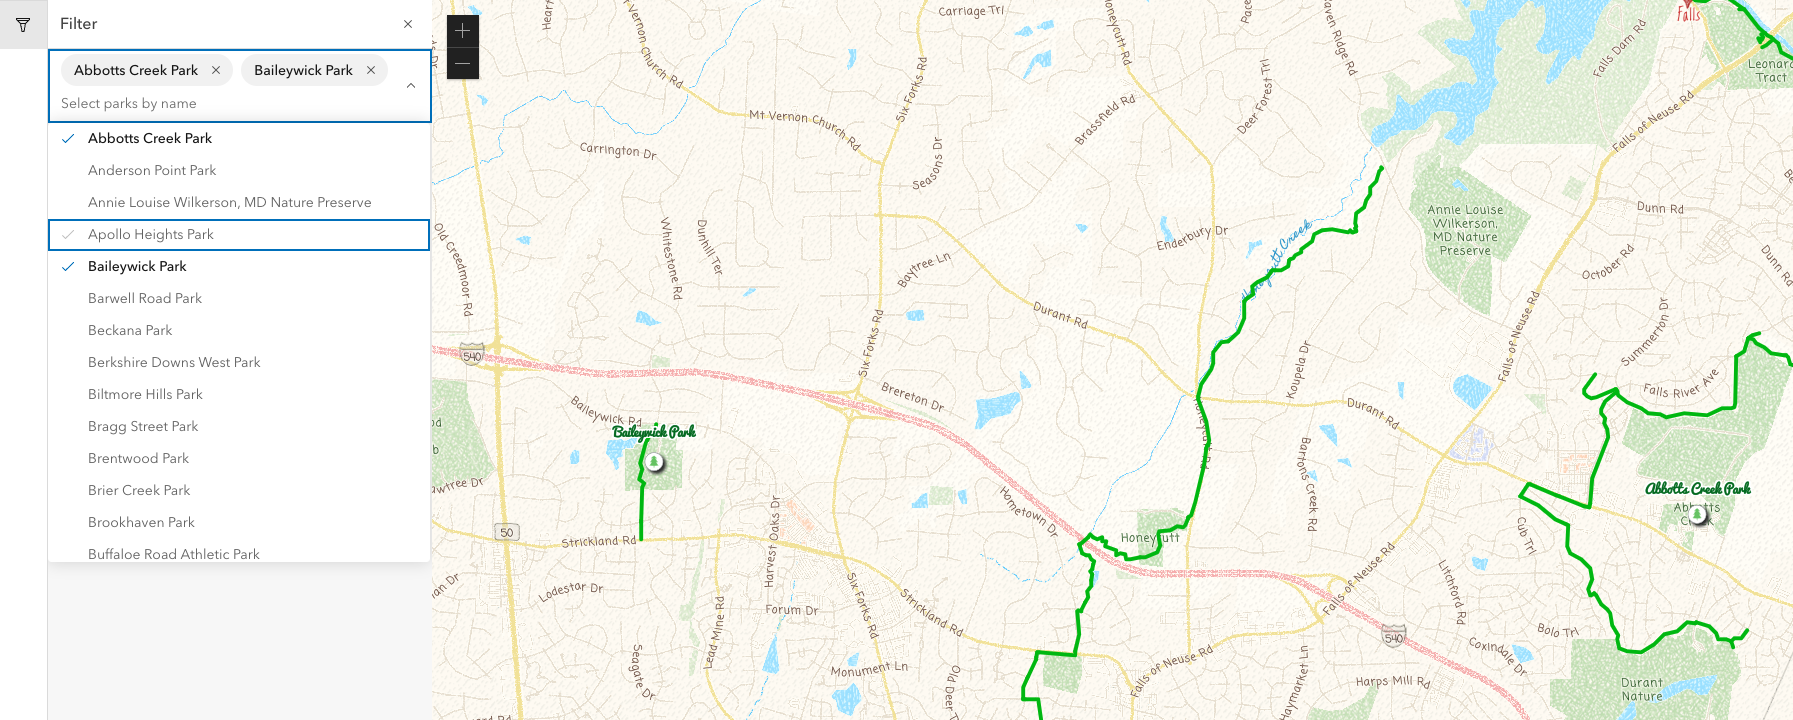
ISSUE, what happens when the selection is cleared? An invalid expression is set and no parks are shown. We can correct this by setting the expression to 1=1 when no parks are selected.
const expression = e.target.selectedItems.length ? `PARK_NAME in ('${selectedParks.join("','")}')` : '1=1';
BONUS, we loaded the dark theme from the ArcGIS JavaScript SDK, we should do the same for Calcite, simply add calcite-mode-dark as a class to the <html> tag in the index.html:
<html lang="en" class="calcite-mode-dark">
As your application grows and gets more complex, you'll want to separate your code into components. For a demo on how to do this, let's put our combobox into its own component.
- Create a new ParkSelect.tsx component
- Add the following to create a blank component:
function ParkSelect() {
    return (
        <>
        </>
    )
}
export default ParkSelect
- Add imports for CalciteCombobox and CalciteComboboxItem
import '@esri/calcite-components/dist/components/calcite-combobox';
import '@esri/calcite-components/dist/components/calcite-combobox-item';
import {
  CalciteCombobox,
  CalciteComboboxItem
} from "@esri/calcite-components-react";
- The component can take a props object that is passed from the parent. Let's define a TypeScript interface for this. Add the following above the
function ParkSelect() {line
interface ParkSelectProps {
    parks: __esri.Graphic[];
}
- Add the props argument to the ParkSelect function:
function ParkSelect(props: ParkSelectProps) {
- Cut the CalciteCombobox component from App.tsx and paste into the JSX of the ParkSelectComponent. You'll get an error about parks not being defined, to fix this add
props.before parks. Also import the updateParks function from the map.tsimport { updateParks } from './utils/map';
        <CalciteCombobox
            placeholder='Select parks by name'
            label={'Select parks by name'}
            onCalciteComboboxChange={e => {
            const selectedParks = e.target.selectedItems.map(p => p.value.getAttribute('PARK_NAME'));
            const expression = e.target.selectedItems.length ? `PARK_NAME in ('${selectedParks.join("','")}')` : '1=1';
            updateParks(expression);
            }}
        >
            {props.parks.map(park =>
            <CalciteComboboxItem
                key={park.getAttribute(`park-${park.getAttribute('OBJECTID')}`)}
                textLabel={park.getAttribute('PARK_NAME')}
                value={park} ></CalciteComboboxItem>
            )}
        </CalciteCombobox>
- Return to App.tsx and remove imports for CalciteCombobox and CalciteComboboxItem and remove the updateParks from the import from map.ts
- In place of where you cut the CalciteCombobox component, add the following:
<ParkSelect parks={parks}></ParkSelect> and make sure to import the ParkSelect component at the top import ParkSelect from './ParkSelect';
- Now you should see no difference in the browser, but you're code is now a few lines shorter in App.tsx
In the last step, we sent data from the parent to the child, now lets send data from the child to the parent. In this use case, we want to update text in the parent component that shows the definition expression we set in the child.
- Add a a function called updated to the ParkSelectProps interface in our component
interface ParkSelectProps {
    parks: __esri.Graphic[];
    updated: Function;
}
- Call props.updated, passing the expression after updateParks is called
props.updated(expression);
- In App.tsx do the following:
- create a state to store the expression in
const [expression, setExpression] = useState<string>(''); - add an event listener called updated to the ParkSelect component, when it is called, set the expression state to the returned value
<ParkSelect parks={parks} updated={(expression: string) => setExpression(expression)}></ParkSelect>
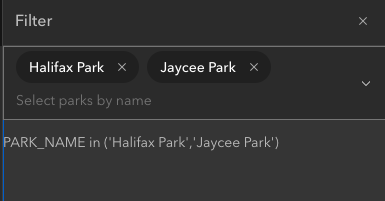
- add a paragraph element directly after the ParkSelect component with the expression state binded
<p>{expression}</p>
- Now after you select your parks, you'll see the expression below the combobox
- Add a search widget to top right
- import Search to map.ts
import Search from "@arcgis/core/widgets/Search.js";
- create addSearchWidget function
const addSearchWidget = (view: MapView) => {
    const search: Search = new Search({view: view});
    view.ui.add(search, 'top-right');
}
- call addSearchWidget passing the view as a parameter, in the initMap function
addSearchWidget(view);
- Import the Legend widget in map.ts
import Legend from "@arcgis/core/widgets/Legend.js";
- add addSearchWidget funtion to map.ts, make sure to mark it as an export
export const addLegendWidget = (container: HTMLDivElement) => {
    new Legend({view: view, container: container});
}
- import addLegendWidget in App.tsx
import { addLegendWidget, getParks, initMap } from './utils/map'; - in App.tsx, add another CalciteAction after Filter
<CalciteAction
  text='Legend'
  icon='legend'
  active={selectedPanel === 'Legend' ? true : undefined}
  onClick={(e) => setSelectedPanel(e.currentTarget.text === "Legend" && e.currentTarget.active ? '' : 'Legend')}
>
</CalciteAction>
- add another CalcitePanel after the filter panel
<CalcitePanel heading='Legend'
  closable
  closed={selectedPanel !== 'Legend'}
  hidden={selectedPanel !== 'Legend'}
  onCalcitePanelClose={() => setSelectedPanel('')}
>
  <div ref={legendDiv}></div>
</CalcitePanel>
- In the useEffect, inside of the initMap callback, add the legend widget
if (legendDiv.current) {
  addLegendWidget(legendDiv.current);
}
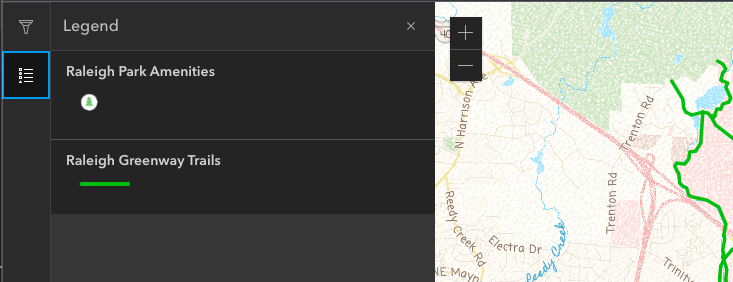
The legend widget now shows up as a panel on the left
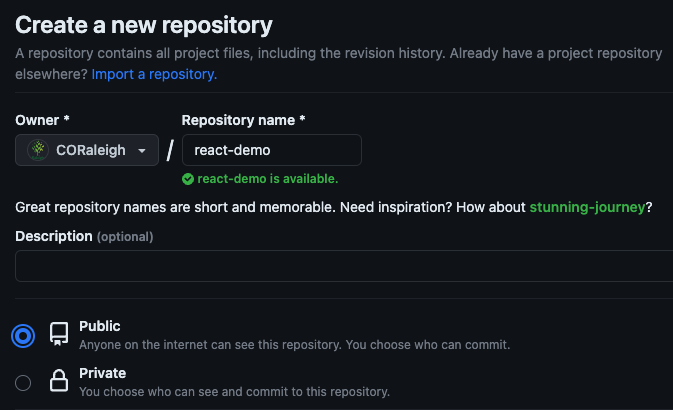
- Create a GitHub repo

- Set base in vite.config.ts to be
/<repo-name>/
import { defineConfig } from 'vite'
import react from '@vitejs/plugin-react'

// https://vitejs.dev/config/
export default defineConfig({
  base: '/react-demo/',
  plugins: [react()],
})
- Initialize Git repo and add remote branch in terminal
git init
git add .
git commit -m "first commit"
git branch -M main
git remote add origin https://github.com/CORaleigh/react-demo.git
git push -u origin main
- In browser, got to GitHub repo settings and to the Pages section under Code and automation.
- Set the source to GitHub Actions
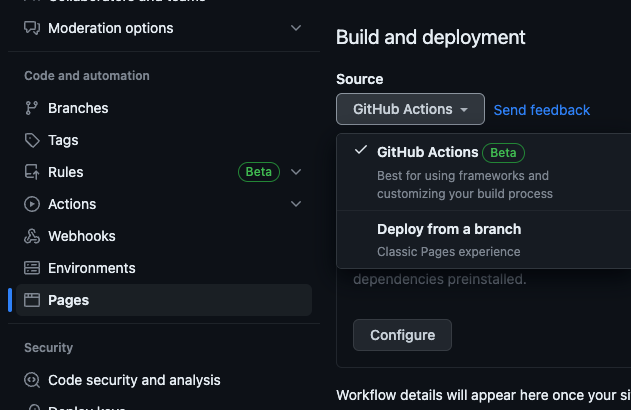
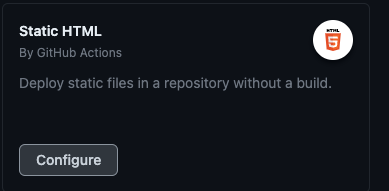
- Under Static HTML, click Configure
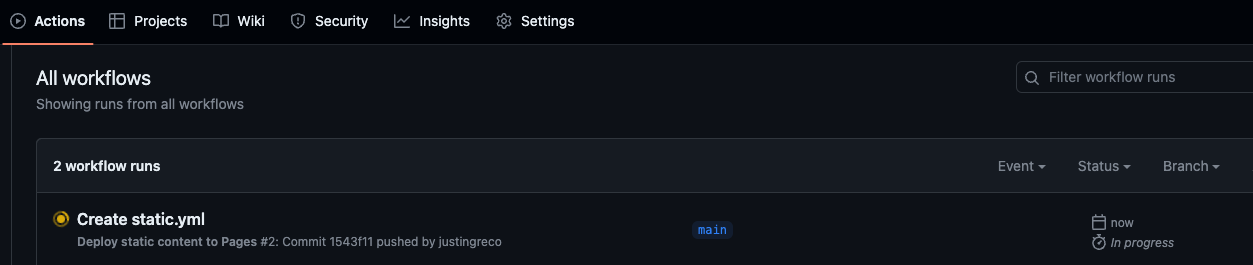
- Paste the following configuration and click Commit Changes
  # Simple workflow for deploying static content to GitHub Pages
name: Deploy static content to Pages

on:
  # Runs on pushes targeting the default branch
  push:
    branches: ['main']

  # Allows you to run this workflow manually from the Actions tab
  workflow_dispatch:

# Sets the GITHUB_TOKEN permissions to allow deployment to GitHub Pages
permissions:
  contents: read
  pages: write
  id-token: write

# Allow one concurrent deployment
concurrency:
  group: 'pages'
  cancel-in-progress: true

jobs:
  # Single deploy job since we're just deploying
  deploy:
    environment:
      name: github-pages
      url: ${{ steps.deployment.outputs.page_url }}
    runs-on: ubuntu-latest
    steps:
      - name: Checkout
        uses: actions/checkout@v3
      - name: Set up Node
        uses: actions/setup-node@v3
        with:
          node-version: 18
          cache: 'npm'
      - name: Install dependencies
        run: npm install
      - name: Build
        run: npm run build
      - name: Setup Pages
        uses: actions/configure-pages@v3
      - name: Upload artifact
        uses: actions/upload-pages-artifact@v1
        with:
          # Upload dist repository
          path: './dist'
      - name: Deploy to GitHub Pages
        id: deployment
        uses: actions/deploy-pages@v1
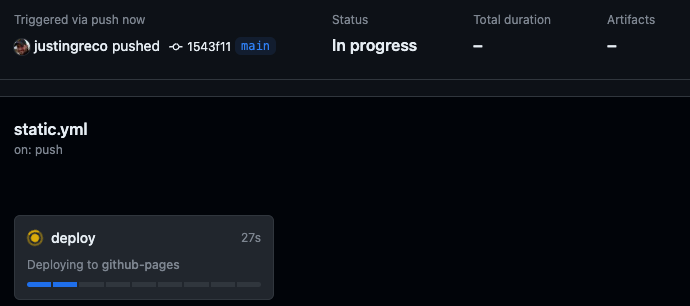
- Note that the action will fail if there are any warnings or errors in your code
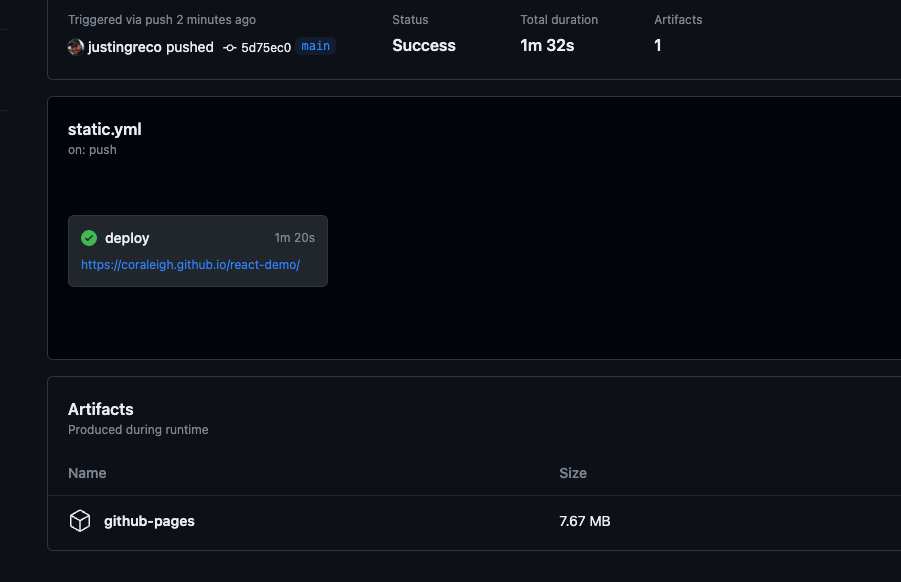
- Go to
https://<user-name>.github.io/<repo-name>/in browser - In terminal run git pull to pull down the static.yml
- Everytime you push your updates to the repo, you're code will be rebuilt by GitHub Actions and made available through GH Pages