Installation
- Prerequisites
- Installation Procedure using Command Line (for Linux and macOSX)
- Installation Procedure on Windows
- Sample Morphologies
- Navigation
To run the installation script, the following tools must be installed on your system:
VessMorphoVis can be installed on Linux and macOSX as follows:
- Download the setup.py script.
From the browser, this script can be downloaded by clicking on the link and then Save link as...

On Linux, this script can be downloaded from the terminal as follows
wget https://raw.githubusercontent.com/BlueBrain/VessMorphoVis/master/setup.py
On macOSX, this script can be downloaded from the terminal as follows
curl https://raw.githubusercontent.com/BlueBrain/VessMorphoVis/master/setup.py >setup.py .
- Change access permissions of the
setup.pyscript to be able to execute it as follows
chmod +x setup.py - Run the
setup.pyscript and provide a valida or existing directory where the artifacts will be downloaded and installed.
./setup.py --prefix=VALID_DIRECTORY --verboseUsers can select the version of Blender using the --blender-version option.
--blender-version BLENDER_VERSION
Blender version. 2.79, 2.80, or 2.81. By default it is 2.80.- Once done, change directory to this
VALID_DIRECTORYas follows
cd VALID_DIRECTORY/blender-bluebrain - Run Blender from the terminal
./blender- From the Edit panel, open Preferences.

- Go to the Add-ons panel and load VessMorphoVis from the list by checking the box: System: VessMorphoVis.

-
Once loaded without errors, close the Blender Pereferences window.
-
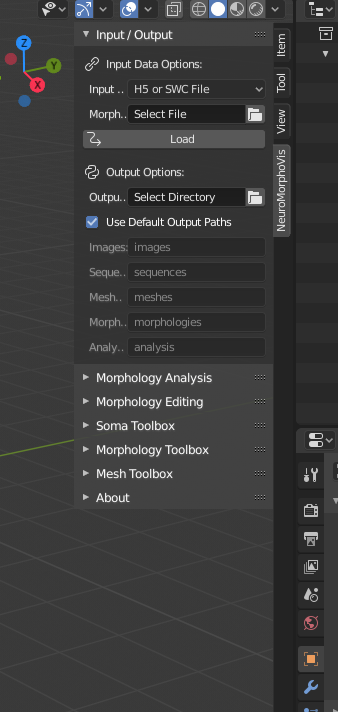
If you click N, VessMorphoVis panel will appear on the right side of Blender (in Blender 2.8). In Blender 2.79 or earlier, this panel will appear on the left side of Blender.
To install VessMorphoVis on Windows, you need to download a portable version of Blender and a clone of the VessMorphoVis code.
You can download Blender from any of the following links, depending on the version:
- Version 3.3 blender-3.3.1-windows-x64.zip
- Version 3.2 blender-3.2.2-windows-x64.zip
- Version 3.1 blender-3.1.2-windows-x64.zip
- Version 3.0 blender-3.0.1-windows-x64.zip
Then you should extract this .zip archive.
Then, you need to download a clone of the latest release of VessMorphoVis from this link.
Then, you should extract this .zip archive.
After unarchiving, copy the folder that contains the VessMorphoVis addon (must hasve an init.py file) into the addons directory. This addon directory is found under BLENDER_VERSION/scripts/addons, where BLENDER_VERSION should be replaced by the version of the downloaded blender (3.0, 3.1, 3.2, or 3.3).
Once added, you can execute Blender, and follow the following instructions to load the addon in Blender.
- From the Edit panel, open Preferences.
- Go to the Add-ons panel and load VessMorphoVis from the list by checking the box: System: VessMorphoVis. Note that this step might takes a while to download and install all the dependencies (2-5 minutes) in case they are not installed.
-
Once loaded without errors, close the Blender Pereferences window.
-
If you click N, VessMorphoVis panel will appear on the right side of Blender (in Blender 2.8). In Blender 2.79 or earlier, this panel will appear on the left side of Blender.
To test the package, a set of sample morphology files (in VMV , SWCand H5 formats) are available upon request from the Blue Brain Project. SWC morphologies are available from the brain vasculature (BraVA) database.
-
Starting
-
Panels
-
Other Links
-
Starting
-
Panels
-
Other Links
![]()
![]()