TasmotaPulseTime is available in HACS (Home Assistant Community Store).
Use this link to directly go to the repository in HACS

or
- Install HACS if you don't have it already
- Open HACS in Home Assistant
- Search for "Mushroom"
- Click the download button. ⬇️
- To run this card seamlessly without issue you should include the below service and cusomt component to you home assistant
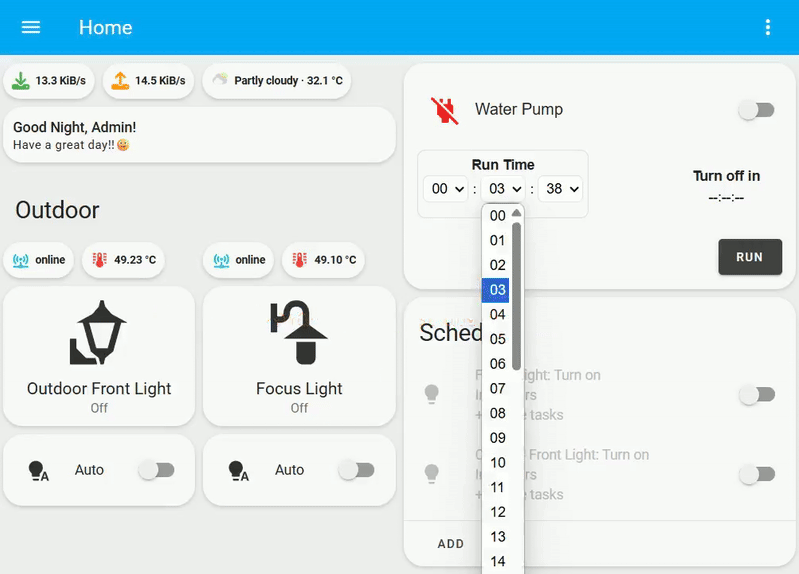
- tasmota_dynamic_pulse: Actually this is a script which can be able to publich the specific switch PulseTime and Turn on it. You can find the repository and instruction here.
- mycustomapi: This is a custom component actually to get the current PulseTime Status of a switch from tasmota. You can find the repository and the instruction here.
- Download
tasmota-pulsetime-card.jsfile from the latest release. - Put
tasmota-pulsetime-card.jsfile into yourconfig/wwwfolder. - Add reference to
tasmota-pulsetime-card.jsin Dashboard. There's two way to do that:- Using UI: Settings → Dashboards → More Options icon → Resources → Add Resource → Set Url as
/local/tasmota-pulsetime-card.js→ Set Resource type asJavaScript Module. Note: If you do not see the Resources menu, you will need to enable Advanced Mode in your User Profile - Using YAML: Add following code to
lovelacesection.resources: - url: /local/tasmota-pulsetime-card.js type: module
- Using UI: Settings → Dashboards → More Options icon → Resources → Add Resource → Set Url as
All the TasmotaPulseTime cards can be configured using Dashboard UI editor.
- In Dashboard UI, click 3 dots in top right corner.
- Click Edit Dashboard.
- Click Plus button to add a new card.
- Find one of the _Custom: tasmota-pulsetime-card in the list.
TasmotaPulseTime works without theme but you can add a theme for better experience by installing the Mushroom Themes. If you want more information about themes, check out the official Home Assistant documentation about themes.
The design is inspired by Arun’s work on Behance and Ui Lovelace Minimalist.