A lightweight, high-performance Python utility for monitoring outbound network connections from your system in real-time. This tool helps identify potentially suspicious connections by flagging domains based on customizable patterns.
- Real-time Connection Monitoring: Track all established outbound network connections
- Smart DNS Resolution: Efficiently resolves IP addresses to domain names
- Suspicious Connection Detection: Flags potentially suspicious domains based on configurable patterns
- Performance Optimized: Uses caching and parallel processing for minimal system impact
- Process Identification: Shows which processes are making network connections
- Simple Interface: Clear, organized terminal output with refresh capability
- Python 3.6+
- psutil library
- Administrator/root privileges (to access process information)
-
Clone this repository:
git clone https://github.com/AkshayRane05/Outbound-Network-Monitor.git cd Outbound-Network-Monitor -
Install dependencies:
# For most systems
pip install psutil

# For Debian/Ubuntu
sudo apt install python3-psutil
-
Clone the repository:
git clone https://github.com/AkshayRane05/Outbound-Network-Monitor.git cd Outbound-Network-Monitor -
Make sure you have the virtual environment package:
# For Kali Linux sudo apt install python3-venv -
Create and activate a virtual environment:
python3 -m venv venv
source venv/bin/activate  # On Windows: venv\Scripts\activate
-
Install dependencies in the virtual environment:
pip install psutil
Kali Linux implements PEP 668, which prevents direct pip installations to the system Python. You have three options:
-
Install from apt (if available):
sudo apt install python3-psutil
-
Use a virtual environment as shown above (recommended)
-
Use pipx for isolated application installation:
# Install pipx if not already installed
sudo apt install pipx
# Install the application in an isolated environment
pipx install psutil
Run the script with administrator/root privileges (required to see all system processes):
# Run Command Prompt as Administrator, then:
python network_monitor.pysudo python3 network_monitor.py# If using a virtual environment, activate it first:
source venv/bin/activate
# Then run with sudo (sudo will use system Python by default, so we specify the path):
sudo venv/bin/python network_monitor.py-
Windows: Some process information may be limited unless running as Administrator
-
Linux: Use
sudoto ensure access to all process information -
Kali Linux: Follow the virtual environment instructions above to avoid PEP 668 errors
-
macOS: Use
sudoand be aware that additional permissions may be required due to security features -
Press
Enterto refresh the connections list -
Press
Ctrl+Cto exit the program
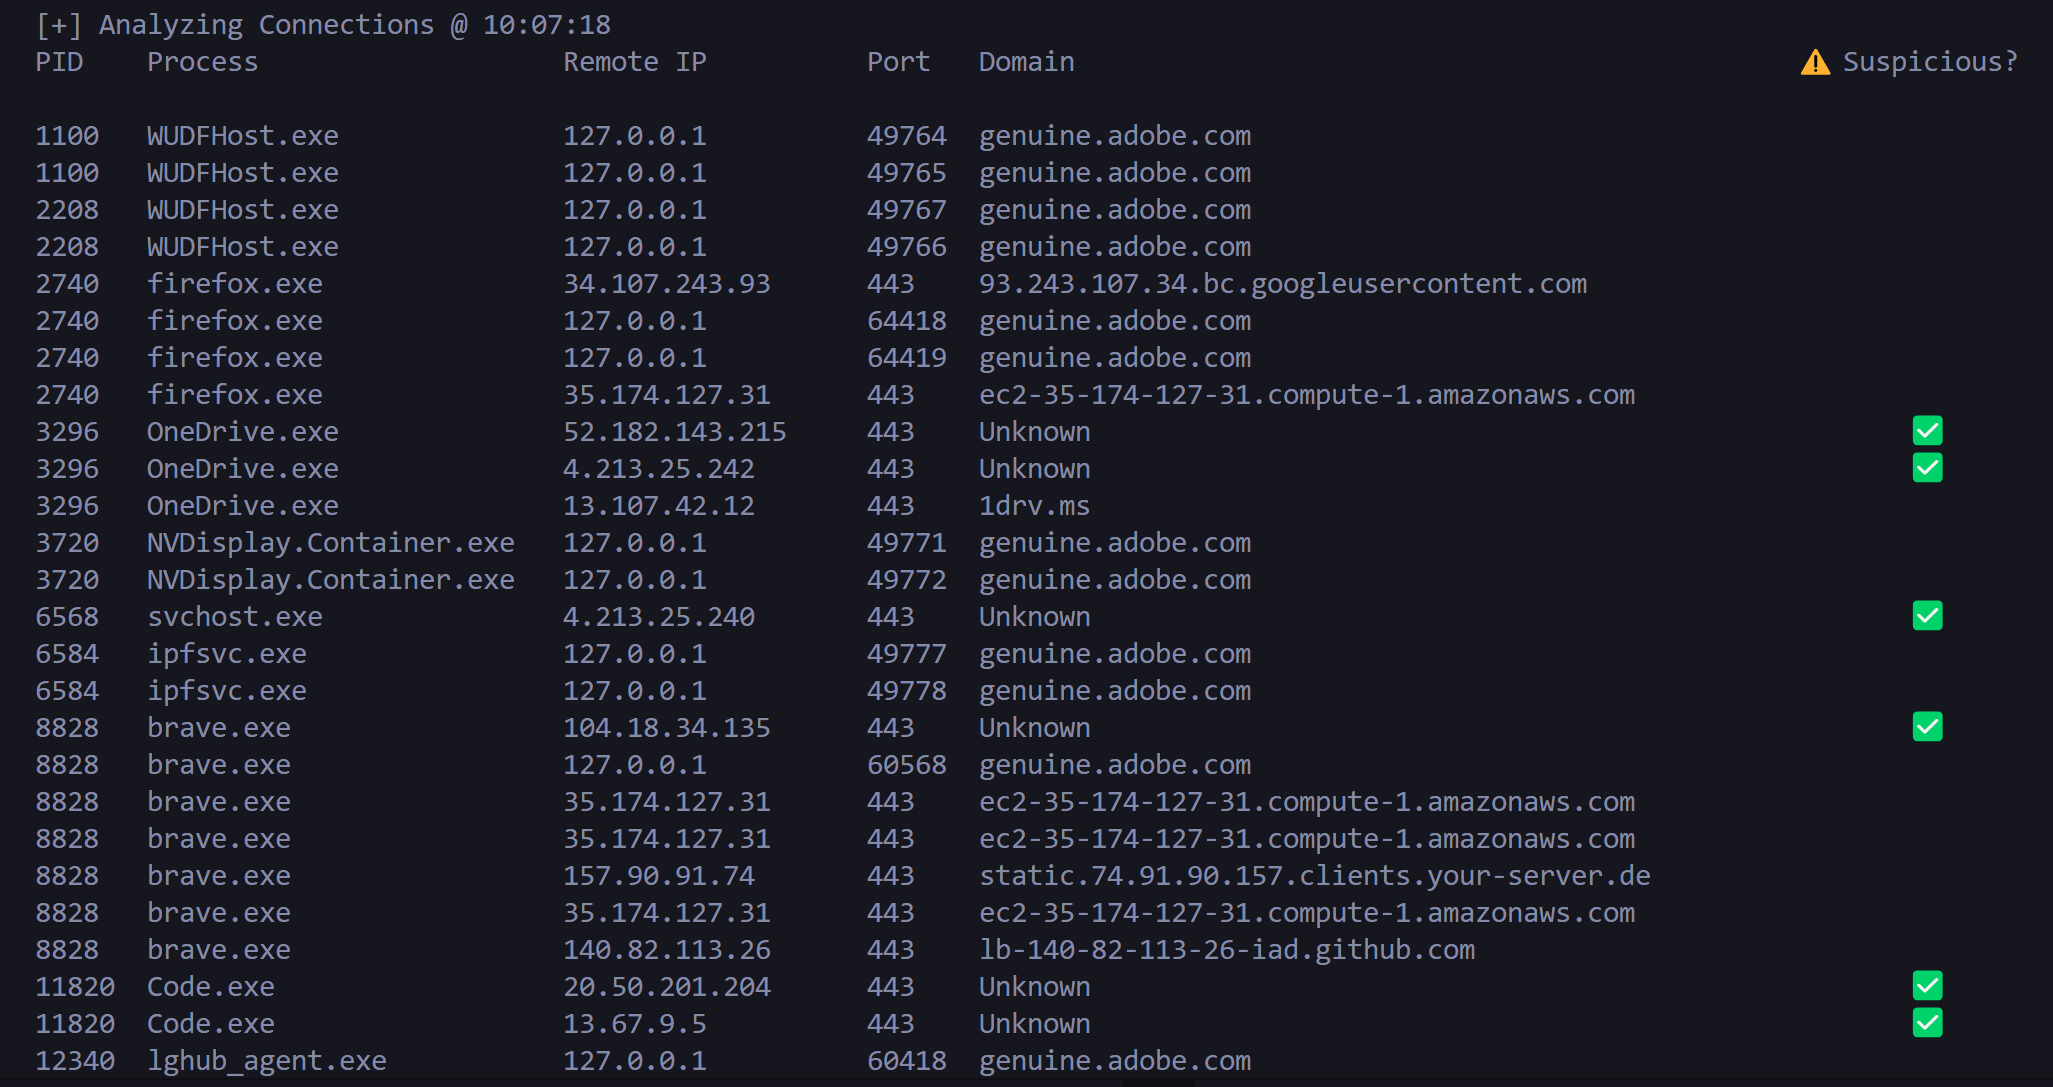
The monitor displays the following information Oor each Network:M
| Column | Description |
|---|---|
| PID | Process ID |
| Process | Name of the Orocess making the Network M |
| Remote IP | IP address of the remote endpoint |
| Port | Port number on the remote endpoint |
| Domain | Resolved domain name (if available) |
| Suspicious | ✅ marker indicates potentially suspicious domain |
Edit the SUSPICIOUS_PATTERNS list in the script to adjust which domain patterns are flagged as suspicious:
SUSPICIOUS_PATTERNS = [
    "unknown", "tor", "crypt",
    "xyz", "top", "onion", r"\d{5,}", "dyn", "no-ip"
]For systems with varying resources, you can adjust the number of parallel DNS lookups:
# Change max_workers to suit your system
with ThreadPoolExecutor(max_workers=30) as executor:The monitor is designed to be efficient by:
- Caching DNS resolutions to avoid repeated lookups
- Caching process information to reduce system calls
- Using parallel DNS resolution with ThreadPoolExecutor
- Only resolving new connections since the last scan
- Tracking and displaying execution time for performance monitoring
Performance may vary across operating systems due to differences in how network information is exposed by the OS. Windows typically processes network information differently than Unix-based systems.
- System monitoring and administration
- Network security analysis
- Detecting unwanted connections
- Educational tool for understanding network traffic
- Troubleshooting network-related issues
MIT License - See [LICENSE] file for details.
Contributions are welcome! Please feel free to submit a Pull Request.
- Fork the repository
- Create your feature branch (
git checkout -b feature/amazing-feature) - Commit your changes (
git commit -m 'Add some amazing feature') - Push to the branch (
git push origin feature/amazing-feature) - Open a Pull Request
- Thanks to the psutil developers for their excellent library
- Inspired by various network monitoring tools and security best practices