Transform your photos into works of art, powered by AI and deep learning! This project brings the power of neural style transfer to your fingertips, letting you blend the content of one image with the artistic style of another. I built this project using PyTorch and PyQt6 as a hands-on way to explore how AI can see, understand, and reimagine images, all through an interactive desktop app.
Neural Style Transfer is a process that uses deep learning to combine two images, one for content (like a photo of a landscape) and one for style (like a painting by Van Gogh). The result is a new image that keeps the structure of the original photo but adopts the artistic style of the second image. It works by analyzing both images through a neural network and balancing their visual features to generate a blended output.
As someone fascinated by the intersection of art and AI, I wanted to explore how deep learning could be used to create something both beautiful and interactive. My project sought to explore neural style transfer, a technique that uses convolutional neural networks (CNNs) to reimagine ordinary images in the styles of famous artworks. I took this project as an opportunity to go beyond theory; translating a research paper into a real, working application helped me strengthen both my technical skills and my ability to build practical AI tools from the ground up.
Through this project, I learned how to work directly with PyTorch to build and customize a deep learning model. I also explored how different parts of the model influence the final results and experimented with how to balance artistic style and image content. Finally, I learned how to package everything into a desktop app that anyone can use which I believe is a valuable step in making machine learning more accessible and user-friendly.
Neural Style Transfer combines two images:
- Content Image: The subject (e.g., a photo of a tiger)
- Style Image: The look and texture (e.g., Van Gogh’s Starry Night)
By using a pre-trained VGG19 model, my app compares how much the generated image differs from the original content and the chosen style. It does this by calculating two things: content loss (how well the subject is preserved) and style loss (how well the artistic feel is transferred). My model then adjusts the image to balance both, aiming to keep the structure of the original photo while painting it in the chosen style.
🧪 I inserted custom loss layers at different points in the VGG19 model to see how each level influenced style and content. This helped me learn how deeper or shallower neural network layers affect the final look, from preserving structure to enhancing texture, and how to fine-tune that balance for better results.
- 🎨 Upload any content and style image
- ⚖️ Adjust content/style influence with intuitive sliders
- 📷 Progress tracking and real-time stylized output
- 💾 One-click save for your final creation
- 🌓 Beautiful dark-themed UI
- 🖥️ CPU-compatible (no GPU needed)
- Inserted custom content and style loss layers directly into a VGG19 model to guide optimization
- Gained a deeper understanding of how different convolutional layers capture content structure vs. artistic texture
- Practiced working with pretrained models, backpropagation, and loss balancing in PyTorch
- Explored how loss layer placement affects style transfer outcomes
- Tuned loss weights to control realism vs. abstraction in generated images
- Observed how subtle tweaks in configuration lead to noticeable artistic differences
- Built a modular system with clean separation between model logic and UI
- Designed a responsive UI using PyQt6 that feels smooth and polished
- Packaged the app into an executable for easy sharing and use
Below are examples of stylized output using different content/style weight settings:
Note: These examples were generated on my CPU-only setup, which resulted in lower visual quality or less refined details compared to GPU-accelerated results.
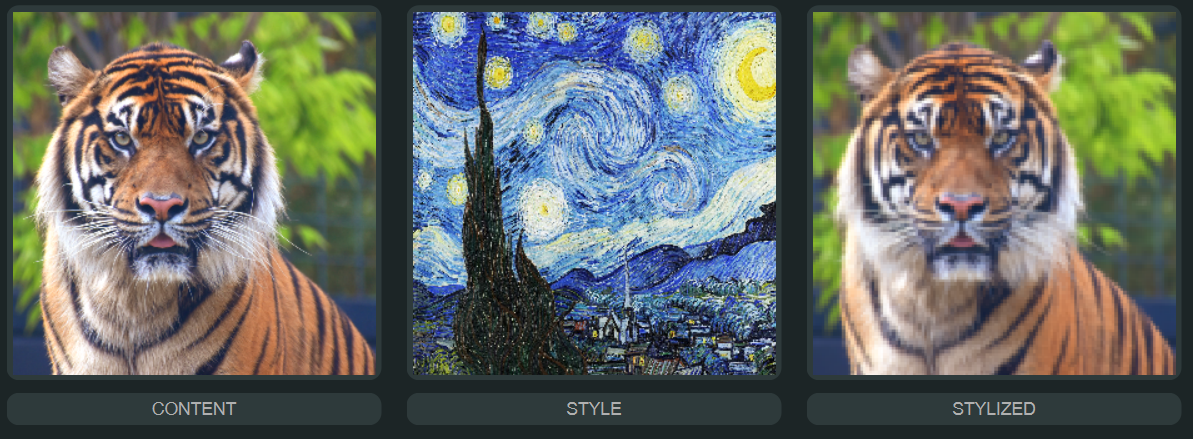
Content-focused stylization (minimal style)
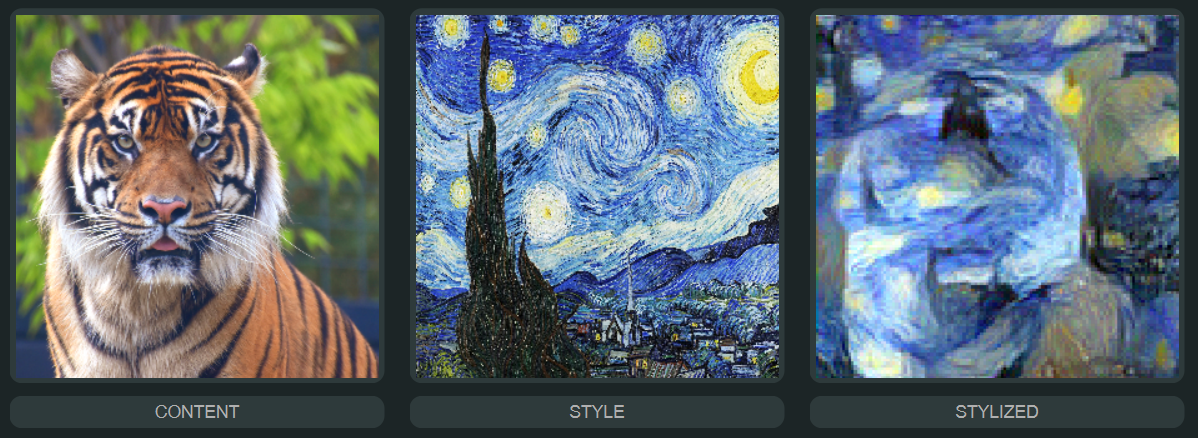
Style-focused stylization (no clear content)
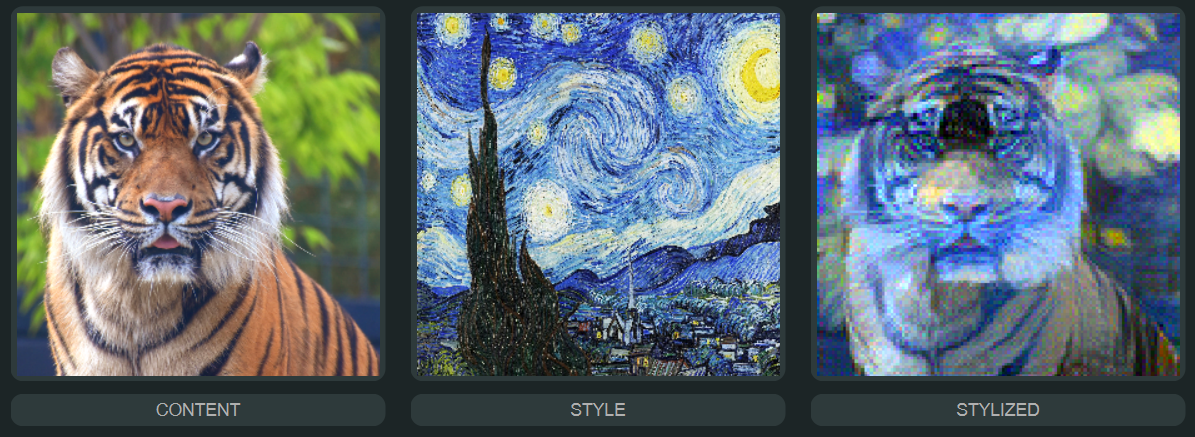
Balanced stylization (best of both worlds)
- Download for Windows
- Open the app and start stylizing!
- On Windows: Search for "Command Prompt" or "PowerShell" in the Start Menu.
- On Mac: Open Terminal from Launchpad or Spotlight.
git clone https://github.com/Akhan521/Neural-Style-Transfer.git
cd Neural-Style-Transferpython -m venv venv
venv\Scripts\activate # On Windowspip install -r requirements.txtpython app.py- Launch the app
- Load a content image (the subject)
- Load a style image (the artwork or texture)
- Adjust weights if needed using the sliders
- Click Run Style Transfer
- View the result and save your image!
- Inspired by the original NST paper by Gatys et al.
- Uses a pre-trained VGG19 model from PyTorch
- UI built with PyQt6
Aamir Khan | ✨ Portfolio | 💼 LinkedIn | 💻 GitHub
If you enjoyed this project or found it useful, feel free to ⭐ the repo or reach out!