This repository contains the code used by The Pythons team to operate the autonomous vehicle, a schematic for the electromechanical components and a diagram to illustrate the mechanical design for the autonomous vehicle and the mechanisms used in it.
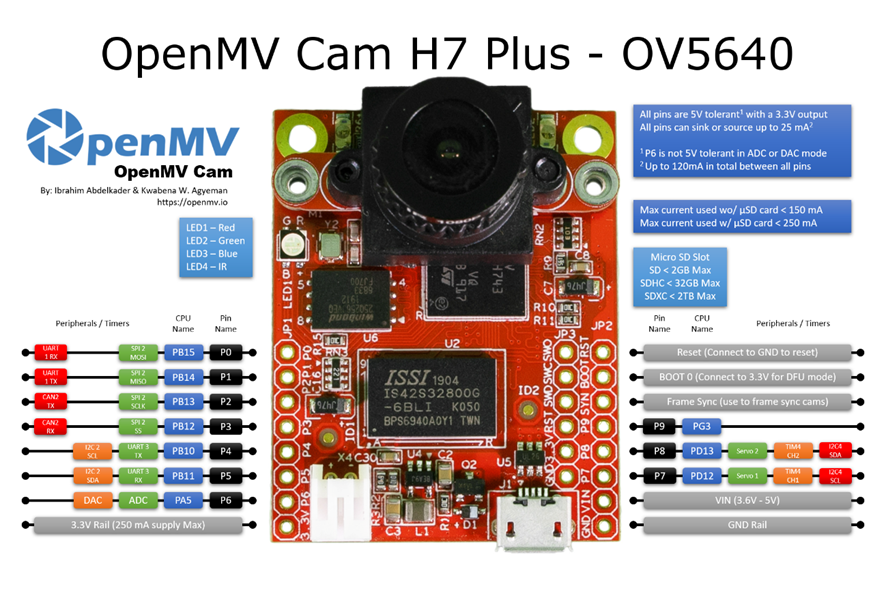
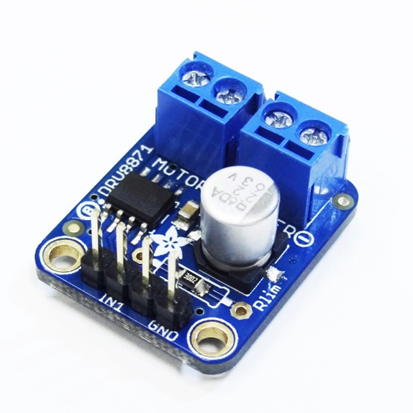
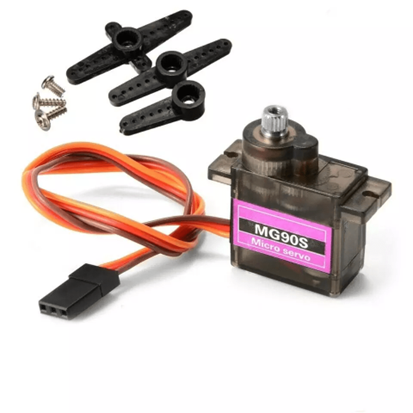
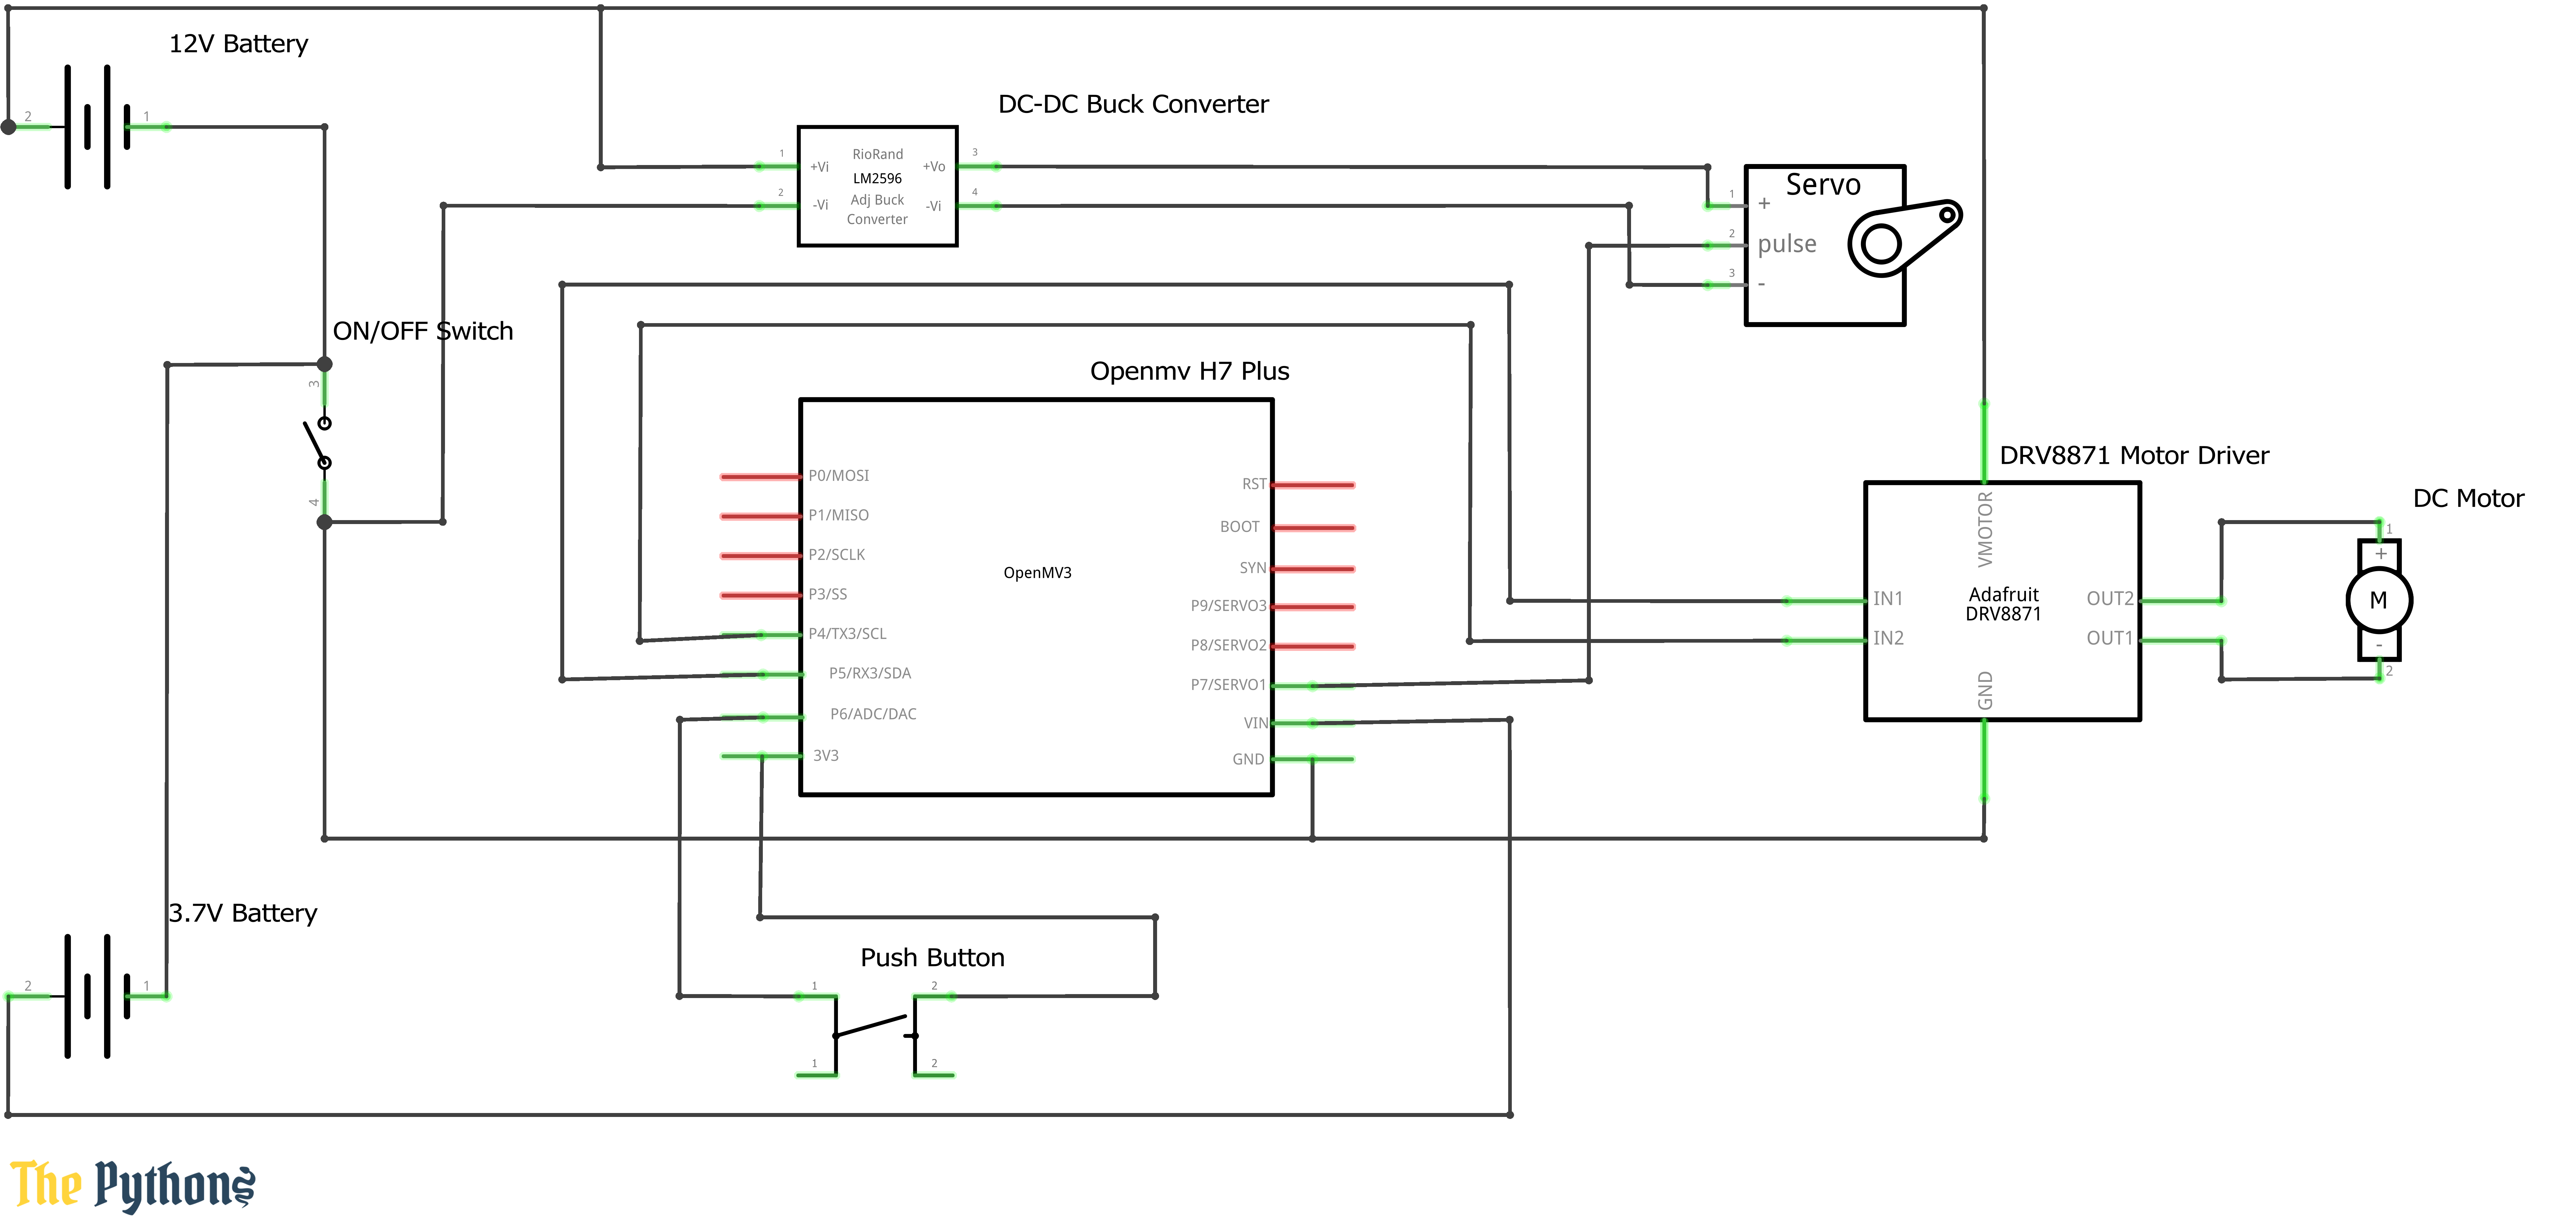
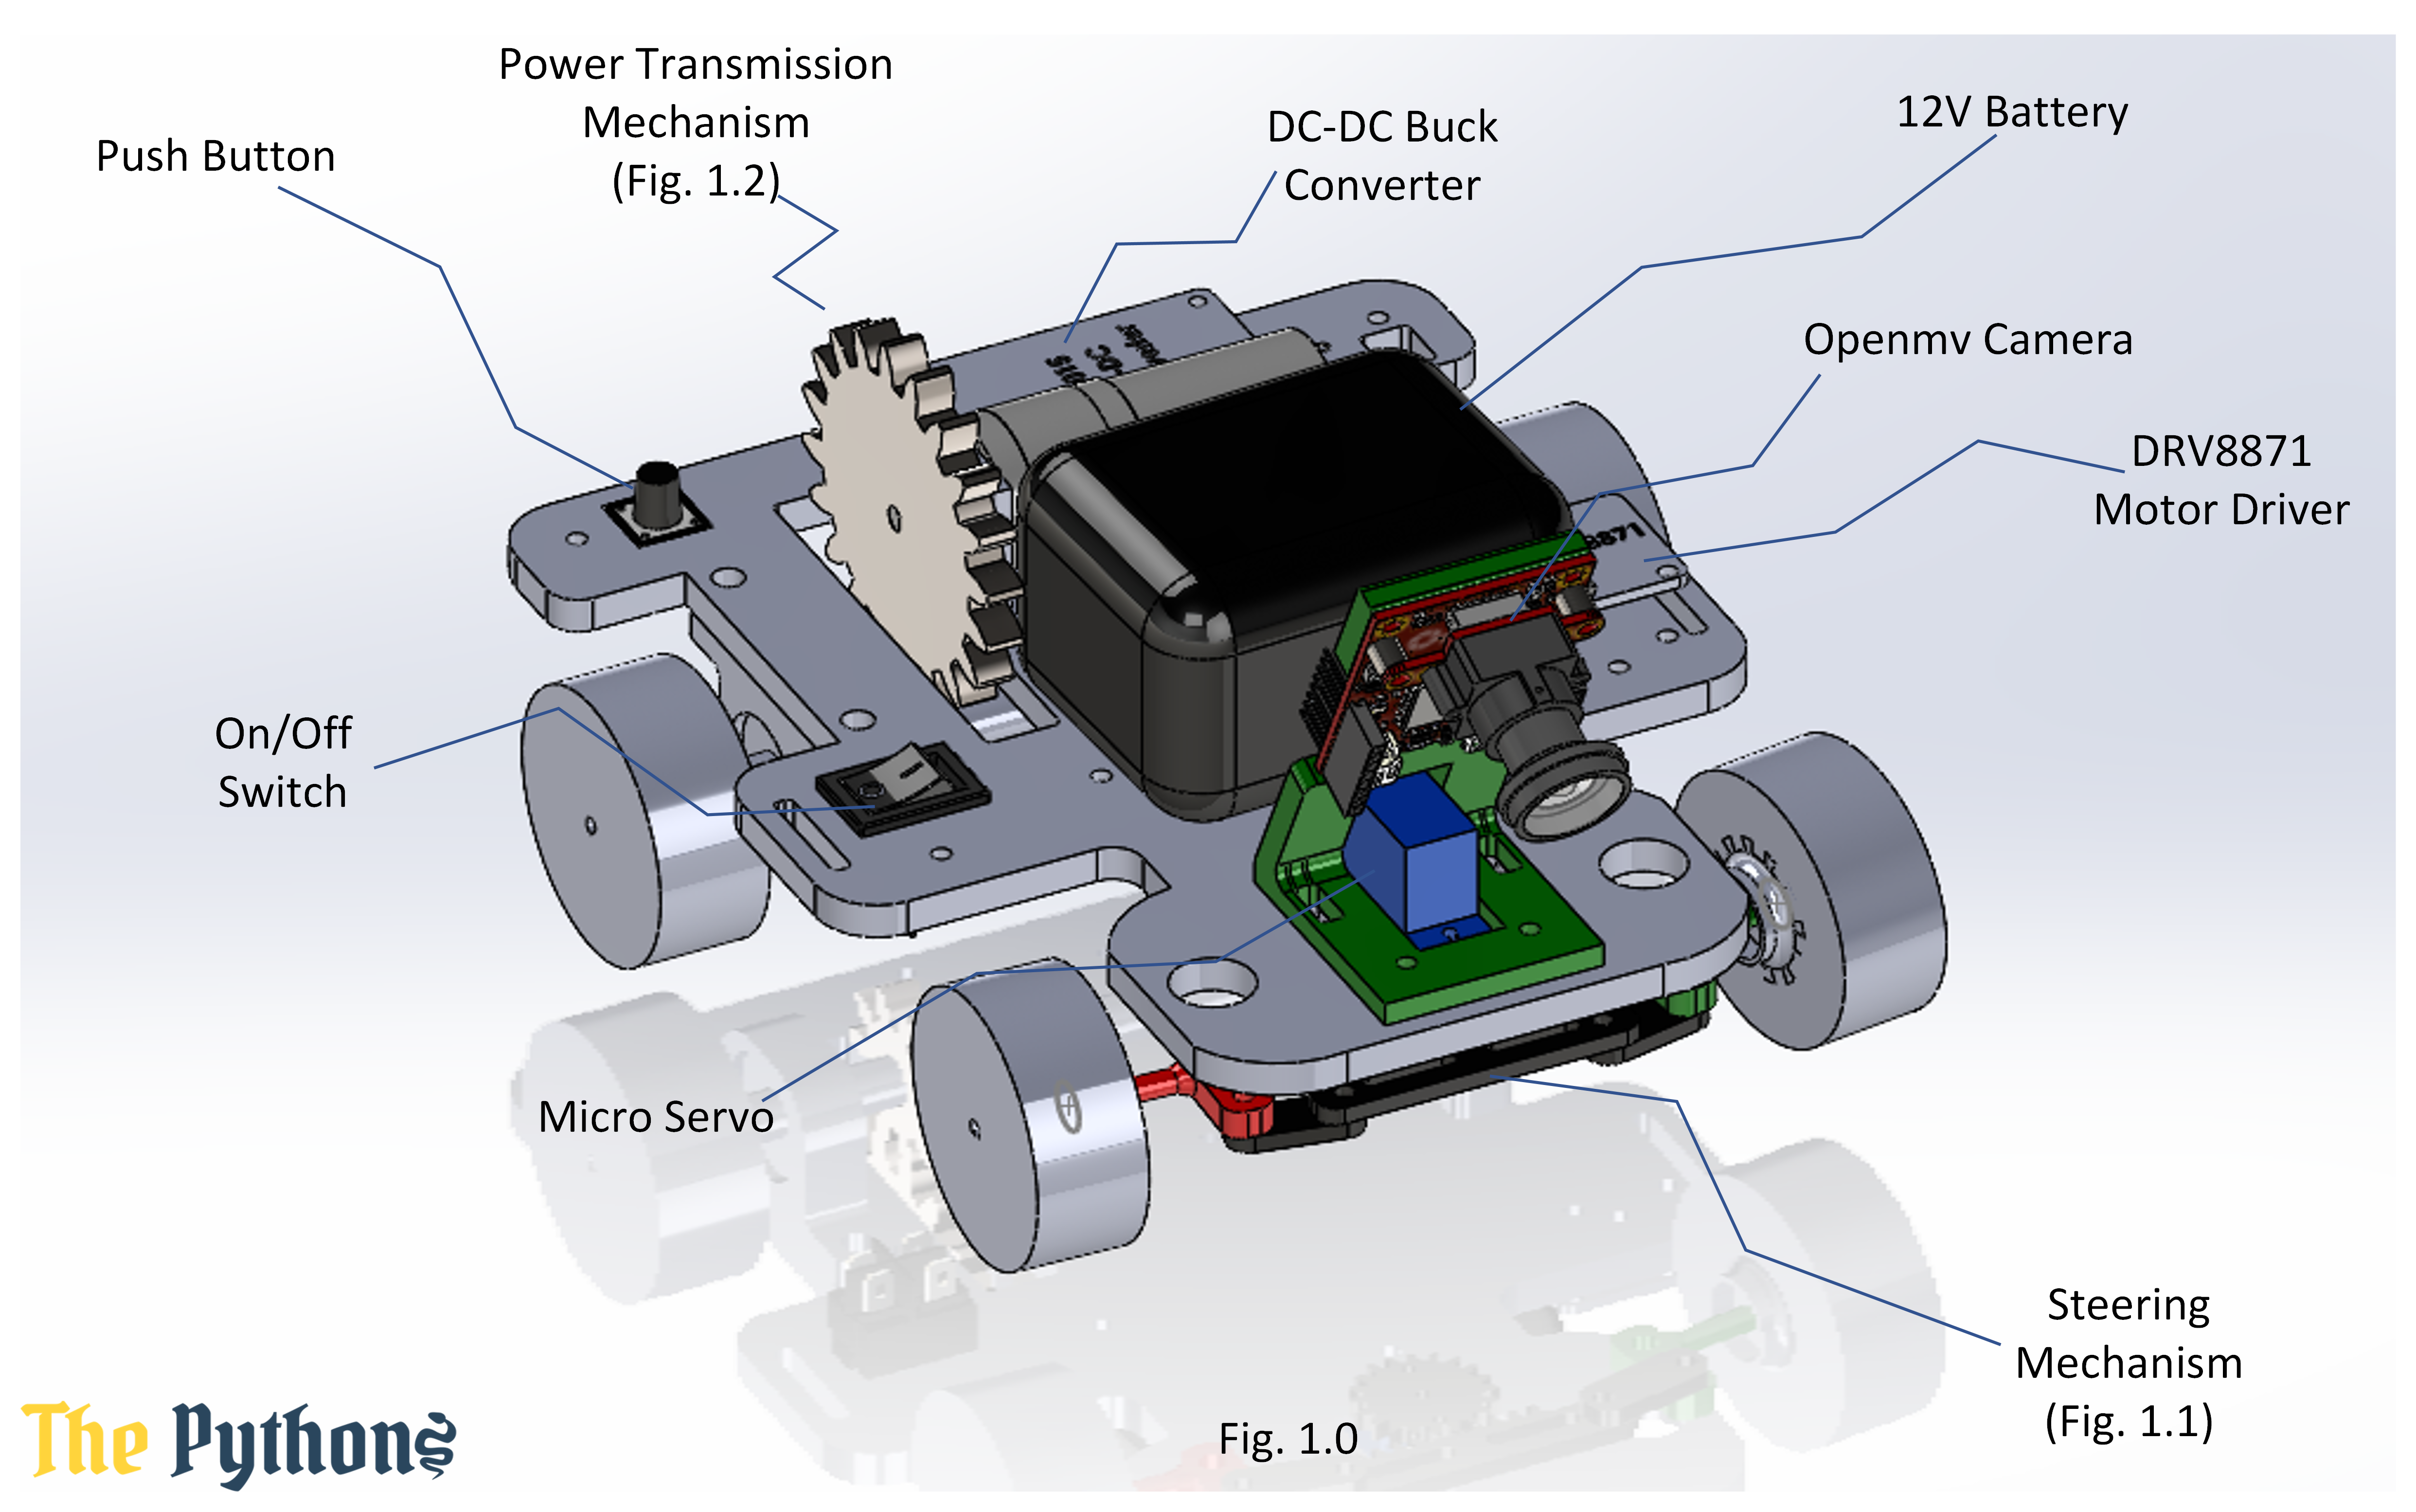
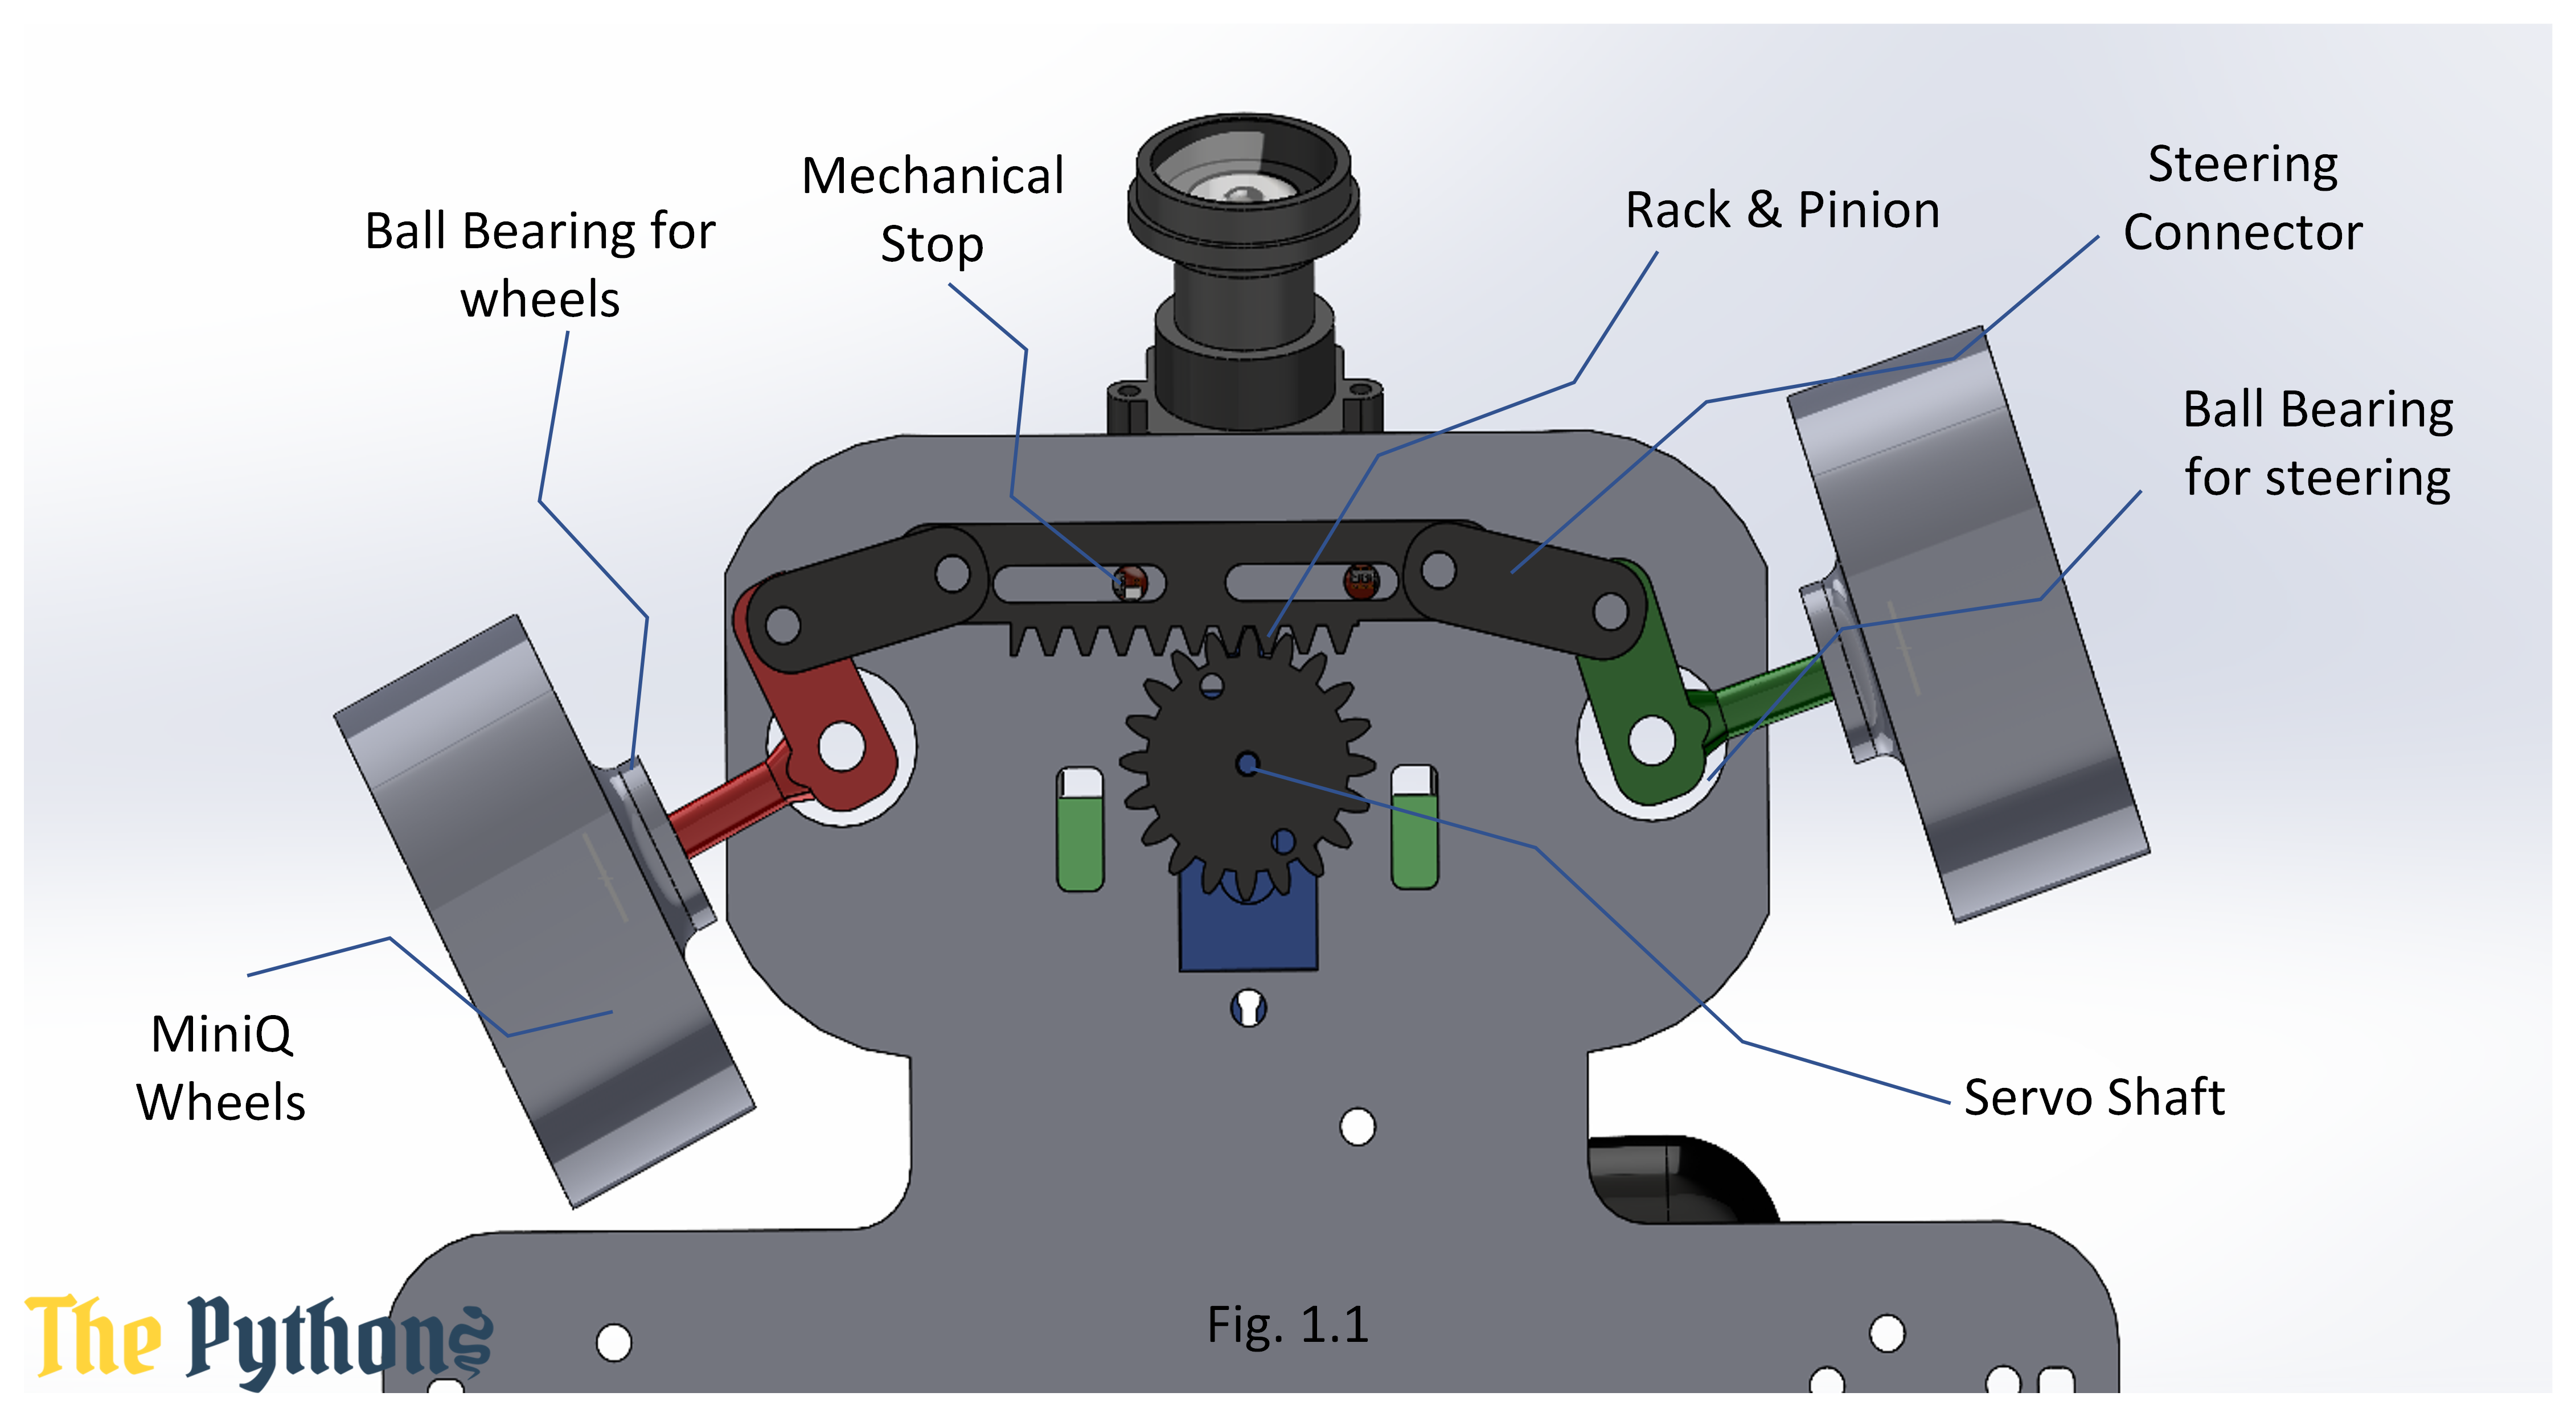
Our robot is a four-wheeled vehicle with a rear-wheel drive (RWD), with a steering mechanism that mimics that of real cars. All decisions are made by an OpenMV Cam H7 Plus. The code is written on the OpenMV IDE in micropython and is uploaded to the microcontroller. The microcontroller is connected to the micro metal gear servo which is responsible for the steering of the vehicle as shown in Fig. 1.1, the DRV8871 motor driver that allows the pulse-width modulation (PWM) control of the motor and a pushbutton that signals the start of the trial.
The vehicle contains the following components:
-
An OpenMV Cam H7 Plus – The brains of the vehicle which captures frames from the camera sensor attached to the microcontroller, processes it according to the running code and gives signals to the servo motor and the motor driver.
More about OpenMV Cam: https://docs.openmv.io/openmvcam/quickref.html
-
A DRV8871 motor driver – a relatively small and powerful H-bridge that handles a single DC motor and can operate using 3.3V logic level signal.
DRV8871 motor driver datasheet: https://cdn.shopify.com/s/files/1/0672/9409/files/drv8871_datasheet.pdf?812
-
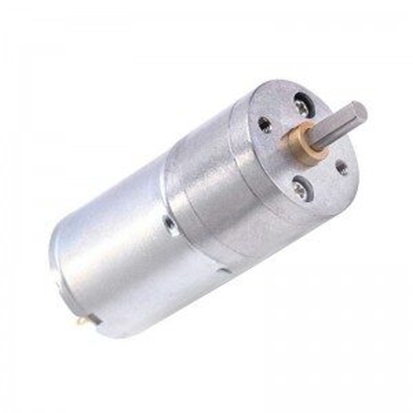
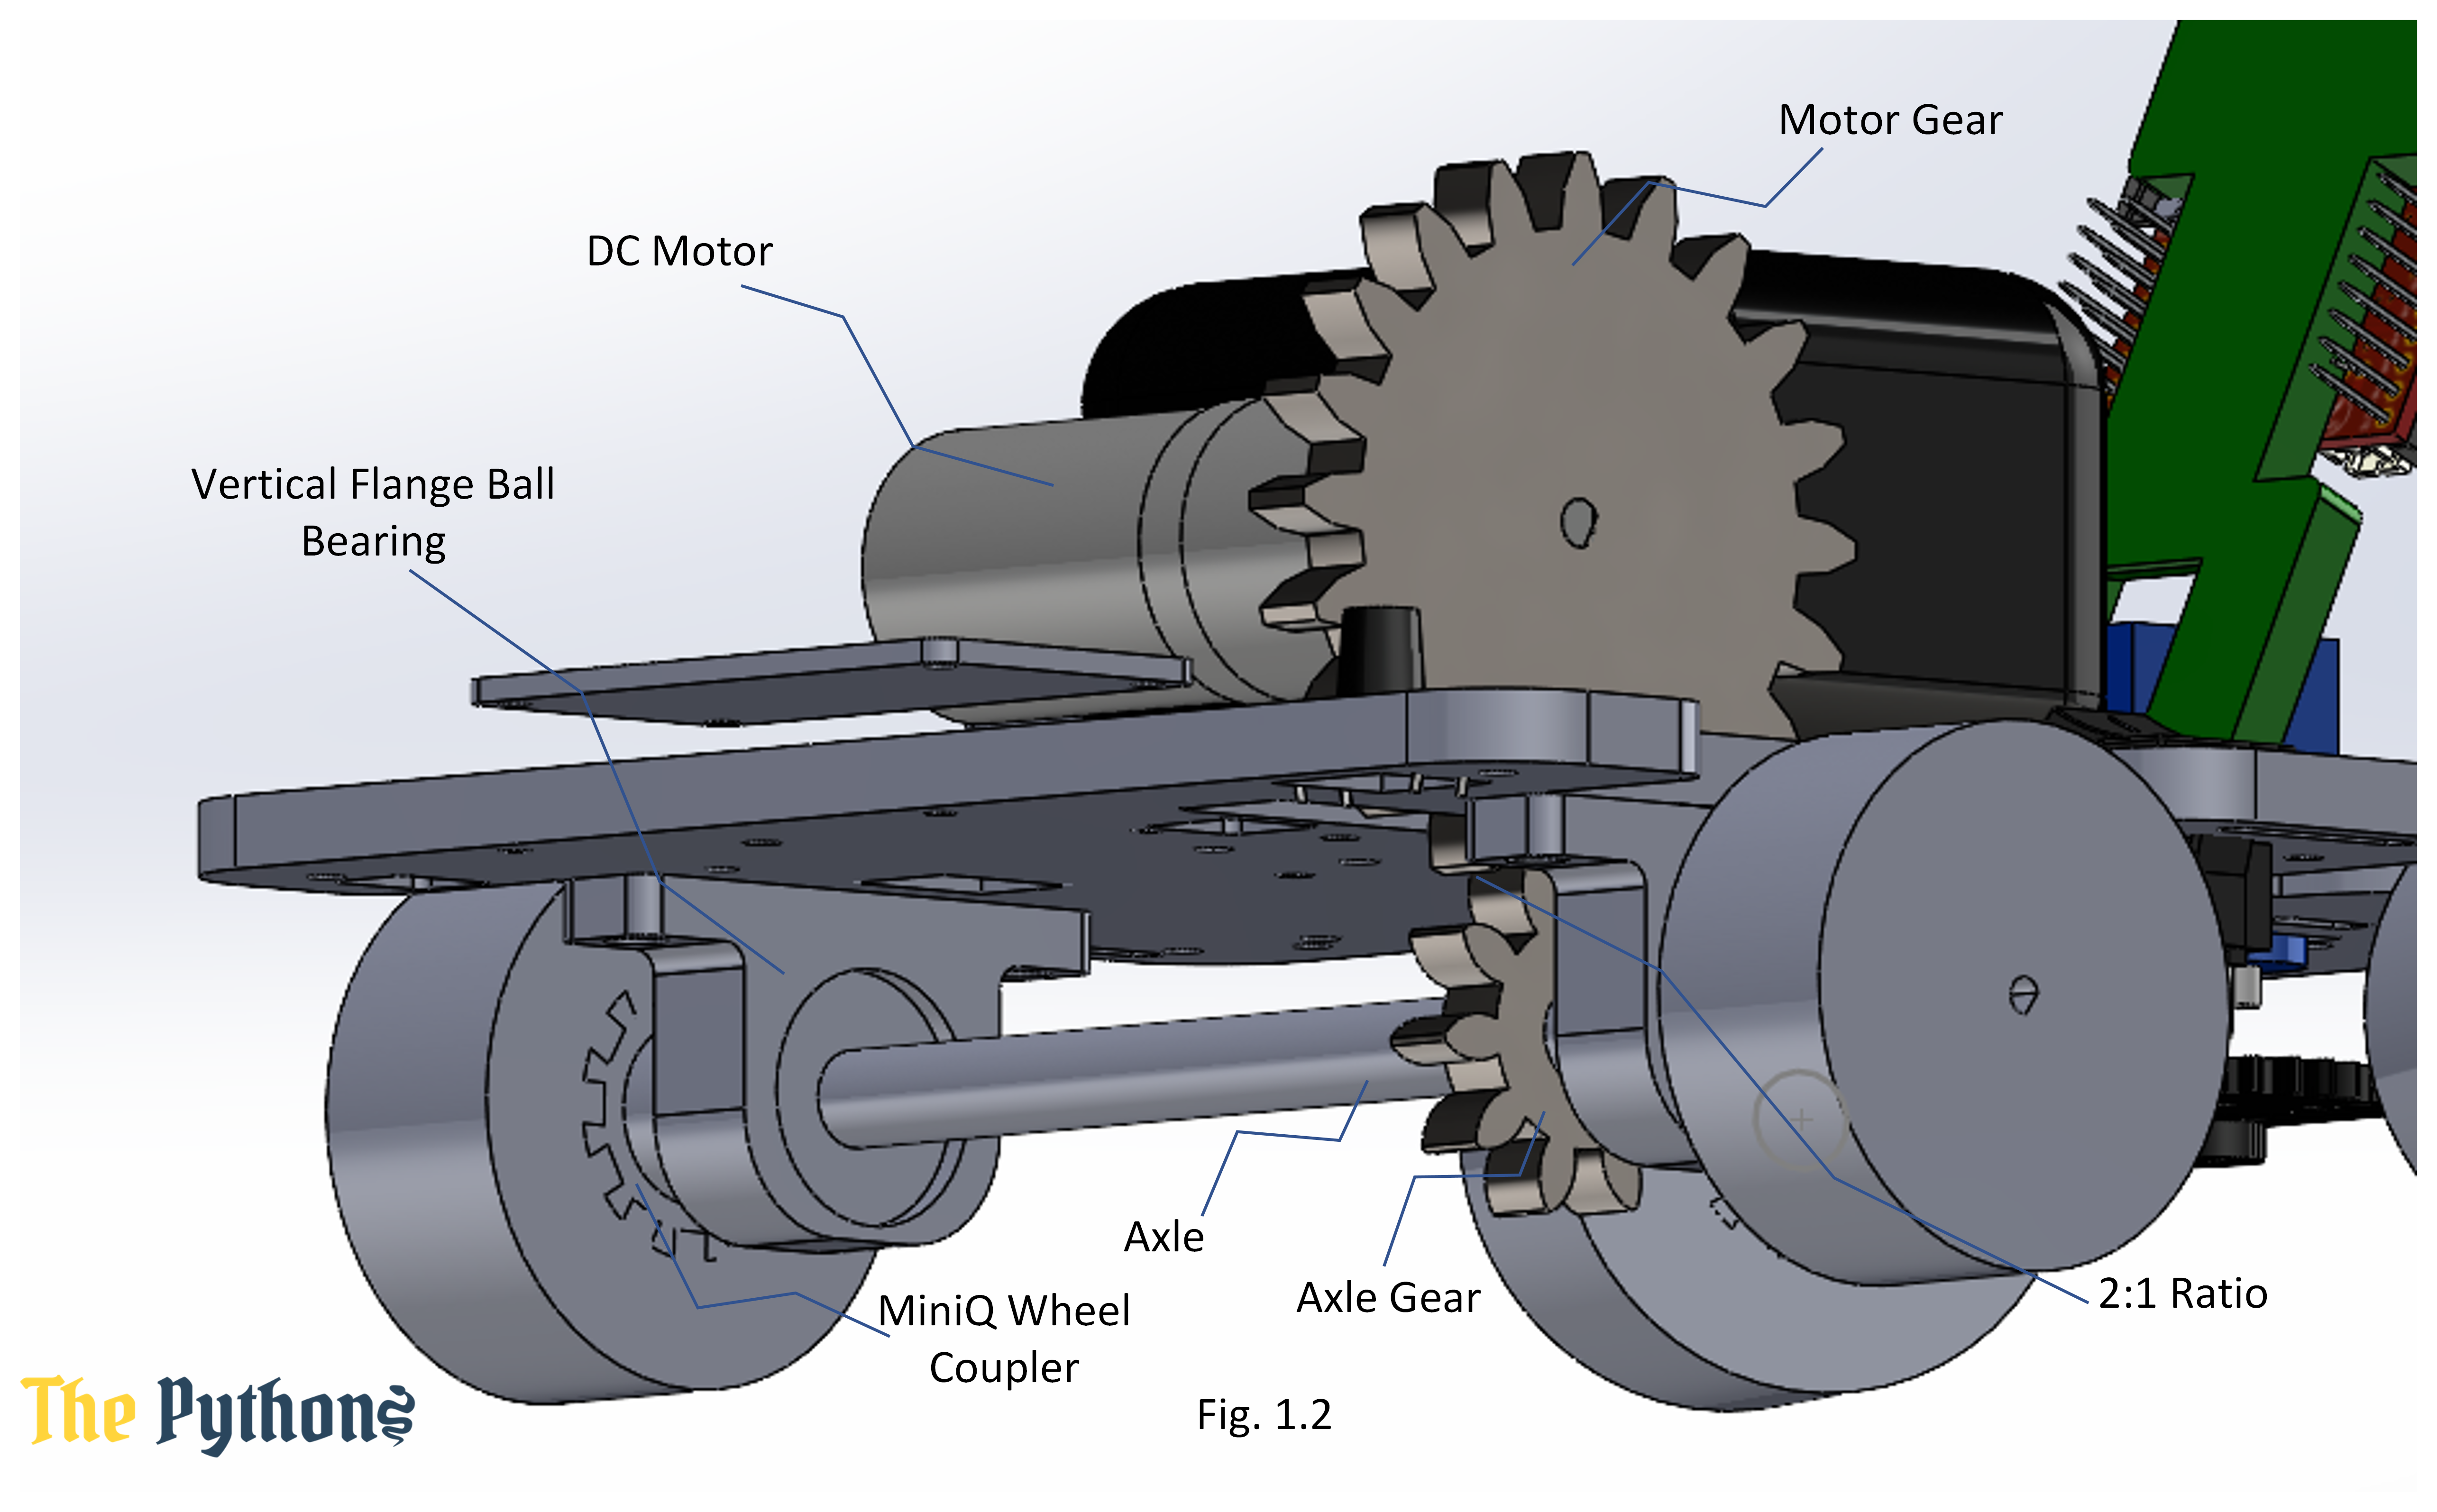
A DC Motor with Gear Box JGA25-370-12V-250RPM 8.8Kg.cm
-
A Micro Servo MG90S (Metal) – used for steering the vehicle with precise angles
MG90S (Metal) datasheet: https://www.electronicoscaldas.com/datasheet/MG90S_Tower-Pro.pdf
More information about how to move a servo using a using OpenMV Cam: https://docs.openmv.io/library/pyb.Servo.html?highlight=pwm
-
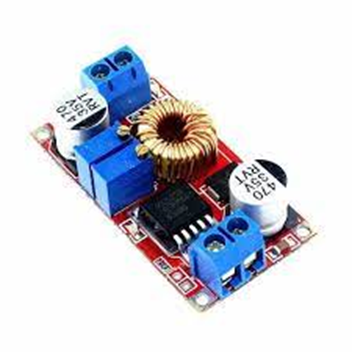
A BUCK converter – a DC DC adjustable voltage converter step down power module, we use it to step down the battery voltage from 12V to 5.5V which is within the operating voltage of the servo motor.
Specifications of the buck converter: https://store.fut-electronics.com/products/dc-dc-convereter
-
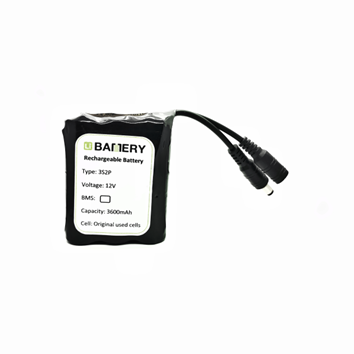
A 12V 3S-2P 3600mAh Rechargeable 18650 Li-ion Battery Pack with battery management system (BMS) – this battery is responsible for powering the robot except for the OpenMV Cam H7.
Specifications of this battery: https://makerselectronics.com/product/12v-3s-2p-3600mah-rechargeable-18650-li-ion-battery-pack
-
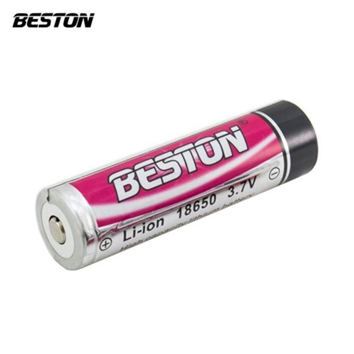
A Beston Li-ion Rechargeable Battery 18650 3000mAh – this battery is responsible for powering up the OpenMV Cam H7 and it can be considered a safety measure that prevents the OpenMV Cam H7 from being damaged.
Specifications of this battery: https://makerselectronics.com/product/beston-li-ion-rechargeable-battery-18650-3000mah
The code consists of five main parts:
- Start of trial
- Detecting lines
- Detecting traffic signs
- Detecting walls
- Stopping after the three laps are done
If the pushbutton connected on pin six isn’t pressed, a flag called button_flag will be equal to one, otherwise it will be zero once the pushbutton is pressed. While the flag is equal to one, the following code in the while loop will be skipped, otherwise the following code will run.
Detecting the lines has the highest priority in our code as we count the number of laps by counting the number of corners where we find the lines. We use the built-in function, find_blobs, to return information about the colored objects that fit within the threshold, so we use it twice once for the blue line and once for the orange line. If both lines are captured, we compare their centers’ y-coordinate (cy) to know which is nearer, the larger the cy means that it is below the other one. Once a line is detected, a counting variable called corner_counter is incremented by one and a timer starts, which is used in order to not count the same line twice.
More information about the function find_blobs: https://docs.openmv.io/library/omv.image.html?highlight=find_blobs#image.image.Image.image.find_blobs
Detecting traffic signs has the second highest priority in our code. We use a user-defined function, find_the_blob, which takes the wanted threshold as a parameter and then plugs it in the built-in function, find_blobs, as in the OpenMV color detection example code. This function returns the largest area of a blob and the x-coordinate of the center (cx) of the largest blob, but when no blob that fits within that threshold is found the function returns -1 for the area and the cx of the blob. Then a comparison is done between the areas of the red and green blobs to determine which is nearer, the nearer the object the larger its area, and act based on that.
The example color detection code: https://ideone.com/0GkiTh
After the code doesn’t find any lines or traffic signs, it will start looking for the black walls and try to make the robot as close to the center as possible. It will start searching for the wall in two regions of interest (ROIs), a left ROI for the left wall and a right ROI for the right wall. The areas within the ROIs are compared and the servo motor is directed towards the smaller area. Additionally, there is a third ROI that is found in the center of the frame that is used to prevent the collision of the robot with the walls by seeing if the area in the ROI is larger than a certain constant, and if that is true then the robot will go backwards while also inversing the direction from right to left and vice versa.
When the variable called corner_counter is equal to twelve (three laps are finished and the robot should stop) a timer is started and after 1.25 seconds have passed since the timer has started, the robot will stop. During these 1.25 seconds the code will resume normally in order to not collide with any traffic signs or walls in the last section.