멘토링 과제 (~2021.10.21) 2. 주요한 OpenCV 공부 #18
Replies: 7 comments 9 replies
-
1) 파일 읽고 윈도우로 띄우기이미지 읽기 _ cv2.imread() 함수로 이미지를 읽어 올 수 있습니다.(출처 : https://bkshin.tistory.com/entry/OpenCV-3-%EC%9D%B4%EB%AF%B8%EC%A7%80-%EC%9E%85%EC%B6%9C%EB%A0%A5) # 이미지 파일을 화면에 표시(img_show.py) import cv2 img_file = "../img/yeosu.jpg" # 표시할 이미지 경로 ---① if img is not None: cv2.imread(path, flag)
윈도우창 관리① cv2.namedWindow(winname, flags)
② cv2.moveWindow(winname, x, y)
③ cv2.resizeWindow(winname, width, hegith)
④ cv2.destroyWindow(winname)
⑤ cv2.destroyAllwindows()
+)키보드 이벤트 처리( 윈도우창과 세트)
+) 마우스 이벤트 처리( 마우스 이벤트가 입력되면 사전에 작성한 함수를 불러와서 작동 )
|
Beta Was this translation helpful? Give feedback.
-
|
이미지 읽어서 살펴보기 file_name : 읽고자 하는 이미지 파일 *IMREAD_GRAYSCALE : 이미지를 회색으로 읽기 (Gray Scale) *IMREAD_UNCHANGED : 이미지를 Color로 읽고 투명한 부분도 읽기(Alpha) 반환 값 : Numpy 객체(행, 열, 색상 : 기본 BGR) 이미지를 어떤 제목으로 어떤 이미지를 읽어줄지 정해주는 함수 file_name : 저장할 이미지 파일 이름 time : 입력 대기 시간 (0을 넣으면 어떤 키를 넣을 때 까지 무한대기 함) 사용자가 어떠한 키를 입력 시, 사용자가 입력한 아스키 코드 값이 반환됨 (예 : ECS : 27 로 반환) cv2.destrowAllWindows() : 화면의 모든 윈도우를 닫는 함수 ***** 적어주신 같은 내용 한번 더 정리 했습니다 |
Beta Was this translation helpful? Give feedback.
-
깔끔한 정리 감사합니다! |
Beta Was this translation helpful? Give feedback.
-
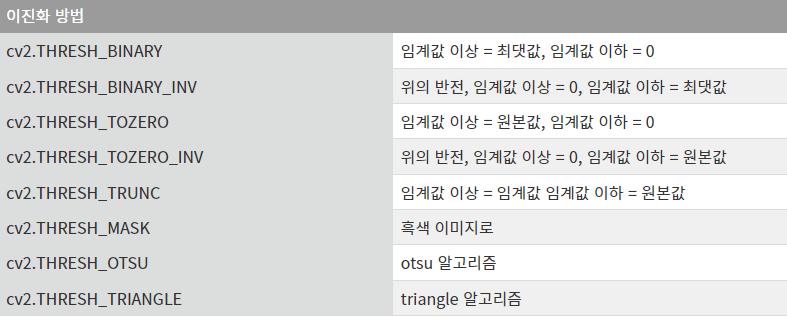
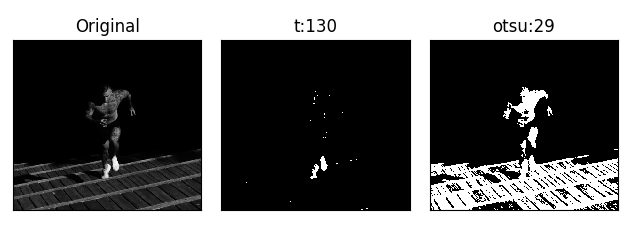
2) 2진화 ( 뼈 흰색 나머지 검정 / 잡음은 나중에 처리) (threshold 어떻게 할지)임계처리 : 임계처리(thresholding)는 이미지 행렬에서 하나의 픽셀값을 사용자가 지정한 기준값(threshold)를 사용하여 이진화(binarization)하는 가장 단순한 필터 이진화 함수 _ cv2.threshold(), 그레이스케일 이미지에 이진화를 적용할 수 있습니다.(출처 : https://076923.github.io/posts/Python-opencv-12/)
[Main Code]import cv2 src = cv2.imread("Image/geese.jpg", cv2.IMREAD_COLOR) gray = cv2.cvtColor(src, cv2.COLOR_BGR2GRAY) cv2.imshow("dst", dst) [Detailed Code]gray = cv2.cvtColor(src, cv2.COLOR_BGR2GRAY) gray = cv2.cvtColor(img, cv2.COLOR_BGR2GRAY)
retval, dst = cv2.threshold(src, thresh, maxval, type)
cv2.imshow("binary", dst) _ 이진화된 영상을 출력엄청난속도로 무언가가 떴다가 바로 꺼짐. 대기 명령 필요. cv2.waitKey(0) : openCV의 대기명령 코드오츠의 알고리즘(Otsu Algorithm, Thresholding)
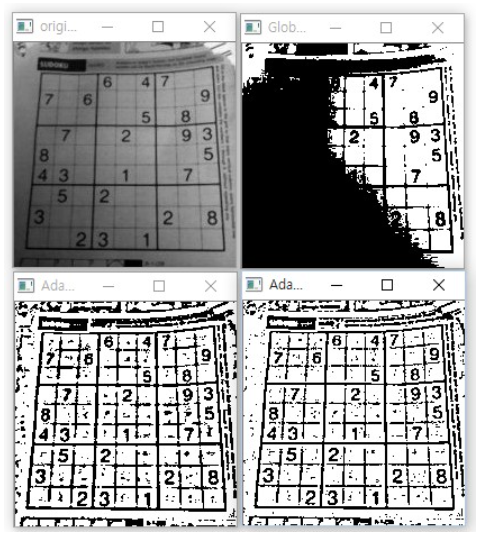
지역 임계처리(Adaptive Threshold) _ cv2.adaptiveThreshold()(출처 : https://dsbook.tistory.com/171, https://m.blog.naver.com/samsjang/220504782549)
dst = cv2.adaptiveThreshold(img, maxValue , adaptivemethod, thresholdType, blocksize, C)
✓ adaptiveMethod : thresholding value를 결정하는데 사용되는 계산 방법(알고리즘)
✓ thresholdType : 앞서 threshold 함수에서 살펴봤던 다양한 임계값 적용 방법과는 다르게 오직 두가지 방법만 사용할 수 있다.
Adaptive Thresholding 은 적절한 인자를 적용하면 노이즈를 최소화하면서 정련된 이미지를 추출할 수 있음 |
Beta Was this translation helpful? Give feedback.
-
|
|

Beta Was this translation helpful? Give feedback.
-
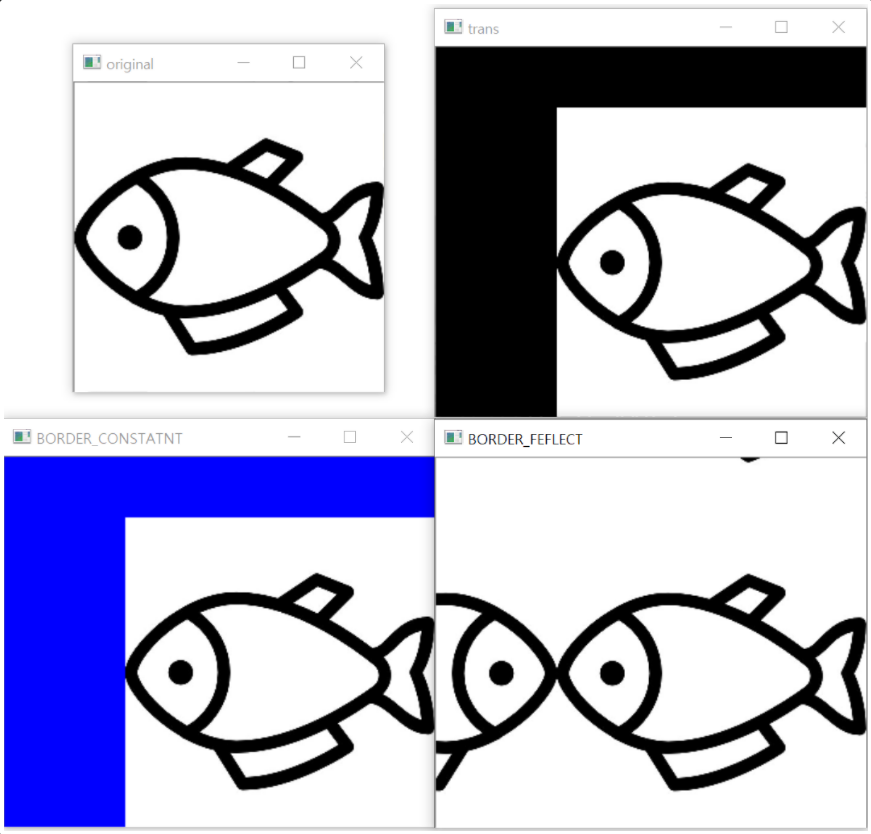
3) 이동, 회전, 크기변환이미지 이동(WarpAffine) _ cv2.warpAffine()(출처:https://bkshin.tistory.com/)
dst = cv2.warpAffine(src, matrix, dsize, dst, flags, borderMode, borderValue)
|
Beta Was this translation helpful? Give feedback.
-
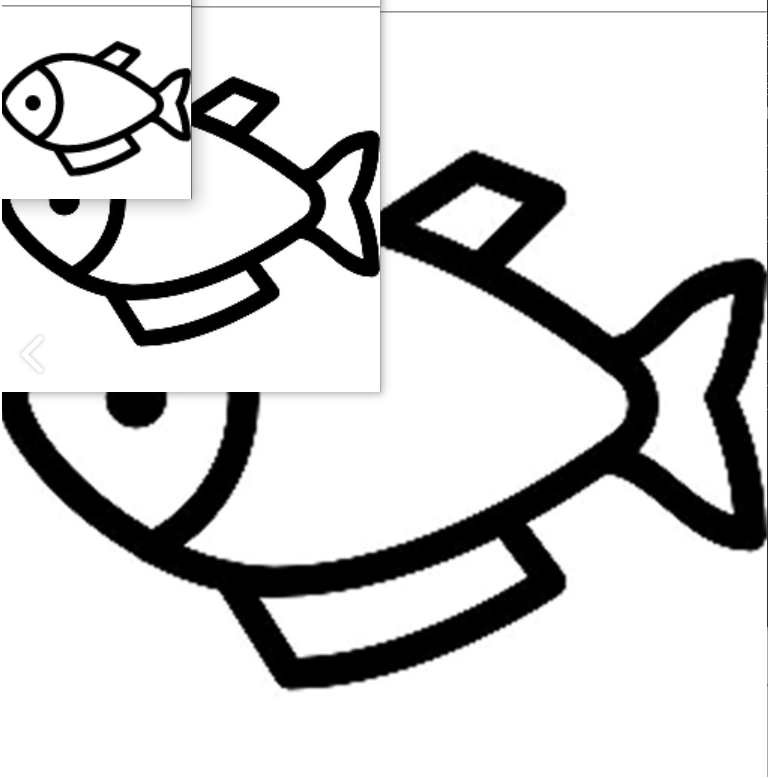
평행 이동 (translate.py)import cv2 img = cv2.imread('../img/fish.jpg') dx, dy = 100, 50 # 이동할 픽셀 거리 ---① 변환 행렬 생성mtrx = np.float32([[1, 0, dx], ---② 단순 이동dst = cv2.warpAffine(img, mtrx, (cols+dx, rows+dy)) ---③ 탈락된 외곽 픽셀을 파랑색으로 보정dst2 = cv2.warpAffine(img, mtrx, (cols+dx, rows+dy), None, ---④ 탈락된 외곽 픽셀을 원본을 반사 시켜서 보정dst3 = cv2.warpAffine(img, mtrx, (cols+dx, rows+dy), None, cv2.imshow('original', img) |
Beta Was this translation helpful? Give feedback.
-
이미지 확대, 축소 _ cv2.resize()(출처: https://bkshin.tistory.com/)
cv2.resize(src, dsize, dst, fx, fy, interpolation)
|
Beta Was this translation helpful? Give feedback.
-
cv2.reize()로 이미지 확대 및 축소 (scale_resize.py)import cv2 img = cv2.imread('../img/fish.jpg') --① 크기 지정으로 축소#dst1 = cv2.resize(img, (int(width0.5), int(height0.5)), None, 0, 0, cv2.INTER_AREA) --② 배율 지정으로 확대dst2 = cv2.resize(img, None, None, 2, 2, cv2.INTER_CUBIC) --③ 결과 출력cv2.imshow("original", img) |
Beta Was this translation helpful? Give feedback.
-
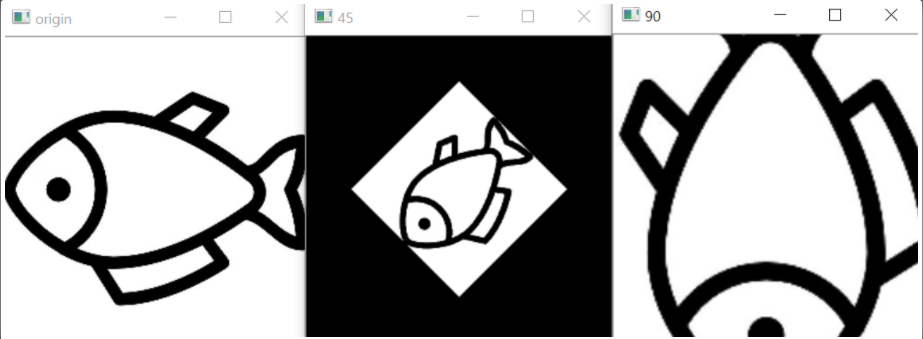
이미지 회전 _ cv2.getRotationMatrix2D()(출처: https://bkshin.tistory.com/)
mtrx = cv2.getRotationMatrix2D(center, angle, scale)
|
Beta Was this translation helpful? Give feedback.
-
OpenCv로 회전 변환행렬 구하기 (rotate_getmatrix.py)import cv2 img = cv2.imread('../img/fish.jpg') ---① 회전을 위한 변환 행렬 구하기#회전축:중앙, 각도:45, 배율:0.5 ---② 변환 행렬 적용img45 = cv2.warpAffine(img, m45,(cols, rows)) ---③ 결과 출력cv2.imshow('origin',img) |
Beta Was this translation helpful? Give feedback.
-
4) 넘파이의 부분 배열 빼내기(출처 : https://bkshin.tistory.com/entry/OpenCV-6-dd, https://velog.io/@bangsy/Python-OpenCV-ROI%EA%B4%80%EC%8B%AC-%EC%98%81%EC%97%AD)
ex1) cv2.rectangle(img, (0,0), (h-1, w-1), (0,255,0)) ex2) img2 = img1[40:120, 30:150] # numpy.ndarray의 슬라이싱 이미지 연산(출처 : https://076923.github.io/posts/Python-opencv-31/
src = cv2.imread("pencils.jpg")
cv2.add(src1, src2, dest, mask, dtype): src1과 src2 더하기
cv2.subtract(src1, src2, dest, mask, dtype): src1에서 src2 빼기
cv2.multiply(src1, src2, dest, scale, dtype): src1과 src2 곱하기
cv2.divide(src1, src2, dest, scale, dtype): src1을 src2로 나누기
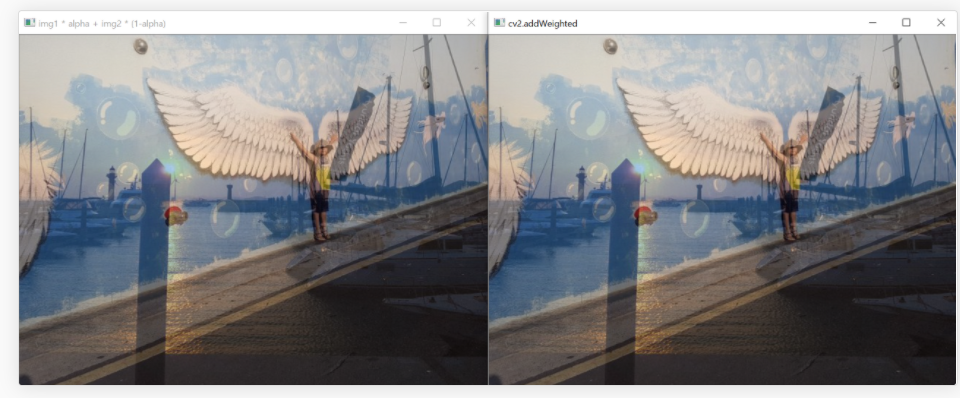
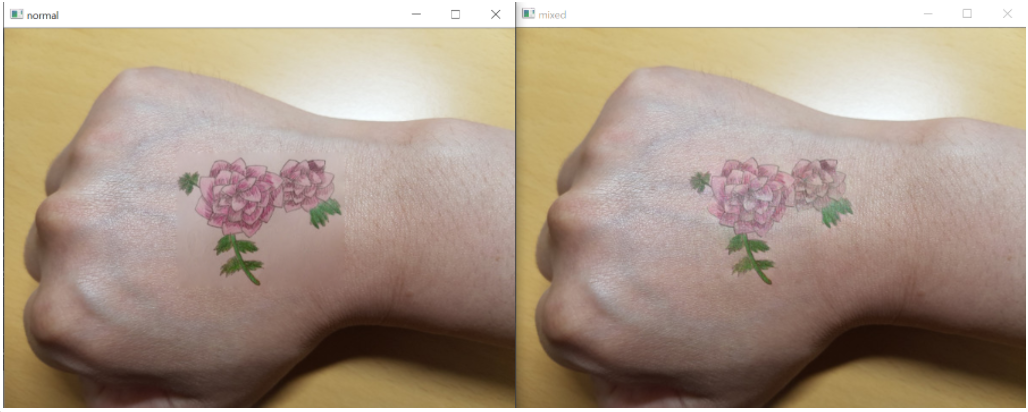
###이미지 합성 _ cv2.addWeight( ), cv2.seamlessClone()
cv2.addWeight(img1, alpha, img2, beta, gamma)
비트와이즈 연산
cv2.bitwise_and(img1, img2, mask=None): 각 픽셀에 대해 AND 연산 cv2.bitwise_or(img1, img2, mask=None): 각 픽셀에 대해 OR 연산 cv2.bitwise_xor(img1, img2, mask=None): 각 픽셀에 대해 XOR 연산 cv2.bitwise_not(img1, img2, mask=None): 각 픽셀에 대해 NOT 연산
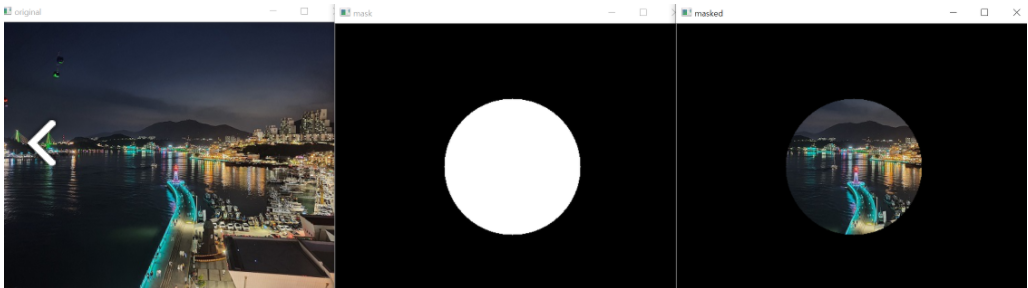
[ 이미지 일부분을 원하는 모양으로 떼어내는 예제 코드 ] #--② 마스크 만들기 #--③ 마스킹 #--④ 결과 출력
두 이미지의 차이 _ cv2.absdiff()픽셀 값의 차를 구하는 함수 diff = cv2.absdiff(img1, img2)
[ ROI(Region of Interest, 관심 영역) ]selectROI 함수 사용(마우스 드레그) 1_ cv2.selectROI( ) : 원본 이미지를 띄우고, 마우스 이벤트 처리도 도와줌, 원하는 부분(관심영역, roi)을 선택ret = cv2.selectROI(win_name, img, showCrossHair=True, fromCenter=False)
selectROI 함수 사용(마우스 드레그) 2_ cv2.selectROIs ( )
src = cv2.imread('./data/lena.jpg', cv2.IMREAD_GRAYSCALE) #한 번에 여러 경계 상자를 선택하려는 경우 |

Beta Was this translation helpful? Give feedback.
-
5) 객체 탐지 및 컨텍스 헐 (= Convex Hull).객체 탐지( 출처 : https://deep-eye.tistory.com/6)
[ OpenCV로 YOLO를 사용하는 코드, yolov3 ] #Load Yolo net = cv2.dnn.readNet("yolov3.weights", "yolov3.cfg") 블록 껍질(Convex Hull)(출처 : https://076923.github.io/posts/Python-opencv-24/)
[ Main Code ] gray = cv2.cvtColor(src, cv2.COLOR_RGB2GRAY) contours, hierarchy = cv2.findContours(binary, cv2.RETR_CCOMP, cv2.CHAIN_APPROX_NONE) for i in contours: cv2.imshow("dst", dst) [ Detailed Code ] for i in contours:
cv2.convexHull(윤곽선, 방향)
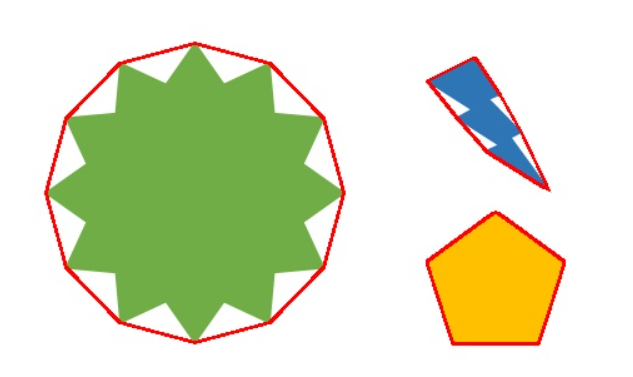
Tip1) 윤곽선 구조는 윤곽선 검출 함수의 반환값과 형태가 동일하다면, 임의의 배열에서도 검출이 가능 +) 블록 껍질 검출은 스크랜스키(Sklansky) 알고리즘을 사용
|
Beta Was this translation helpful? Give feedback.
-
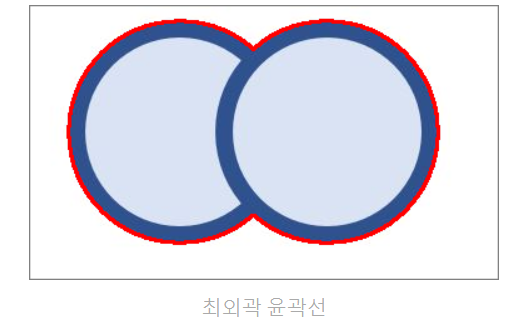
컨투어 _ 윤곽선(Contour) : cv2.findContours()
images, contours, hierachy = cv2.findContours(image, mode, method)
#최외곽 윤곽선을 찾고 윤곽선을 빨간색으로 그려주는 코드 gray = cv2.cvtColor(src, cv2.COLOR_RGB2GRAY) contours, hierachy = cv2.findContours(binary, cv2.RETR_EXTERNAL, cv2.CHAIN_APPROX_NONE) print("contours = ", contours) cv2.drawContours(src, [contours[0]], 0, (0, 0, 255), 2) cv2.destroyAllWindows()
cv2.drawContours(이미지, [윤곽선], 윤곽선 인덱스, (B, G, R), 두께, 선형 타입) [ print("contours = ", contours) ]
contours[0][0] = [[116 11]]
+)윤곽선의 최대,최소값 구하기 |
Beta Was this translation helpful? Give feedback.
-
|
😦대단하십니다 |
Beta Was this translation helpful? Give feedback.
Uh oh!
There was an error while loading. Please reload this page.
Uh oh!
There was an error while loading. Please reload this page.
-
멘토링 과제 2. OpenCV
Beta Was this translation helpful? Give feedback.
All reactions