Building Scopy on Windows
Download MSYS2 from here: https://msys2.github.io
Follow the instructions on the page linked above to install it, and update it.
When it's done, you need to install a couple of packages (64-bit or 32-bit) that Scopy depends on:
64-bit:
pacman -S mingw-w64-x86_64-gcc mingw-w64-x86_64-gdb mingw-w64-x86_64-cmake mingw-w64-x86_64-matio \
mingw-w64-x86_64-libxml2 mingw-w64-x86_64-libusb mingw-w64-x86_64-boost mingw-w64-x86_64-python3 \
mingw-w64-x86_64-fftw mingw-w64-x86_64-libzip mingw-w64-x86_64-glib2 mingw-w64-x86_64-glibmm \
mingw-w64-x86_64-pkg-config mingw-w64-x86_64-ninja mingw-w64-x86_64-breakpad-git git tar
32-bit:
pacman -S mingw-w64-i686-gcc mingw-w64-i686-gdb mingw-w64-i686-cmake mingw-w64-i686-matio \
mingw-w64-i686-libxml2 mingw-w64-i686-libusb mingw-w64-i686-boost mingw-w64-i686-python3 \
mingw-w64-i686-fftw mingw-w64-i686-libzip mingw-w64-i686-glib2 mingw-w64-i686-glibmm \
mingw-w64-i686-pkg-config mingw-w64-i686-ninja mingw-w64-i686-breakpad-git git tar
In order to apply the style guidelines astyle is required:
64-bit:
pacman -S mingw-w64-x86_64-astyle
32-bit:
pacman -S mingw-w64-i686-astyle
An older version of hdf5 is needed, the one that is currently being installed on MSYS2 is not supported:
64-bit:
wget -q http://repo.msys2.org/mingw/x86_64/mingw-w64-x86_64-hdf5-1.8.21-2-any.pkg.tar.xz
pacman -U --force --noconfirm mingw-w64-x86_64-hdf5-1.8.21-2-any.pkg.tar.xz
32-bit:
wget -q http://repo.msys2.org/mingw/i686/mingw-w64-i686-hdf5-1.8.21-2-any.pkg.tar.xz
pacman -U --force --noconfirm mingw-w64-i686-hdf5-1.8.21-2-any.pkg.tar.xz
This will take about 5-6 GiB on your hard drive.
The latest version of Qt can be installed using:
64-bit:
pacman -S mingw-w64-x86_64-qt5
32-bit:
pacman -S mingw-w64-i686-qt5
Some dependencies cannot be found in MSYS2 (GNU Radio, libsigrok etc.).
To simplify things, we created a ZIP package containing these dependencies in pre-compiled form.
Let's download it and extract it in the MSYS2 folder:
64-bit pre-compiled libraries
wget "https://ci.appveyor.com/api/projects/analogdevicesinc/scopy-mingw-build-deps/artifacts/scopy-mingw64-build-deps.tar.xz?branch=master&job=Environment: MINGW_VERSION=mingw64, ARCH=x86_64" -O- | tar -C / --strip-components=1 -xJ
32-bit pre-compiled libraries
wget "https://ci.appveyor.com/api/projects/analogdevicesinc/scopy-mingw-build-deps/artifacts/scopy-mingw32-build-deps.tar.xz?branch=master&job=Environment: MINGW_VERSION=mingw32, ARCH=i686" -O- | tar -C / --strip-components=1 -xJ
First, make sure you launch the 64-bit shell of MSYS2. It won't work in any other shell.
cd ~
git clone https://github.com/analogdevicesinc/scopy.git
This will fetch the latest sources from GitHub to a "scopy" directory.
First, let's create a build folder so that we don't pollute the sources with generated files:
mkdir ~/scopy/build
cd ~/scopy/build
Then, let's configure the build:
cmake -GNinja ~/scopy
If everything goes well, it should say "Configuring done" and "Generating done".
If it says that it failed, no need to continue further.
To build the project:
ninja
This can take as long as 10 minutes or more, depending on your CPU.
To run Scopy, it is required to first set a few environment variables.
To do that, click on the Start menu, search for 'environment'. The option 'Edit environment variables for your account' should appear; click on it.
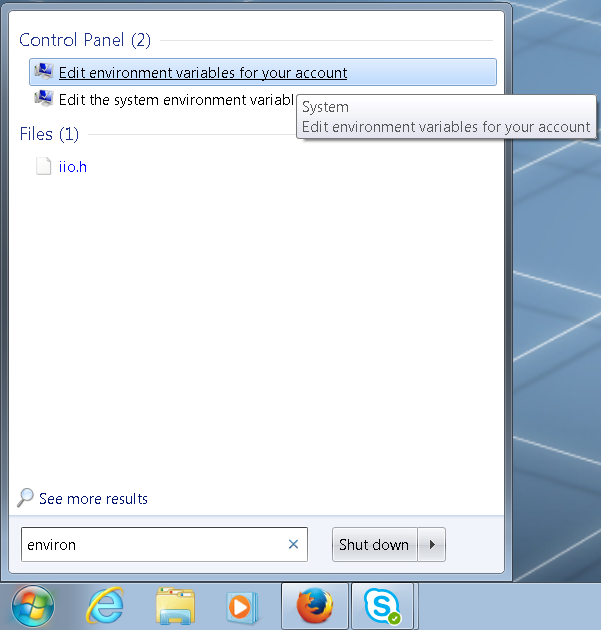
The following dialog will open:
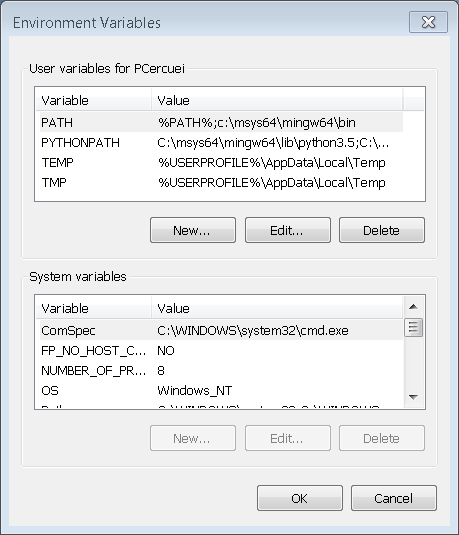
You will need to create two environment variables: "PATH" and "SCOPY_PYTHONPATH".
First, let's add "PATH":
- Click on "New..."
- In "Variable name:", write
PATH - In "Variable value:" write
%PATH%;C:\msys64\mingw64\bin - Then click OK.
Finally, add the "SCOPY_PYTHONPATH" variable:
- Click on "New..."
- In "Variable name:", write
SCOPY_PYTHONPATH - In "Variable value:" write
C:\msys64\mingw64\lib\python3.7;C:\msys64\mingw64\lib\python3.7\plat-win;C:\msys64\mingw64\lib\python3.7\lib-dynload;C:\msys64\mingw64\lib\python3.7\site-packages - Then click OK.
Once those steps are done, the Scopy you built should run.
With the file explorer, navigate to C:\msys64\home\<your_username>\scopy\build, and double-click on scopy.exe.
That's all folks!