Scipion Cloud for training
Only AWS admin user can do that, but these are the steps.
- Login to AWS console
- Go to EC2 services
- Select AMIs on the left side menu
- Select i2pc-training-2 and click on Launch

- Choose the instance type appropriate for the training. For the usual Workflow (ExtendedBetagal) we normally use p2.xlarge (GPU).
- Click ‘Next: Configure instance details’ and select the number of instances to be created.
- Click ‘Next: Add Storage’ and specify the disk size (30 GB by default).
- Click ‘Next: Add tags’ and specify the following tags:

(UserName must be i2pc-training but Name can be chosen, although it must contain the word training).
- Click ‘Next: Configure Security group’ and select the one named ‘https+ssh’.

It is advised to modify this setting to set up an IP range when possible.
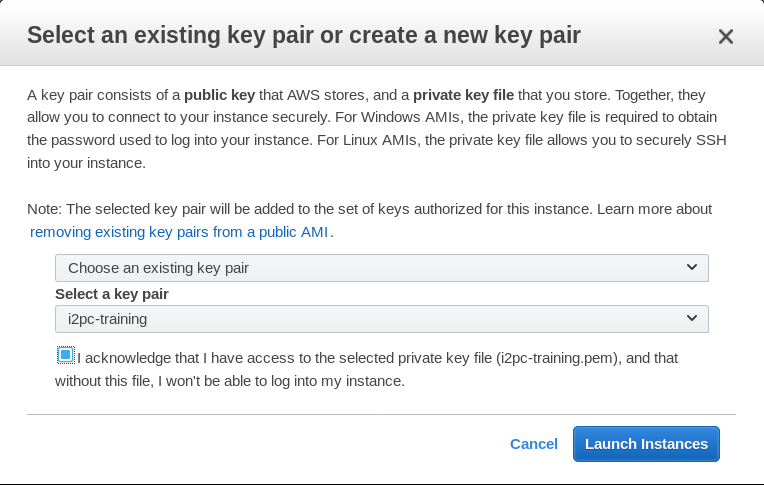
- Click on ‘Review and launch’ and press ‘Launch’. A pop-up window will appear to select a security key pair.
- Click on ‘Launch Instances’ and go to ‘View Instances’ and wait until instances has been initialized (Status Checks)
Instances are by default created with a dynamic IP address. This means that when the instance is restarted the IP changes. AWS allows to create ‘Elastic IPs’ that are fix IPs that can be assigned to an instance. This way even if the instance is restarted the IP is kept, which which might interesting for a multi-day course. The steps to do this are:
- Go to the Left side menu ‘Network and Security’/Elastic IPs
- Click on ‘Allocate new address’
- Once the new IP address appears on the list select it and click on ‘Actions/Associate address’. By default AWS have a limit of 5 Elastic IPs but this limit can be changed through the AWS support service.
There is a user called i2pc-training that can only manage training instances (start, stop and reboot). The steps are:
- Login to AWS console (https://aws.amazon.com/)
- Go to EC2 services
- Select Instances on the left side menu
- Select the instance and either click on ‘Actions’ or Right-click on the instance and select Instance State and the action required.

Once instances are up and running they can be accessed either through ssh or guacamole.
- Ssh: user ubuntu with pubkey i2pc-training or user scipion with password
- Guacamole with user scipion and password on the following URL https://PUB_IP/scipion/ The first time you will be warned that connection is not secure and will have to add a security exception). Also, the first time you might get an error saying ‘connection failed’. Simply click ‘Ok’, ‘Cancel’, ‘Logout’ and try again (it has to do something with initializing a machine from an AWS AMI or snapshot and I do not know how to solve it).
This is how Desktop on the new machine will look like:
